
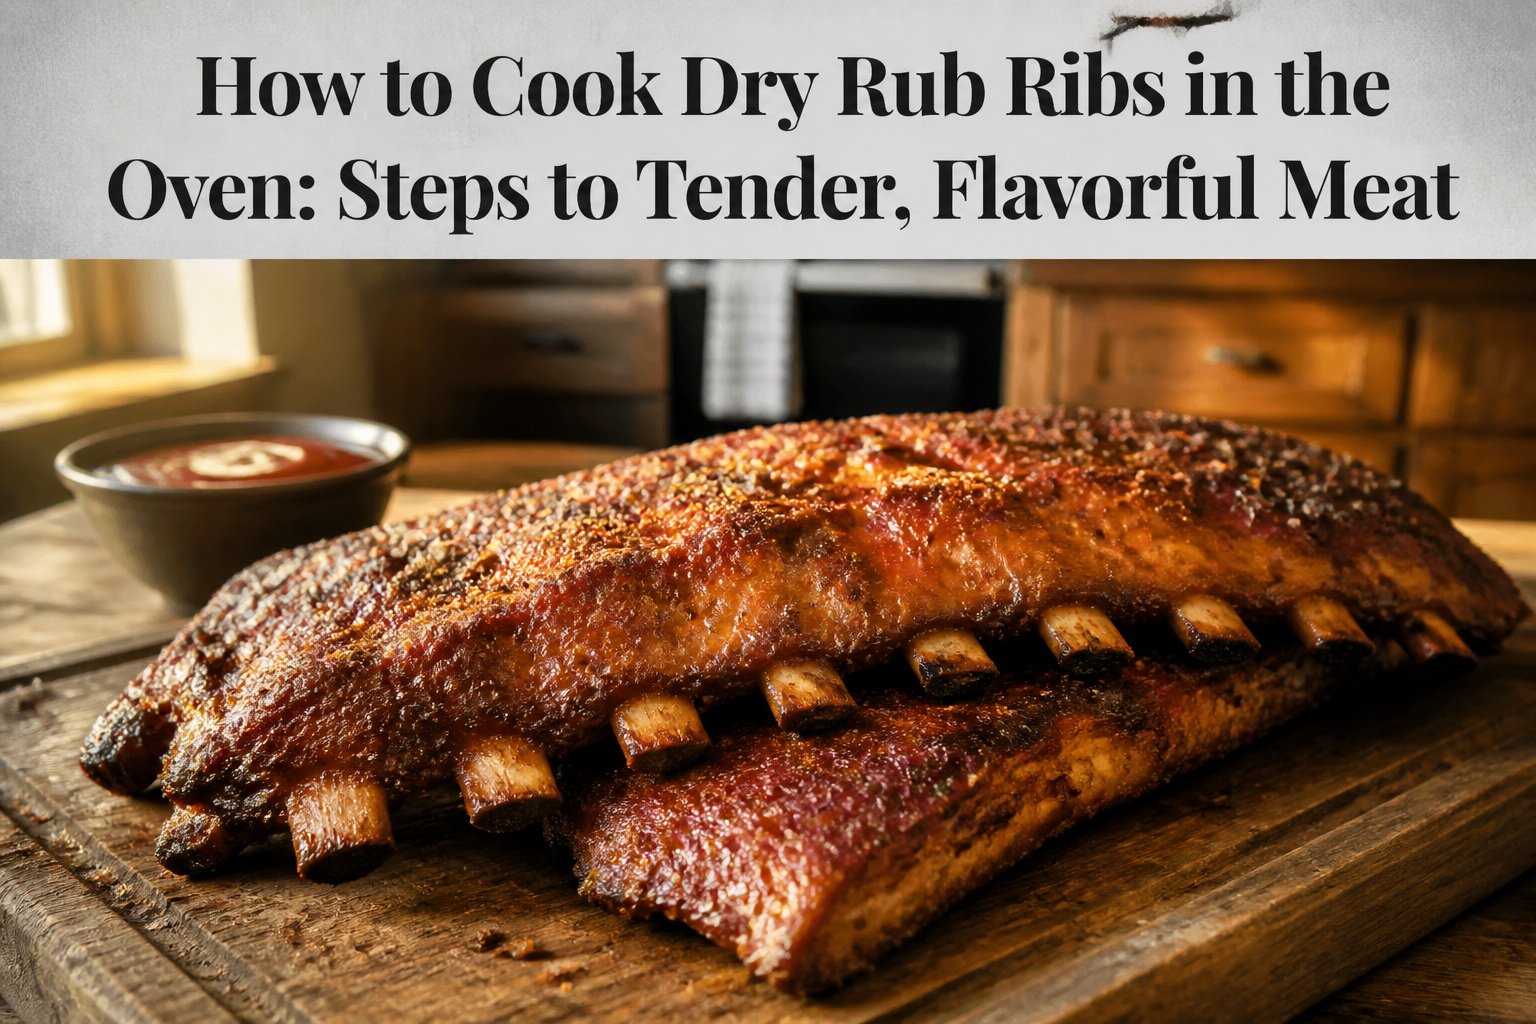
Dry-rubbed oven ribs that pull cleanly from the bone need about three hours at 275°F wrapped in heavy-duty foil.
Most home cooks miss where it actually goes wrong: they skip removing the silvery membrane from the bone side, which turns papery in the oven and blocks every spice from reaching the meat underneath. The mustard trick surprises people too.
A thin coat of yellow mustard before the rub goes on sounds odd, but the flavor cooks away entirely and the spices grip the meat instead of falling off in the first ten minutes.
1. Preheat the Oven

275°F is where the oven dial belongs for ribs that actually fall apart instead of fighting back.
At that temperature, the connective tissue between the ribs breaks down slowly, turning tough collagen into the silky gelatin that makes meat pull cleanly from the bone. 275°F is the temperature that rewards patience.
Some recipes call for 375°F to speed things up. The ribs will cook through, but the exterior tightens before the interior softens, and you end up with meat that is done but not tender.
The faster heat also squeezes out moisture faster than the foil can trap it. Two and a half to three hours at 275°F beats a quicker, chewier result.
If your evening is pressed, start the ribs earlier in the afternoon; the oven does the work while you handle everything else.
Recommended Products

Master Your Rib Prep: This essential rib prep tool membrane remover is engineered for superior performance. Its reinforced, thickened blade effortlessly tackles even the toughest membranes, making rib membrane removal faster and simpler than ever.

【Premium Heavy-Duty Stainless Steel】Crafted from thickened food-grade 304 stainless steel, this rib membrane remover delivers exceptional heat resistance, rustproofing, and deformation resistance. It effortlessly withstands repeated use and the demanding conditions of busy kitchens, designed for years of reliable service in your kitchen.
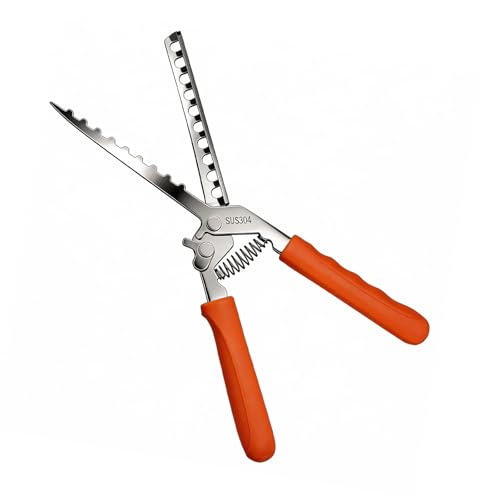
Quick & Effortless Rib Membrane Removal - Designed with a wide, sharp contact surface and secure serrated edges, this rib membrane remover grips and lifts fascia smoothly for clean, professional results. Perfect for home cooks and BBQ masters alike.
2. Remove the Membrane

Flip the rack bone-side up and look for the thin, silvery membrane stretched across the ribs.
That sheet blocks seasoning from reaching the meat and turns tough and papery in the oven, so it has to come off before the rub goes on.
Slide a paring knife under one corner to lift an edge, then grip the membrane with a paper towel. The towel gives you traction the slippery film won’t offer bare-handed.
Pull slowly and steadily; it sometimes releases in one clean strip, sometimes tears and needs a few passes. Either way, keep working until every bit is gone and the bone surface looks bare.
The meat underneath will take seasoning and heat evenly once that barrier is removed, which is the difference between ribs that eat tender and ribs that fight back.
3. Apply the Dry Rub

Brown sugar forms the base of the rub, about a quarter cup, with paprika, garlic powder, and onion powder at a tablespoon each. Two teaspoons of black pepper and a couple teaspoons of salt round out the essentials.
I add cayenne when I want heat, but it is optional and does not change the chemistry.
A thin layer of oil or yellow mustard helps the rub grip the meat and prevents bare patches where the bone shows through. The mustard flavor cooks away entirely, so do not let the bottle scare you off.
Coat both sides generously and work the mixture into any crevices between the bones. Some cooks wrap the ribs and refrigerate immediately; others let them sit uncovered for fifteen minutes while the oven heats.
Both work. The rub needs at minimum that brief rest for the salt to begin drawing moisture to the surface.
If you have time, twenty-four to forty-eight hours in the refrigerator deepens the flavor noticeably, though the difference between overnight and two full days is subtle enough that I rarely plan that far ahead.
Recommended Products

CONVENIENT SEASONING: This bold blend of ingredients includes mustard seed, molasses, and hickory smoke for cooking up “love and happiness” at the grill.

CONVENIENT SEASONING: A Texas-style blend of sea salt, mustard, garlic, and hickory smoke for cooking up “love and happiness” at the grill. Seasoning is kosher.

THE BLEND FOR SWEET AND TANGY MUSTARD LOVERS: Dive into a blend of three mustards: spicy brown, tangy yellow, and refined ground, perfectly balanced with the sweetness of honey and caramel hints of demerara sugar. This bold, flavorful seasoning is ideal for pork and chicken, transforming meals into culinary delights with its unique sweet and tangy taste.
4. Wrap the Ribs

Heavy-duty aluminum foil is the right move here, not the thin stuff that tears when you pull it tight.
Lay the ribs meat-side up in the center of a sheet long enough to wrap twice around, fold the edges into a sealed packet, and crimp until no steam can escape.
That trapped steam is what keeps the meat from tightening into leather over the next few hours.
Set the wrapped rack on a rimmed baking sheet, which will catch whatever drips through.
You can skip the foil if you want, but the meat sits closer to the dry heat of the oven wall and the margin for error shrinks fast.
Unwrapped ribs need watching, and pulling them at 145°F internally is the safer play if you go that route. For most weeknight cooks, the tight wrap is worth the insurance.
Recommended Products

Pork rub with the right amount of sweetness

Distinctive sweet and spicy blend of brown sugar, bourbon, garlic, onion and salt

NATURALLY FLAVORED: McCormick Grill Mates Brown Sugar Bourbon Seasoning captures the trend of alcohol-inspired flavor; naturally flavored with brown sugar, bourbon, molasses, red bell pepper and extractives of paprika, garlic, onion and salt
5. Bake Until Tender

The oven does the heavy lifting now. At 275°F, ribs need 2.5 to 3 hours until the meat pulls back from the bone ends and a fork slides in without resistance.
You can push the heat to 375°F if time is short, but the window tightens to 1.5 to 2 hours and you will sacrifice some of that silky, slow-rendered texture.
St. Louis ribs demand patience. The extra meat and fat that make them so satisfying also mean they run longer than baby backs, sometimes by a noticeable margin.
Same oven, same rack position, different clock. I have learned to check St. Louis styles at the back end of the range and expect to add time rather than pull early.
The visual cue matters more than the timer. Bone exposure of a quarter inch or so means collagen has melted to gelatin and the connective tissue has surrendered.
That is when you rest them, not before.
6. Rest the Ribs

A rack of ribs pulled straight from the oven looks finished, but cutting into it right away sends the juices running onto the board instead of staying where they belong.
Let the meat sit for 30 to 60 minutes, tented loosely with foil, and those juices settle back into the fibers.
The internal temperature drops slowly enough that the ribs stay warm for serving, but the texture changes in a way you can actually feel: slices hold together, the surface doesn’t weep, and each bite carries more flavor because the seasoning hasn’t washed away with the first cut.
I used to skip this step when I was hungry and the kitchen smelled like dinner, and I could never figure out why some batches turned out dry even when I pulled them at the right temperature.
The resting period is the difference.
Recommended Products

Premium Stainless Steel Construction for Long-Lasting Use: Made from high-grade stainless steel, this rib prep tool boasts exceptional durability and rust resistance. It stands up to repeated outdoor grilling and kitchen use, delivering reliable performance that meets all your barbecue needs for years to come.
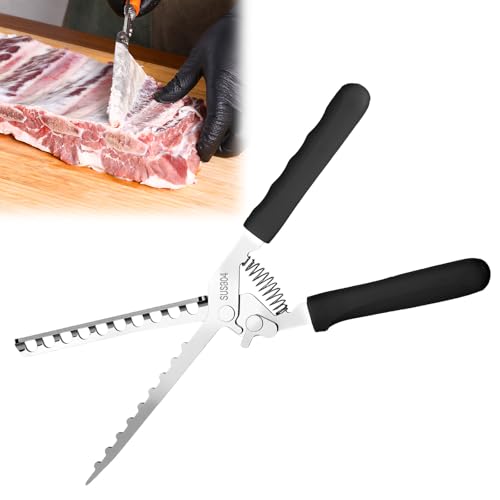
Upgraded Premium Stainless Steel Rib Membrane Remover:Made from high-grade stainless steel, this rib prep tool boasts exceptional durability and rust resistance,it resists bending when removing tough rib membranes, saving you time and effort
7. Finish with Sauce or Crust

Unwrap the ribs once they have rested. The meat will look tender and slightly shrunk from the bone, which is the sign that the slow stage did its work.
If you are finishing with barbecue sauce, brush on a thin layer and run the ribs under the broiler for 3 to 5 minutes.
The sugar in the sauce darkens fast at that heat, so stay close and pull them when the surface turns sticky and browned rather than waiting for color to deepen across the whole rack.
For a dry-rub finish alone, skip the sauce entirely. Leave the ribs unwrapped and return them to the oven, still at your baking temperature, for 10 to 15 minutes uncovered.
That window lets the exterior set into a proper crust without drying the meat underneath. A second sprinkling of rub before this final stage adds texture and sharpens the spice flavor.
Either way, the ribs need a few minutes on the cutting board after they come out. Slice between the bones and serve while the crust still crackles.
Dry Rub Ingredients

A dry rub for oven ribs usually starts with ten core ingredients, and the ratios matter more than the exact brand. Here is what shows up across the most-used recipes:
- Brown sugar (1/4 to 1/2 cup) and paprika (1/2 tablespoon to 2 tablespoons) appeared in eight of the sources I checked; these two form the sweet-smoky base most people expect
- Salt (1 teaspoon to 1 tablespoon) also appeared in eight sources; the New York Times recipe calls for fine sea salt with the note to add more to taste
- Garlic powder (1 teaspoon to 1 tablespoon) and black pepper (1/2 teaspoon to 1 tablespoon) each appeared in seven sources
- Onion powder (1 teaspoon to 1 tablespoon) appeared in six
- Cayenne (1/4 teaspoon to 1 teaspoon) and chili powder (1/2 teaspoon to 1 1/2 tablespoons) each appeared in five
- Mustard powder (1 teaspoon to 1 tablespoon) and cumin (1/2 teaspoon to 2 teaspoons) each appeared in four
The New York Times keeps their rub spare and direct:
1 tablespoon garlic powder, 1 tablespoon onion powder, 2 teaspoons smoked paprika, 1 tablespoon fine sea salt, plus more to taste, 2 teaspoons black pepper, plus more to taste
That shorter list still hits the same sweet-salty-smoky notes; the "plus more to taste" matters because ribs can handle aggressive seasoning. I would start there and add brown sugar only if you want the caramelized bark that sauceless ribs need.
Baby Back vs. St. Louis Ribs

Baby back ribs run leaner and smaller, which means they cook faster in the oven.
St. Louis ribs come from the belly side with more fat marbled through the meat, and they need that extra time for the fat to render into tenderness.
Either cut works for a dry rub method, but the timing shifts enough that you should decide before you preheat.
| Attribute | Baby Back Ribs | St. Louis Ribs |
|---|---|---|
| Source | Upper rib cage, near the loin | Belly side, near the sternum |
| Meat & fat | Leaner, less fat between bones | Meatier, more fat between bones |
| Typical weight per rack | 4 to 5 lbs | n/a |
| Oven time at 275°F | 2 to 2½ hours | About 1 hour longer |
A full rack of baby backs at 4 to 5 lbs feeds roughly four adults if you plan on a pound per person.
St. Louis ribs take longer, but that extra fat carries more flavor through the meat and forgives a slightly longer bake if your timing drifts.
I reach for St. Louis when I want the bigger, messier rib; baby backs when I need dinner on the table closer to the two-hour mark.
Recommended Products

Gibsons BBQ Seasoning, Chicago’s 30+ year steakhouse secret, blends salt, paprika, brown & white sugar, garlic & onion for robust flavor; It’s perfect for ribs, pork, brisket, chicken, roasts & more, offering unmatched versatility to elevate your cooking

ONE shaker bottle of seasoning

Smoky Sweet Flavor Profile – Blend of brown sugar, molasses, and hickory smoke for bold taste
Temperature and Time Options

Two common paths exist for oven ribs, and the temperature you set shapes everything that follows.
| Attribute | 275°F (2.5–3 hours) | 375°F (1.5–2 hours) |
|---|---|---|
| Texture | Tender, fall-off-the-bone | Firmer, chewier |
| Bark development | Better crust formation | Less pronounced |
| Time commitment | Longer | Shorter |
| Risk of toughness | Lower | Higher |
Lower and slower wins on texture because the fat and collagen break down gradually without tightening the muscle fibers.
At 375°F, the ribs cook through fast enough for a weeknight, but the meat can seize if you push even thirty minutes past the window.
I plan for 275°F when I can start by late afternoon; the extra hour is passive, and the bark that forms during the uncovered final stage is worth it.
If I am running behind and need the ribs on the table by six, 375°F works, though I pull them the moment a toothpick slides through with slight resistance rather than waiting for full pullback from the bone.
Liquid Smoke and Brining

Liquid smoke is the cheat code for oven ribs that still read as barbecue. A modest drizzle massaged into the meat before the rub goes on adds a convincing grill note without any backyard equipment.
The technique shows up in competition-style recipes for a reason: it layers with the dry spices rather than sitting on top of them.
Half the rub gets applied first, the liquid smoke follows, and the rest of the rub seals it in.
Brining is the other move worth considering if you have the foresight. An overnight soak in a basic pork brine changes the moisture equation, giving you more insurance against a dry rack even if your timing drifts slightly.
Prep stretches from ten minutes to ten minutes plus a day, and the cook time stays the same at roughly four hours.
Neither step is mandatory. Plenty of excellent oven ribs skip both and rely on fat, low heat, and a tight foil wrap to do the work.
The liquid smoke adds flavor complexity; the brine adds moisture buffer. Use one, both, or neither based on what your schedule allows and whether you already own a bottle of liquid smoke.
Common Questions

A few questions come up every time I make these ribs, so here is what actually matters.
- How long should the rub sit? Anywhere from 15 minutes to 48 hours. The longer it sits, the deeper the flavor and the better the bark. I have thrown them straight into the oven after a quick coat and I have prepped them the night before; both work, but overnight wins if you planned ahead.
- Do you need oil or mustard underneath? You do not have to use either. Pat the ribs dry after rinsing and the surface moisture will hold the rub. That said, a light coat of olive oil or yellow mustard helps the rub adhere and adds a little extra flavor. Keep it thin either way.
- Is foil necessary? Yes, if you want insurance on moisture. Wrapping the ribs creates a steamy environment that keeps them juicy. You can cook unwrapped, but you will need to pay closer attention so they do not dry out.
Frequently Asked Questions
How long should dry rub be on ribs before cooking?
Anywhere from 15 minutes to 48 hours. The salt needs at least that brief rest to draw moisture to the surface, but letting the rub sit overnight deepens the flavor noticeably.
Two full days adds a subtle edge most weeknight cooks won’t miss.
Do you put oil on ribs before the rub?
You don’t have to, but a thin layer of olive oil or yellow mustard helps the spices grip the meat and prevents bare patches. The mustard flavor cooks away completely, so the bottle shouldn’t scare you off.
Pat the ribs dry first either way.
Can you cook these ribs without foil?
You can, but the margin for error shrinks fast. The foil traps steam that keeps the meat from tightening into leather; unwrapped ribs need closer watching and are safer pulled at 145°F internally.
If you skip the wrap, consider pulling the foil off only for the final 10 to 15 minutes to build a crust.
Should I bake ribs at 250 or 275?
275°F is the temperature that rewards patience. At that heat, collagen breaks down slowly into silky gelatin without the exterior tightening before the interior softens.
Do I bake ribs in the oven, covered or uncovered?
Covered for most of the cook, then uncovered to finish. The tight foil wrap creates a steamy environment that keeps the meat juicy through the 2.5 to 3 hour bake.
Remove the foil for the final stage, whether that’s a broil with sauce or 10 to 15 minutes dry to set the crust.
Should I bake ribs at 350 or 400?
Neither is ideal for tender results. Faster heat squeezes out moisture before the connective tissue fully breaks down.
About The Author
