
The Perfect White Bread Recipe
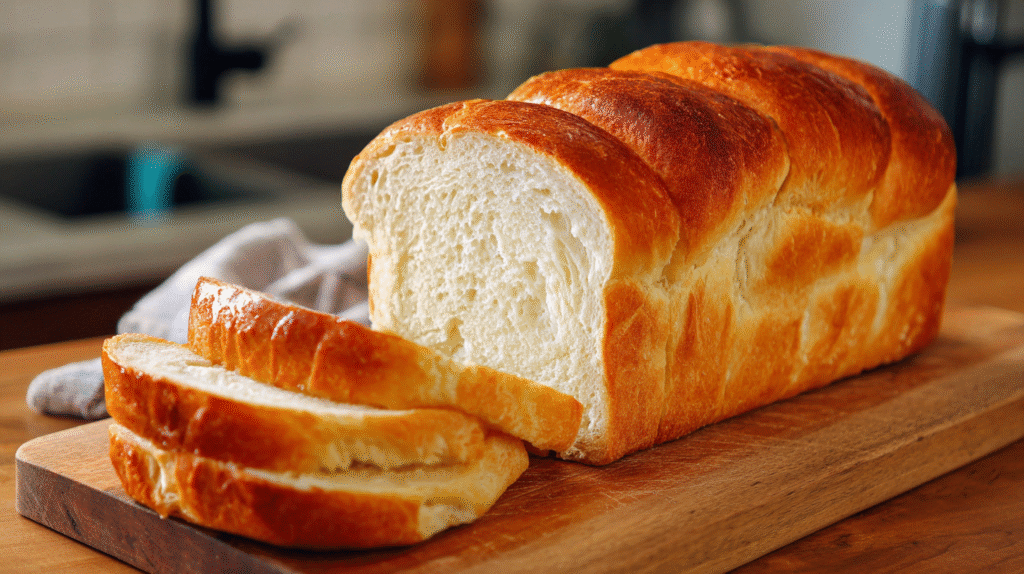
This classic white bread recipe yields two beautiful loaves with golden crusts and soft interiors. Follow these straightforward steps to create bread that will fill your home with an irresistible aroma and deliver that perfect slice for sandwiches toast or simply enjoying with butter.
Ingredients
- 6 cups all-purpose flour
- 2¼ teaspoons active dry yeast (1 packet)
- 2¼ cups warm water (110°F-115°F)
- 2 tablespoons granulated sugar
- 1 tablespoon salt
- 2 tablespoons unsalted butter softened
Equipment Needed
- Large mixing bowl
- Measuring cups and spoons
- Wooden spoon
- Kitchen thermometer
- 2 loaf pans (9×5 inch)
- Clean kitchen towel
- Cooling rack
Instructions
- Activate the yeast: Pour warm water into a large bowl. Add sugar and stir until dissolved. Sprinkle yeast over the water and let stand for 5-10 minutes until foamy.
- Form the dough: Add salt butter and 3 cups of flour to the yeast mixture. Beat vigorously with a wooden spoon until smooth. Gradually add remaining flour ½ cup at a time until dough forms a rough mass that pulls away from the sides of the bowl.
- Knead the dough: Turn dough onto a lightly floured surface. Knead for 8-10 minutes until smooth elastic and no longer sticky. You’ll know it’s ready when you can press a finger into the dough and it springs back.
- First rise: Shape dough into a ball and place in a lightly greased bowl turning once to grease the top. Cover with a clean damp kitchen towel and let rise in a warm draft-free place until doubled in size about 1 hour.
- Shape the loaves: Punch down the dough to release air bubbles. Divide in half. Shape each half into a loaf by flattening into a rectangle then rolling up tightly starting from the short end. Pinch seams and ends to seal.
- Second rise: Place shaped loaves seam-side down in greased 9×5 inch loaf pans. Cover and let rise until dough has crowned about 1 inch above the pans approximately 30-45 minutes.
- Bake: Preheat oven to 375°F. Bake loaves for 30-35 minutes until golden brown. Bread should sound hollow when tapped on the bottom.
- Cool: Remove bread from pans immediately and cool on wire racks completely before slicing.
Pro Tips for Perfect White Bread
- Temperature matters: Use a thermometer to ensure your water is between 110°F-115°F. Too hot will kill the yeast too cold won’t activate it.
- Flour gradually: Add flour slowly during mixing to achieve the perfect consistency. Humidity affects how much flour you’ll need.
- Proper kneading: Don’t rush the kneading process. This develops gluten which gives bread its structure.
- Rising environment: Create a warm environment for rising by placing dough near a warm oven or in an oven with just the light on.
- Butter the crust: For an extra soft crust brush the tops with melted butter immediately after baking.
This versatile white bread makes excellent sandwich bread works wonderfully for French toast and stays fresh for several days when stored properly in an airtight container or bread bag.
Why This White Bread Recipe Works
This classic white bread recipe has been tested countless times to ensure perfect results with every bake. The precise ratio of bread flour to all-purpose flour creates the ideal structure while maintaining a tender crumb that store-bought bread simply can’t match.
The method of activating yeast separately before incorporating it ensures proper fermentation and guarantees your bread will rise beautifully. Unlike many recipes that rush the process, this one allows for two full rises which develops exceptional flavor and that characteristic soft texture everyone loves.
The addition of butter enriches the dough, resulting in a more flavorful loaf that stays fresh longer than lean bread recipes. Many white bread recipes skimp on fat content, but this perfect balance creates bread that’s both sturdy enough for sandwiches and tender enough to enjoy plain.
Temperature control plays a crucial role in this recipe’s success. The exact water temperature (110-115°F) activates the yeast without killing it, while creating a warm environment for rising helps develop the perfect texture every baker strives to achieve.
The technique of brushing the hot crust with melted butter isn’t just for flavor—it softens the exterior slightly while preserving that satisfying golden color. This small but important step elevates this bread beyond basic recipes and creates that bakery-quality finish.
For beginning bakers, this recipe provides detailed instructions that eliminate guesswork. The dough’s consistency is forgiving enough to handle minor measuring variations, making it nearly impossible to fail even if this is your first attempt at homemade bread.
Equipment Needed
Creating perfect homemade white bread requires a few essential tools to ensure success. Gather these kitchen items before beginning your bread-making journey:
- Large mixing bowl – For combining ingredients and initial dough formation
- Measuring cups and spoons – For accurate ingredient measurements
- Kitchen scale – Optional but recommended for precise flour measurements
- Wooden spoon or silicone spatula – For stirring ingredients before kneading
- Stand mixer with dough hook – Optional but helpful for easier kneading (you can knead by hand if preferred)
- Clean work surface – For kneading the dough if doing it by hand
- Bench scraper – Useful for dividing dough and cleaning your work surface
- Two 9×5-inch loaf pans – Standard size for this recipe
- Kitchen towels or plastic wrap – For covering the dough during rising periods
- Pastry brush – For applying melted butter to the baked loaves
- Wire cooling rack – Allows air circulation for proper cooling
- Sharp bread knife – For clean slices without compressing the bread
Most of these items are common kitchen tools you likely already own. The investment in proper bread pans proves worthwhile as they help create the classic sandwich loaf shape and promote even baking. Your white bread deserves the right equipment to achieve that perfect golden crust and soft interior texture that makes homemade bread so special.
Ingredients
Here’s everything you need to create two perfect loaves of homemade white bread. Each ingredient plays a crucial role in developing the ideal texture and flavor that makes this bread superior to store-bought varieties.
For the Dough
- 2 cups warm water (105-115°F)
- 2 tablespoons active dry yeast (or instant yeast)
- 1/4 cup granulated sugar
- 1 tablespoon salt
- 3 tablespoons unsalted butter, melted
- 3 cups bread flour
- 3-4 cups all-purpose flour
- 2 tablespoons butter, melted (for brushing on top after baking)
Optional Additions
- 1/4 cup dried herbs (rosemary, thyme, or basil) for herb bread
- 2 tablespoons honey (can substitute for sugar for a different flavor profile)
- 1/2 cup grated cheese (cheddar or parmesan work wonderfully)
- 1 tablespoon garlic powder for garlic bread
- 2 tablespoons milk powder for extra soft texture
- 1 tablespoon vital wheat gluten (helps with rise if using only all-purpose flour)
- Egg wash (1 egg beaten with 1 tablespoon water) for a shiny crust instead of butter
- Oats, sesame seeds, or poppy seeds for topping
Instructions
Follow these step-by-step instructions to create perfectly fluffy homemade white bread with a golden crust. Each stage is crucial for developing the ideal texture and flavor that makes this bread truly exceptional.
Making the Dough
- Activate the yeast by combining warm water (105-110°F), sugar, and active dry yeast in a large bowl. Let this mixture sit for 5-10 minutes until it becomes foamy and bubbly.
- Add melted butter and salt to the yeast mixture and stir to combine.
- Gradually incorporate 2 cups of bread flour, mixing until smooth. This initial addition creates a foundation for the dough structure.
- Add the remaining bread flour and all-purpose flour about 1/2 cup at a time, stirring after each addition. You’ll eventually need to switch from a spoon to using your hands.
- Turn the dough onto a lightly floured surface when it becomes too difficult to stir but still feels slightly sticky.
- Knead the dough for 8-10 minutes until it becomes smooth and elastic. The dough should spring back when lightly pressed with your fingertips.
- Test the dough using the “windowpane test” – stretch a small piece until it’s thin enough to see light through without tearing. This indicates proper gluten development.
First Rise
- Lightly oil a large clean bowl and place your kneaded dough inside, turning once to coat both sides with oil.
- Cover the bowl with a clean kitchen towel or plastic wrap and place in a warm draft-free location (around 75-80°F).
- Allow the dough to rise until doubled in size, approximately 1-1½ hours depending on your kitchen temperature.
- Check if the dough has risen properly by gently poking it with your finger – the indentation should remain without the dough springing back completely.
- Punch down the risen dough by pressing your fist into the center to release excess air bubbles.
Shaping the Loaf
- Transfer the dough to a lightly floured work surface and divide it into two equal portions using a bench scraper or knife.
- Work with one portion at a time, gently pressing each into a rectangle about 9 inches wide and 12 inches long.
- Starting from the short end, roll the dough tightly like a jelly roll, pinching the seam and ends to seal after each turn.
- Tuck the ends under and place the shaped loaf seam-side down in a greased 9×5-inch loaf pan.
- Repeat the shaping process with the second portion of dough and place it in another greased loaf pan.
Second Rise
- Cover the shaped loaves loosely with clean kitchen towels or lightly greased plastic wrap.
- Place the covered loaves in a warm area and allow them to rise until the dough crowns about 1 inch above the rim of the pans, approximately 45-60 minutes.
- Start preheating your oven to 375°F when the loaves are nearly doubled in size, about 30 minutes into the second rise.
- Test if the dough is ready for baking by gently pressing with your finger – the dough should spring back slowly and leave a slight indentation.
Baking
- Place the fully risen loaves in the preheated 375°F oven, positioning them in the center rack for even heat distribution.
- Bake for 30-35 minutes until the loaves are golden brown and sound hollow when tapped on the bottom.
- Check the internal temperature with an instant-read thermometer if available – properly baked bread should register 190-200°F.
- Remove the bread from the oven and immediately brush the tops with melted butter for a softer crust.
- Allow the loaves to cool in the pans for 10 minutes before transferring to a wire rack.
- Let the bread cool completely (at least 1 hour) before slicing to prevent the crumb from becoming gummy.
- Store completely cooled bread in an airtight container or bread bag at room temperature for up to 4 days, or freeze for longer storage.
Tips For Baking Success
Even with a foolproof recipe, bread baking can sometimes present challenges. These tips will help you achieve consistent success with your homemade white bread every time.
Troubleshooting Common Issues
Bread didn’t rise properly: Check your yeast’s expiration date first. Old yeast won’t activate properly no matter how perfect your technique. Water temperature also plays a crucial role—too hot (above 115°F) will kill the yeast while too cool won’t activate it effectively. Aim for 105-110°F for optimal results. Your kitchen environment matters too; dough rises best in a warm draft-free spot around 75-85°F.
Dense or heavy texture: This typically results from insufficient kneading or not allowing enough rising time. Knead your dough until it passes the windowpane test—when a small piece can be stretched thin enough to see light through without tearing. Each rise should nearly double the dough’s size, which develops proper structure and airiness.
Crust too hard or too pale: For a softer crust, brush the loaves with melted butter immediately after baking. If your crust is too pale, your oven temperature might be too low or you may need to bake longer. Consider using an oven thermometer to verify temperature accuracy, as many ovens run cooler or hotter than their settings indicate.
Bread collapses during baking: This frustrating issue usually means your dough was overproofed during the second rise. Watch carefully—when the dough rises about 1 inch above the rim of the pan, it’s ready for baking regardless of how much time has passed. Environmental factors like humidity and room temperature can significantly affect rising times.
Uneven texture or large air holes: These problems typically stem from improper shaping. Take time to properly deflate the dough after the first rise and shape it tightly when forming your loaves. This creates an even crumb structure without large gaps or dense spots.
Storage and Freezing
After you’ve baked your perfect loaves of homemade white bread the proper storage method will determine how long they maintain their freshness. Cool your bread completely on a wire rack before attempting to store it. Residual heat trapped in wrapped bread can create condensation leading to soggy crusts and premature molding.
For short-term storage keep your white bread at room temperature in a bread box or wrapped in a clean kitchen towel. Avoid plastic bags for fresh bread as they trap moisture and soften that delicious crust too quickly. Your homemade white bread will stay fresh at room temperature for up to 3 days when properly stored.
For longer storage periods freezing offers excellent results. Slice your completely cooled bread before freezing to allow for easy portion control. Wrap individual slices or whole loaves tightly in plastic wrap then place in a freezer bag with all air pressed out. Label each package with the date to track freshness.
Frozen white bread maintains quality for up to 3 months. Thaw individual slices directly in the toaster for immediate use or leave a whole loaf at room temperature for 2-3 hours while still wrapped. Refresh thawed bread by heating in a 350°F oven for 5-10 minutes to restore that fresh-baked texture and aroma.
Never refrigerate your homemade white bread as the cold temperature actually accelerates staling through a process called retrogradation. The refrigerator environment speeds up the crystallization of starch molecules making your bread firm and dry much faster than at room temperature.
Revive slightly stale bread by sprinkling it with water and heating in a 350°F oven for 5-8 minutes. This technique rehydrates the crumb and crisps the crust making day-old bread taste nearly fresh-baked again. Your homemade white bread also makes excellent French toast croutons or breadcrumbs when it’s past its prime.
Serving Suggestions
Your freshly baked white bread is versatile enough to complement many meals and occasions. Try serving thick slices alongside hearty soups like tomato bisque or beef stew for a satisfying dinner. Toast the bread to golden perfection and top with avocado smashed with lemon juice salt and red pepper flakes for a trendy breakfast option.
Create the ultimate grilled cheese sandwich by buttering the exterior of two slices and filling with your favorite cheeses before cooking until golden and melty. French toast made with this homemade bread delivers an exceptional texture that absorbs the egg mixture beautifully while maintaining structure during cooking.
Homemade garlic bread becomes extraordinary when you slice this bread lengthwise brush with a mixture of melted butter minced garlic and chopped parsley then bake until fragrant. Cube leftover bread to make croutons for salads or homemade stuffing that will elevate your next holiday meal.
Morning toast tastes incredible when slathered with fruit preserves honey or quality butter. Serving this bread as the foundation for open-faced sandwiches topped with roasted vegetables hummus or thinly sliced meats creates an impressive lunch option. Bread pudding transforms day-old slices into a decadent dessert when combined with eggs milk sugar and cinnamon.
Traditional tea sandwiches gain distinction when made with thinly sliced homemade white bread filled with cucumber and cream cheese or egg salad. Your homemade loaves also make exceptional breadcrumbs when dried and processed providing superior texture for coating chicken cutlets or topping casseroles.
Variations On This Classic White Bread
Once you’ve mastered the basic white bread recipe you can experiment with these delicious variations to create unique flavors and textures. These adaptations use the same foundational dough but incorporate different ingredients or techniques to transform your homemade loaves.
Whole Wheat Blend
Replace up to 50% of the white flour with whole wheat flour for a heartier loaf with more fiber and nutrients. This variation creates a slightly denser texture with a nuttier flavor profile. You might need to add an extra tablespoon or two of water since whole wheat flour absorbs more moisture than all-purpose flour.
Honey Oat Bread
Add ½ cup of rolled oats to the dough and replace the sugar with ¼ cup of honey for a naturally sweetened bread with added texture. Sprinkle additional oats on top of the loaves before baking for an attractive finish. The oats create a slightly chewier texture while the honey imparts a gentle sweetness throughout the bread.
Cinnamon Swirl Bread
Roll out the dough into a rectangle after the first rise and spread with a mixture of:
- 3 tablespoons melted butter
- ⅓ cup brown sugar
- 1 tablespoon ground cinnamon
Roll up the dough tightly starting from the short end then place in the loaf pan for the second rise. This creates beautiful swirls of cinnamon throughout each slice making it perfect for breakfast toast.
Herb and Garlic Bread
Mix 2 tablespoons of dried herbs (such as rosemary thyme oregano or Italian seasoning) and 2 teaspoons of garlic powder into the dough during the mixing stage. This savory variation pairs wonderfully with pasta dishes and soups. For even more flavor brush the tops with garlic butter before baking.
Milk Bread
Replace the water with whole milk for an incredibly soft and tender crumb. The milk proteins and fat create a richer flavor and more delicate texture. This variation stays fresh longer and has a slightly yellowish interior with a tender golden crust.
Potato Bread
Add ½ cup of instant potato flakes or ½ cup of cooled mashed potatoes to the dough for exceptional moisture retention. Potato bread remains soft for days longer than traditional white bread and has a slightly denser yet very moist texture. This variation makes exceptional sandwich bread that doesn’t dry out quickly.
Cheesy Bread
Fold in 1 cup of shredded cheese (cheddar Parmesan Gruyère or a mixture) after the first rise. The cheese creates pockets of savory goodness throughout the loaf. For extra flavor add ¼ teaspoon of garlic powder or dried herbs to complement the cheese.
Multigrain Bread
Add 3-4 tablespoons each of various seeds and grains such as:
- Sunflower seeds
- Flax seeds
- Poppy seeds
- Millet
- Quinoa
Mix these into the dough during the initial mixing stage for a nutritious variation packed with texture and flavor. Reserve some seeds to sprinkle on top before baking for an attractive finish.
Sourdough-Style Bread
Replace ¼ cup of water with ½ cup of sourdough starter discard for a mild tangy flavor without requiring a fully active starter. This creates a more complex flavor profile while still maintaining the reliable rise of commercial yeast. The texture becomes slightly chewier with a more developed crust.
Buttery Pull-Apart Bread
After the first rise divide the dough into small balls (about 1½ inches in diameter). Dip each ball into melted butter then arrange in layers in your loaf pan. Allow to rise a second time before baking. This creates a fun interactive bread where pieces can be pulled apart rather than sliced making it perfect for sharing.
Conclusion
This white bread recipe will transform your home baking experience with its foolproof approach and bakery-quality results. You’ll love watching your family’s faces light up as they taste bread that’s worlds apart from store-bought versions.
Remember that bread making is both science and art. Don’t be discouraged if your first loaf isn’t perfect – each batch teaches you something new about the fascinating process of bread creation.
With practice you’ll develop an intuition for the perfect dough consistency and baking time for your kitchen’s unique conditions. Soon you’ll be experimenting with the suggested variations and perhaps creating signature loaves of your own.
There’s something deeply satisfying about mastering this fundamental culinary skill – enjoy the process and the delicious rewards!