
Why This Sugar Cookie Frosting Recipe Is Perfect
This sugar cookie frosting recipe stands out from the crowd for several compelling reasons. The texture strikes that ideal balance between spreadable and pipeable consistency without being too runny or overly stiff. You’ll appreciate how it holds its shape beautifully on cookies yet remains soft enough to bite through cleanly.
The flavor profile offers the perfect level of sweetness that complements rather than overwhelms your sugar cookies. Many store-bought frostings contain artificial ingredients and preservatives but this homemade version delivers pure flavor using simple pantry staples.
Versatility makes this frosting truly exceptional as it works equally well for both casual family treats and elaborate decorated cookies for special occasions. Your creative options are endless since the base recipe accepts food coloring beautifully without breaking down or becoming too thin.
The 10-minute preparation time means you can whip up this frosting while your cookies are cooling with minimal effort. No specialized equipment is required beyond a mixing bowl and electric mixer which makes this recipe accessible for bakers of all skill levels.
Storage flexibility adds another advantage since this frosting can be made ahead and refrigerated for up to a week. You can easily adjust the consistency if needed by adding small amounts of milk or powdered sugar to achieve your desired thickness.
Ingredients for Sugar Cookie Frosting
Creating perfect sugar cookie frosting requires just a handful of simple ingredients you likely already have in your pantry. This recipe yields enough frosting to cover approximately 24 cookies with a generous layer.
Basic Ingredients
- 4 cups powdered sugar (confectioners’ sugar)
- ½ cup unsalted butter softened to room temperature
- 3-4 tablespoons milk or heavy cream
- 1 teaspoon pure vanilla extract
- ¼ teaspoon salt
- 1-2 tablespoons light corn syrup (optional for extra shine)
Optional Add-Ins and Flavorings
- Food coloring (gel food coloring works best for vibrant colors without thinning the frosting)
- Flavor extracts (almond, lemon, peppermint, or maple) – substitute ¼-½ teaspoon for part of the vanilla
- Citrus zest (lemon, orange, or lime) – 1-2 teaspoons for a fresh flavor
- Cocoa powder – 2-3 tablespoons to make chocolate frosting (you may need extra milk)
- Sprinkles or decorative sugar for topping
- Cream cheese – substitute half the butter with 4 oz cream cheese for a tangy variation
The quality of your ingredients affects the final flavor. Using pure vanilla extract rather than imitation provides a more authentic taste. Room temperature butter blends more smoothly than cold butter creating a lump-free frosting base. Sifting the powdered sugar before mixing prevents clumps and ensures a silky-smooth texture.
Equipment Needed
Creating this perfect sugar cookie frosting requires minimal equipment yet precision ensures the best results. Here’s what you’ll need to gather before starting:
- Stand mixer or hand mixer: Electric mixers provide the power needed to cream butter properly and incorporate powdered sugar into a smooth frosting. While a stand mixer offers hands-free convenience a hand mixer works equally well.
- Large mixing bowl: If using a hand mixer you’ll need a spacious bowl to prevent ingredients from flying out during mixing. Choose one with high sides for best results.
- Measuring cups and spoons: Accurate measurements are crucial for achieving the right consistency. Use proper measuring tools rather than eyeballing ingredients.
- Rubber spatula: Essential for scraping down the sides of your bowl ensuring all ingredients are fully incorporated and no powdered sugar pockets remain.
- Sifter or fine-mesh sieve: Helps eliminate lumps from powdered sugar resulting in silky-smooth frosting.
- Piping bags and tips (optional): If you plan to pipe decorative designs these tools allow for precise application and creative patterns.
- Offset spatula or butter knife: Perfect for spreading frosting evenly across cookies when not using piping techniques.
- Small bowls: Useful when dividing frosting to create multiple colors.
- Airtight containers: Necessary for storing leftover frosting or preparing it ahead of time.
How to Make Sugar Cookie Frosting
Creating perfect sugar cookie frosting is remarkably simple once you understand the basic techniques. Follow these step-by-step instructions to achieve frosting that’s both delicious and beautifully textured.
Preparing the Base
Begin by beating the softened butter in a large mixing bowl until it becomes light and fluffy—about 2-3 minutes on medium speed. Properly creamed butter creates the foundation for smooth frosting without lumps. Gradually add the sifted powdered sugar about 1 cup at a time while mixing on low speed to prevent a powdery cloud from forming. Pour in the vanilla extract and salt after incorporating half the sugar to distribute the flavors evenly throughout the mixture. Continue adding the remaining powdered sugar until fully incorporated. The base should look somewhat thick at this stage which is exactly what you want before adjusting the consistency.
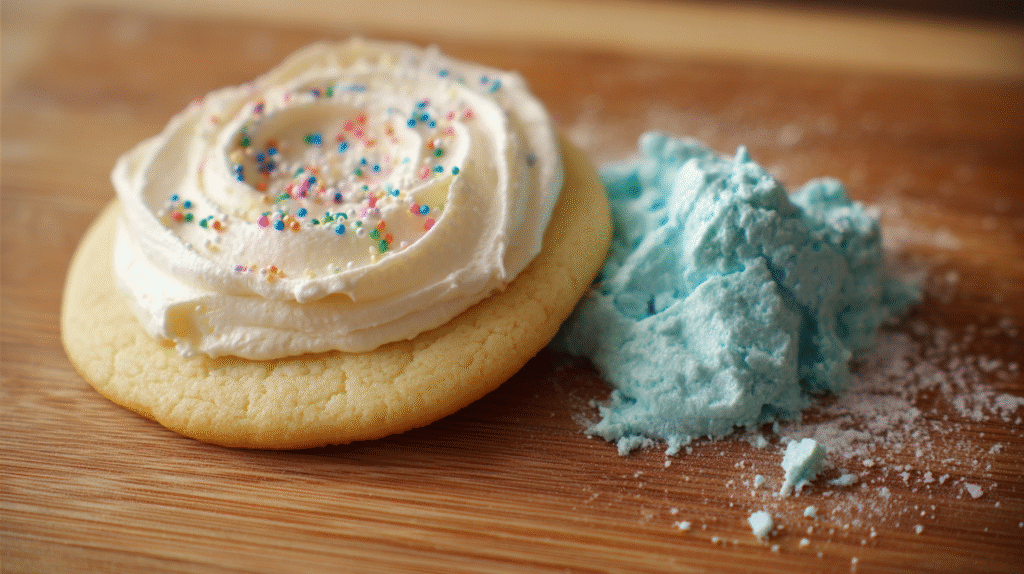
Adding Color and Flavor
Personalize your frosting by incorporating various flavors and colors after the base is complete. Add food coloring a few drops at a time—gel food coloring works best as it provides vibrant hues without thinning the frosting. Divide your frosting into separate bowls before coloring if you plan to create multiple colors for decorating. Experiment with flavor extracts like almond mint or lemon by adding just ¼ teaspoon at a time then tasting before adding more. Fresh citrus zest such as orange or lemon can impart bright natural flavors—use about 1-2 teaspoons per batch. For chocolate frosting blend in 2-3 tablespoons of cocoa powder adjusting with additional milk if the mixture becomes too thick.
Achieving the Right Consistency
Adjust your frosting’s thickness by adding small amounts of liquid or powdered sugar until reaching your desired consistency. Mix in additional milk or heavy cream 1 teaspoon at a time to thin frosting for spreading. Thicker frosting works better for piping decorative designs while thinner consistency is ideal for flooding or glazing cookies. Test the consistency by lifting your spatula—perfect spreading frosting should hold a soft peak that gently folds over itself. For piping consistency the frosting should hold its shape when piped but still feel soft enough to bite through comfortably. Beat the frosting on medium-high speed for 2-3 minutes after all adjustments to incorporate air creating an extra light and fluffy texture that spreads beautifully.
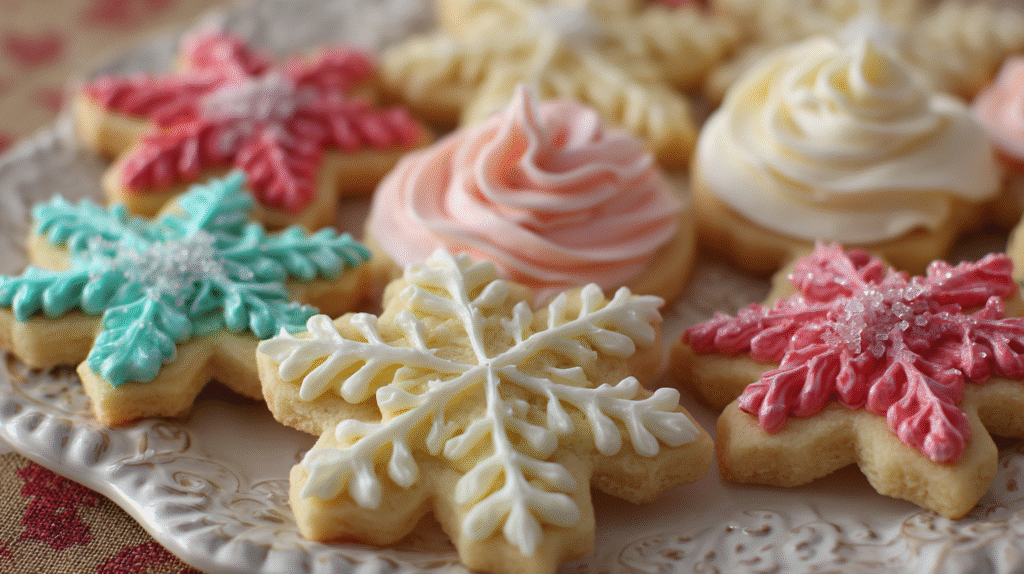
Decorating Techniques Using This Frosting
Once you’ve prepared your sugar cookie frosting, it’s time to unleash your creativity. This versatile frosting opens up many decorating possibilities that can transform simple sugar cookies into edible works of art.
Spreading vs. Piping
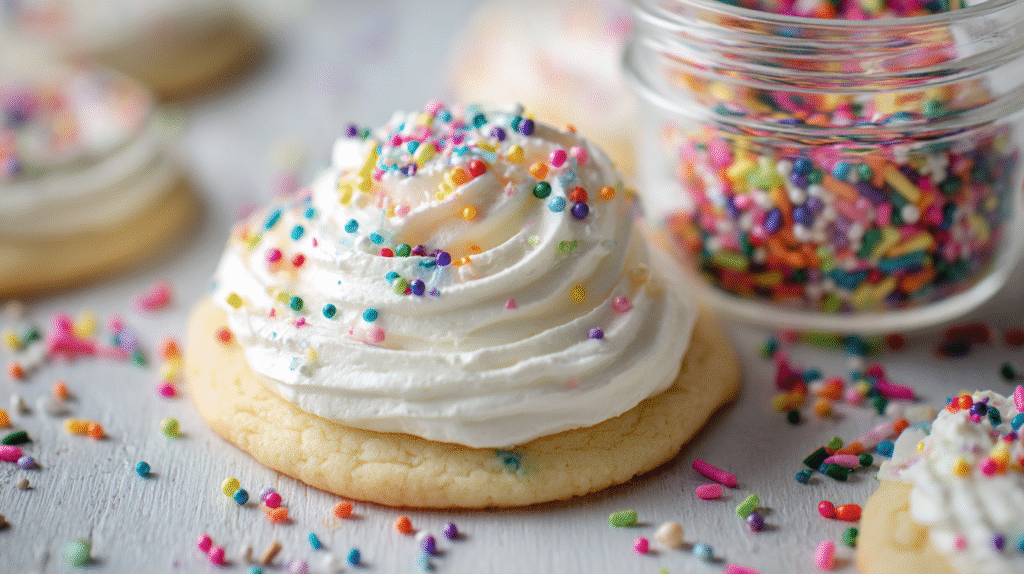
Spreading offers a quick and casual approach to frosting cookies. For this technique, use an offset spatula or butter knife to apply a smooth layer of frosting across the cookie surface. Adjust the consistency to be slightly thinner for spreading—add a few drops of milk if needed for easier application. Create textured designs by gently lifting the spatula to form small peaks or swirls in the frosting. This method works perfectly for everyday treats or when decorating with children.
Piping delivers more precise and elaborate designs that elevate your cookies for special occasions. Fill a piping bag fitted with your desired tip—star tips create beautiful borders and rosettes while round tips work well for writing and outlines. Maintain a slightly stiffer consistency for piping to ensure your designs hold their shape. Hold the piping bag at a 45-degree angle about half an inch above the cookie surface for optimal control. Practice consistent pressure to achieve uniform lines and shapes. Remember to release pressure completely before lifting the tip to avoid unwanted drips.
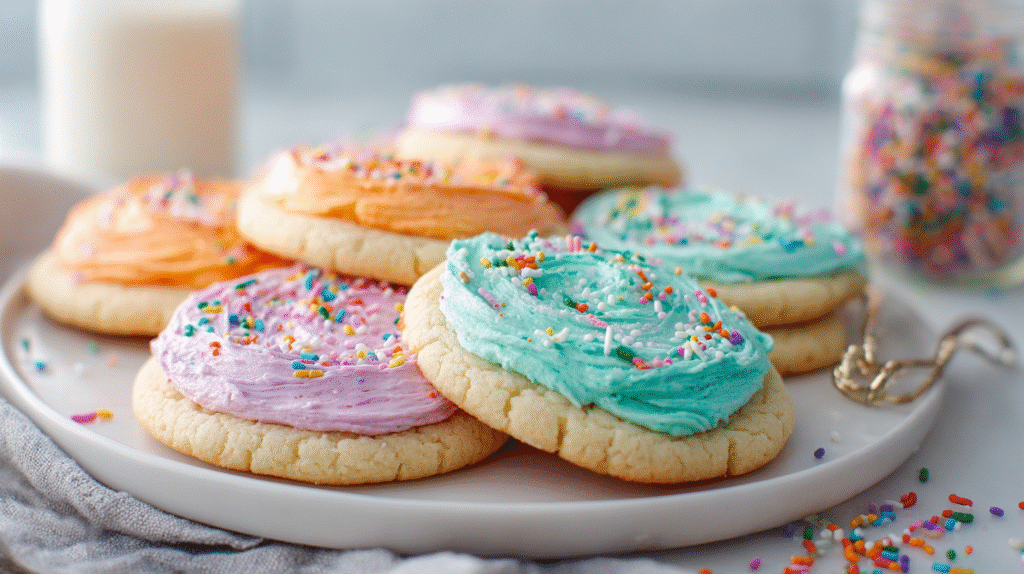
Creating Multiple Colors
Transform your base frosting into a vibrant palette by dividing it into separate bowls before adding food coloring. Start with a small amount of coloring—you can always add more to intensify the shade, but you can’t remove it once mixed. Gel food colors deliver the most vivid results without altering the frosting consistency, unlike liquid alternatives that may thin your frosting. Achieve sophisticated color schemes by mixing custom hues rather than relying solely on standard colors.
Master the technique of color blending directly on cookies by piping lines or dots of different colors side by side, then gently dragging a toothpick through them to create marbled effects. For ombré designs, prepare several batches of frosting in graduating shades of the same color. Consider complementary or seasonal color combinations that enhance your cookie theme—pastels for spring, bright colors for birthdays, or traditional red and green for Christmas cookies.
Storage and Make-Ahead Tips
Refrigerator Storage
This sugar cookie frosting can be stored in the refrigerator for up to 7 days when kept in an airtight container. Before using refrigerated frosting allow it to come to room temperature for about 30 minutes. You might need to re-whip the frosting with a mixer for 1-2 minutes to restore its fluffy texture after refrigeration. For best results place plastic wrap directly on the surface of the frosting before sealing the container to prevent a crust from forming.
Freezing Instructions
Freeze this frosting for up to 3 months in freezer-safe containers or heavy-duty freezer bags. Thaw frozen frosting overnight in the refrigerator rather than at room temperature for the best texture preservation. After thawing beat the frosting with an electric mixer until it regains its smooth consistency. Adding 1-2 teaspoons of milk or cream may help revive the texture if the frosting seems too stiff after freezing.
Make-Ahead Options
Prepare this frosting up to 3 days before you plan to decorate your cookies for stress-free holiday or party preparations. Divide the frosting into separate containers before adding food coloring if you plan to create multiple colors ahead of time. Store colored frosting in individual airtight containers to prevent colors from bleeding together. Label each container with the color and date for easy organization.
Reviving Stored Frosting
If your stored frosting becomes too firm simply beat in additional milk or cream 1 teaspoon at a time until you reach your desired consistency. For frosting that has become too soft add more sifted powdered sugar 1 tablespoon at a time while mixing. Room temperature frosting works best for both spreading and piping so plan your timing accordingly when removing it from storage.
Frosted Cookie Storage
Cookies with this frosting can be stored at room temperature in an airtight container for 3-4 days. Place parchment paper between layers of frosted cookies to prevent sticking. Refrigerate frosted cookies if your kitchen is particularly warm or if you used cream cheese as an add-in to extend their shelf life. Completely decorated cookies can also be frozen for up to 2 months when properly wrapped and stored in freezer-safe containers.
Troubleshooting Common Frosting Issues
Even with the best recipe in hand you might encounter a few bumps along your sugar cookie frosting journey. Knowing how to fix common problems ensures your decorating session stays fun and stress-free.
Frosting Too Thick
When your frosting becomes too stiff to spread or pipe smoothly add liquid gradually to thin it out. Start with 1/4 teaspoon of milk or heavy cream at a time and mix thoroughly between additions. The ideal consistency should allow the frosting to hold its shape while remaining workable. Rushing this process by adding too much liquid at once can quickly turn your frosting runny which is much harder to fix.
Frosting Too Thin
For frosting that’s too runny incorporate additional powdered sugar one tablespoon at a time. Mix completely after each addition until you reach your desired thickness. This gradual approach prevents overcorrection which could make your frosting too sweet. Remember that frosting will firm up slightly as it sets so aim for a consistency that’s just slightly softer than your final goal.
Air Bubbles in Frosting
Air bubbles can ruin the smooth appearance of your decorated cookies. To eliminate them after mixing gently tap your bowl of frosting on the counter several times to release trapped air. For particularly stubborn bubbles use a rubber spatula to press the frosting against the side of the bowl in a folding motion. This technique known as “knocking back” helps create that professional-looking finish on your cookies.
Frosting Won’t Set
If your frosting remains tacky or fails to develop a slight crust try adjusting the recipe. Adding a bit more powdered sugar helps create that desired set. Environmental factors like humidity can significantly impact setting time so on particularly humid days you might need to adjust accordingly. Placing frosted cookies in a cool dry place rather than the refrigerator often yields better results.
Separating or Curdling
Frosting that appears separated or curdled usually stems from temperature issues with your butter. When butter is too cold it creates lumps while overly soft butter can make frosting greasy. Fix this problem by letting the frosting sit at room temperature for 15 minutes then beating again until smooth. For greasy frosting place the bowl in the refrigerator for 10-15 minutes before remixing to help it come together properly.
Color Problems
Achieving your desired frosting color can sometimes prove challenging. Food coloring tends to darken as frosting sets so mix colors slightly lighter than your target shade. For vibrant colors use gel or paste food coloring rather than liquid varieties which can thin your frosting. Creating consistent colors across batches requires precise measurements so note exact drop counts when making multiple batches for the same project.
Flavor Issues
When frosting tastes too sweet balance it by adding a pinch of salt or a few drops of lemon juice without affecting the consistency. Bland frosting benefits from additional vanilla extract or other flavor enhancers like almond extract or citrus zest. Always taste your frosting before applying it to cookies to ensure the flavor profile matches your expectations.
Perfect Pairings: Cookies That Work Best With This Frosting
While this versatile frosting works beautifully on almost any cookie base it truly shines when paired with certain cookie varieties. Classic sugar cookies provide the perfect canvas for showcasing this smooth creamy frosting allowing its flavor and color to take center stage. Their neutral taste creates an ideal balance with the sweetness of the frosting without competing flavors.
Shortbread cookies offer another excellent pairing option due to their buttery crumbly texture that contrasts wonderfully with the smooth consistency of the frosting. The slight saltiness in traditional shortbread creates a delightful flavor profile when topped with sweet frosting making each bite more interesting.
Snickerdoodles surprisingly work incredibly well with this frosting even though their cinnamon sugar coating. The warm spice notes complement vanilla frosting beautifully and create an unexpected flavor combination that many find addictive. Try using a thin layer to avoid overpowering the distinct snickerdoodle flavor.
Cut-out cookies designed for holidays or special occasions are practically made for this frosting. Their flat sturdy surface provides ample space for decorating with multiple colors and designs. Whether you’re creating Valentine hearts Christmas trees or birthday shapes this frosting adheres well to these types of cookies.
Drop sugar cookies with their slightly domed tops present a different decorating opportunity. The frosting can be swirled on top like a cupcake creating an elegant presentation with minimal effort. Their soft texture pairs wonderfully with the creamy frosting creating a melt-in-your-mouth experience.
Lemon cookies become something extraordinary when topped with this frosting especially when you add a hint of lemon extract or zest to the mix. The bright citrus flavor cuts through the sweetness creating a balanced treat that feels sophisticated yet approachable.
Chocolate cookies provide a dramatic contrast both visually and flavor-wise when paired with this vanilla frosting. The rich cocoa flavor works particularly well with tinted frosting creating striking color combinations perfect for special occasions or holiday platters.
Gingerbread cookies traditionally decorated with royal icing can be transformed with this softer creamier alternative. The spicy robust flavor of gingerbread stands up beautifully to the sweet frosting creating a more modern take on this classic holiday favorite.
Vanilla wafers or tea biscuits can be elevated into elegant sandwich cookies using this frosting as filling. Their delicate nature pairs wonderfully with a thin layer of frosting creating bite-sized treats perfect for afternoon tea or special gatherings.
Remember that thicker sturdier cookies generally work better for piped designs while thinner more delicate cookies may benefit from a simple spread of frosting. Experiment with different cookie bases to discover your perfect pairing and unleash your creativity with this versatile frosting recipe.
Conclusion
Armed with this sugar cookie frosting recipe you’re now ready to transform ordinary cookies into extraordinary treats. This versatile frosting strikes the perfect balance between spreadable and pipeable while offering just the right level of sweetness.
Remember that quality ingredients make all the difference so don’t skimp on pure vanilla extract or room temperature butter. Whether you’re decorating for holidays birthdays or just because your homemade creations will outshine any store-bought alternative.
The beauty of this recipe lies in its simplicity and adaptability. From casual family gatherings to elaborate celebrations your sugar cookies will shine with this smooth creamy frosting. So grab your mixer get creative with colors and flavors and enjoy the sweet satisfaction of perfectly frosted cookies!