There’s something utterly delightful about a small chocolate cake that captures the essence of indulgence in every bite.
Perfect for intimate gatherings or a treat-yourself moment, this 6-inch cake is rich, moist, and packed with chocolatey goodness.
Whether you’re a seasoned baker or a novice in the kitchen, this recipe offers a straightforward path to dessert perfection.
The balance of deep cocoa flavors and tender crumb will have you reaching for another slice.
With simple ingredients and easy techniques, this cake is the ultimate quick-fix for chocolate lovers.
So, let’s dive into making a small chocolate cake that’s big on flavor and satisfaction.
The History and Cultural Significance
• Small Chocolate Cake traces its origins to 19th-century Europe, where it was originally created by home bakers looking for a quick sweet treat.
• The dish evolved over decades as cocoa became more widely available, eventually becoming the beloved version we know today.
• In many Western cultures, this dish traditionally appears at birthdays and intimate celebrations, symbolizing joy and indulgence.
• While many variations exist across different regions, the authentic version maintains a rich, moist texture that sets it apart from imitations.
Recipe Overview
Nutritional Information (per serving)
Essential Equipment Guide
6-Inch Cake Pan: A 6-inch cake pan is essential for achieving the perfect size and shape for this small cake, allowing for even baking. Alternatives can include mini springform pans. Look for non-stick options for easy release.
Electric Mixer: An electric mixer is important for creaming butter and sugar to achieve the ideal cake texture. A hand whisk can be used as an alternative, but it requires more effort and time. Choose one with multiple speed settings.
Cooling Rack: A cooling rack is crucial for allowing the cake to cool evenly, preventing sogginess. While you can use an inverted plate as an alternative, a wire rack provides optimal airflow.
Ingredients
For the Cake
|
|
| Amount | Ingredient | Notes |
|---|---|---|
| 1 cup | all-purpose flour | sifted for a light texture |
| 1/2 teaspoon | baking soda | aids in rising |
| 1/4 teaspoon | salt | enhances flavor |
| 1/2 cup | unsalted butter | softened, adds richness |
| 1 cup | granulated sugar | for sweetness |
| 2 large | eggs | room temperature, adds structure |
| 1/2 cup | cocoa powder | unsweetened, for chocolate flavor |
| 1/2 cup | buttermilk | adds moisture and tang |
For the Frosting
| Amount | Ingredient | Notes |
|---|---|---|
| 1/2 cup | heavy cream | for creaminess |
| 1 cup | semi-sweet chocolate chips | melted, for glossy finish |
Preparation Methods
Creaming Butter and Sugar: Creaming involves beating butter and sugar until light and fluffy, which incorporates air and creates a tender cake crumb. This step is vital for texture, so spend a good few minutes on it. Use room temperature butter for best results.
Folding in Ingredients: Folding is a gentle mixing method that helps maintain airiness in the batter. Use a spatula to fold the dry ingredients into the wet mixture, turning the bowl as you go. This prevents overmixing, which can lead to a dense cake.
Checking Cake Doneness: Insert a toothpick into the center of the cake. If it comes out clean or with a few moist crumbs, the cake is done. This method ensures the cake is baked through without becoming dry.
Step 1: Preheat the Oven

Preheat your oven to 350°F (175°C).
Ensure the oven rack is in the middle position.
This allows for even heat distribution.
Proper preheating is essential for consistent baking results.
Step 2: Prepare the Cake Pan

Grease a 6-inch cake pan with butter or non-stick spray.
Line the bottom with a round piece of parchment paper.
This ensures the cake will release easily after baking.
Proper preparation prevents sticking and ensures a smooth surface.
Step 3: Mix Dry Ingredients

In a medium bowl, sift together the flour, baking soda, and salt.
Use a whisk to combine them evenly.
This step helps distribute the leavening agent throughout the flour.
Sifting prevents lumps and ensures a light cake texture.
Step 4: Cream Butter and Sugar

In a large bowl, beat the butter and sugar together until light and fluffy.
Use an electric mixer on medium speed for about 3-4 minutes.
The mixture should be pale and airy.
This step incorporates air, which is crucial for a tender cake.
Step 5: Add Eggs to Mixture

Add the eggs to the butter and sugar mixture one at a time.
Beat well after each addition until fully incorporated.
The mixture should be smooth and cohesive.
This gradual addition helps maintain the emulsion and prevents curdling.
Step 6: Incorporate Cocoa and Buttermilk

Add the cocoa powder to the batter and mix on low speed until combined.
Slowly pour in the buttermilk while mixing continuously.
The batter should be smooth and chocolatey.
Ensure no lumps remain for an even chocolate flavor.
Step 7: Fold in Dry Ingredients

Gently fold the dry ingredients into the wet mixture using a spatula.
Turn the bowl as you incorporate the flour mixture.
Stop when just combined to avoid overmixing.
This technique retains air in the batter for a light cake.
Step 8: Pour Batter into Pan

Pour the batter into the prepared cake pan.
Use a spatula to spread it evenly.
Tap the pan gently on the countertop to remove air bubbles.
Ensuring an even surface leads to uniform baking.
Step 9: Bake the Cake
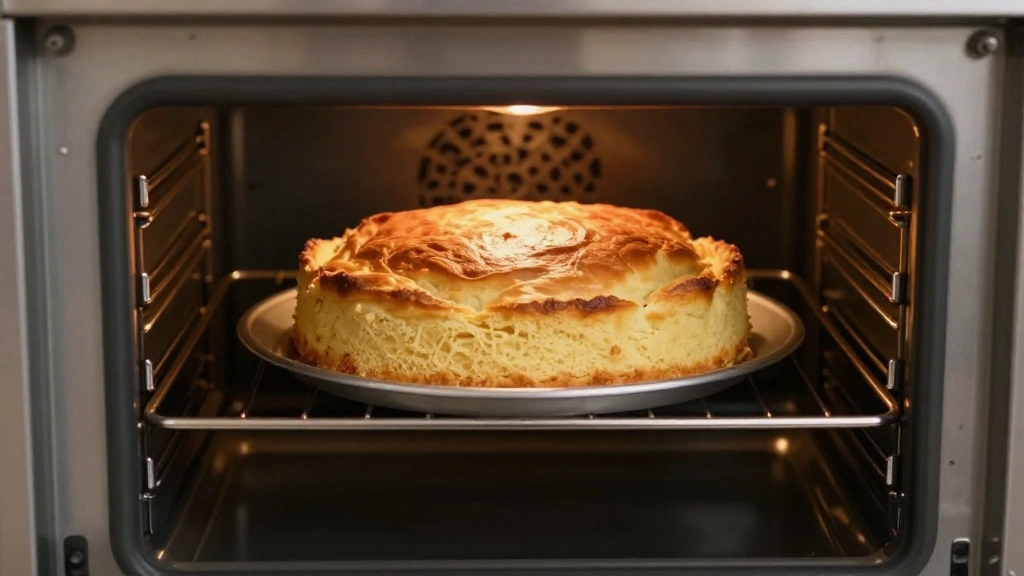
Place the cake in the preheated oven.
Bake for 25-30 minutes, or until a toothpick inserted in the center comes out clean.
Check for doneness to avoid overbaking.
A perfect bake will have a moist and tender crumb.
Step 10: Cool the Cake
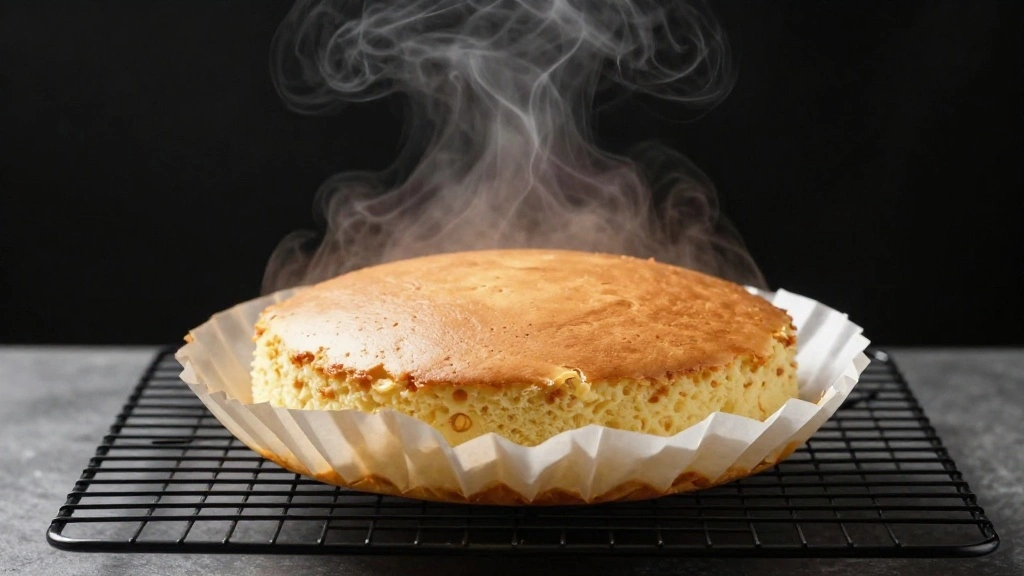
Remove the cake from the oven and let it cool in the pan for 10 minutes.
Run a knife around the edge to loosen it.
Invert the cake onto a cooling rack and peel off the parchment paper.
Cooling prevents the cake from becoming soggy.
Step 11: Prepare the Frosting
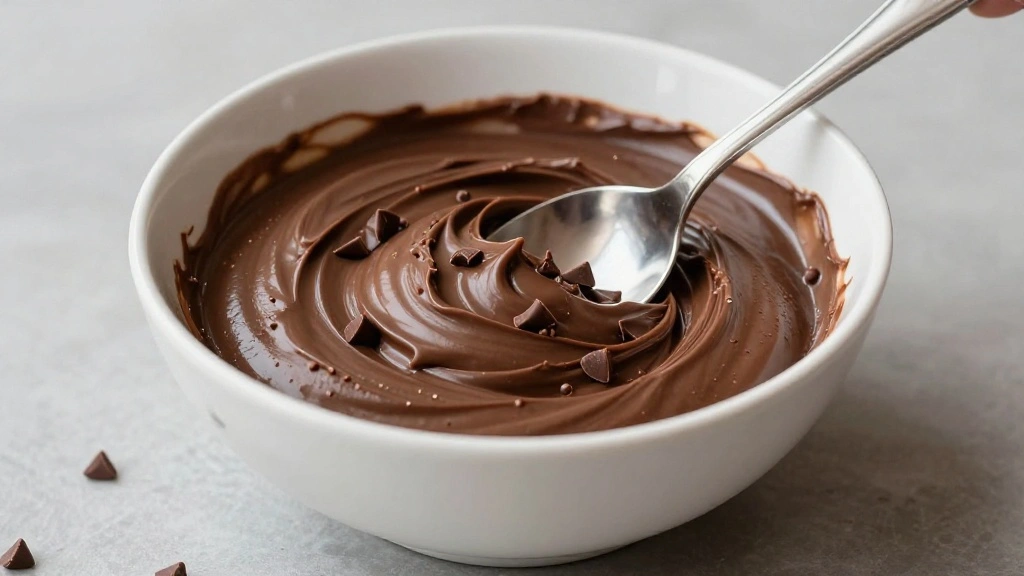
In a small saucepan, heat the heavy cream over medium heat until it begins to simmer.
Pour the hot cream over the chocolate chips in a bowl.
Let sit for a minute, then stir until smooth and glossy.
This creates a rich, shiny frosting ideal for spreading.
Step 12: Frost the Cake
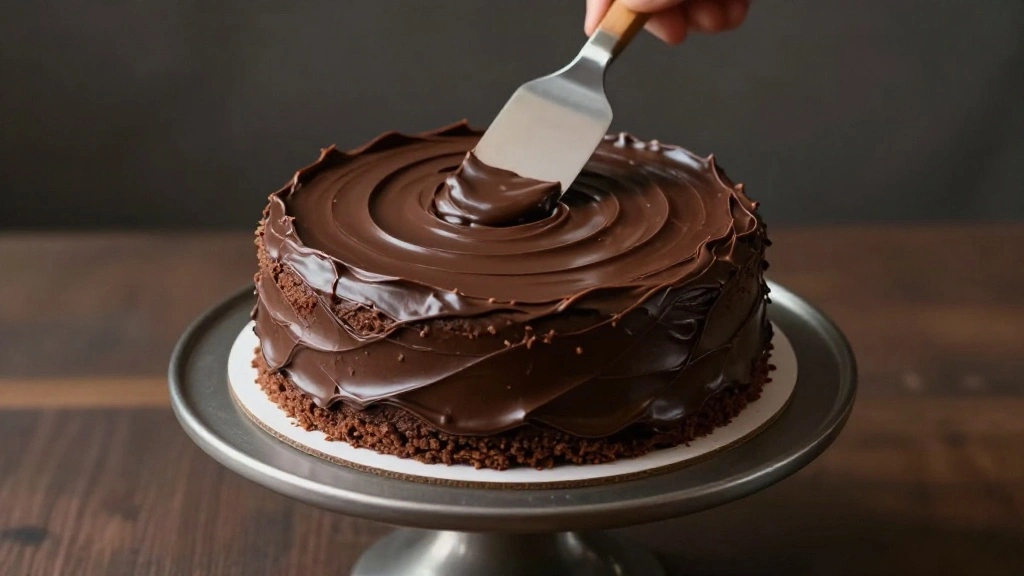
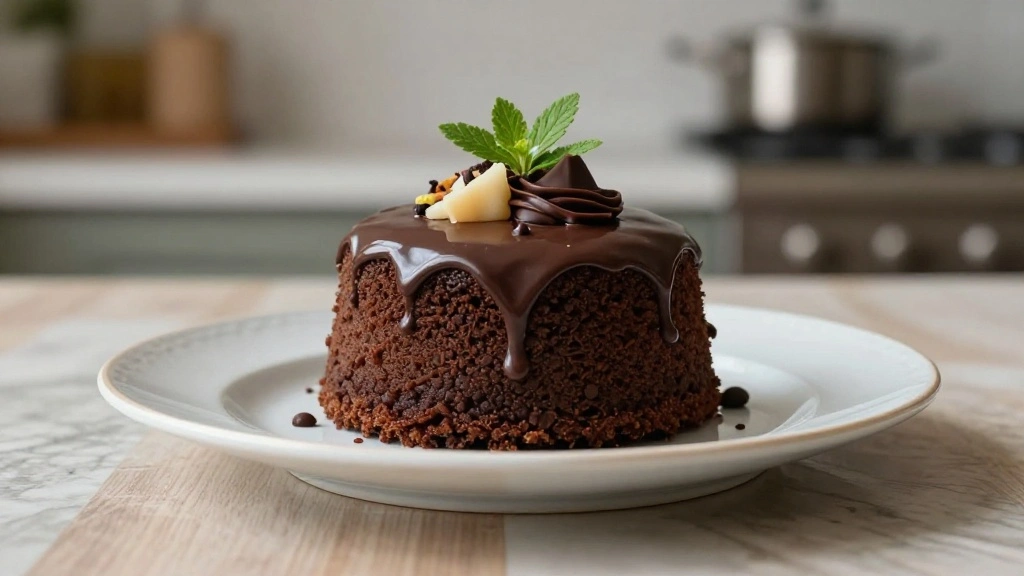
Once the cake is completely cool, spread the frosting over the top and sides.
Use a spatula for an even layer.
Decorate as desired with chocolate shavings or berries.
A smooth frosting finish enhances presentation and flavor.
Critical Timing and Temperature Guide
Baking the Cake: Bake at 350°F (175°C) for 25-30 minutes. Look for a firm top and a clean toothpick test. Avoid opening the oven early, which can cause the cake to sink.
Cooling the Cake: Cool on a rack for at least 30 minutes before frosting. A warm cake can cause the frosting to melt and slide off.
Preparing the Frosting: Heat cream until simmering, but do not boil. The right temperature ensures smooth melting of chocolate without seizing.
Pro Tips for Small Chocolate Cake
• Ingredient Selection: Use high-quality cocoa powder and fresh butter for the richest flavor impact. These ingredients significantly affect the cake’s depth of flavor.
• Preparation Secret: Let the batter rest for a few minutes before baking to allow the flour to hydrate fully, which improves the texture.
• Temperature Management: Ensure all ingredients are at room temperature before starting. This helps them blend more smoothly and evenly.
• Texture Enhancement: For a moist crumb, avoid overmixing once the flour is added. This keeps the gluten from developing too much.
• Flavor Layering: Adding a pinch of espresso powder can intensify the chocolate flavor without adding coffee taste.
• Make-Ahead Strategies: Bake the cake a day ahead and wrap tightly in plastic to keep it fresh. Frost just before serving.
• Restaurant-Quality Finishing Touches: Dust the cake with cocoa powder or powdered sugar for added visual appeal.
• Equipment Optimization: If using a hand mixer, alternate between mixing speeds to achieve a perfect texture without overworking the batter.
Troubleshooting Common Issues
• Texture Too Dense: This can occur from overmixing the batter or using cold ingredients. Ensure thorough mixing of butter and sugar and use room temperature ingredients.
• Uneven Rise: If the cake rises unevenly, check that the oven is preheated and the rack is centered. Uneven heat can cause lopsided baking.
• Dry Cake: Overbaking is the usual culprit. Always check for doneness at the minimum baking time with a toothpick.
• Frosting Too Runny: If the frosting is too runny, it may be due to overheated cream. Allow it to cool slightly before mixing with chocolate.
• Stuck Cake: Ensure the pan is well-greased and lined with parchment. Running a knife around the edges can help release it.
Variations and Regional Differences
• American Style: Typically includes vanilla extract for added aroma and sometimes uses sour cream instead of buttermilk for a denser texture.
• European Variation: May include ground almonds or hazelnuts for a nutty flavor and a slightly coarser texture.
• Mexican Influence: Adds a hint of cinnamon and cayenne for a spicy kick, complementing the chocolate flavor.
• Vegan Adaptation: Uses almond milk and vegetable oil in place of dairy and eggs, with a touch of apple cider vinegar to mimic buttermilk.
Food Science Behind the Recipe
• Emulsification: The process of creaming butter and sugar creates an emulsion that traps air, which expands during baking to create a light and fluffy texture.
• Leavening Reaction: Baking soda reacts with acidic buttermilk, releasing carbon dioxide that helps the cake rise.
• Maillard Reaction: The browning of the cake surface develops complex flavors and a pleasing aroma through this chemical reaction between sugars and amino acids.
Frequently Asked Questions
What's the most common mistake people make when preparing a small chocolate cake? Overmixing the batter once the flour is added, which can lead to a dense texture.
Can I use regular milk instead of buttermilk? Yes, but add a tablespoon of vinegar or lemon juice to mimic the acidity of buttermilk.
How do I prevent the cake from sticking to the pan? Use a well-greased and parchment-lined pan for easy release.
What can I do if my frosting is too thick? Gently warm it over a double boiler or add a tablespoon of warm cream to loosen it.
How long will this cake stay fresh? It stays fresh for up to 3 days when stored in an airtight container at room temperature.
Can I double this recipe for a larger cake? Yes, but increase baking time and use a larger pan to accommodate the batter.
Is it possible to make this cake gluten-free? Substitute with a 1:1 gluten-free baking flour for similar results.
Serving and Presentation Guide
• Traditional Presentation: Serve the cake with a dollop of whipped cream and a handful of fresh berries for a classic look.
• Modern Twist: Add a drizzle of salted caramel sauce over the top for an indulgent finish.
• Minimalist Style: Dust with powdered sugar and garnish with a single mint leaf for an elegant touch.
• Themed Approach: Decorate with edible flowers or seasonal fruits to match a specific occasion or theme.
Conclusion
With its rich chocolate flavor and tender crumb, this small chocolate cake is a delightful treat for any occasion.
Easy to prepare and quick to bake, it's the perfect dessert to whip up when time is of the essence.
So gather your ingredients, follow the steps, and enjoy the satisfaction of baking a cake that's sure to impress.
Share this delicious creation with loved ones and savor the sweet moments together.