Ingredients
These carefully selected ingredients work together to create a restaurant-quality roast chicken with crispy skin and juicy meat. Each component plays a vital role in building layers of flavor that make this dish unforgettable.
For the Chicken
- 1 whole chicken (3-4 pounds), giblets removed
- 2 tablespoons kosher salt
- 1 tablespoon freshly ground black pepper
- 1 tablespoon garlic powder
- 1 teaspoon paprika
- 1 teaspoon dried thyme
- 1 teaspoon dried rosemary
- 1/2 teaspoon onion powder
- 2 tablespoons olive oil
- 1 lemon (halved)
For the Herb Butter
- 4 tablespoons unsalted butter (softened)
- 2 cloves garlic (minced)
- 2 tablespoons fresh parsley (chopped)
- 1 tablespoon fresh thyme leaves
- 1 tablespoon fresh rosemary (chopped)
- 1/2 teaspoon salt
- 1/4 teaspoon black pepper
- 1 teaspoon lemon zest
For the Vegetables (Optional)
- 1 pound baby potatoes (halved)
- 3 large carrots (cut into 2-inch pieces)
- 1 large onion (quartered)
- 1 head garlic (halved crosswise)
- 2 tablespoons olive oil
- 1 teaspoon salt
- 1/2 teaspoon black pepper
- 2 sprigs fresh thyme
Equipment Needed
You’ll need essential cookware and tools to achieve restaurant-quality results with your roast chicken. A heavy-duty roasting pan forms the foundation of this recipe, providing even heat distribution and ample space for your bird and vegetables.
Essential Cookware:
- Large roasting pan (12-15 inches)
- Roasting rack or wire cooling rack
- Meat thermometer (instant-read preferred)
- Large mixing bowl for seasoning
- Kitchen twine for trussing
Preparation Tools:
- Sharp chef’s knife for trimming
- Cutting board (preferably wood or bamboo)
- Paper towels for patting dry
- Aluminum foil for tenting
- Basting brush or spoon
Your roasting rack elevates the chicken above the pan bottom, allowing hot air to circulate completely around the bird. This circulation creates that coveted crispy skin on all sides while preventing the bottom from becoming soggy.
An instant-read thermometer eliminates guesswork when determining doneness. Insert it into the thickest part of the thigh without touching bone to ensure your chicken reaches the safe internal temperature of 165°F.
Kitchen twine helps maintain the chicken’s shape during roasting, ensuring even cooking throughout. Trussing keeps the wings and legs close to the body, preventing them from overcooking while the breast meat reaches perfect doneness.
Optional but Helpful:
- Kitchen shears for spatchcocking
- Silicone basting brush
- Carving board with juice groove
- Sharp carving knife
These tools work together to streamline your roasting process and deliver consistent results every time you prepare this classic dish.
Prep Instructions
Proper preparation transforms your roast chicken from ordinary to extraordinary. Following these essential prep steps ensures perfectly seasoned meat and golden crispy skin.
Preparing the Chicken
Remove your chicken from the refrigerator 30 minutes before cooking to bring it to room temperature. Pat the entire bird completely dry with paper towels, paying special attention to the cavity and skin surface. Moisture prevents proper browning and crispy skin development.
Season the chicken generously inside and out with kosher salt and freshly ground black pepper. Work the seasoning under the skin by gently loosening it with your fingers, creating pockets for the herb butter. Sprinkle garlic powder evenly across the skin surface for enhanced flavor penetration.
Truss the chicken using kitchen twine to ensure even cooking. Cross the legs and tie them together, then tuck the wing tips under the body. This compact shape promotes uniform heat distribution and maintains the bird’s attractive presentation.
Making the Herb Butter
Soften 4 tablespoons of unsalted butter at room temperature until easily spreadable. Mince 3 cloves of fresh garlic and finely chop 2 tablespoons each of fresh rosemary and thyme leaves. Fresh herbs provide superior flavor compared to dried alternatives.
Combine the softened butter with minced garlic and chopped herbs in a small bowl. Mix thoroughly until the ingredients distribute evenly throughout the butter. Add 1/2 teaspoon of kosher salt and 1/4 teaspoon of black pepper to enhance the herb flavors.
Carefully work the herb butter under the loosened chicken skin, spreading it evenly across the breast and thigh areas. Rub any remaining butter over the outside skin surface to promote golden browning during roasting.
Prepping the Vegetables
Wash and quarter baby potatoes, leaving the skins intact for added texture and nutrients. Cut carrots into 2-inch pieces on the diagonal for uniform cooking and attractive presentation. Peel and quarter large yellow onions, keeping the root end partially intact to prevent the layers from separating.
Toss the prepared vegetables with 2 tablespoons of olive oil in a large bowl. Season with kosher salt and black pepper to taste, ensuring even coating on all surfaces. The vegetables will absorb the chicken drippings during roasting, creating incredible flavor depth.
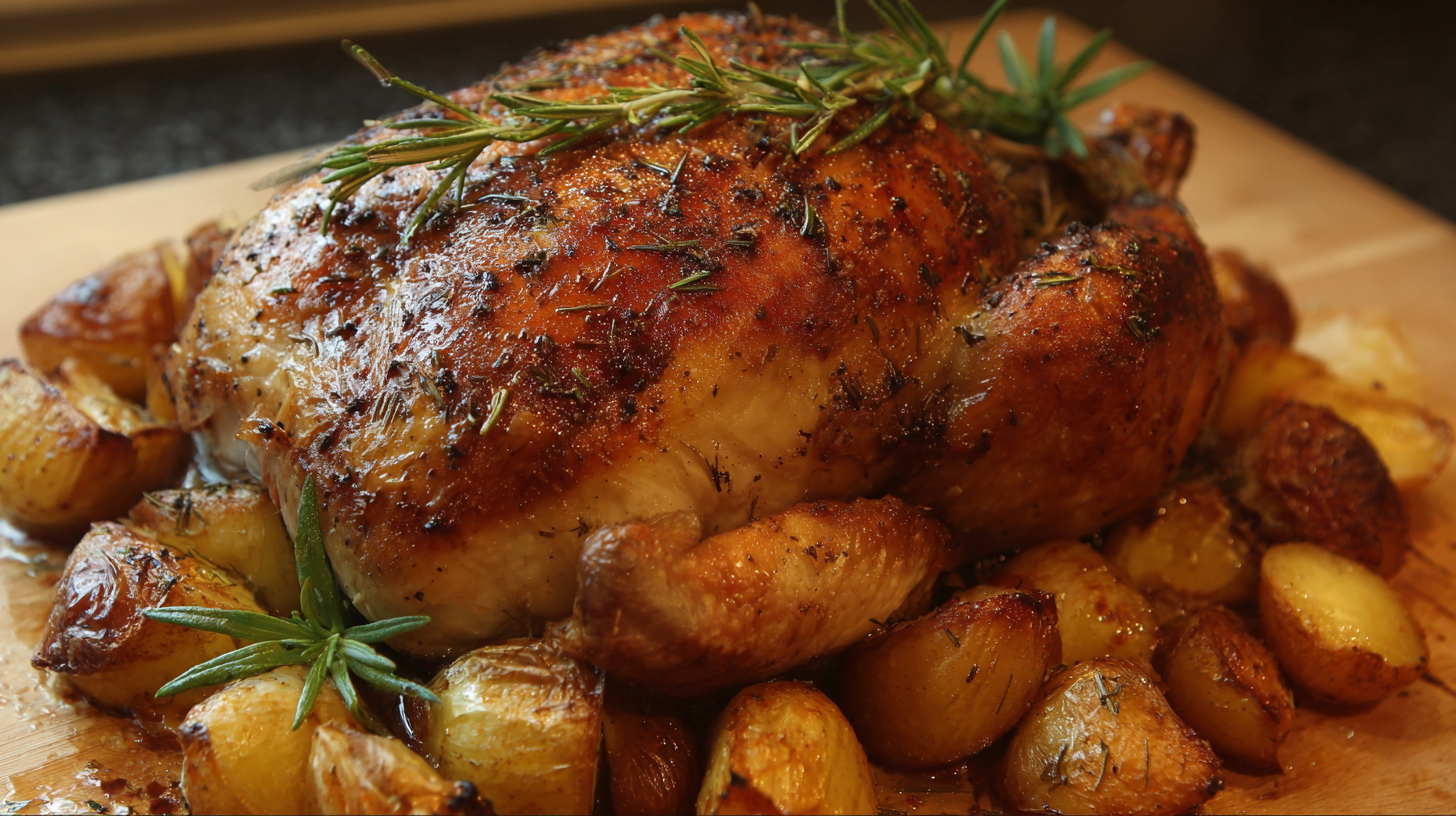
Arrange the seasoned vegetables in the bottom of your roasting pan, creating a flavorful bed for the chicken. This technique prevents the bird from sitting in its own juices while infusing the vegetables with rich roasted chicken flavors.
Cooking Instructions
You’ve completed all the prep work and your chicken is ready for the oven. These cooking instructions will guide you through achieving that perfect golden-brown exterior and juicy interior.
Roasting the Chicken
Preheat your oven to 425°F and position the rack in the lower third of the oven. Place your seasoned and herb-buttered chicken breast-side up on the roasting rack in your prepared roasting pan. If you’ve added vegetables, arrange them around the chicken in a single layer.
Roast the chicken for 60 to 75 minutes depending on size. The exact cooking time varies based on your chicken’s weight and your oven’s performance. You’ll notice the skin beginning to turn golden brown after about 30 minutes of cooking.
Rotate the roasting pan halfway through cooking to ensure even browning. This prevents one side from becoming too dark while the other remains pale. Avoid opening the oven door frequently as this releases heat and extends cooking time.
Your kitchen will fill with incredible aromas as the herbs and garlic infuse the chicken. The vegetables will begin to caramelize and absorb the flavorful drippings from the chicken above.
Checking for Doneness
Insert your instant-read thermometer into the thickest part of the thigh without touching the bone. The internal temperature should reach 165°F for safe consumption. The thigh meat typically takes longer to cook than the breast meat.
Check the breast meat as well by inserting the thermometer into the thickest part. The breast should also register 165°F. If the breast reaches temperature before the thigh, continue cooking until both areas reach the proper temperature.
Look for visual cues that indicate doneness. The juices should run clear when you pierce the thigh with a knife. The skin should appear golden brown and crispy all over. The legs should move freely when gently wiggled.
| Temperature Check | Target Temperature | Location |
|---|---|---|
| Thigh (safest check) | 165°F | Thickest part, avoid bone |
| Breast | 165°F | Thickest part of breast |
| Wing joint | 165°F | Where wing meets body |
Resting the Chicken
Remove the chicken from the oven once it reaches the proper internal temperature. Transfer the entire roasting pan to a heat-safe surface and tent the chicken loosely with aluminum foil.
Allow the chicken to rest for 15 to 20 minutes before carving. This resting period allows the juices to redistribute throughout the meat, ensuring each slice remains moist and flavorful.
Use this resting time to prepare any final accompaniments or make gravy from the pan drippings. The vegetables will continue to cook slightly from residual heat, becoming perfectly tender.
Keep the chicken loosely covered during the resting period. Tight covering traps steam and can soften the crispy skin you worked hard to achieve. The internal temperature will actually rise by 5 to 10 degrees during this resting phase, ensuring the meat is perfectly cooked throughout.
Serving Suggestions

Your perfectly roasted chicken deserves an equally impressive presentation. Transform this centerpiece into an elegant dining experience with proper carving techniques and thoughtfully chosen accompaniments.
Carving the Chicken
Start by placing the rested chicken on a large cutting board with a juice groove. Remove the kitchen twine using sharp kitchen shears or a knife. Position the chicken breast-side up and locate the natural seam between the leg and body.
Use a sharp carving knife to cut through the skin connecting the thigh to the body. Pull the leg away from the body until you hear the joint pop. Slice through the joint to separate the entire leg and thigh in one piece. Repeat this process on the opposite side.
Separate the drumstick from the thigh by cutting through the joint where they connect. Place your knife at the base of the breast and slice downward parallel to the cutting board. Remove each breast half by cutting along the breastbone and following the rib cage curve.
Slice the breast meat against the grain into even pieces about half an inch thick. Arrange the carved pieces on a warm serving platter with the dark meat pieces alongside the breast slices. Pour any accumulated juices from the cutting board over the carved chicken to maintain moisture.
Side Dish Pairings
Classic roasted vegetables complement your chicken beautifully. The baby potatoes and carrots that roasted alongside the chicken provide natural accompaniments with concentrated flavors from the pan drippings. Serve them directly from the roasting pan for rustic appeal.
Fresh seasonal vegetables add color and nutrition to your plate. Steamed green beans with almonds provide a crisp contrast to the tender chicken. Roasted Brussels sprouts with bacon create a savory balance that enhances the herb flavors in your bird.
Starch options should absorb the delicious pan juices. Creamy mashed potatoes topped with gravy made from the drippings create the ultimate comfort combination. Wild rice pilaf with dried cranberries adds texture and subtle sweetness that pairs wonderfully with the herb butter flavors.
Bread selections round out the meal perfectly. Warm dinner rolls allow guests to soak up every drop of pan juices. Herb focaccia echoes the rosemary and thyme notes in your chicken seasoning. Buttermilk biscuits provide a Southern touch that complements the crispy skin beautifully.
Light salads cleanse the palate between bites. Mixed greens with lemon vinaigrette cut through the richness of the roasted chicken. Apple and walnut salad with cranberry dressing adds seasonal appeal and textural variety to your dinner presentation.
Storage and Reheating
Your perfectly roasted chicken can provide delicious meals for days when stored properly. Following proper storage and reheating techniques ensures you maintain the quality and safety of your leftover chicken.
Storing Leftovers
Remove all meat from the bone within two hours of cooking to prevent bacterial growth. Store the carved chicken pieces in airtight containers or wrap them tightly in aluminum foil or plastic wrap.
Refrigerate your leftover roast chicken for up to four days in the coldest part of your refrigerator. Place larger pieces on the bottom shelf where temperatures remain most consistent.
For longer storage, freeze the carved chicken in freezer-safe containers or heavy-duty freezer bags for up to three months. Label each container with the date to track freshness. Remove as much air as possible from freezer bags to prevent freezer burn.
Store any leftover vegetables separately from the chicken to maintain their texture and flavor. Gravy or pan drippings should be refrigerated in separate containers and used within two days.
Reheating Instructions
Thaw frozen chicken completely in the refrigerator before reheating. This process typically takes 24 hours for most portions.
Preheat your oven to 350°F for the best reheating results. Place chicken pieces in a baking dish and add a tablespoon of chicken broth or water to prevent drying. Cover the dish with aluminum foil and heat for 15 to 20 minutes until the internal temperature reaches 165°F.
For quicker reheating, use your microwave on medium power (50%) to avoid overcooking. Place chicken on a microwave-safe plate, cover with a damp paper towel, and heat in 30-second intervals until warmed through.
Avoid reheating chicken more than once to maintain food safety. Heat only the portion you plan to eat immediately.
Crispy skin will soften during storage, but you can restore some crispiness by placing reheated chicken under the broiler for 1 to 2 minutes. Watch carefully to prevent burning.
Recipe Variations
Transform your basic roast chicken into exciting new flavors with these delicious variations. Each version maintains the same cooking technique while introducing bold new taste profiles.
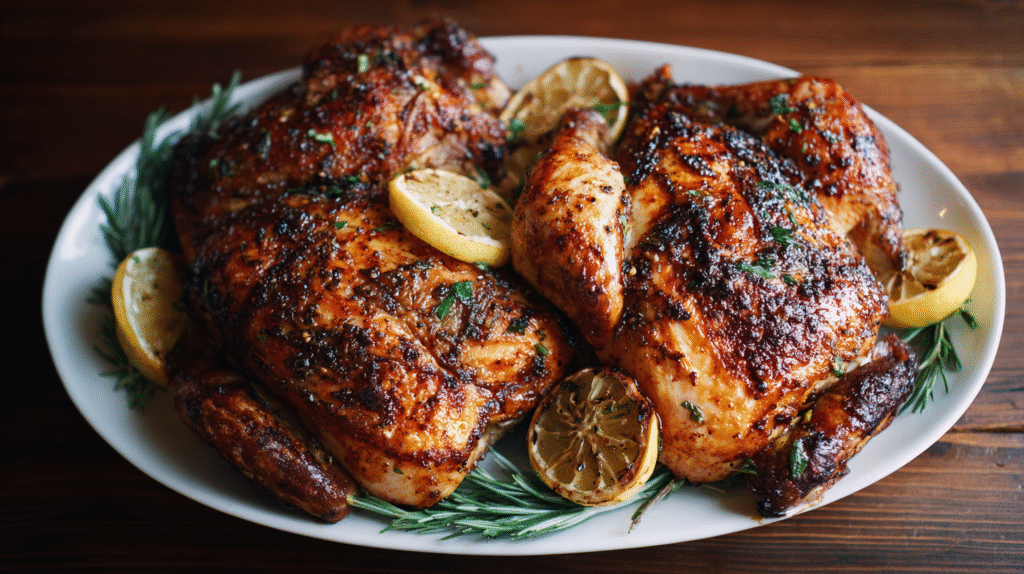
Lemon Herb Roast Chicken
Fresh lemon zest and juice create a bright Mediterranean flavor that pairs beautifully with tender roasted chicken. You combine 2 tablespoons of fresh lemon zest with 1/4 cup of fresh lemon juice and mix this into your herb butter along with 2 tablespoons of chopped fresh thyme and 1 tablespoon of fresh oregano. Stuff the chicken cavity with 2 lemon halves after juicing them to infuse the meat from the inside out.
Season the skin with the same salt and pepper base but add 1 teaspoon of dried herbs de Provence for an authentic French touch. The lemon juice helps break down proteins for extra tender meat while the citrus oils in the zest provide aromatic complexity. Roast at the same 425°F temperature but check doneness 5 minutes earlier as the acid can accelerate cooking slightly.
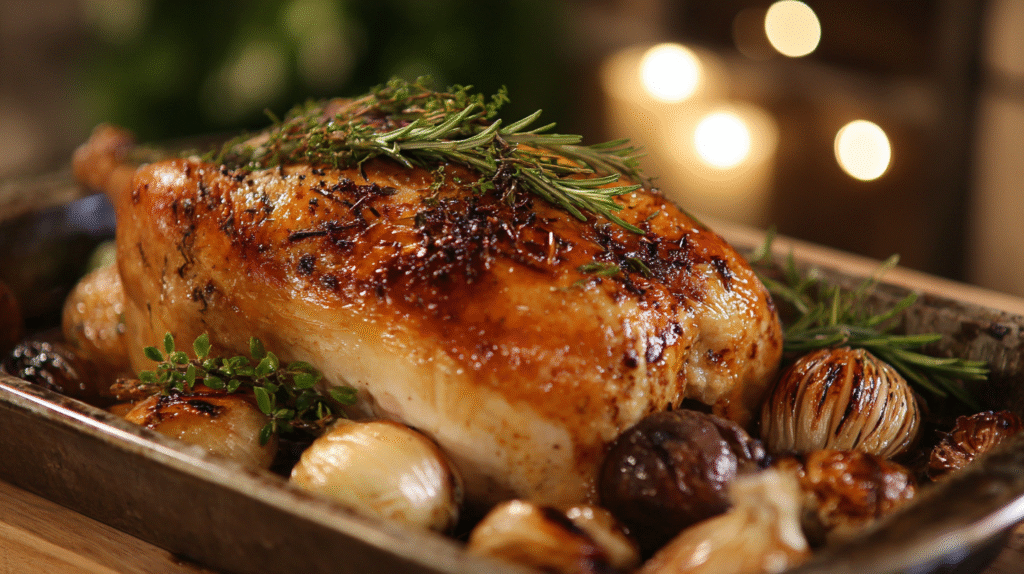
Garlic and Rosemary Version
Bold garlic and woody rosemary create an intensely savory roast chicken that fills your kitchen with irresistible aromas. You increase the garlic in your herb butter to 6 cloves of minced fresh garlic and replace other herbs with 3 tablespoons of chopped fresh rosemary. Create additional flavor by making small slits in the chicken skin and inserting thin garlic slices directly into the meat.
Rub the skin with 1 tablespoon of garlic powder plus to your salt and pepper base. Place 4 whole garlic cloves and 3 fresh rosemary sprigs inside the cavity for internal aromatics. The extended cooking time allows the garlic to mellow and sweeten while the rosemary infuses every bite with earthy pine notes.
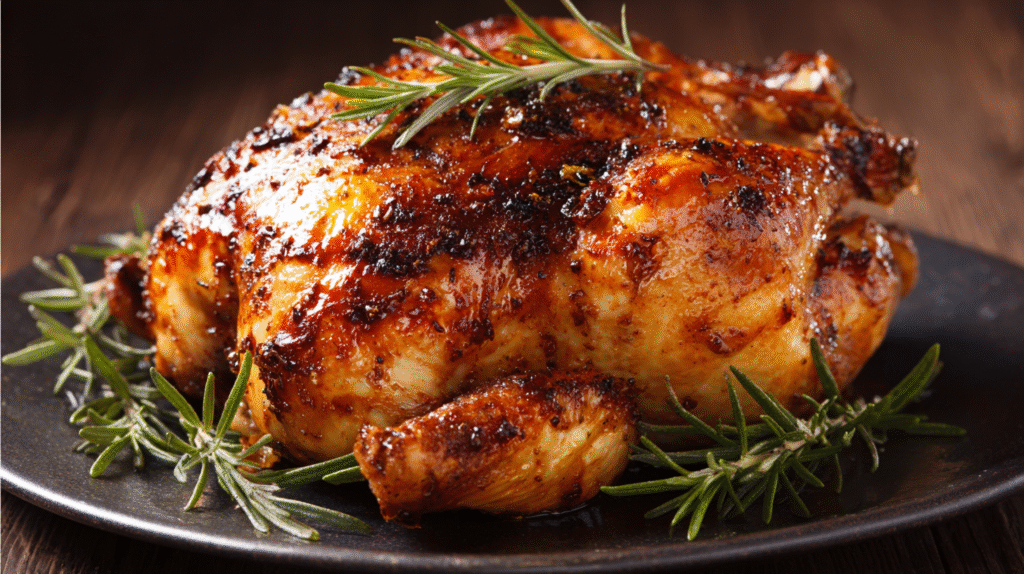
Spicy Paprika Roast Chicken
Smoky paprika and warm spices deliver a chicken with beautiful color and bold heat that awakens your taste buds. You create a spice rub using 2 tablespoons of sweet paprika, 1 tablespoon of smoked paprika, 1 teaspoon of cayenne pepper, and 1 teaspoon of cumin mixed with your salt and pepper base. Work this spice blend under the skin and coat the exterior generously for maximum flavor penetration.
Add 1 teaspoon of hot sauce to your herb butter along with 2 minced garlic cloves for extra kick. The paprika creates a stunning reddish-brown skin while the cayenne provides adjustable heat levels. Monitor the skin color closely during roasting as the spices can darken quickly at high temperatures.
Tips for Perfect Roast Chicken
Your roast chicken’s success depends on mastering these essential techniques that separate amateur cooking from professional results. Temperature control stands as the foundation of exceptional roast chicken preparation. You must preheat your oven to exactly 425°F and maintain this temperature throughout the cooking process. Heat distribution varies between ovens so positioning your roasting pan in the center rack ensures optimal air circulation around the chicken.
Moisture management transforms ordinary chicken into extraordinary dining experiences. Pat your chicken completely dry with paper towels before seasoning. Surface moisture prevents proper browning and creates steam that softens the skin. Salt draws out additional moisture from the skin when applied 40 to 60 minutes before roasting. This technique creates the crispy exterior texture that defines restaurant quality roast chicken.
Trussing your chicken maintains uniform cooking temperatures across all sections of the bird. Tuck wing tips under the body and tie legs together with kitchen twine. This compact shape promotes even heat distribution and prevents overcooking of smaller sections like wing tips. Your chicken will cook 15 to 20 minutes faster when properly trussed.
| Technique | Impact on Results | Time Required |
|---|---|---|
| Proper drying | Crispy skin formation | 5 minutes |
| Salt timing | Enhanced flavor penetration | 40-60 minutes |
| Trussing | Even cooking | 3-5 minutes |
| Temperature monitoring | Perfect doneness | Throughout cooking |
Herb butter placement under the skin delivers maximum flavor impact to the breast meat. Gently separate skin from meat using your fingers and spread softened herb butter directly onto the flesh. This technique bastes the meat from inside while creating additional flavor layers. Work carefully to avoid tearing the delicate skin that protects the breast during roasting.
Roasting rack elevation allows hot air to circulate beneath the chicken and prevents soggy bottom skin. Position your chicken breast side up on the rack with vegetables arranged below. The elevated position ensures all surfaces develop golden brown color while vegetables catch flavorful drippings for enhanced taste.
Internal temperature accuracy eliminates guesswork from your cooking process. Insert your instant read thermometer into the thickest part of the thigh without touching bone. Target temperature reaches 165°F for both thigh and breast meat. Clear juices running from the leg joint provide visual confirmation of proper doneness.
Resting time allows muscle fibers to relax and redistribute juices throughout the meat. Cover your finished chicken loosely with foil and rest for 15 to 20 minutes before carving. This waiting period prevents juice loss during slicing and ensures each serving remains moist and flavorful. Your patience during this final step determines the overall success of your roast chicken experience.
Conclusion
You now have everything you need to create restaurant-quality roast chicken right in your own kitchen. This classic dish transforms simple ingredients into something truly spectacular with proper technique and attention to detail.
Your journey to perfect roast chicken starts with quality ingredients and the right equipment. Remember that patience during preparation and cooking pays off with incredibly flavorful results that’ll impress your family and guests.
The beauty of this recipe lies in its versatility. You can stick with the classic version or explore the exciting variations to keep your dinner table interesting week after week.
Most importantly you’ll discover that homemade roast chicken beats store-bought every time. The crispy skin juicy meat and incredible aroma make this dish worth mastering for any home cook.