Ingredients
The success of these impressive popovers relies on using precise measurements and high-quality ingredients. Each component plays a crucial role in creating the perfect texture and flavor balance.
For the Popover Batter
- 1 cup all-purpose flour
- 1 cup whole milk, room temperature
- 3 large eggs, room temperature
- 3 tablespoons unsalted butter, melted
- 1 teaspoon kosher salt
- 1/4 teaspoon freshly ground black pepper
- 2 tablespoons vegetable oil or melted butter for greasing
For the Gruyere and Thyme Filling
- 4 ounces Gruyere cheese, grated (about 1 cup)
- 2 tablespoons fresh thyme leaves, finely chopped
- 1 tablespoon fresh chives, minced
- 1/4 teaspoon garlic powder
- Pinch of nutmeg
Equipment Needed

Creating perfect gruyere and thyme popovers requires exact kitchen tools that ensure proper rise and texture. Your success depends on having the right equipment to achieve those signature hollow centers and golden exteriors.
Standard popover pan serves as your primary tool for achieving the classic popover shape. Six-cup popover pans feature deep wells that allow batter to climb high during baking. Muffin tins work as an alternative but produce shorter popovers with less dramatic rise.
Large mixing bowl accommodates vigorous whisking without spillage. Choose a bowl with at least 3-quart capacity to provide ample room for combining ingredients thoroughly. Stainless steel or glass bowls work best for temperature control.
Wire whisk creates the smooth batter essential for proper popover structure. Medium-sized whisks blend ingredients effectively while incorporating air into the mixture. Avoid electric mixers which can overwork the batter and result in tough popovers.
Measuring cups and spoons ensure accurate ingredient ratios critical for popover success. Use liquid measuring cups for milk and dry measuring cups for flour. Level measurements create consistent results every time.
Kitchen scale provides the most precise measurements for professional-quality popovers. Weighing flour eliminates variations caused by different packing methods. Digital scales offer accuracy within grams for optimal baking results.
Fine-mesh grater produces perfectly sized gruyere cheese shreds that melt evenly throughout the batter. Microplane graters create fluffy cheese particles that distribute uniformly. Avoid pre-shredded cheese which contains anti-caking agents that affect texture.
Pastry brush applies oil evenly to popover pan cups preventing sticking. Silicone brushes withstand high oven temperatures without melting. Clean brushes ensure pure flavors without residual tastes.
Oven thermometer verifies accurate temperature settings crucial for proper popover rise. Many home ovens run hot or cold affecting baking results. Place the thermometer on the center rack for most accurate readings.
Prep Instructions
Proper preparation sets the foundation for creating exceptional gruyere and thyme popovers. Following these systematic steps ensures your popovers achieve maximum height and develop the perfect golden crust.
Preparing the Pan
Position your oven rack to the center position and preheat to 450°F. Generously brush each cup of your popover pan with oil using a pastry brush to create a thorough coating on all surfaces. Place the empty oiled pan in the preheating oven for 10 minutes to heat completely.
The hot pan creates immediate steam when the batter hits the surface which helps drive the dramatic rise characteristic of perfect popovers. Remove the heated pan only when you’re ready to fill it with batter to maintain optimal temperature.
Mixing the Batter
Combine flour and kosher salt in a large mixing bowl and whisk together to eliminate any lumps. Create a well in the center of the dry ingredients and pour in the whole milk at room temperature. Add eggs one at a time while whisking continuously to prevent lumps from forming.
Stream in the melted butter while continuing to whisk until the batter achieves a smooth consistency similar to heavy cream. Season with freshly ground black pepper and whisk for an additional 30 seconds. Allow the batter to rest for 2 minutes while the flour fully hydrates.
Preparing the Cheese and Herbs
Grate the gruyere cheese using a fine mesh grater to achieve uniform pieces that melt evenly during baking. Strip fresh thyme leaves from their stems and chop them finely to release maximum flavor. Combine the grated gruyere with chopped thyme leaves and minced chives in a small bowl.
Add garlic powder and a pinch of nutmeg to the cheese mixture and toss gently to distribute the seasonings evenly. This herb and cheese blend will be folded into the batter just before baking to maintain the integrity of each ingredient.
Baking Instructions
The baking process transforms your prepared batter into golden popovers with perfectly melted gruyere and aromatic thyme. Success depends on maintaining consistent high heat and resisting the urge to open the oven door prematurely.
Initial Baking Phase
Pour the prepared batter into your preheated oiled popover pan, filling each cup approximately two-thirds full. The hot pan creates immediate steam that helps the popovers begin their dramatic rise. Place the pan on the middle rack of your 450°F oven and bake for 15 minutes without opening the door.
Steam generation during this critical phase creates the hollow interior structure that makes popovers special. Your kitchen will fill with the scent of warming gruyere and fresh thyme as the batter begins to puff and set. Avoid checking progress during these first 15 minutes as temperature fluctuations can cause collapse.
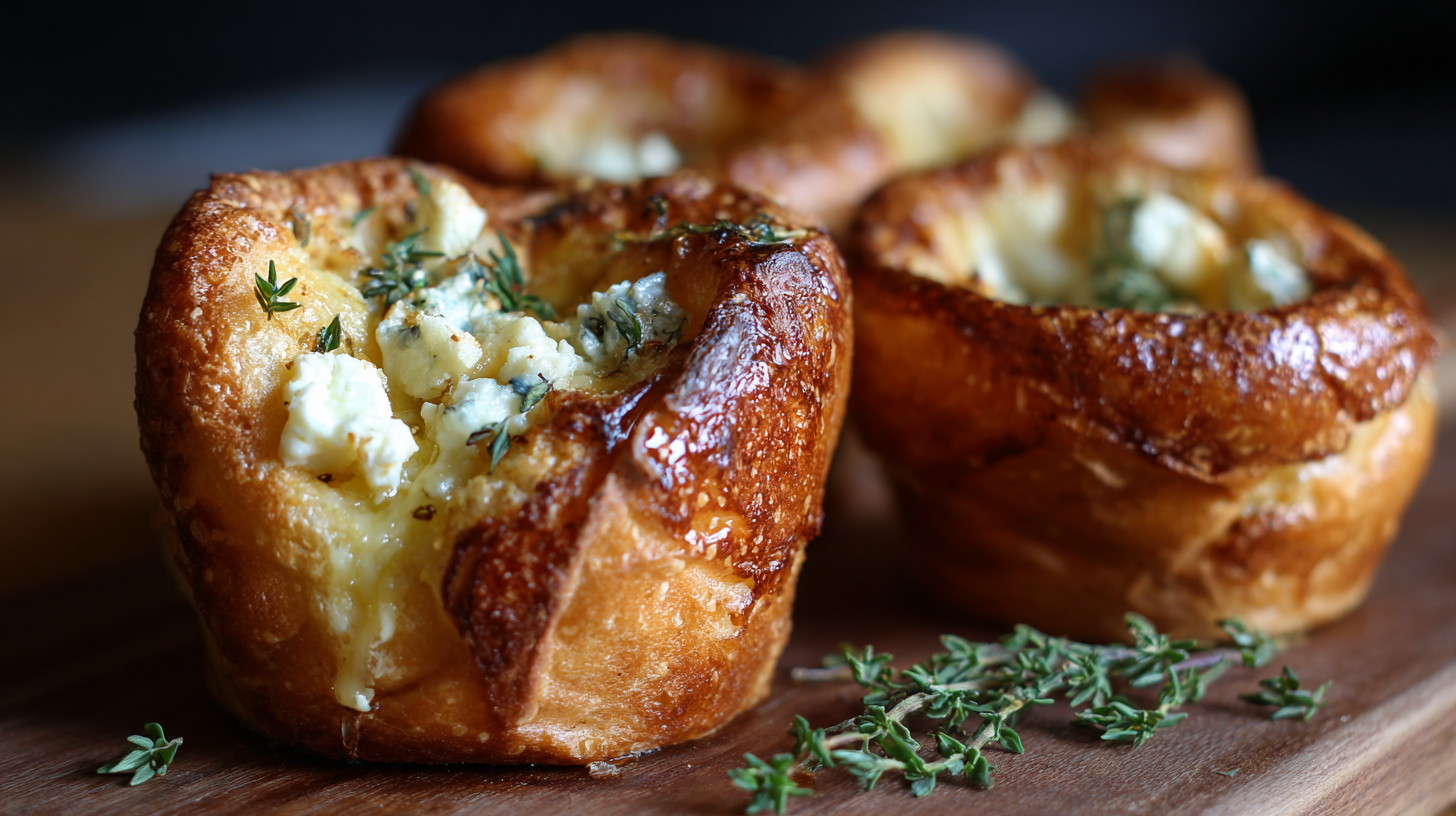
Adding the Filling
Remove the pan carefully from the oven after the initial baking period. Each popover should show important rise with golden edges beginning to form. Working quickly, use a small spoon to add approximately one tablespoon of your gruyere and thyme mixture into the center of each partially baked popover.
Press the filling gently into the soft centers without deflating the risen edges. The cheese will begin melting immediately from the residual heat. Return the pan to the oven within 2-3 minutes to maintain temperature consistency and prevent structural collapse.
Final Baking Phase
Continue baking at 450°F for an additional 15-20 minutes until the popovers achieve deep golden brown color. The tops should feel firm when gently tapped with your finger. Internal temperature should reach 190°F for proper doneness and structural integrity.
Remove from the oven and immediately pierce each popover with a sharp knife to release steam. This prevents sogginess and maintains the crispy exterior texture. Serve within 5 minutes of removal from the oven while the gruyere remains molten and the thyme fragrance is most pronounced.
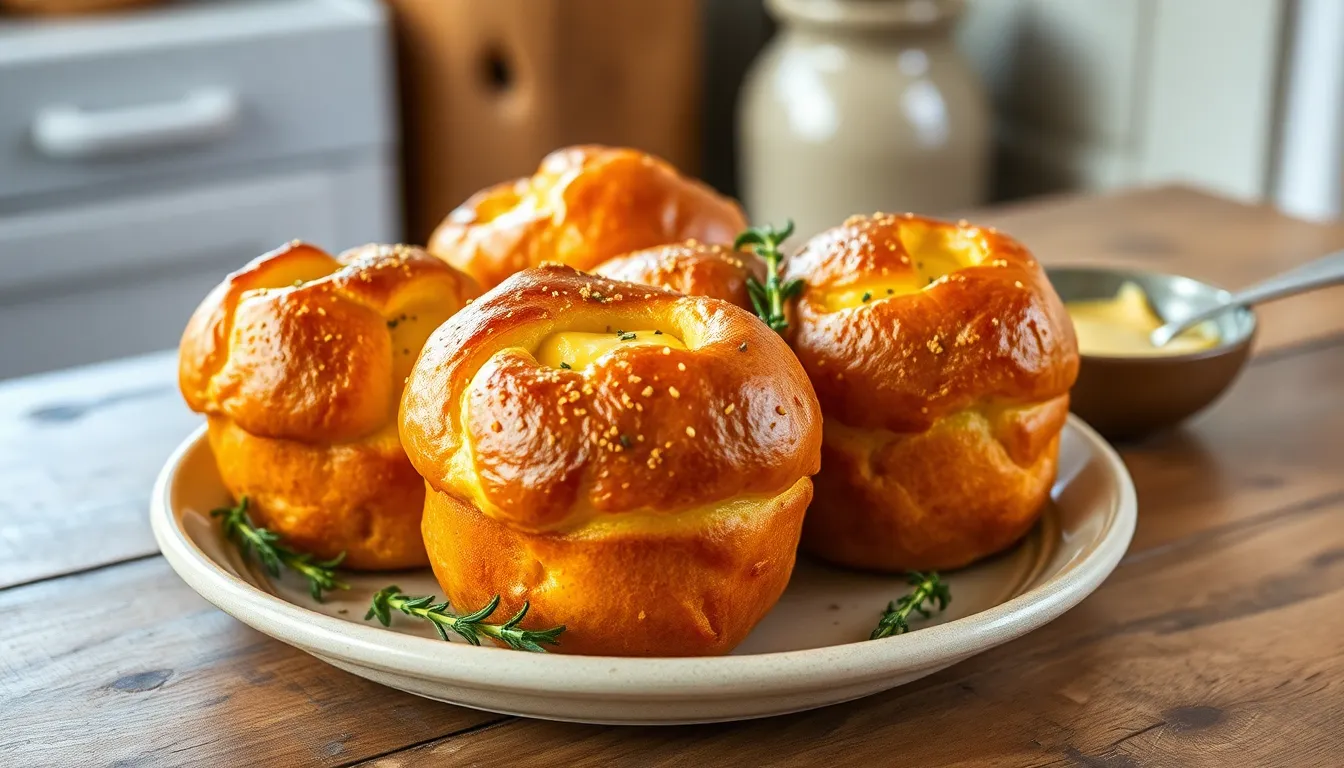
Serving Suggestions

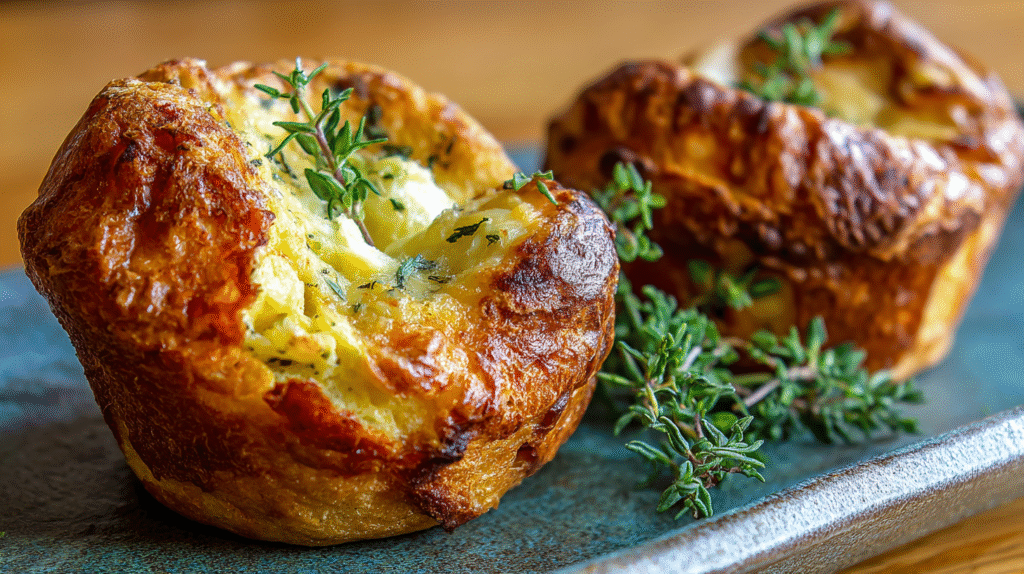
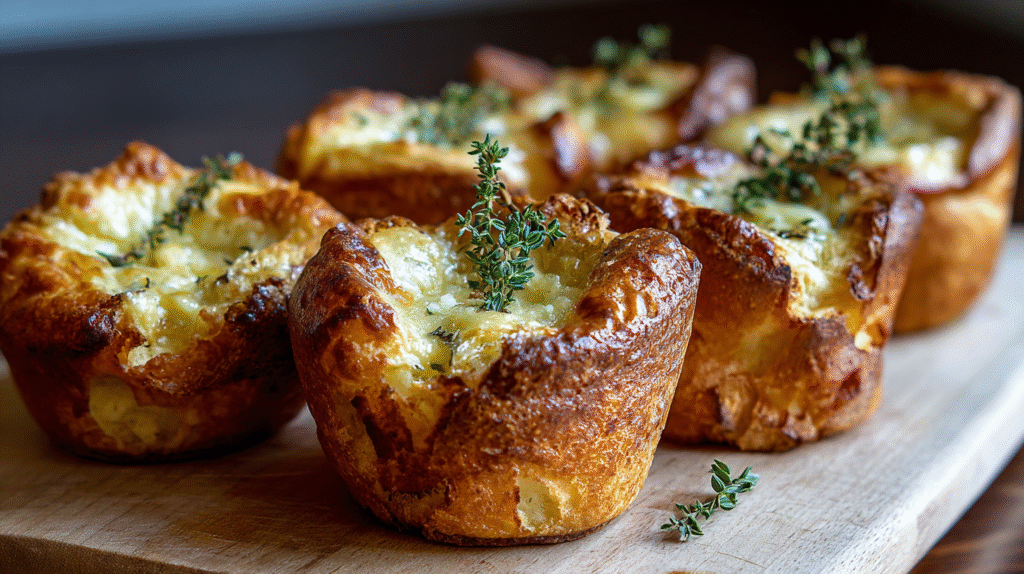
Your gruyere and thyme popovers deserve thoughtful presentation to showcase their golden exterior and molten cheese interior. Serve these warm pastries within 10 minutes of removing them from the oven for the best texture and flavor experience.
Brunch Pairings work exceptionally well with these savory popovers. Present them alongside scrambled eggs with herbs, crispy bacon, or smoked salmon with cream cheese. The nutty gruyere complements egg dishes perfectly while the thyme adds an aromatic touch to your morning spread.
Soup Accompaniments transform your popovers into the perfect bread substitute. Tear them open to soak up French onion soup, butternut squash bisque, or creamy mushroom soup. The hollow centers capture every drop of broth while the cheese creates an indulgent richness.
Dinner Presentations elevate your evening meals when you serve these popovers as sophisticated dinner rolls. Place one beside grilled steak, roasted chicken, or pan-seared fish. Your guests will appreciate the restaurant-quality touch these pastries bring to the table.
Wine and Beverage Pairings enhance the overall dining experience significantly. Choose crisp white wines like Sauvignon Blanc or Chardonnay to complement the gruyere’s nuttiness. For non-alcoholic options, sparkling apple cider or herbal teas create delightful flavor combinations.
Storage and Reheating maintains quality when you have leftovers. Store cooled popovers in an airtight container for up to 2 days. Reheat them in a 350°F oven for 5-7 minutes to restore their crispy exterior and warm the cheese filling. Avoid microwaving as this creates soggy textures that diminish the popover experience.
Garnish Options add visual appeal and extra flavor layers. Sprinkle fresh thyme leaves on top, add a light dusting of grated parmesan, or brush with herb butter before serving. These simple touches create professional presentation that impresses your guests.
Storage and Reheating Tips
Fresh popovers taste best when served immediately after baking. You should plan to enjoy these gruyere and thyme delights within 10 minutes of removing them from the oven for optimal texture and flavor.
Room temperature storage works well for leftover popovers. Store them in an airtight container for up to 2 days at room temperature. Avoid refrigerating popovers as the moisture can make them soggy and compromise their delicate texture.
Freezing extends the storage life significantly. Wrap cooled popovers individually in plastic wrap then place them in freezer bags for up to 3 months. Label the bags with the date to track freshness.
Oven reheating produces the best results for maintaining that crispy exterior. Preheat your oven to 350°F and place the popovers directly on the middle rack for 5-7 minutes. This method restores much of their original texture and warmth.
Toaster oven reheating offers a convenient alternative for smaller portions. Set the temperature to 350°F and heat for 3-5 minutes until warmed through and slightly crispy on the outside.
Microwave reheating should be avoided entirely. The microwave steam makes popovers chewy and eliminates their signature crispy texture that makes them so appealing.
Air fryer reheating works exceptionally well for restoring crispiness. Set your air fryer to 350°F and heat the popovers for 2-3 minutes. Check frequently to prevent overcooking.
| Storage Method | Duration | Temperature | Notes |
|---|---|---|---|
| Room Temperature | 2 days | 68-72°F | Airtight container required |
| Freezer | 3 months | 0°F | Wrap individually |
| Oven Reheat | 5-7 minutes | 350°F | Best texture retention |
| Air Fryer Reheat | 2-3 minutes | 350°F | Monitor closely |
Thawed frozen popovers require gentle handling. Remove them from the freezer and let them thaw at room temperature for 30 minutes before reheating. This prevents uneven heating and maintains their structural integrity.
Steam buildup ruins popover texture during storage. Pierce any stored popovers with a fork before reheating to allow moisture to escape and prevent sogginess.
Recipe Variations
Transform your gruyere and thyme popovers by exploring different cheese and herb combinations. These adaptations maintain the perfect rise while introducing exciting new flavor profiles to suit your taste preferences.
Different Cheese Options
Sharp cheddar provides a more pronounced tanginess than gruyere while maintaining excellent melting properties. You can substitute the same amount of freshly grated sharp cheddar for a bolder flavor that pairs beautifully with the thyme.
Aged gouda offers a sweet and nutty alternative that creates deeper caramelized notes during baking. Use the same measurement as gruyere but expect a slightly smokier taste that complements both savory and sweet applications.
Fontina delivers a creamy texture with mild earthy undertones that blend seamlessly with herbs. This Italian cheese melts exceptionally well and creates silky pockets within your popovers.
Parmesan brings intense umami depth when combined with softer cheeses like ricotta or cream cheese. Mix half parmesan with half ricotta for a lighter filling that still delivers robust flavor.
Comte provides complexity similar to gruyere but with more pronounced fruity notes. This French cheese works particularly well when you want sophisticated flavor without overpowering the delicate popover structure.
Herb Substitutions
Fresh rosemary creates an aromatic Mediterranean twist when chopped finely and used in smaller quantities. Replace thyme with half the amount of rosemary to avoid overwhelming the cheese flavors.
Sage leaves offer earthiness that pairs exceptionally well with aged cheeses like parmesan or pecorino. Use fresh sage sparingly as its flavor intensifies during the high heat baking process.
Chervil provides delicate anise notes that complement lighter cheeses such as fontina or fresh goat cheese. This subtle herb works best when added generously since its flavor remains gentle even with extended baking.
Oregano brings Mediterranean warmth that transforms your popovers into savory Italian inspired treats. Fresh oregano works better than dried for maintaining bright flavor throughout the baking process.
Tarragon introduces a sophisticated French element with its slight licorice undertones. Pair tarragon with gruyere or comte for an authentic French bistro experience that elevates any meal presentation.
Troubleshooting Tips
Your popovers may refuse to rise if your oven temperature runs too low. Verify your oven reaches exactly 450°F using an oven thermometer before placing the pan inside. Cold batter also prevents proper rising so ensure your milk and eggs reach room temperature before mixing.
Flat popovers often result from opening the oven door during the first 15 minutes of baking. Steam escapes when you peek and your popovers collapse immediately. Wait until the timer sounds before checking their progress through the oven window.
Dense or heavy popovers indicate overmixed batter. Mix your ingredients just until smooth and small lumps disappear. Stop whisking once you achieve a consistency similar to heavy cream.
Uneven browning occurs when your popover pan lacks proper preheating. Heat the oiled pan in the oven for at least 5 minutes before adding batter. Hot metal creates instant steam that lifts your popovers uniformly.
Your gruyere may clump together if you add it to warm batter. Allow your batter to cool slightly after incorporating the melted butter. Room temperature batter distributes cheese evenly without melting it prematurely.
Soggy bottoms develop when you underbake your popovers. Continue baking until they sound hollow when tapped gently. The internal temperature should reach 200°F for fully set interiors.
Bitter flavors emerge from burnt thyme leaves. Chop your herbs just before adding them to the batter. Fresh thyme releases oils that turn acrid when exposed to high heat for extended periods.
Your popovers may stick to the pan if you skimp on oil. Coat each cup generously with neutral oil and brush the rim areas thoroughly. Butter burns at high temperatures so avoid using it for greasing.
Collapsed popovers after removing from the oven indicate insufficient baking time. Pierce each popover with a knife tip to release steam before serving. This prevents them from deflating as they cool.
| Common Problem | Cause | Solution |
|---|---|---|
| No rise | Low oven temperature | Use oven thermometer |
| Flat shape | Door opened early | Wait 15 minutes minimum |
| Dense texture | Overmixed batter | Mix until just smooth |
| Uneven browning | Cold pan | Preheat pan 5 minutes |
| Clumpy cheese | Warm batter | Cool batter before adding cheese |
| Soggy bottom | Underbaked | Bake until hollow sound |
| Bitter taste | Burnt herbs | Add herbs just before baking |
| Sticking | Insufficient oil | Coat generously with oil |
| Collapse after removal | Steam trapped | Pierce before serving |
Conclusion
These gruyere and thyme popovers represent the perfect marriage of technique and flavor that’ll transform your kitchen into a bakery. You’ve got all the tools and knowledge needed to create these impressive pastries that rise dramatically and deliver restaurant-quality results.
The beauty of this recipe lies in its versatility – you can adapt the cheese and herb combinations to match your preferences or what’s available in your pantry. Whether you’re hosting a special brunch or simply want to elevate your weeknight dinner these popovers will become your go-to showstopper.
Remember that timing is everything with popovers. Serve them hot from the oven and watch as your guests marvel at the golden exteriors and fluffy interiors. With practice you’ll master the technique and soon be creating these delightful pastries with confidence every time.
Conflicting directions. Does the cheese go in the Bauer or just after 15 min of baking