
The Perfect Flaky Pie Crust Recipe
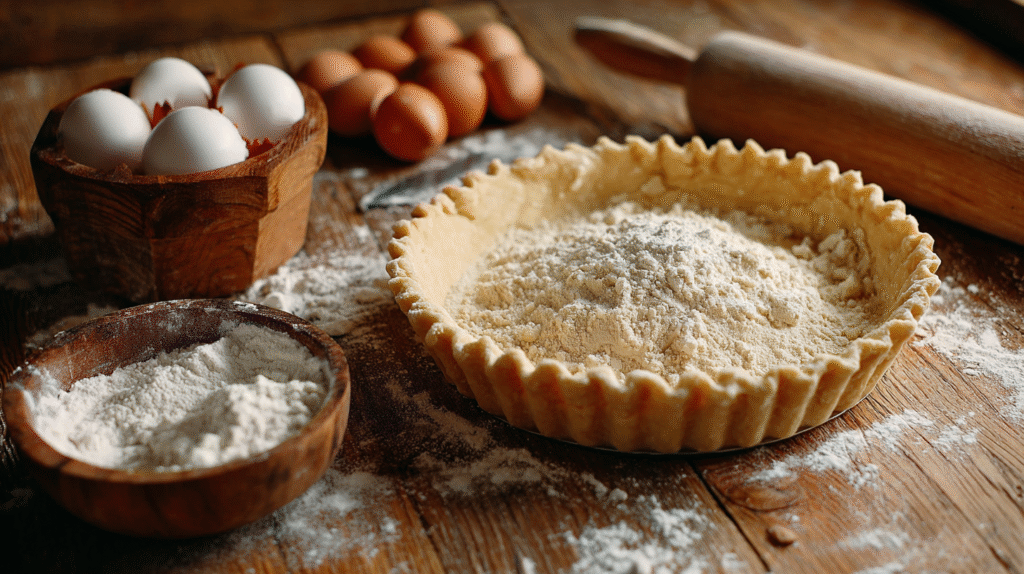
This pie crust recipe yields a perfectly flaky texture with buttery flavor that will elevate any filling you choose. The secret lies in keeping ingredients cold and handling the dough minimally to achieve those beautiful layers that make homemade pie crust superior to store-bought versions.
Ingredients
- 2½ cups all-purpose flour (312g)
- 1 teaspoon salt
- 1 tablespoon granulated sugar (omit for savory pies)
- 1 cup unsalted butter (226g) very cold and cubed
- ½ cup ice water (120ml) plus extra if needed
Equipment Needed
- Food processor or pastry cutter
- Large mixing bowl
- Measuring cups and spoons
- Plastic wrap
- Rolling pin
- Pie dish
- Fork or parchment paper with pie weights
Step-by-Step Instructions
Start by combining the flour salt and sugar in a large bowl or food processor. Pulse or whisk these dry ingredients to ensure even distribution of the salt and sugar throughout the flour.
Add the cold cubed butter to the flour mixture. If using a food processor pulse 8-10 times until the mixture resembles coarse crumbs with some pea-sized pieces remaining. For the manual method cut the butter into the flour using a pastry cutter until you achieve the same texture.
Drizzle half of the ice water over the flour-butter mixture. Pulse or stir gently to incorporate. Add more water one tablespoon at a time just until the dough begins to come together when pinched between your fingers. The dough should not be sticky or wet.
Turn the dough onto a lightly floured surface and divide it into two equal portions. Shape each portion into a disc about 1-inch thick without overworking the dough. Wrap each disc tightly in plastic wrap and refrigerate for at least 2 hours or overnight.
Remove one disc from the refrigerator and let it sit at room temperature for about 5-10 minutes to slightly soften. On a floured surface roll the dough from the center outward into a circle about 12 inches in diameter and ⅛-inch thick.
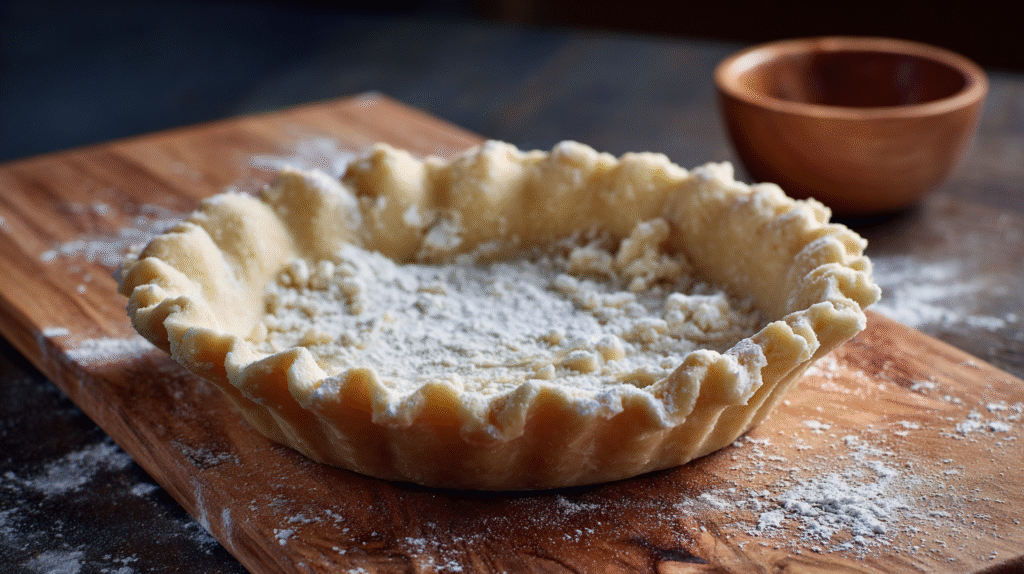
Transfer your rolled dough to a 9-inch pie plate by carefully rolling it around your rolling pin then unrolling it over the dish. Gently press the dough into the bottom and sides of the plate without stretching it.
Trim the excess dough leaving about a 1-inch overhang. Fold the overhang under itself to create a thicker rim that sits on the edge of the pie plate. Crimp the edges decoratively with your fingers or a fork.
For a single-crust pie prick the bottom several times with a fork (docking) to prevent bubbling. For extra insurance against a soggy bottom chill the shaped crust for 30 minutes then line it with parchment paper add pie weights and blind bake at 375°F for 15-20 minutes.
For double-crust pies fill your bottom crust roll out the second disc for the top crust and proceed according to your pie recipe’s exact instructions.
Tips for Perfect Results
Always keep your ingredients cold. Return the dough to the refrigerator if it becomes too soft or warm during preparation.
Handle the dough as little as possible to prevent gluten development which can make your crust tough rather than flaky.
Create a beautiful golden crust by brushing the top with an egg wash (one beaten egg mixed with a tablespoon of water) before baking.
For sweet pies sprinkle the top crust with coarse sugar before baking for a professional-looking finish and pleasant crunch.
Rest your baked pie for at least 2 hours before slicing to allow the filling to set properly and prevent a runny mess.
Why This Pie Crust Recipe Works
This pie crust recipe delivers consistently excellent results because it’s built on fundamental pastry principles that professional bakers swear by. The perfect balance of fat to flour creates those desirable flaky layers that make homemade crusts superior to store-bought versions.
Using cold butter rather than shortening provides unmatched flavor while still achieving the flakiness you desire. The small pockets of solid butter disperse during baking to create steam which pushes the dough layers apart resulting in that coveted flaky texture.
The addition of a small amount of sugar enhances browning and adds subtle flavor complexity even in savory applications. Your crust develops a beautiful golden color without becoming too sweet for meat pies or quiches.
Ice water plays a crucial role by keeping the butter solid during mixing which prevents the dough from becoming tough. This technique allows you to work with the dough more easily while still maintaining those distinct butter pieces essential for flakiness.
The method of pulsing ingredients in a food processor saves time while preventing overworking the dough. You achieve the perfect crumbly texture quickly without developing excess gluten that would make your crust tough and chewy.
Resting the dough in the refrigerator serves two important purposes: it relaxes the gluten to prevent shrinkage during baking and allows the flour to fully hydrate. This simple waiting period dramatically improves both the texture and workability of your crust.
The versatility of this recipe makes it perfect for both sweet and savory applications with minimal adjustments needed. You can create everything from apple pies to chicken pot pies using this single reliable formula.
Equipment Needed
To make this perfect pie crust, you’ll need several key pieces of kitchen equipment that help ensure consistent results. Gathering these tools before starting will streamline your baking process and set you up for success.
- Food processor – For quickly cutting butter into flour without warming the ingredients
- Measuring cups and spoons – For accurate ingredient measurements
- Large mixing bowl – For combining ingredients if not using a food processor
- Pastry cutter or fork – Alternative to food processor for cutting butter into flour
- Plastic wrap – For wrapping and chilling dough
- Rolling pin – For evenly rolling out dough to desired thickness
- Pie plate – 9-inch standard size works best for this recipe
- Parchment paper – For rolling dough between sheets to prevent sticking
- Bench scraper – For easily transferring dough and cleaning surfaces
- Kitchen scissors or knife – For trimming excess dough from pie edges
- Fork or docking tool – For creating vent holes in single-crust pies
- Pastry brush – For applying egg wash if desired
Your food processor serves as the most efficient tool for combining ingredients quickly while keeping everything cold. If you don’t own one, a pastry cutter works well as an alternative though it requires more physical effort. The bench scraper proves invaluable for lifting delicate dough without tearing and transferring it to your pie plate.
Standard metal or glass pie plates conduct heat efficiently but ceramic dishes work beautifully too. Choose a 9-inch plate for this recipe as the dough quantity is calibrated specifically for this size.
Ingredients
Here’s everything you need to create a perfectly flaky homemade pie crust. These simple ingredients combine to create a versatile base for both sweet and savory pies.
For Traditional Pie Crust
- 2½ cups (313g) all-purpose flour
- 1 teaspoon salt
- 2 tablespoons granulated sugar (reduce to 1 tablespoon for savory pies)
- 1 cup (2 sticks/226g) unsalted butter, very cold and cut into ½-inch cubes
- 6-8 tablespoons ice water
- 1 tablespoon white vinegar (optional, helps with tenderness)
Optional Add-ins for Flavor Variations
- 1 tablespoon fresh herbs (thyme, rosemary, or sage) for savory pies
- 1 teaspoon cinnamon or nutmeg for sweet fruit pies
- 2 teaspoons citrus zest (lemon, orange, or lime) for brightness
- ¼ cup finely grated hard cheese like Parmesan for savory applications
- 1 tablespoon cocoa powder for chocolate-based dessert pies
- ½ teaspoon vanilla extract added to the ice water for enhanced sweetness
- 2 tablespoons finely chopped nuts for texture and nutty flavor
Tips for Making the Best Pie Crust
Master these professional techniques to elevate your homemade pie crust from good to exceptional. These tried-and-true tips will help you achieve that perfect balance of flakiness and flavor every time.
The Secret to Flaky Layers
Flaky pie crust results from proper technique rather than special ingredients. Cut your cold butter into small cubes before adding it to the flour mixture. Leave visible butter pieces about the size of peas when mixing your dough. These butter pockets create steam during baking which lifts the dough into distinct flaky layers. Avoid overworking the dough which develops gluten and results in a tough crust. Handle the dough with a light touch using your fingertips rather than your palms which transfer more heat. Form the dough into a disk rather than a ball before chilling to make rolling easier later. For extra flakiness fold the dough like a letter during rolling creating additional butter layers similar to puff pastry.
Temperature Matters
Cold ingredients are absolutely essential for pie crust success. Refrigerate your butter for at least 2 hours before starting or freeze it for 20 minutes. Use ice water not just cold tap water for your recipe. Chill your mixing bowl and food processor blade for 15 minutes before beginning. Work in a cool kitchen environment with the air conditioning on during summer months. Take breaks during preparation if your ingredients start warming up returning everything to the refrigerator for 15 minutes. After forming your dough chill it for at least 2 hours or preferably overnight to relax the gluten and solidify the fat. Always refrigerate your rolled crust for 30 minutes before baking to prevent shrinking. For blind baking freeze the crust-lined pie plate for 15 minutes before adding weights which helps maintain the shape during baking.
Step-by-Step Instructions
Follow these detailed instructions to create a perfect flaky pie crust every time. The process is broken down into manageable stages to ensure your success.
Making the Dough
- Place 2½ cups all-purpose flour salt and sugar in a food processor. Pulse 2-3 times to combine these dry ingredients thoroughly.
- Add your very cold cubed butter to the flour mixture. Pulse in short bursts 8-10 times until the mixture resembles coarse crumbs with some pea-sized butter pieces still visible—these butter pieces are crucial for creating flaky layers.
- Drizzle 4-6 tablespoons of ice water (and vinegar if using) through the feed tube while pulsing. Add just enough liquid for the dough to begin clumping together when pressed between your fingers.
- Turn the mixture onto a clean work surface. The dough will look somewhat crumbly but should hold together when pressed.
- Gently gather the dough with your hands working quickly to avoid warming it. Divide it into two equal portions for a double crust pie or keep it whole for a single crust.
- Form each portion into a flat disc shape about 1-inch thick. This shape will make rolling easier later.
Chilling the Dough
- Wrap each disc tightly in plastic wrap ensuring no air pockets remain that could dry out the dough.
- Refrigerate the wrapped dough for at least 1 hour or up to 2 days. This chilling time allows the gluten to relax preventing shrinkage and helps solidify the butter.
- For longer storage freeze the wrapped discs for up to 3 months. Thaw overnight in the refrigerator before using.
- Remove the dough from the refrigerator 10-15 minutes before rolling to allow it to slightly soften making it easier to roll without cracking.
Rolling Out Your Pie Crust
- Prepare your work surface by dusting it lightly with flour. Place a disc of dough in the center.
- Begin rolling from the center outward applying even pressure. Turn the dough a quarter turn after each roll to maintain an even circular shape.
- Continue rolling until the dough reaches about 12 inches in diameter for a 9-inch pie plate providing enough overhang for crimping.
- Lift and rotate the dough occasionally adding small amounts of flour underneath to prevent sticking.
- Check for even thickness throughout approximately ⅛-inch thick. Uneven areas may cook differently resulting in inconsistent texture.
- If the dough tears patch it by pressing a small piece of dough over the tear and lightly rolling to incorporate.
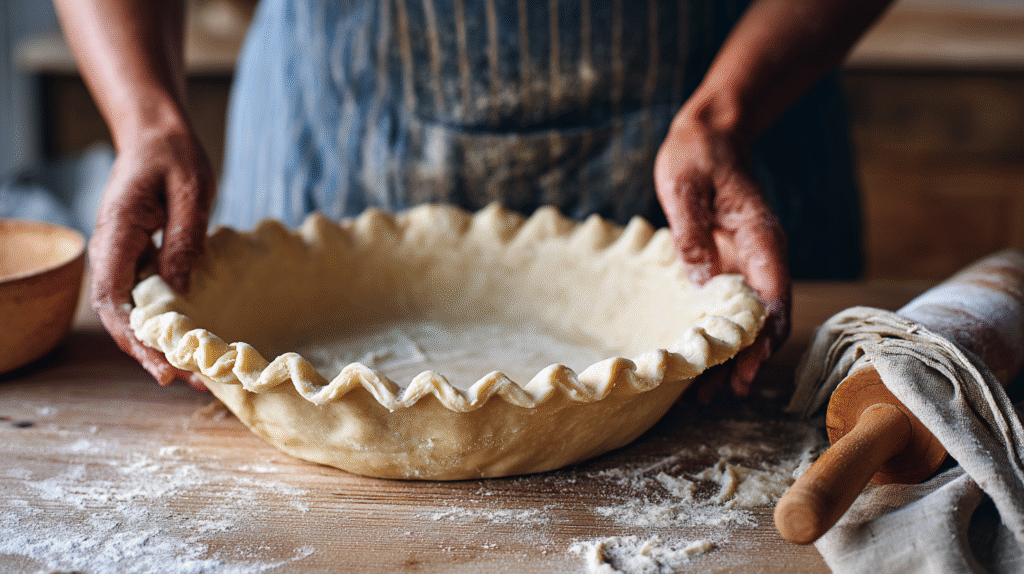
Transferring to the Pie Dish
- Gently fold your rolled dough in half then in quarters for easier transfer without stretching or tearing.
- Position the folded point at the center of your pie plate then carefully unfold the dough.
- Press the dough gently into the bottom and sides of the dish without stretching which can cause shrinkage during baking.
- Trim the overhang to about 1-inch beyond the edge of the pie plate using kitchen scissors or a sharp knife.
- For a single crust pie fold the excess dough under itself to create a thicker edge then crimp decoratively using your fingers or a fork.
- For a double crust pie add your filling to the bottom crust roll out the second disc and place it on top. Trim and seal the edges by pressing them together then crimp.
- Dock a single crust by pricking the bottom and sides with a fork to prevent bubbling during baking.
- Refrigerate the assembled pie for 15-30 minutes before baking to relax the gluten and rechill the butter.
Common Pie Crust Problems and Solutions
Even when following a recipe precisely pie crusts can sometimes present challenges. Recognizing these common issues and knowing how to fix them will help you achieve perfect results every time.
Tough or Chewy Crust
A tough pie crust typically results from overworked dough or excessive gluten development. To avoid this problem pulse your ingredients in the food processor just until combined rather than running it continuously. Handle the dough as little as possible once water is added and avoid excessive kneading. Using very cold ingredients also helps minimize gluten formation which leads to a more tender result.
Crumbly Dough
If your dough falls apart when rolling it likely needs more moisture. Add ice water one tablespoon at a time until the dough just comes together. Remember that humidity levels can affect flour’s moisture content so you might need slightly more or less water than the recipe specifies depending on your environment. A dough that holds together when pinched between your fingers has enough moisture.
Shrinking Crust
Nothing is more frustrating than a beautifully crimped edge that shrinks during baking. This happens when the gluten in the dough contracts from heat. Allow your dough to rest in the refrigerator for at least 30 minutes before rolling and again after placing it in the pie plate. Using pie weights when blind baking also helps maintain the crust’s shape and prevent shrinkage.
Soggy Bottom
A soggy bottom crust ruins an otherwise perfect pie. Prevent this by brushing the bottom crust with egg white before adding filling which creates a moisture barrier. Another effective technique involves partially baking the crust before adding wet fillings. For fruit pies sprinkle a tablespoon of flour or ground nuts on the bottom crust to absorb excess juice.
Burnt Edges
Edges often brown faster than the rest of the pie causing them to burn before the filling cooks through. Protect your crust by covering the edges with foil or using a pie shield after the first 15-20 minutes of baking. This simple step allows the filling to cook completely while preventing the rim from becoming too dark.
Uneven Browning
Patchy browning can make your pie look less appealing. Ensure even browning by applying an egg wash (one beaten egg with a tablespoon of water) to the top crust before baking. Position your pie in the center of the oven and rotate it halfway through baking time for consistent heat distribution.
Butter Leaking Out
When butter melts and leaks from your dough during baking it indicates that your ingredients weren’t cold enough. Keep butter and water ice-cold and chill your tools if possible. If you see butter beginning to soften while working return the dough to the refrigerator immediately for 15 minutes before continuing.
Dough Sticking to Surface
A dough that sticks to your work surface becomes difficult to transfer to the pie plate. Prevent sticking by generously flouring your surface and rolling pin or rolling between two sheets of parchment paper. A bench scraper helps lift and reposition stubborn dough without tearing it.
Pale, Undercooked Crust
A pale crust often lacks flavor and proper texture. Bake your pie in the lower third of the oven where heat is more intense. For single-crust pies bake at a higher temperature (400-425°F) for the first 15 minutes then reduce to finish cooking. Adding a tablespoon of sugar to the dough also promotes better browning.
Make-Ahead and Storage Options
Pie crust dough is perfect for preparing ahead of time allowing you to streamline your baking process. You can refrigerate unbaked pie dough for up to 3 days tightly wrapped in plastic wrap. For longer storage freeze the dough discs for up to 3 months by double-wrapping them in plastic wrap followed by aluminum foil or placing them in a freezer-safe bag.
When ready to use frozen dough thaw it overnight in the refrigerator before rolling. Allow the dough to sit at room temperature for about 10-15 minutes if it feels too firm to roll easily. Pre-rolled crusts can also be frozen in the pie plate—simply line your plate with the crust freeze until solid then wrap tightly and return to the freezer for up to 1 month.
Blind-baked pie shells offer excellent make-ahead convenience. Once completely cooled store unfilled baked crusts at room temperature in an airtight container for up to 2 days or freeze them for up to 3 months. Thaw frozen pre-baked crusts at room temperature before filling.
For fully baked pies most varieties can be stored at room temperature for 1-2 days or refrigerated for 4-5 days. Fruit pies generally keep best at room temperature under a pie dome or loosely wrapped while custard-based pies require refrigeration. Extend the life of your baked pies by freezing individual slices wrapped in plastic then aluminum foil for up to 3 months.
To revive the texture of stored pie crust warm room temperature pies in a 350°F oven for 5-10 minutes or reheat frozen slices directly from the freezer at 350°F for 15-20 minutes until warmed through. This reheating process helps restore the flaky texture that might soften during storage.
Recipe Variations
While our classic pie crust recipe yields excellent results each time you can adapt it to suit different dietary needs and flavor preferences. These variations maintain the same flaky texture while offering unique characteristics to complement various fillings.
All-Butter Pie Crust
This traditional variation creates the richest flavor and most pronounced flakiness in your finished pie. Use 1 cup (2 sticks) of very cold unsalted butter instead of combining fats. Cut the butter into slightly larger pieces (½-inch cubes) to create more distinct layers during baking. The all-butter crust browns more deeply with a beautiful golden color that signals its superior flavor. This version works exceptionally well with fruit pies where you want the buttery taste to shine through. Keep in mind that an all-butter crust requires extra care to maintain cold temperatures throughout preparation as butter melts more quickly than shortening.
Shortening and Butter Combination
For bakers seeking structural stability with good flavor this combination offers the best of both worlds. Use ½ cup (1 stick) cold unsalted butter and ½ cup vegetable shortening in place of all butter. The shortening creates a more forgiving dough that resists shrinking during baking while the butter contributes essential flavor. This variation produces an extremely tender crust with reliable performance making it perfect for intricate lattice work or decorative edges. You’ll find this combination particularly useful for custard-based pies that require blind baking or high-moisture fillings where crust integrity matters most. The resulting texture splits the difference between flaky and tender with a consistent crumb that many professional bakers prefer.
Gluten-Free Pie Crust
Transform this recipe to accommodate gluten sensitivities without sacrificing quality or taste. Replace all-purpose flour with 2½ cups of gluten-free flour blend that contains xanthan gum (or add ¾ teaspoon xanthan gum to your flour blend). Add 1 tablespoon of apple cider vinegar to the ice water to help with structure and tenderness. Gluten-free doughs typically require more moisture so you may need to increase the ice water by 1-2 tablespoons. Allow the dough to rest longer in the refrigerator (at least 2 hours) to fully hydrate the alternative flours. This variation works best with simple applications rather than intricate designs as the dough tends to be more fragile when rolled. Even though these differences you’ll achieve a remarkably similar texture and flavor that makes this adaptation worth the effort for those avoiding gluten.
Blind Baking Instructions
Blind baking is an essential technique for achieving crisp well-cooked pie crusts when making certain types of pies. This process involves pre-baking a pie shell either partially or completely before adding the filling.
When to Blind Bake
Blind baking becomes necessary whenever you’re making a pie with a filling that requires less baking time than the crust itself. You should always blind bake when preparing pies with no-bake fillings such as cream pies custard pies or fresh fruit tarts. Partially blind baking works best for pies with wet fillings like pumpkin quiche or pecan to prevent the dreaded “soggy bottom.” Fully blind bake your crust when the filling won’t be baked at all as with chocolate pudding pies lemon meringue or fresh strawberry pies. This technique ensures your crust maintains its structural integrity and pleasant texture regardless of the moisture content in your filling.
How to Blind Bake
Blind baking requires a few exact steps to ensure your crust turns out perfectly every time:
- Prepare your crust – Roll out your dough and fit it into your pie plate. Trim and crimp the edges as desired.
- Chill thoroughly – Place the shaped crust in the freezer for 20-30 minutes or in the refrigerator for at least 1 hour. Cold dough helps prevent shrinkage during baking.
- Dock the crust – Using a fork prick the bottom and sides of the crust multiple times to allow steam to escape during baking.
- Add pie weights – Line the chilled crust with parchment paper or aluminum foil ensuring it covers the edges. Fill the liner with pie weights dried beans or uncooked rice to hold the crust in place.
- Initial bake – Bake at 375°F (190°C) for 15-20 minutes until the edges begin to turn golden.
- Remove weights – Carefully lift out the parchment paper with the weights and return the crust to the oven.
- For partial blind baking – Bake for an additional 5-7 minutes until the bottom looks dry but is not fully browned. Cool slightly before adding your filling and finishing your pie.
- For full blind baking – Continue baking for 10-15 more minutes until the entire crust is golden brown. Cool completely before adding no-bake fillings.
Remember that different recipes may require slight adjustments to temperature and timing. You’ll know your crust is properly blind baked when it appears dry and lightly golden rather than pale or doughy. This technique creates the perfect foundation for showcasing your delicious fillings while maintaining that coveted flaky texture.
Recommended Pie Fillings for This Crust
This versatile pie crust recipe serves as the perfect foundation for countless delicious fillings. Your flaky, buttery crust deserves to be paired with fillings that complement its texture and flavor profile. Explore these classic and creative filling options that work beautifully with this pie crust recipe.
Fruit Pie Fillings
Classic apple pie filling combines thinly sliced apples with cinnamon, sugar, and a touch of lemon juice for brightness. Fresh cherry filling offers a balance of sweet and tart flavors, especially when made with sour cherries and almond extract. Blueberry filling creates a deep purple masterpiece when mixed with a bit of lemon zest and thickened with cornstarch. Strawberry rhubarb brings together sweet strawberries and tart rhubarb for a perfect spring pie experience.
For summer pies, try peach filling enhanced with a hint of bourbon and vanilla for depth of flavor. Mixed berry fillings work wonderfully with this crust, offering vibrant color and complex flavor profiles from combining raspberries, blackberries, and blueberries. Pear and ginger filling provides a sophisticated alternative with warm spice notes that complement the buttery crust.
Custard-Based Fillings
Silky smooth vanilla custard forms the base for a classic custard pie that showcases the crust’s flakiness. Rich chocolate cream filling pairs decadently with this crust, creating a dessert that satisfies intense chocolate cravings. Coconut cream filling transports you to tropical destinations with its creamy texture and distinctive flavor.
Key lime filling offers bright acidity that contrasts beautifully with the buttery crust. Traditional pumpkin custard brings warm spices and seasonal flavors for the perfect fall or holiday pie. Butterscotch filling provides deep caramel notes that enhance the crust’s natural butteriness. Banana cream filling combines fresh bananas with vanilla pudding for a nostalgic favorite that everyone loves.
Savory Pie Options
Classic chicken pot pie filling with tender chicken, peas, carrots, and creamy sauce creates the ultimate comfort food. Quiche fillings with eggs, cream, cheese, and add-ins like spinach or bacon showcase this crust’s versatility. Mushroom and gruyere filling offers earthy flavors and melty cheese that complement the flaky layers.
Tomato pie with fresh tomatoes, herbs, and cheese makes a perfect summer lunch when garden tomatoes are at their peak. Steak and ale filling creates a robust pie with tender beef chunks and rich gravy. Potato and leek filling provides a vegetarian option with creamy texture and subtle onion flavor. Spinach and feta filling brings Mediterranean flavors with bright lemon notes and tangy cheese.
No-Bake Fillings for Pre-Baked Crusts
Fluffy chocolate mousse creates an impressive dessert when piled into a pre-baked crust and chilled. Fresh strawberry filling bound with gelatin showcases summer berries at their peak. Peanut butter silk filling offers a creamy, indulgent option that sets up beautifully in a blind-baked shell.
Lemon curd filling provides bright citrus flavor that contrasts with the buttery crust. No-bake cheesecake filling creates a lighter alternative to traditional baked cheesecake. Fresh fruit and pastry cream combine for a bakery-worthy creation when arranged atop a blind-baked crust. Salted caramel filling delivers rich, complex sweetness that transforms this crust into a sophisticated dessert.
Seasonal Specialties
During fall, embrace maple pecan filling with its rich, nutty flavor and amber sweetness. Apple cranberry filling combines traditional apples with tart cranberries for a holiday-worthy dessert. Pear and almond filling offers subtle sweetness enhanced by almond frangipane.
Winter calls for chocolate peppermint filling that delivers festive flavor perfect for holiday gatherings. Spring welcomes strawberry rhubarb filling, balancing sweet berries with tart rhubarb. Summer brings opportunities for fresh peach filling that captures sunshine in every bite. Early autumn inspires blackberry apple filling, combining late summer berries with early fall apples.
Filling Tips for Perfect Pies
Thicken fruit fillings properly using cornstarch, tapioca, or flour to prevent soggy crusts. Cool hot fillings completely before adding them to unbaked crusts to maintain flakiness. Par-cook certain fruits like apples to prevent the gap that can form between filling and crust during baking.
Blind bake your crust first when using no-bake fillings or those with high moisture content. Add acid like lemon juice to fruit fillings to brighten flavors and balance sweetness. Use brown sugar instead of white in many fruit fillings for deeper caramel notes. Consider adding a thin layer of chocolate between crust and filling for cream pies to prevent sogginess.
Final Tips for Pie Crust Success
You’ve now mastered the art of creating a perfect pie crust! With this foolproof recipe in your baking arsenal you’ll create consistently flaky delicious crusts every time. Remember that practice makes perfect and each pie you make will build your confidence.
Trust your instincts and don’t be afraid to experiment with different flavor add-ins to complement your fillings. Whether you’re making a sweet apple pie or savory chicken pot pie this versatile crust recipe has you covered.
The true secret to pie crust success lies in keeping everything cold handling the dough gently and giving yourself permission to enjoy the process. Your homemade pies will surely impress family and friends while bringing that special made-from-scratch satisfaction that no store-bought crust can match.