
What Makes These Peppermint Meringues Special
These peppermint meringues stand out from typical cookie recipes for several compelling reasons. Their unique texture combination delivers a satisfying crunch on the outside while maintaining a soft marshmallow center that melts in your mouth.
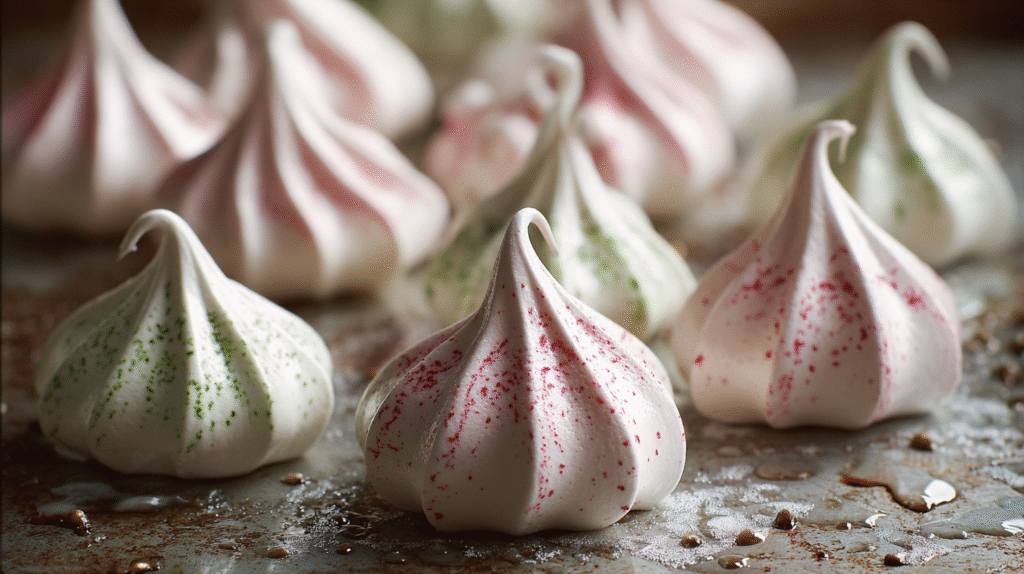
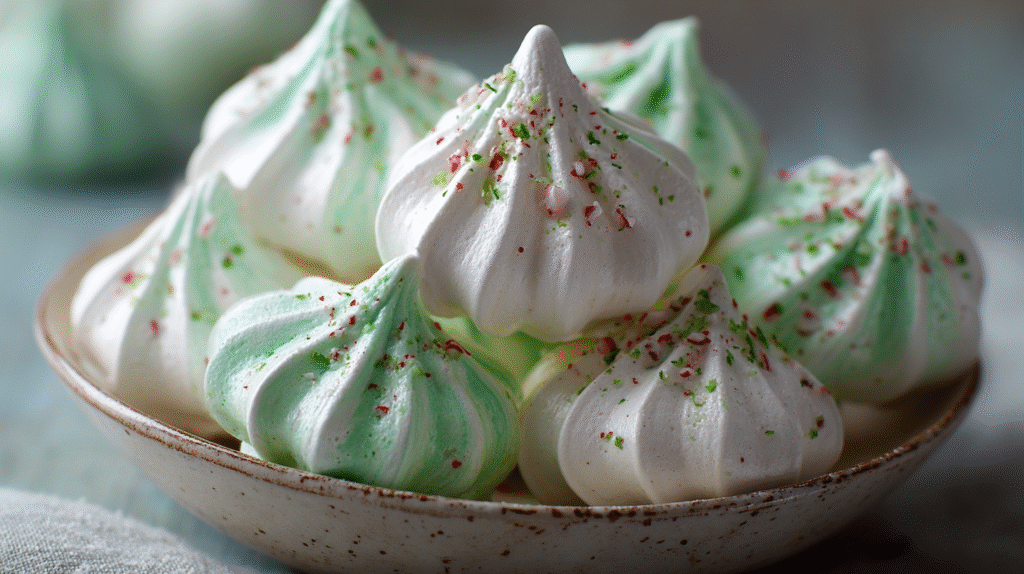
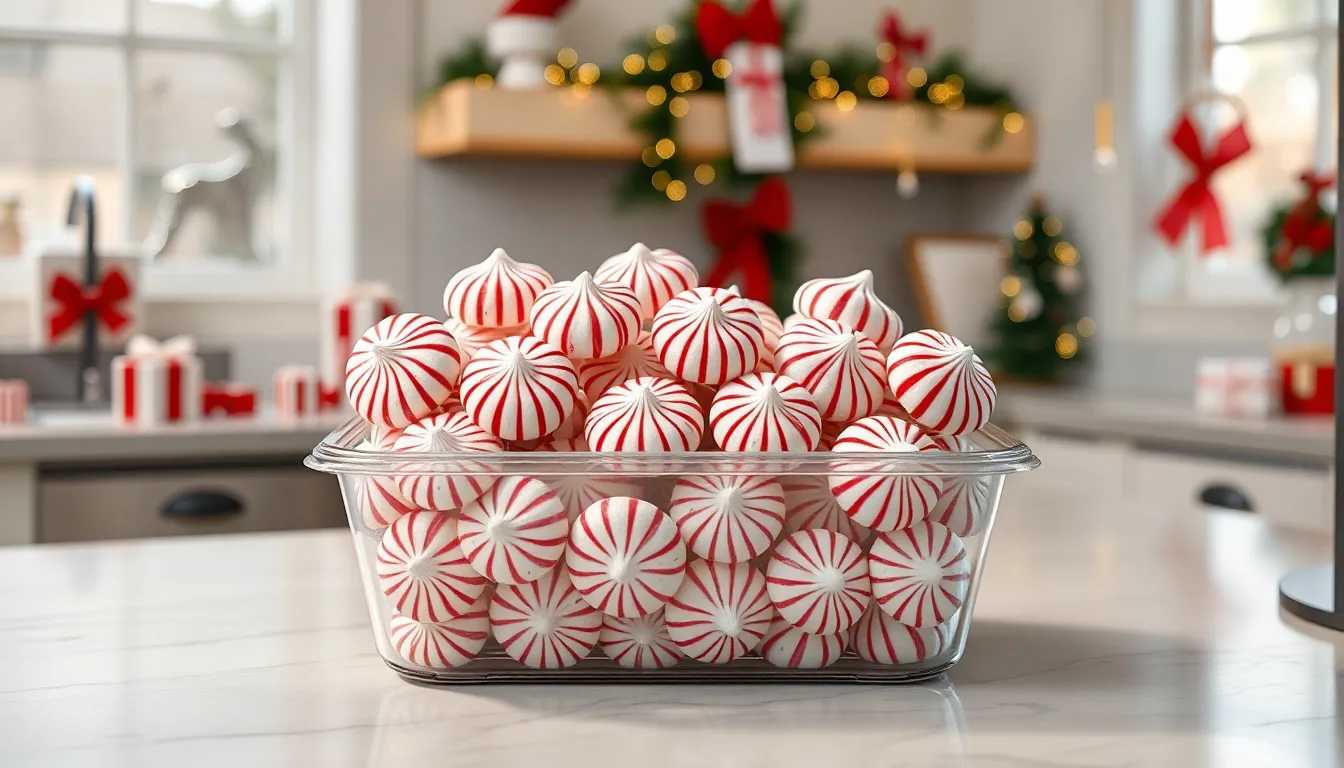
The festive red and white swirls create a beautiful candy cane effect without requiring any special decorating skills. You simply need to paint red food coloring inside your piping bag before adding the meringue mixture.
These meringues contain minimal ingredients compared to traditional holiday cookies. With just egg whites sugar peppermint extract and food coloring you can create something truly spectacular. Their light airy nature also makes them a refreshing alternative to heavier holiday desserts.
The versatility of these meringues truly sets them apart. You can adjust their size to create tiny bite-sized treats or larger statement pieces for your dessert table. The peppermint flavor intensity can be customized to your preference by simply adjusting the extract amount.
These meringues also offer impressive staying power when stored properly. They can last for weeks in an airtight container making them perfect for advance holiday preparation or homemade gifts. Their naturally gluten-free composition makes them accessible for guests with dietary restrictions while still delivering indulgent holiday flavor.
Equipment Needed
To create perfect peppermint meringues with those beautiful candy cane swirls, you’ll need several key pieces of equipment. Gathering everything before you begin will make the process smoother and more enjoyable.
- Stand mixer or handheld electric mixer: Essential for whipping egg whites to stiff peaks—this task is nearly impossible to do properly by hand
- Large mixing bowl: Preferably metal or glass for optimal egg white whipping
- Measuring cups and spoons: For precise ingredient measurements
- Rubber spatula: To fold in flavoring without deflating the meringue
- Baking sheets: Two standard-sized sheets work well
- Parchment paper or silicone baking mats: To prevent sticking and ensure easy removal
- Piping bag: A 12-16 inch pastry bag is ideal
- Star tip or round tip: A 1/2-inch tip creates the perfect meringue shape
- Small food-safe paintbrush: For creating the red stripes in the piping bag
- Cooling rack: For proper air circulation after baking
For the most professional-looking results, a pastry bag with a decorative tip truly makes a difference in the final presentation. If you don’t have a proper piping bag, you can create a makeshift one using a gallon-sized zip-top bag with the corner snipped off, though the results won’t be quite as precise.
Your oven will need an accurate temperature gauge as meringues require low, consistent heat. Consider using an oven thermometer if you suspect your oven temperature fluctuates significantly.
Ingredients
Creating these festive peppermint meringues requires just a handful of simple ingredients you likely already have in your pantry. The recipe breaks down into two key components: the meringue base and the peppermint topping that gives these treats their distinctive holiday flavor.
For the Meringues
- 4 large egg whites, at room temperature
- 1 cup granulated sugar
- ¼ teaspoon cream of tartar
- ⅛ teaspoon salt
- ½ teaspoon peppermint extract
- Red gel food coloring
For the Peppermint Topping
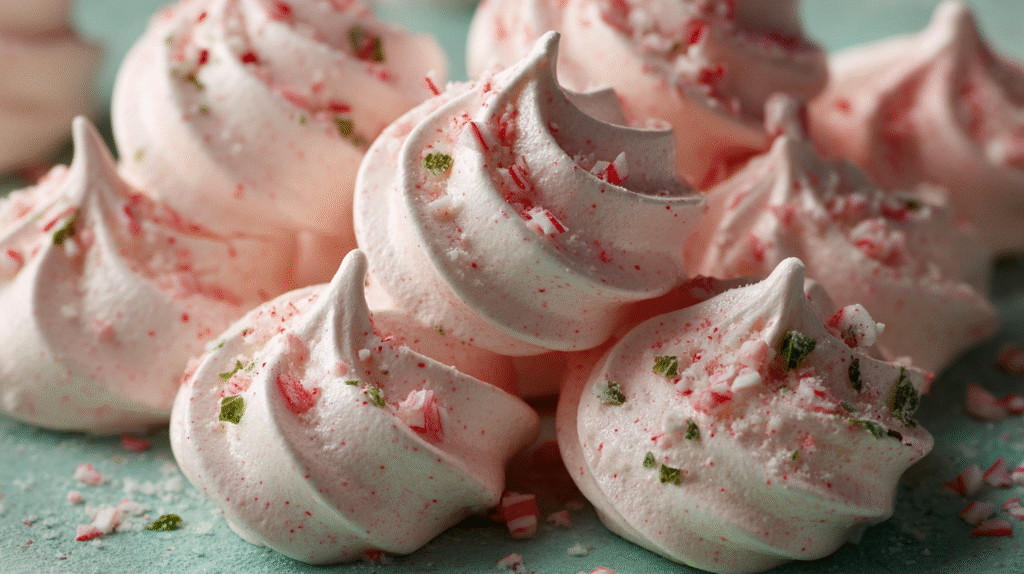
- ¼ cup crushed candy canes or peppermint candies
- 2 tablespoons powdered sugar (optional, for dusting)
- ½ teaspoon peppermint extract (optional, for enhanced flavor)
How to Make Peppermint Meringues
Creating these festive peppermint meringues requires attention to detail and proper technique. Follow these step-by-step instructions to achieve perfect results every time.
Preparing Your Workspace
Start by preheating your oven to 225°F (107°C) and positioning the racks in the middle of the oven. Line two baking sheets with parchment paper or silicone baking mats to prevent sticking. Ensure your mixing bowl and beaters are completely clean and free from any grease or residue as this can prevent egg whites from whipping properly. Set out all your ingredients so they’re readily available throughout the process. Room temperature egg whites whip more efficiently than cold ones so separate your eggs about 30 minutes before you begin. Prepare your piping bag by fitting it with your chosen tip and laying it out for easy filling later.
Whipping the Egg Whites
Place your egg whites in the clean mixing bowl and begin beating on low speed until they become frothy. Add the cream of tartar and salt which help stabilize the egg whites and create more volume. Gradually increase the speed to medium-high and begin adding the granulated sugar one tablespoon at a time allowing each addition to incorporate fully before adding more. This slow addition prevents the meringue from becoming grainy. Continue beating until stiff glossy peaks form typically 7-9 minutes. You’ll know the meringue is ready when it holds its shape firmly on the beater and feels smooth not grainy when rubbed between your fingers. The meringue should be thick enough that you can hold the bowl upside down without it falling out.
Adding the Peppermint Flavor
Once your meringue reaches stiff peaks gently fold in the peppermint extract using a rubber spatula. Fold with a light hand using a bottom-to-top motion to maintain as much air in the mixture as possible. Be careful not to overmix as this can deflate your carefully whipped meringue. The extract should be evenly distributed throughout the mixture without any streaks. For an extra flavor boost you can add a tiny pinch of crushed candy canes directly into the meringue but keep the pieces very small to maintain the smooth texture. Test the flavor by tasting a small amount and adjust if needed remembering that the peppermint flavor will intensify slightly as the meringues dry.
Piping the Meringues
Prepare your piping bag by painting 3-4 thin stripes of red gel food coloring inside the bag using a small food-safe brush or the back of a skewer. The stripes should run from the tip to about halfway up the bag. Transfer the meringue mixture to the prepared piping bag being careful not to smudge the food coloring stripes. Twist the top of the bag to close it and apply gentle pressure to push the meringue toward the tip. Pipe 1½-2 inch rounds or swirls onto the prepared baking sheets maintaining about 1 inch of space between each meringue. Hold the piping bag perpendicular to the baking sheet for the most even shapes. To finish each meringue stop pressure and pull up quickly with a slight twist of your wrist to create a peaked top. The red stripes will naturally create beautiful candy cane swirls throughout your meringues without any additional effort.
Baking Tips for Perfect Meringues
Achieving flawless peppermint meringues requires attention to detail and understanding a few key techniques. These tips will help you create bakery-worthy treats with consistent results every time.
Temperature Control
Low and slow is the golden rule for baking meringues. Your oven should be preheated to 225°F (107°C) before you begin baking to ensure consistent heat throughout the cooking process. An oven thermometer becomes invaluable here as many ovens run hotter or cooler than their displays indicate. Position your baking sheets in the center of the oven where temperature is most stable and avoid opening the oven door during baking which causes temperature fluctuations that can lead to cracked or collapsed meringues. For extra insurance against temperature spikes consider leaving the oven door slightly ajar during the last 15 minutes of baking by propping it open with a wooden spoon. This technique allows moisture to escape gradually resulting in perfectly crisp exteriors without browning.
Drying Time
Patience plays a crucial role in creating perfect meringues. After the initial baking period typically 1-1½ hours allow your meringues to dry completely by turning off the oven and letting them cool inside with the door closed for at least 2 hours. This gradual cooling process prevents the shock of temperature change that often causes meringues to crack or become chewy. Humid days require additional drying time so you might need to extend the cooling period up to 4 hours on particularly muggy days. The meringues should feel completely dry and firm to the touch when ready with no sticky areas. For best results bake your meringues the day before you need them allowing them a full overnight rest in the oven for optimal texture development. This extended drying time ensures that delightful contrast between crisp exterior and soft interior that makes peppermint meringues so irresistible.
Storage and Make-Ahead Instructions
Properly stored peppermint meringues maintain their delightful texture and flavor for an impressive amount of time. Store completely cooled meringues in an airtight container at room temperature for up to 2 weeks. Layering the meringues between sheets of parchment paper prevents them from sticking together or crushing one another.
Avoid refrigerating your meringues as the moisture inside the refrigerator will cause them to become sticky and lose their crisp exterior. Meringues are particularly sensitive to humidity so store them in the driest part of your kitchen away from the dishwasher sink or stove.
For longer storage freeze your meringues in an airtight container with parchment paper between layers for up to 3 months. Allow them to thaw at room temperature for about 30 minutes before serving.
These peppermint treats make excellent make-ahead desserts for the holiday season. Prepare them up to a week before your event and simply store them properly until needed. Their extended shelf life makes them perfect for gifting or preparing well in advance of holiday gatherings.
Remember that exposure to air will make meringues soften over time so always return any unused portions to their airtight container promptly after serving. The candy cane flavor actually intensifies slightly after a day or two of storage making these treats even more delicious with a bit of patience.
Serving Suggestions
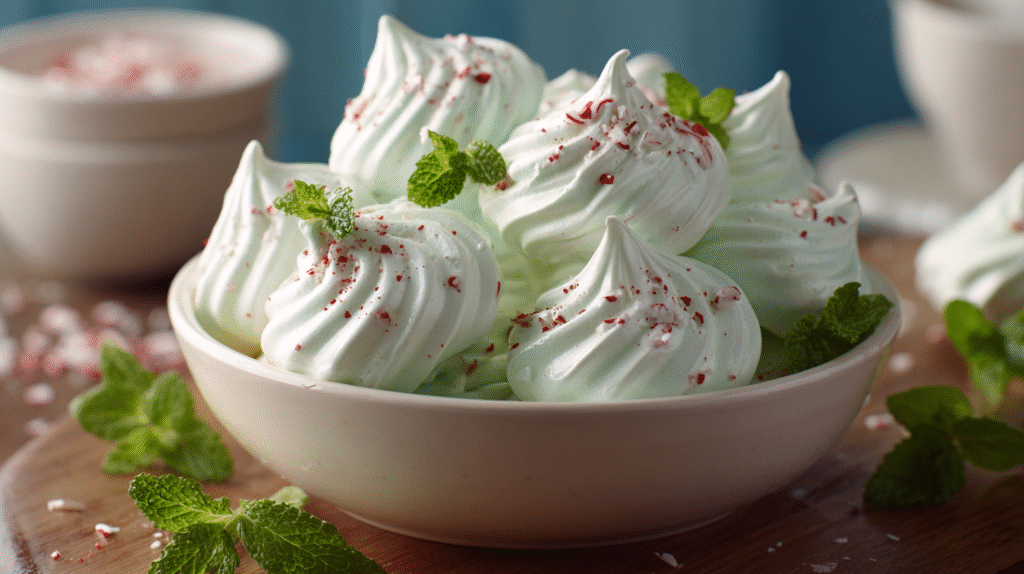
Transform your peppermint meringues from simple treats into spectacular dessert presentations with these serving ideas. These light crispy cookies shine when paired thoughtfully with complementary flavors and festive presentations.
Create a Hot Chocolate Station by arranging your peppermint meringues on a decorative platter beside a pot of rich hot chocolate. The meringues can be served alongside for dipping or placed directly on top of mugs where they’ll slowly melt into the warm drink creating a delightful peppermint mocha experience.
Assemble a Holiday Dessert Board featuring your red and white swirled meringues as the centerpiece. Surround them with chocolate truffles dark chocolate-dipped strawberries and shortbread cookies for a visually stunning spread that offers guests variety.
Serve as Ice Cream Toppers by crushing larger meringues or using smaller piped ones to garnish bowls of vanilla or chocolate ice cream. The contrast between cold creamy ice cream and light crunchy meringue creates an irresistible textural experience.
Pair with After-Dinner Coffee for an elegant finish to your holiday meal. The sweet peppermint flavor complements the bitterness of coffee especially espresso or dark roast varieties.
Create Meringue Sandwich Cookies by adding a thin layer of chocolate ganache or peppermint buttercream between two meringues. This elevates the simple cookie into a more substantial dessert option.
Incorporate into a Trifle by layering crushed meringues with whipped cream chocolate pudding and fresh berries in clear glasses. The distinctive layers make for a beautiful presentation while the varied textures create a memorable dessert experience.
Package as Gifts in clear cellophane bags tied with festive ribbon. Include a note suggesting they be enjoyed with hot chocolate or coffee for the full experience. These lightweight treats ship well making them perfect for sending to distant loved ones during the holidays.
Troubleshooting Common Meringue Problems
Weeping Meringues
Weeping occurs when moisture seeps out of your meringues creating a puddle of sweet liquid around the base. This typically happens when sugar hasn’t fully dissolved during the whipping process. To prevent weeping make sure you add sugar gradually to egg whites rather than all at once. Testing the meringue between your fingers before piping can help – it should feel smooth without any gritty sugar crystals. Room temperature egg whites also incorporate sugar more effectively than cold ones so allow your eggs to sit out for about 30 minutes before separating.
Soft or Collapsed Meringues
Nothing disappoints more than meringues that lack structure or collapse after baking. This problem usually stems from underbaking or removing meringues from the oven too quickly. Your peppermint meringues need slow drying rather than actual baking. Leave them in the turned-off oven after baking for at least 2 hours or even overnight. Humidity presents another culprit – avoid making meringues on particularly humid days as moisture in the air can prevent proper drying. An electric dehumidifier in your kitchen might help if you must make meringues in humid conditions.
Cracked Meringues
Cracking often results from baking at too high a temperature. Your oven should stay at a consistent 225°F (107°C) throughout the entire baking process. Sudden temperature changes can shock the delicate structure of meringues causing cracks. An oven thermometer proves invaluable for monitoring actual temperature as many ovens run hotter or cooler than their settings indicate. Position your meringues in the center of the oven away from heating elements to promote even baking.
Beading on Surface
Small droplets of moisture or sugar on the surface of your meringues indicate beading. This typically happens when meringues are overbeaten or exposed to rapid temperature changes. Beat your egg whites just until stiff peaks form – overbeating introduces too much air making the structure unstable. Gradual cooling proves crucial for perfect texture so resist the urge to move meringues to a cooling rack immediately after baking.
Discolored Meringues
Yellow or brownish meringues can ruin the pristine look of your peppermint treats. This discoloration usually results from baking at too high a temperature or positioning meringues too close to heating elements. Keep your oven temperature low and consistent. Using an egg separator when dividing eggs helps prevent any yolk contamination which can cause yellowing. Fresh egg whites also produce whiter meringues than older ones.
Runny Meringue Mixture
A meringue mixture that refuses to stiffen properly often indicates contamination from fat. Even a tiny bit of egg yolk or grease in your mixing bowl can prevent proper whipping. Use a completely clean and dry glass or metal bowl for whipping – plastic bowls often harbor traces of fat even after washing. Separating eggs when cold reduces the chance of yolk breakage but then allow the whites to come to room temperature before beating. Acid helps stabilize the structure so don’t skip the cream of tartar in your recipe.
Variations of This Peppermint Meringue Recipe
Chocolate Peppermint Meringues
Transform your basic peppermint meringues into a chocolate lover’s dream by adding 2 tablespoons of unsweetened cocoa powder to the meringue mixture. Sift the cocoa powder before folding it in after the sugar has been fully incorporated to prevent lumps. The rich chocolate flavor pairs beautifully with the bright peppermint for a more decadent treat. You might also consider drizzling cooled meringues with melted dark chocolate for an extra touch of elegance.
Peppermint Meringue Cookies with Chunks
Add texture to your meringues by folding in 1/4 cup of finely crushed candy canes or white chocolate chips just before piping. These additions create delightful pockets of flavor and interest throughout each bite. For best results, ensure any add-ins are very small pieces to maintain the delicate structure of your meringues.
Peppermint Meringue Nests
Create shallow bowl-shaped meringues by using the back of a spoon to form an indentation in the center of each piped meringue before baking. Once cooled, fill these meringue nests with peppermint-infused whipped cream and top with crushed candy canes for an elegant dessert. These make stunning individual servings for holiday dinner parties.
Vegan Peppermint Meringues
Make this recipe accessible to those following plant-based diets by substituting egg whites with aquafaba (the liquid from canned chickpeas). Use 3/4 cup of aquafaba in place of 4 egg whites and whip it until stiff peaks form. Add 1/4 teaspoon of cream of tartar to help stabilize the mixture. The result is surprisingly similar to traditional meringues but completely egg-free.
Lemon Peppermint Fusion
Create an unexpected flavor combination by adding 1 teaspoon of lemon zest along with your peppermint extract. The bright citrus notes complement the cool peppermint in a refreshing way that cuts through the sweetness. This variation works particularly well when serving meringues alongside rich holiday desserts.
Peppermint Meringue Kisses
Pipe smaller, bite-sized meringues for a more versatile treat. These tiny kisses cook faster (reduce baking time by about 10 minutes) and make perfect additions to holiday cookie platters or coffee accompaniments. Their smaller size also makes them ideal for gifting in decorative bags or jars.
Swirled Meringue Pops
Insert lollipop sticks into larger piped meringues before baking to create charming meringue pops. For added visual appeal, use both red and green food coloring stripes in your piping bag. Once baked and cooled, these whimsical treats can be wrapped in cellophane and tied with ribbons for delightful holiday gifts or party favors.
Peppermint Meringue Parfait Layers
Crush some of your peppermint meringues into different-sized pieces and layer them in clear glasses with chocolate pudding, whipped cream, and crushed candy canes. This deconstructed approach transforms the original recipe into an impressive layered dessert that showcases various textures while maintaining the beloved peppermint flavor profile.
The Perfect Holiday Gift
These peppermint meringues make stunning homemade presents that friends and family will truly appreciate during the holiday season. Their festive appearance and delicious flavor demonstrate thoughtfulness that store-bought gifts simply cannot match.
Creating gift packages with your meringues requires minimal effort but delivers maximum impact. Start by selecting clear cellophane bags or small holiday tins to showcase the beautiful red and white swirls. Layer 6-8 meringues carefully to prevent breakage while creating an attractive display. Secure bags with colorful ribbon or twine and attach a handwritten tag noting the flavor and any allergen information.
For an elevated presentation, consider creating tiered cookie boxes with peppermint meringues as the star attraction. Pair them with complementary treats like chocolate truffles or shortbread cookies for a varied gift basket. Recipients will appreciate the homemade touch and the fact that these meringues stay fresh for up to two weeks when properly stored.
Teachers, neighbors, coworkers and hosts will be delighted by these lightweight yet flavorful treats. The meringues travel exceptionally well without crushing or crumbling like traditional cookies might. Their gluten-free status makes them appropriate gifts for many people with dietary restrictions.
Planning ahead allows you to prepare these gifts well before the holiday rush. Make a large batch during a free weekend and store them properly until needed. This approach saves precious time during the busiest season of the year while still allowing you to share homemade treats with everyone on your list.
Conclusion
These peppermint meringues truly capture the magic of holiday baking with their festive appearance and delightful texture. You’ll find them remarkably versatile whether you’re hosting a gathering serving hot chocolate or creating thoughtful homemade gifts.
The beauty of this recipe lies in its simplicity. With just a handful of ingredients and some basic techniques you can create something truly spectacular that stands out on any dessert table.
Don’t be afraid to experiment with the variations to make this recipe your own. From chocolate-dipped versions to meringue sandwiches the possibilities are endless.
Master these light crispy-yet-soft treats and you’ll have a signature holiday dessert that friends and family will request year after year. Happy baking!