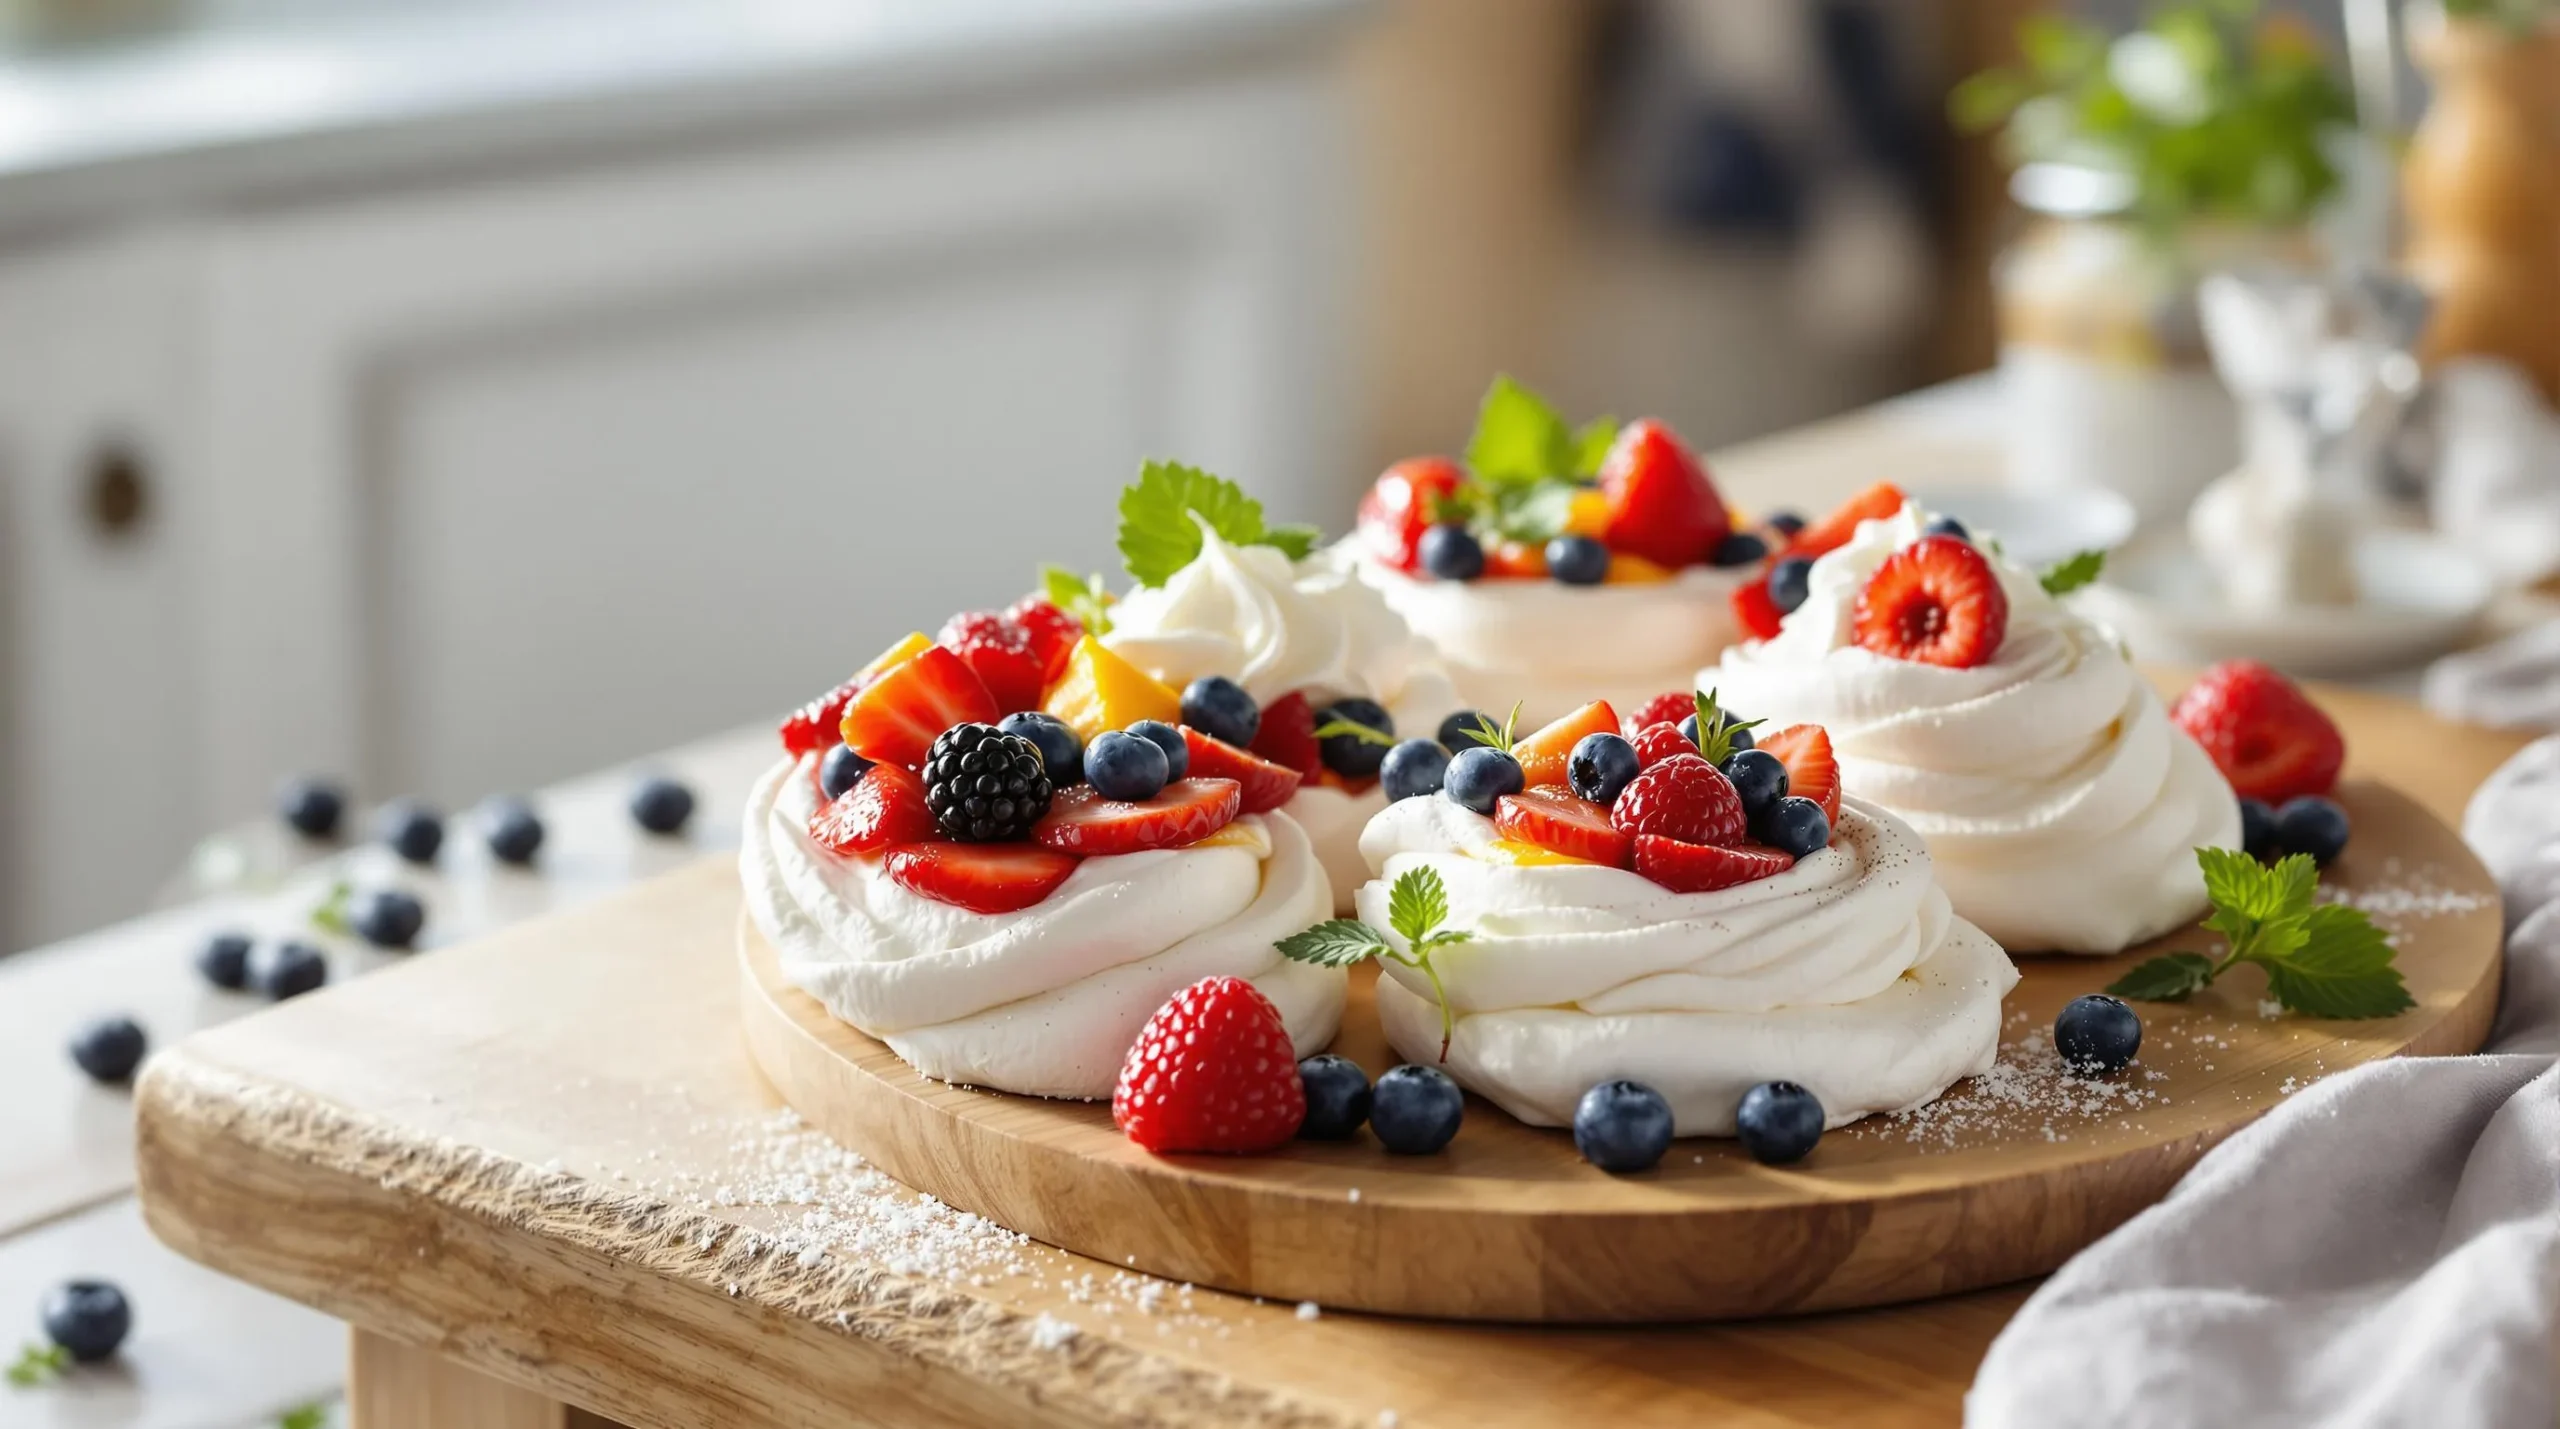
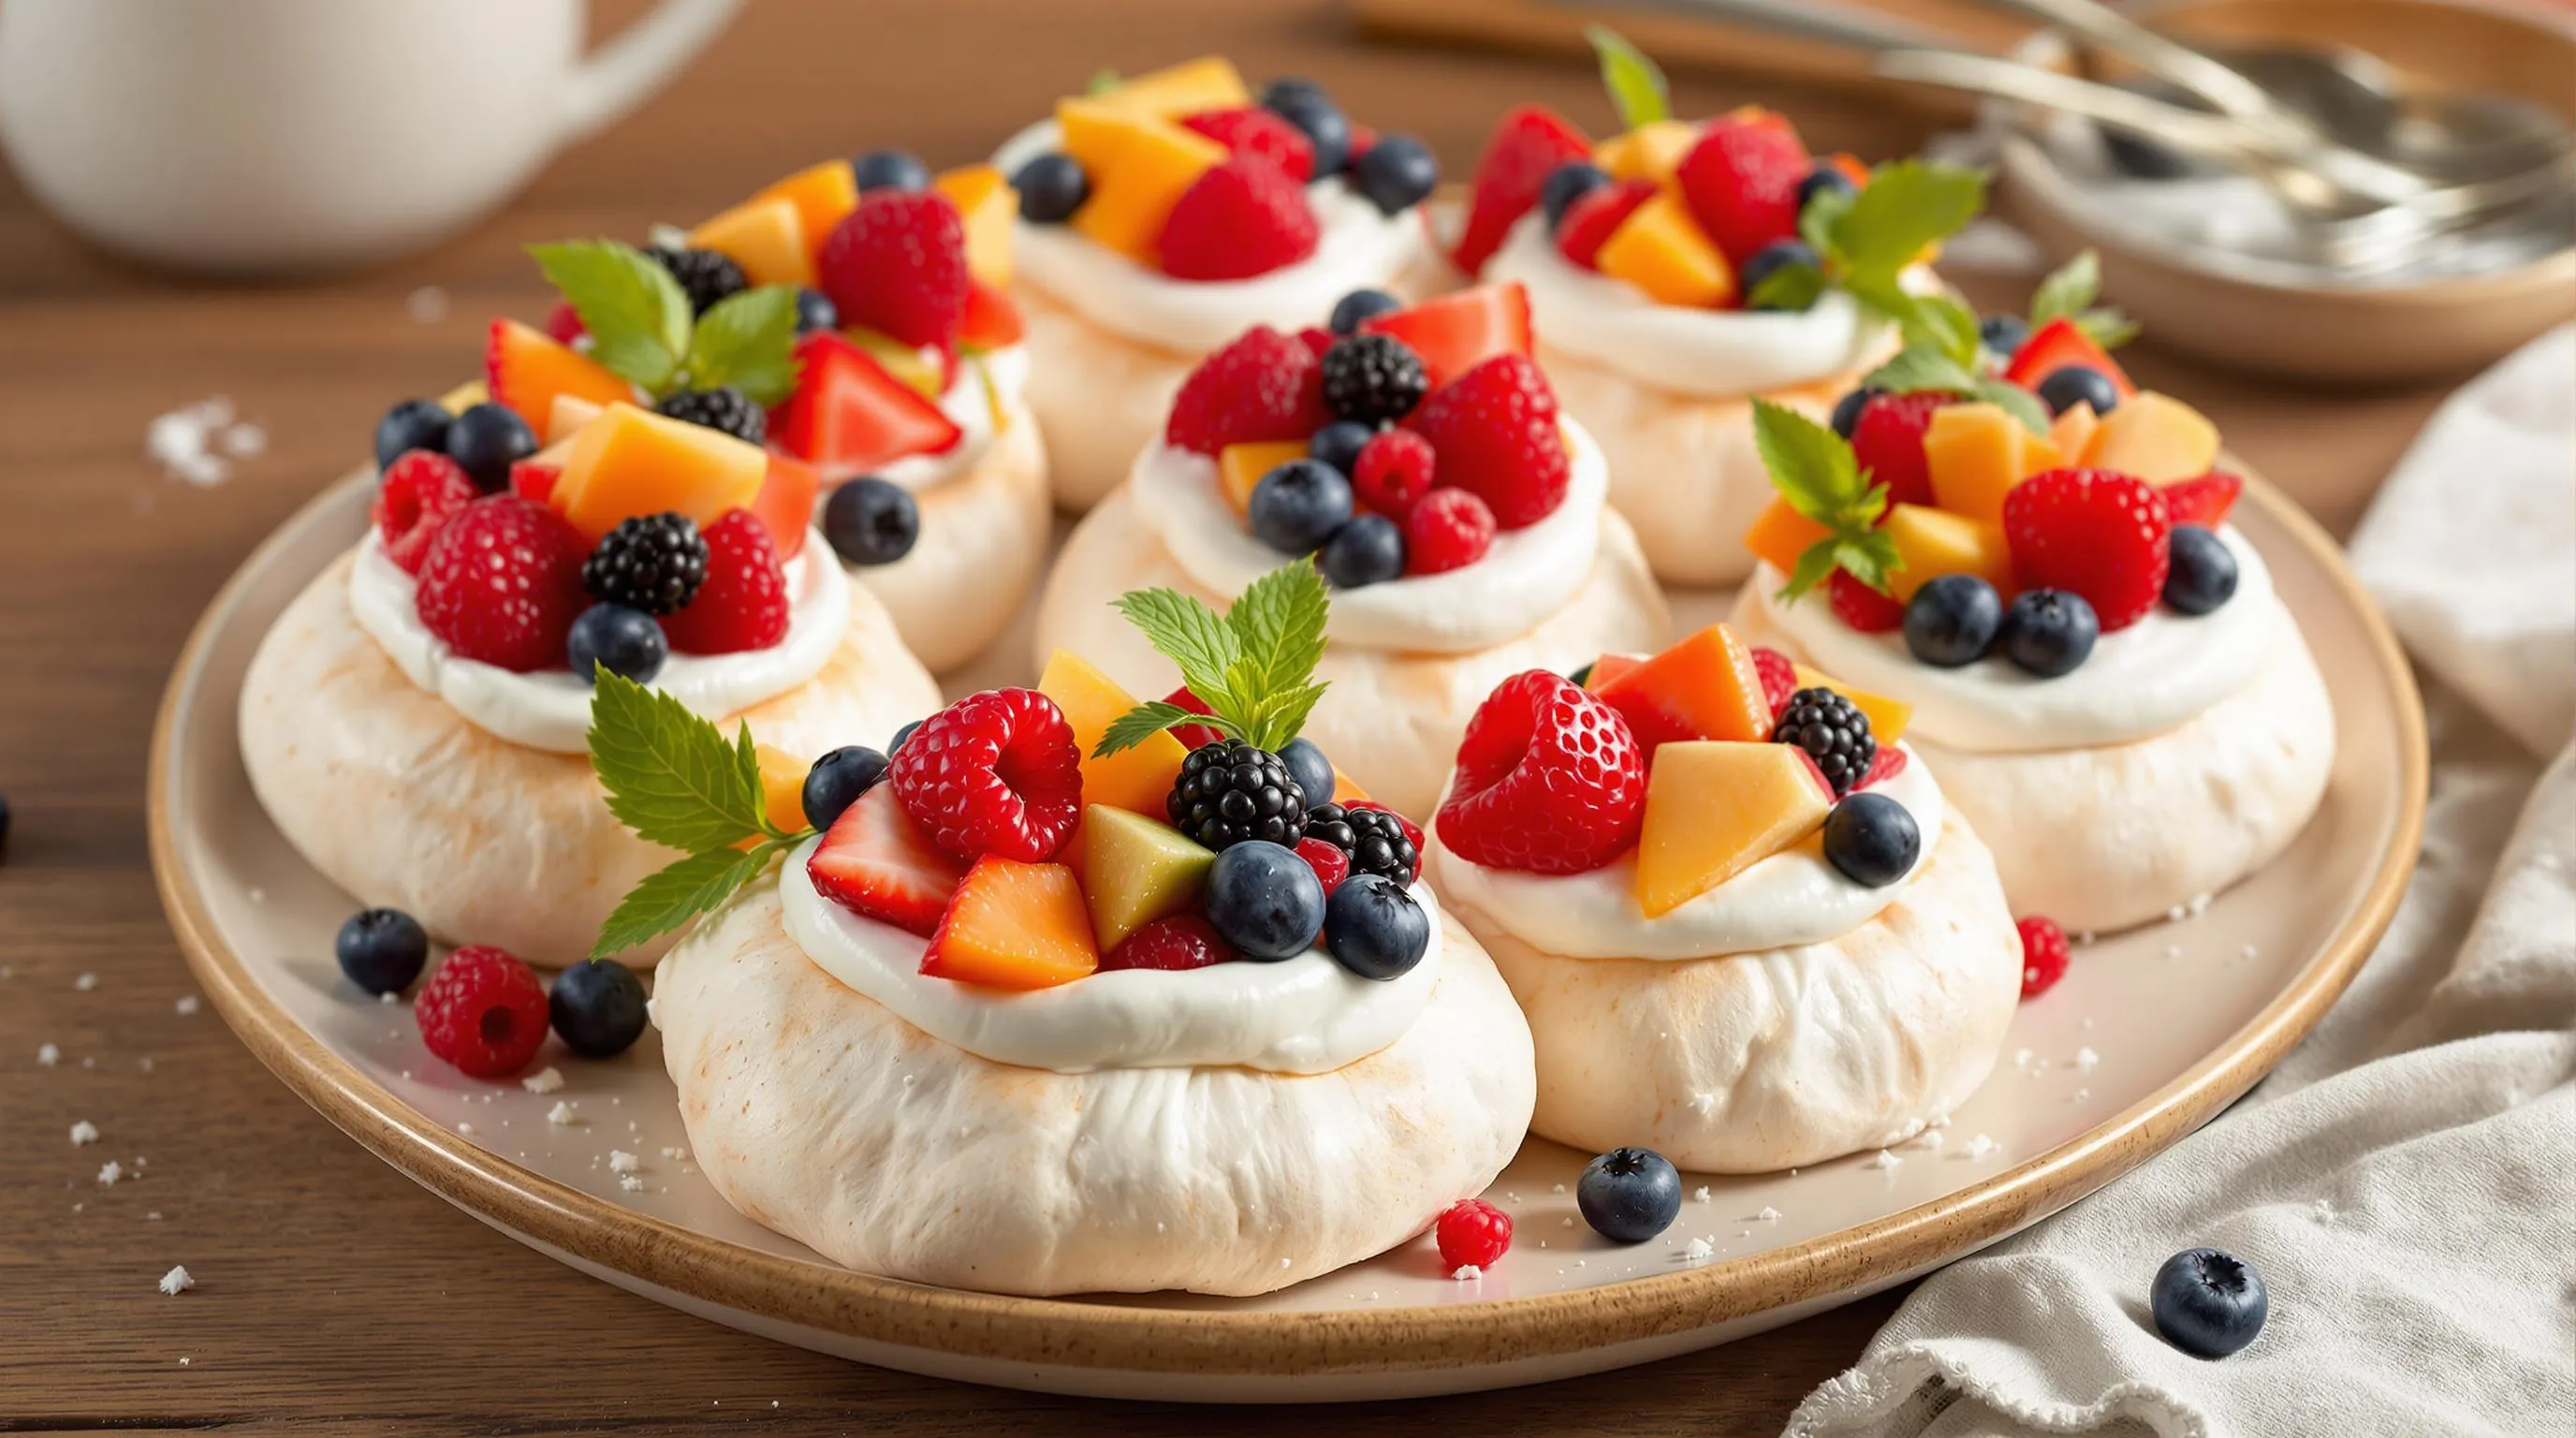
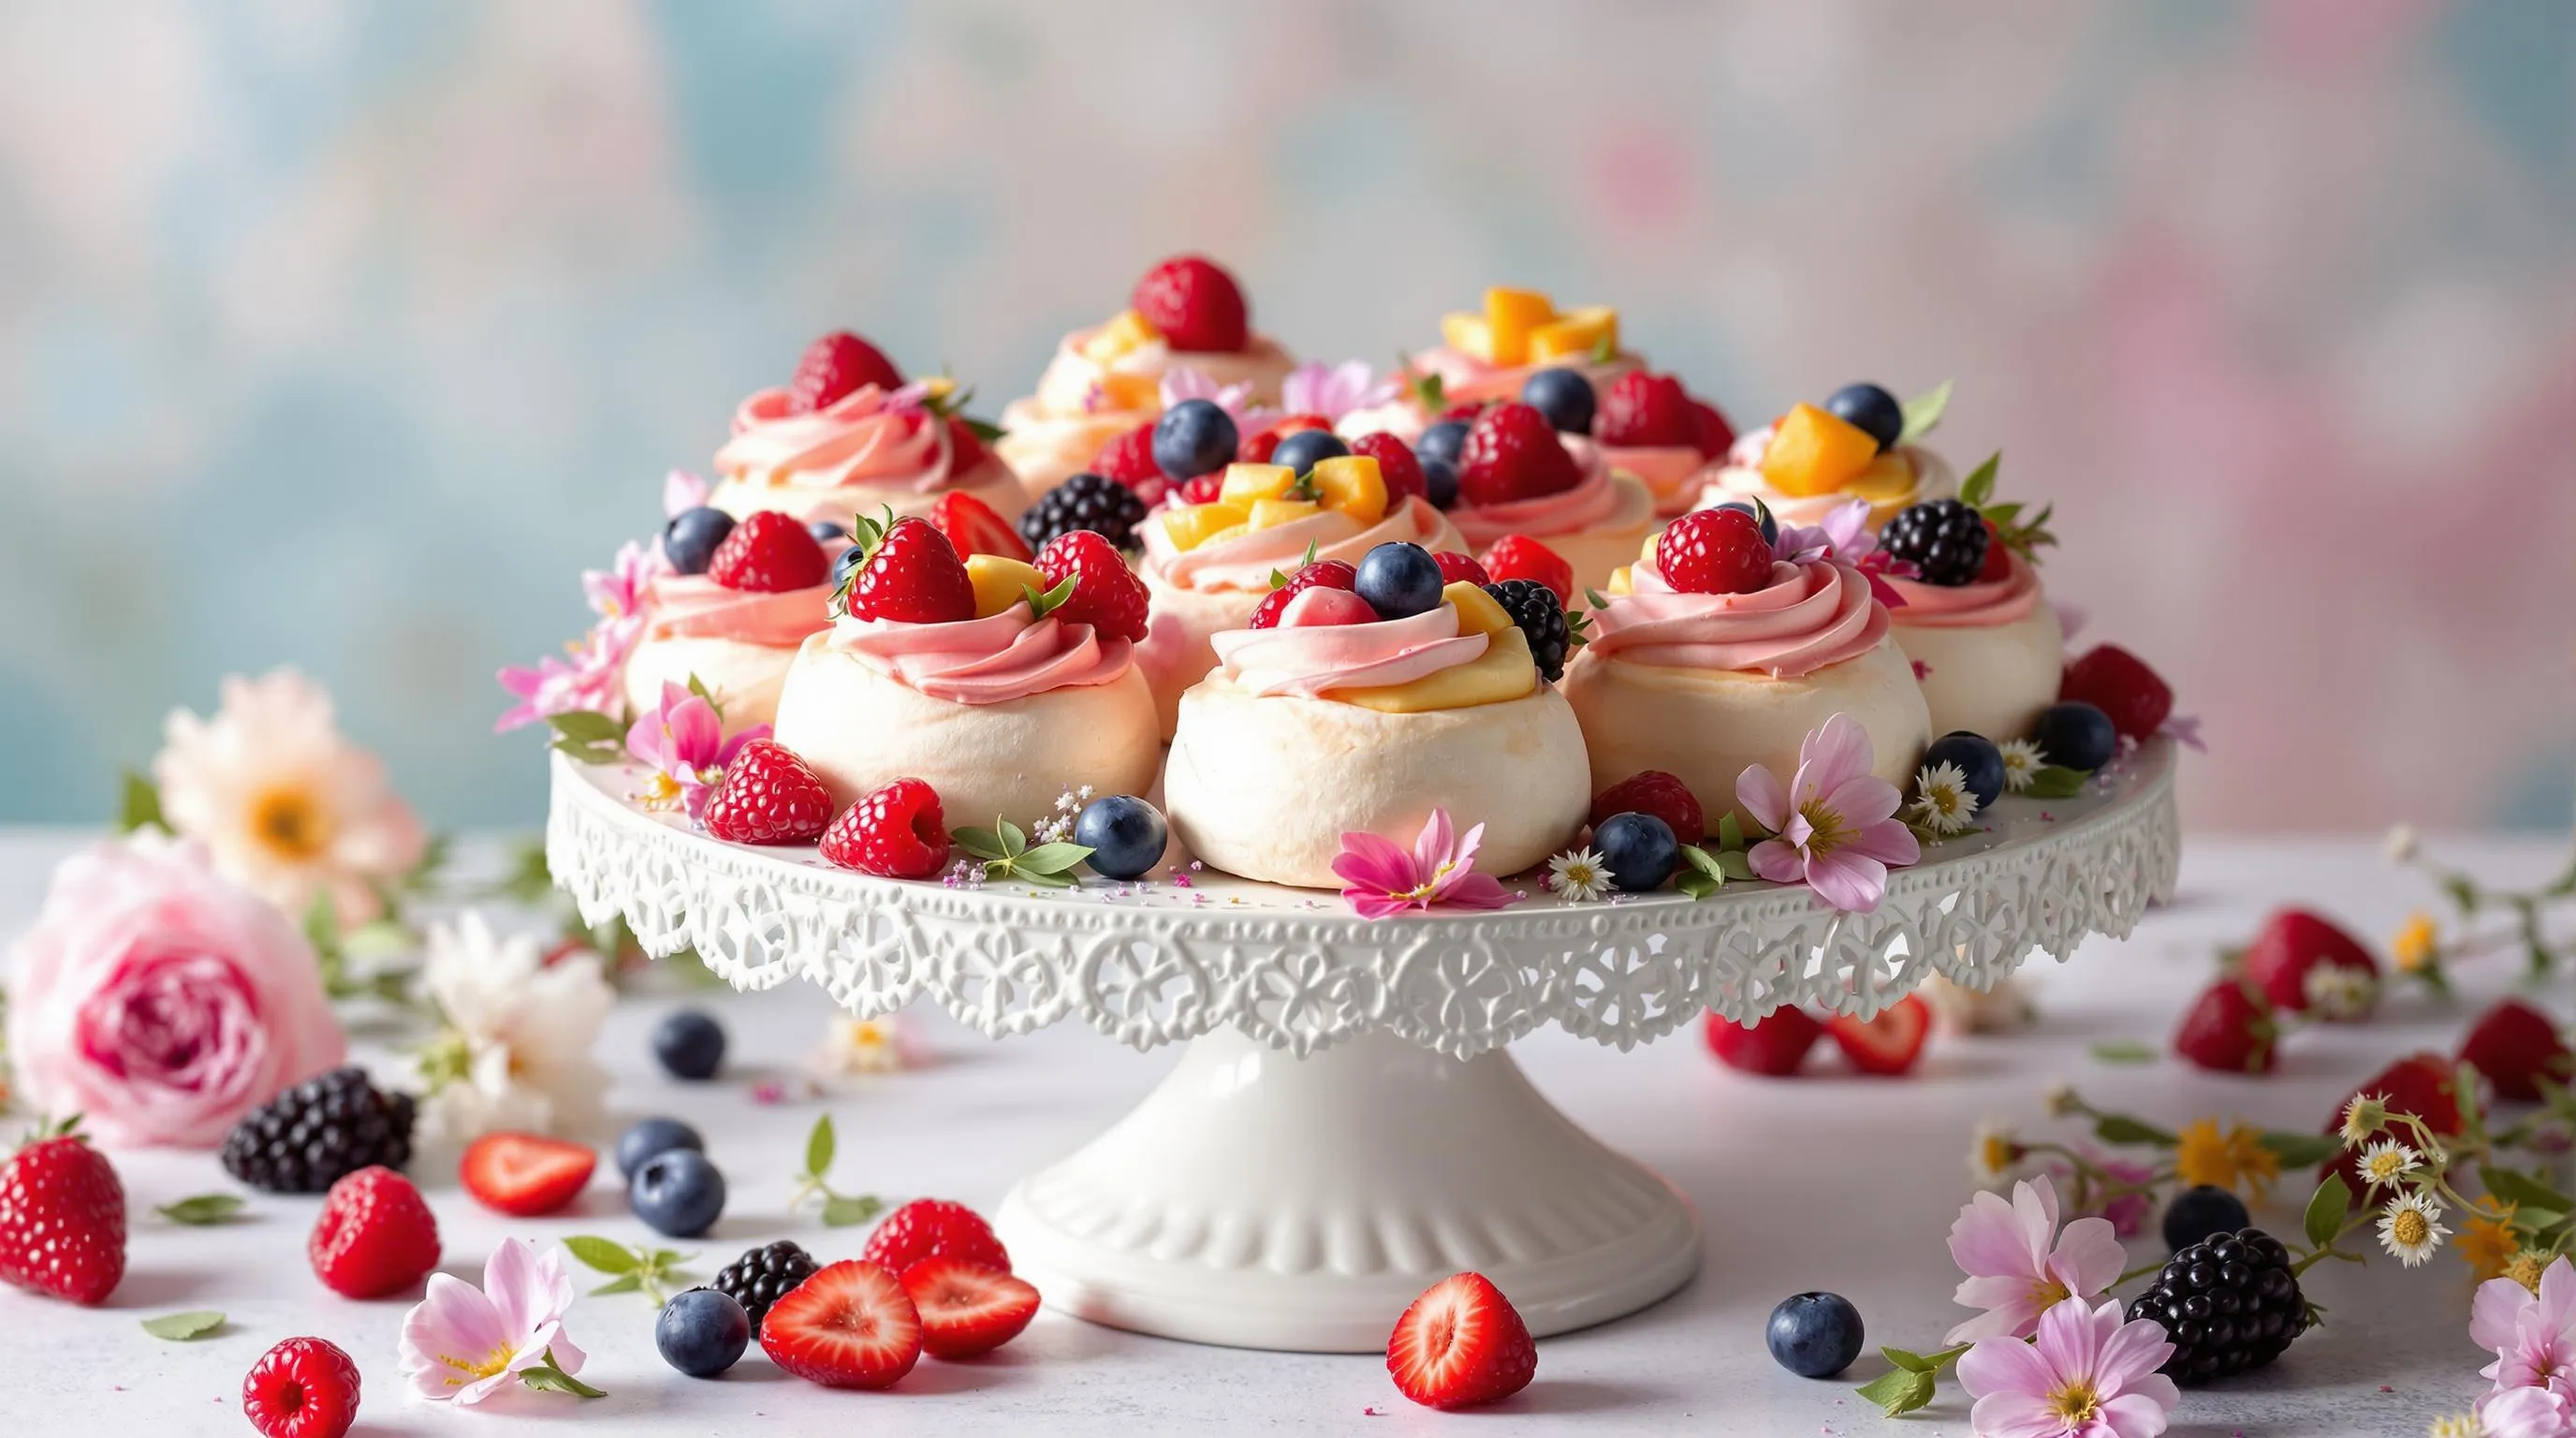
What Are Mini Pavlovas?
Mini pavlovas are individual-sized versions of the classic pavlova dessert featuring crisp meringue shells with soft marshmallow centers. These delicate treats serve as the perfect canvas for fresh toppings like whipped cream and seasonal fruits.
The traditional pavlova originated in Australia and New Zealand during the 1920s to honor Russian ballerina Anna Pavlova during her tour. While the full-sized version creates a stunning centerpiece dessert, these miniature versions offer several advantages for entertaining.
Each mini pavlova provides a personal dessert experience with the ideal ratio of meringue to toppings. Their smaller size creates a more consistent texture throughout with that signature contrast between the crisp exterior and chewy interior that pavlova enthusiasts crave.
You’ll find these bite-sized delights particularly convenient for serving at parties since they eliminate the cutting and potential collapse issues that often occur with full-sized pavlovas. Their versatility allows for creative presentation and customization with various toppings to suit different preferences.
The base ingredients remain simple: egg whites, sugar, cornstarch, and vinegar. This combination creates the chemical reaction needed for that perfect meringue texture. The cornstarch stabilizes the egg whites while the vinegar helps achieve that distinctive crisp shell with the soft center.
Making mini pavlovas requires patience but minimal active preparation time. Most of the process involves careful mixing and extended baking at low temperatures to achieve that ideal texture contrast without burning.
Why You’ll Love This Mini Pavlova Recipe
These mini pavlovas will quickly become your go-to dessert for both special occasions and everyday treats. Their versatility allows you to customize each serving with different toppings based on seasonal fruits or personal preferences.
You’ll appreciate how these elegant desserts create a stunning presentation even though requiring just a handful of basic ingredients. The dramatic contrast between the crisp white exterior and fluffy interior creates a perfect canvas for vibrant fruits and smooth cream.
These bite-sized treats offer a convenient alternative to traditional large pavlovas which can be tricky to slice and serve. Each guest receives their own perfect portion with the ideal balance of textures and flavors.
Your dietary concerns are addressed with this naturally gluten-free dessert option that satisfies sweet cravings without feeling heavy. The airy texture makes these mini pavlovas feel indulgent yet light enough to enjoy after any meal.
Busy hosts will value how these can be prepared in advance with the meringue shells stored for several days in an airtight container. Simply top with fresh cream and fruit just before serving for a stress-free entertaining experience.
You’ll find this recipe forgiving for beginners while still impressive enough for experienced bakers. The step-by-step instructions eliminate guesswork and ensure consistent results even if this is your first attempt at meringue.
Ingredients You’ll Need
Creating these delicate mini pavlovas requires just a handful of simple ingredients. Here’s everything you’ll need to make both the meringue shells and the luscious toppings.
For The Meringue
- 4 large egg whites (at room temperature)
- 1 cup (200g) granulated sugar
- 1 teaspoon cornstarch
- 1 teaspoon white vinegar or lemon juice
- ½ teaspoon pure vanilla extract
- Pinch of salt
For The Topping
- 1 cup (240ml) heavy whipping cream
- 2 tablespoons powdered sugar
- ½ teaspoon vanilla extract
- 2 cups fresh fruit (berries, kiwi, passion fruit, or mango work beautifully)
- 2 tablespoons honey or maple syrup (optional)
- Fresh mint leaves for garnish (optional)
- Zest of 1 lemon or lime (optional)
You can customize your fruit selection based on seasonal availability. Summer berries like strawberries, blueberries, and raspberries offer vibrant color and natural sweetness. Tropical fruits such as passion fruit, mango, and pineapple provide an exotic twist that complements the sweet meringue perfectly. The small amount of powdered sugar in the whipped cream balances the sweetness without overwhelming the delicate meringue shells.
Equipment Required
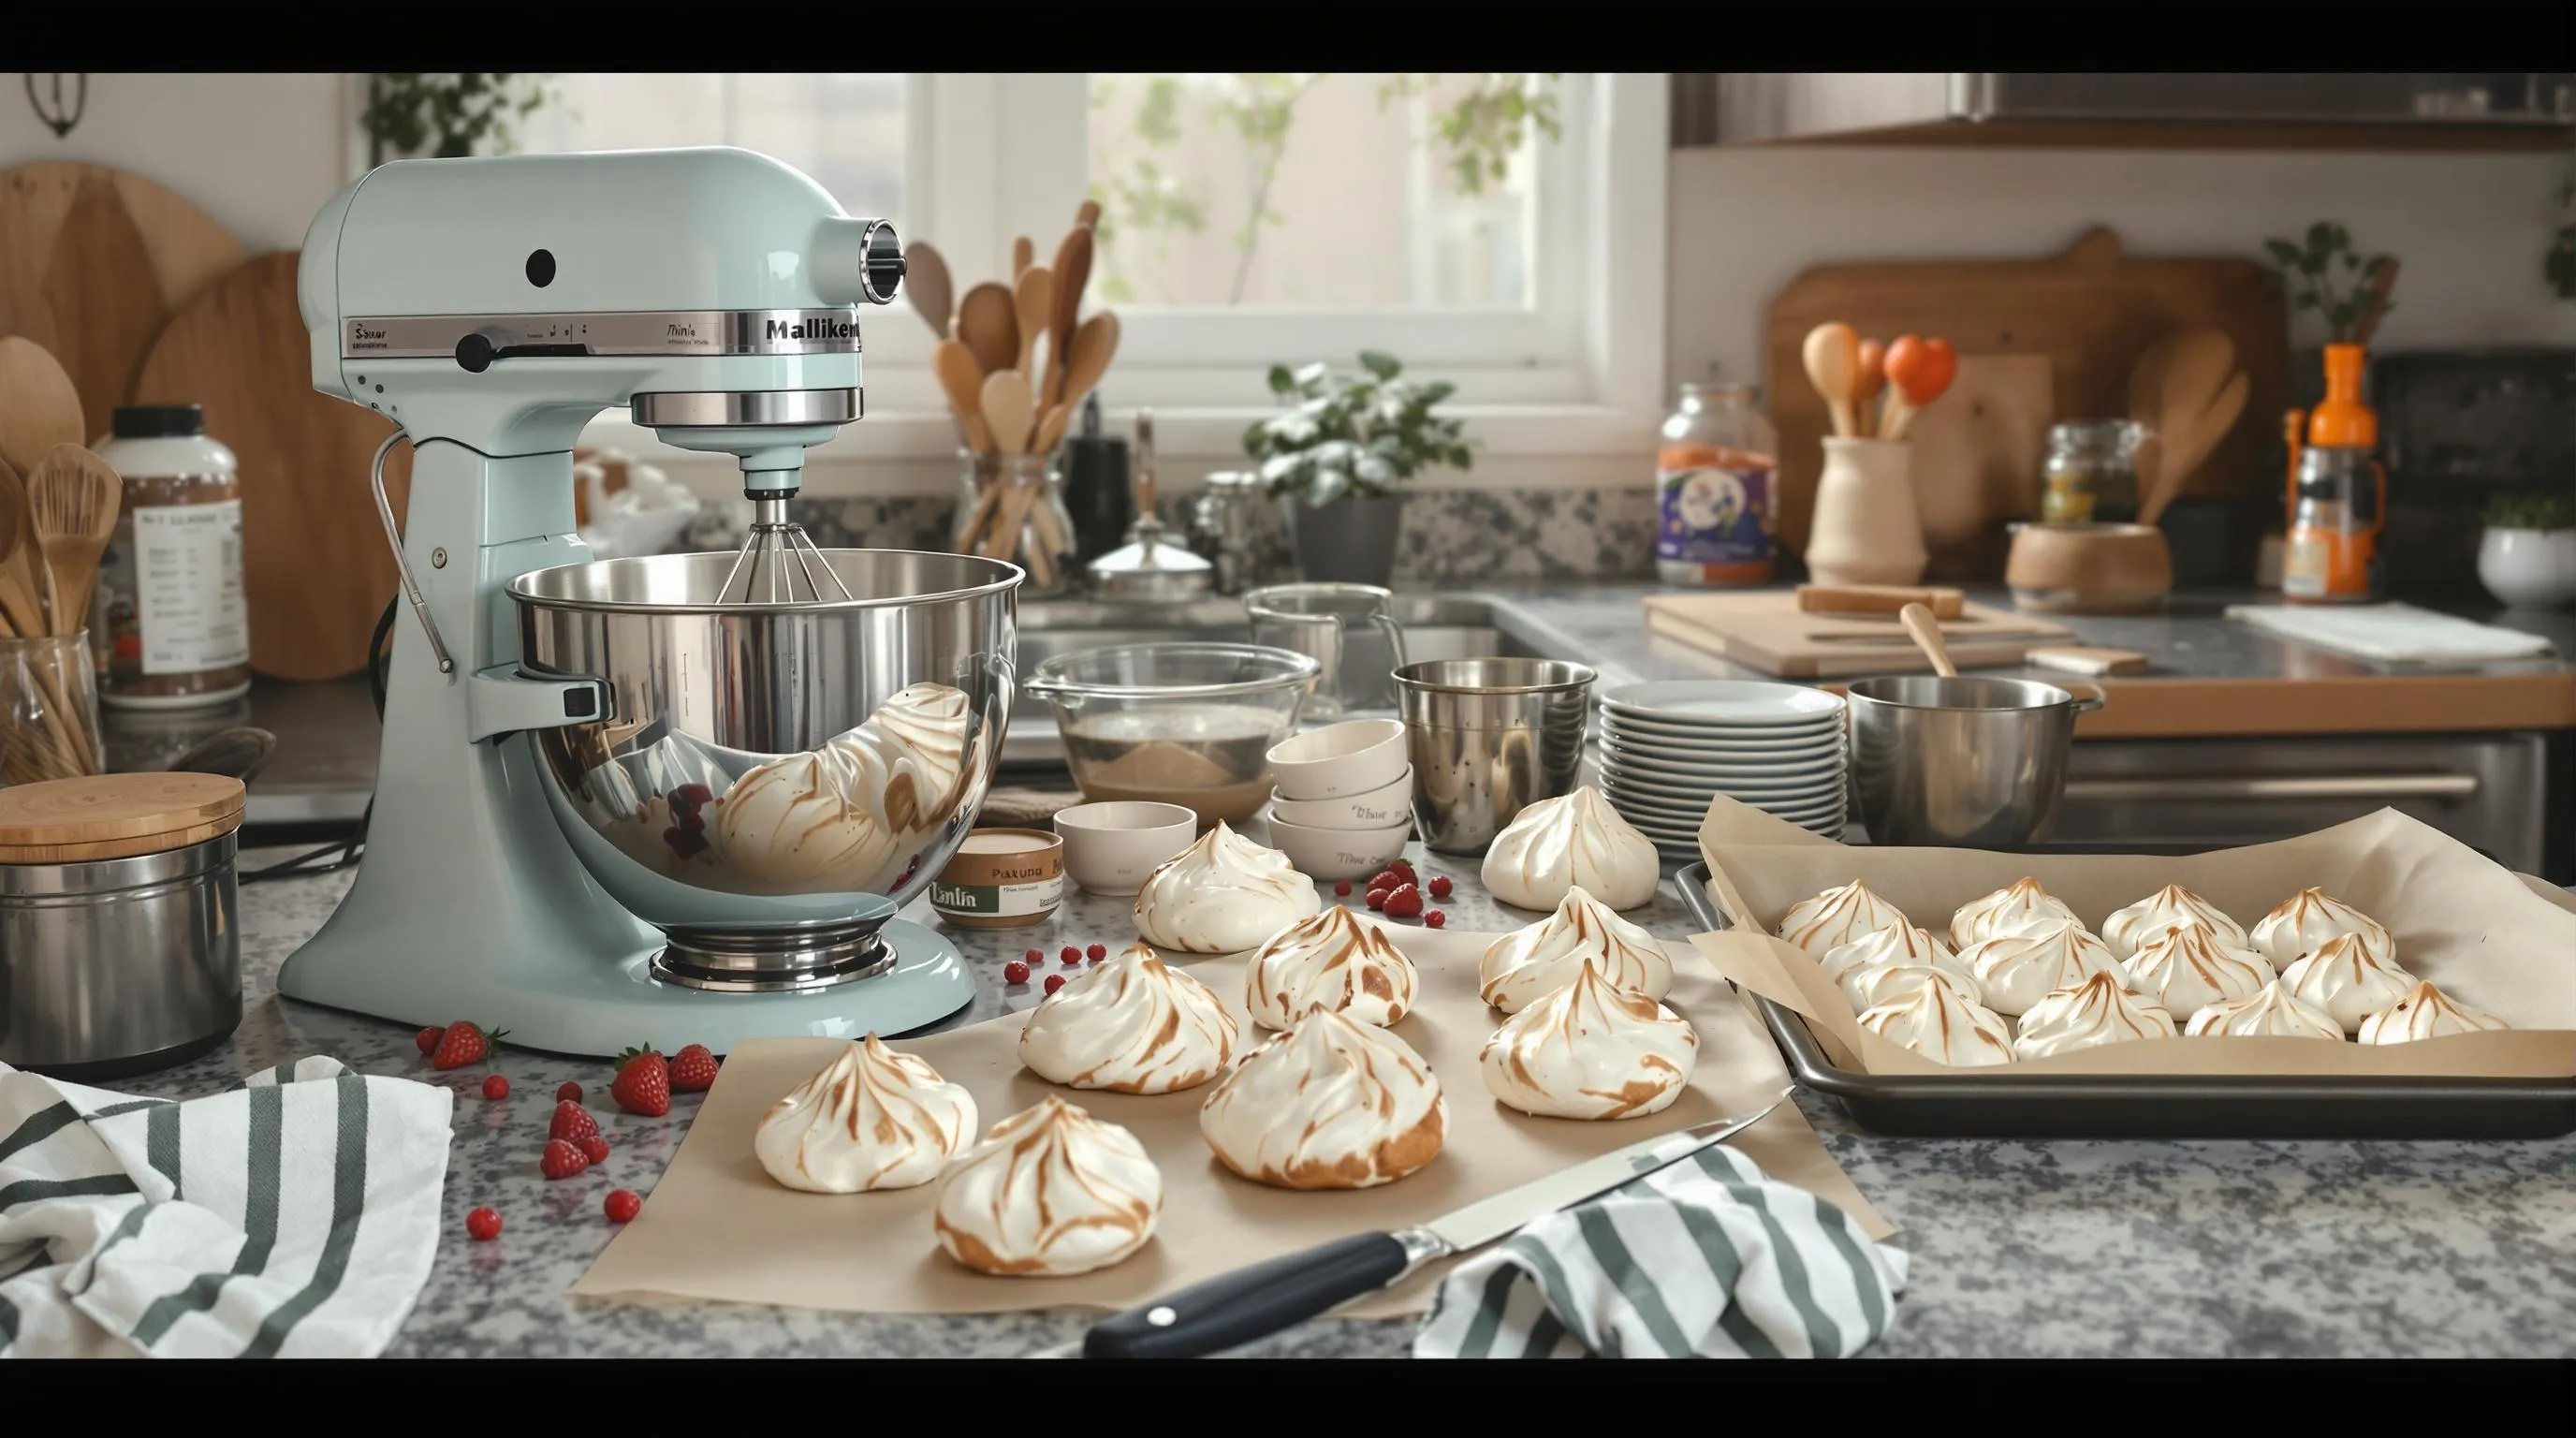
To create perfect mini pavlovas, you’ll need several key pieces of equipment that ensure success with these delicate meringue-based treats:
- Stand mixer or electric hand mixer – Essential for whipping egg whites to stiff peaks; manual whisking is possible but extremely laborious
- Large mixing bowl – Preferably metal or glass for better stability when whipping
- Measuring cups and spoons – For precise ingredient measurements
- Baking sheets – Two standard-sized sheets work best for this recipe
- Parchment paper – Creates a non-stick surface that helps pavlovas release easily
- Piping bag with large round tip – Optional but helpful for creating uniform shapes
- Rubber spatula – For gently folding in ingredients without deflating the meringue
- Small bowl – For combining cornstarch and vinegar
- Kitchen scale – Optional but useful for perfectly portioned meringues
- Cooling rack – Allows air circulation for proper cooling
- Offset spatula or butter knife – For transferring delicate pavlovas after baking
The mixer is particularly crucial as achieving the right meringue consistency requires sustained whipping at high speed. Your baking sheets should be completely flat without warping to prevent uneven baking. Parchment paper works significantly better than aluminum foil or silicone mats for this particular dessert, as meringues tend to stick to other surfaces.
Your workspace should allow enough room to pipe or spoon multiple mini pavlovas onto the baking sheets with adequate spacing between each one. Having all equipment ready before beginning will streamline the process and help maintain the integrity of your whipped egg whites, which can begin to deflate if left waiting too long.
How To Make Mini Pavlovas
Creating these delicate meringue-based desserts requires attention to detail but follows a straightforward process. Follow these step-by-step instructions to achieve perfectly crisp exteriors with marshmallowy centers that will impress your guests.
Preparing The Meringue
Start with room temperature egg whites for maximum volume. Place your egg whites in a completely clean and dry mixing bowl—any trace of fat will prevent proper whipping. Begin beating the egg whites on medium speed until they form soft peaks that slightly bend at the tips. Gradually add granulated sugar one tablespoon at a time while continuing to beat the mixture. This slow addition ensures the sugar dissolves completely which prevents grittiness in your finished pavlovas. Keep beating until the meringue becomes glossy and forms stiff peaks that stand straight up when you lift the beater. Test the meringue by rubbing a small amount between your fingers—it should feel smooth without any sugar granules. Gently fold in cornstarch and vinegar using a rubber spatula with a light hand to maintain the air you’ve incorporated. The meringue should now appear thick glossy and hold its shape firmly.
Shaping The Mini Pavlovas
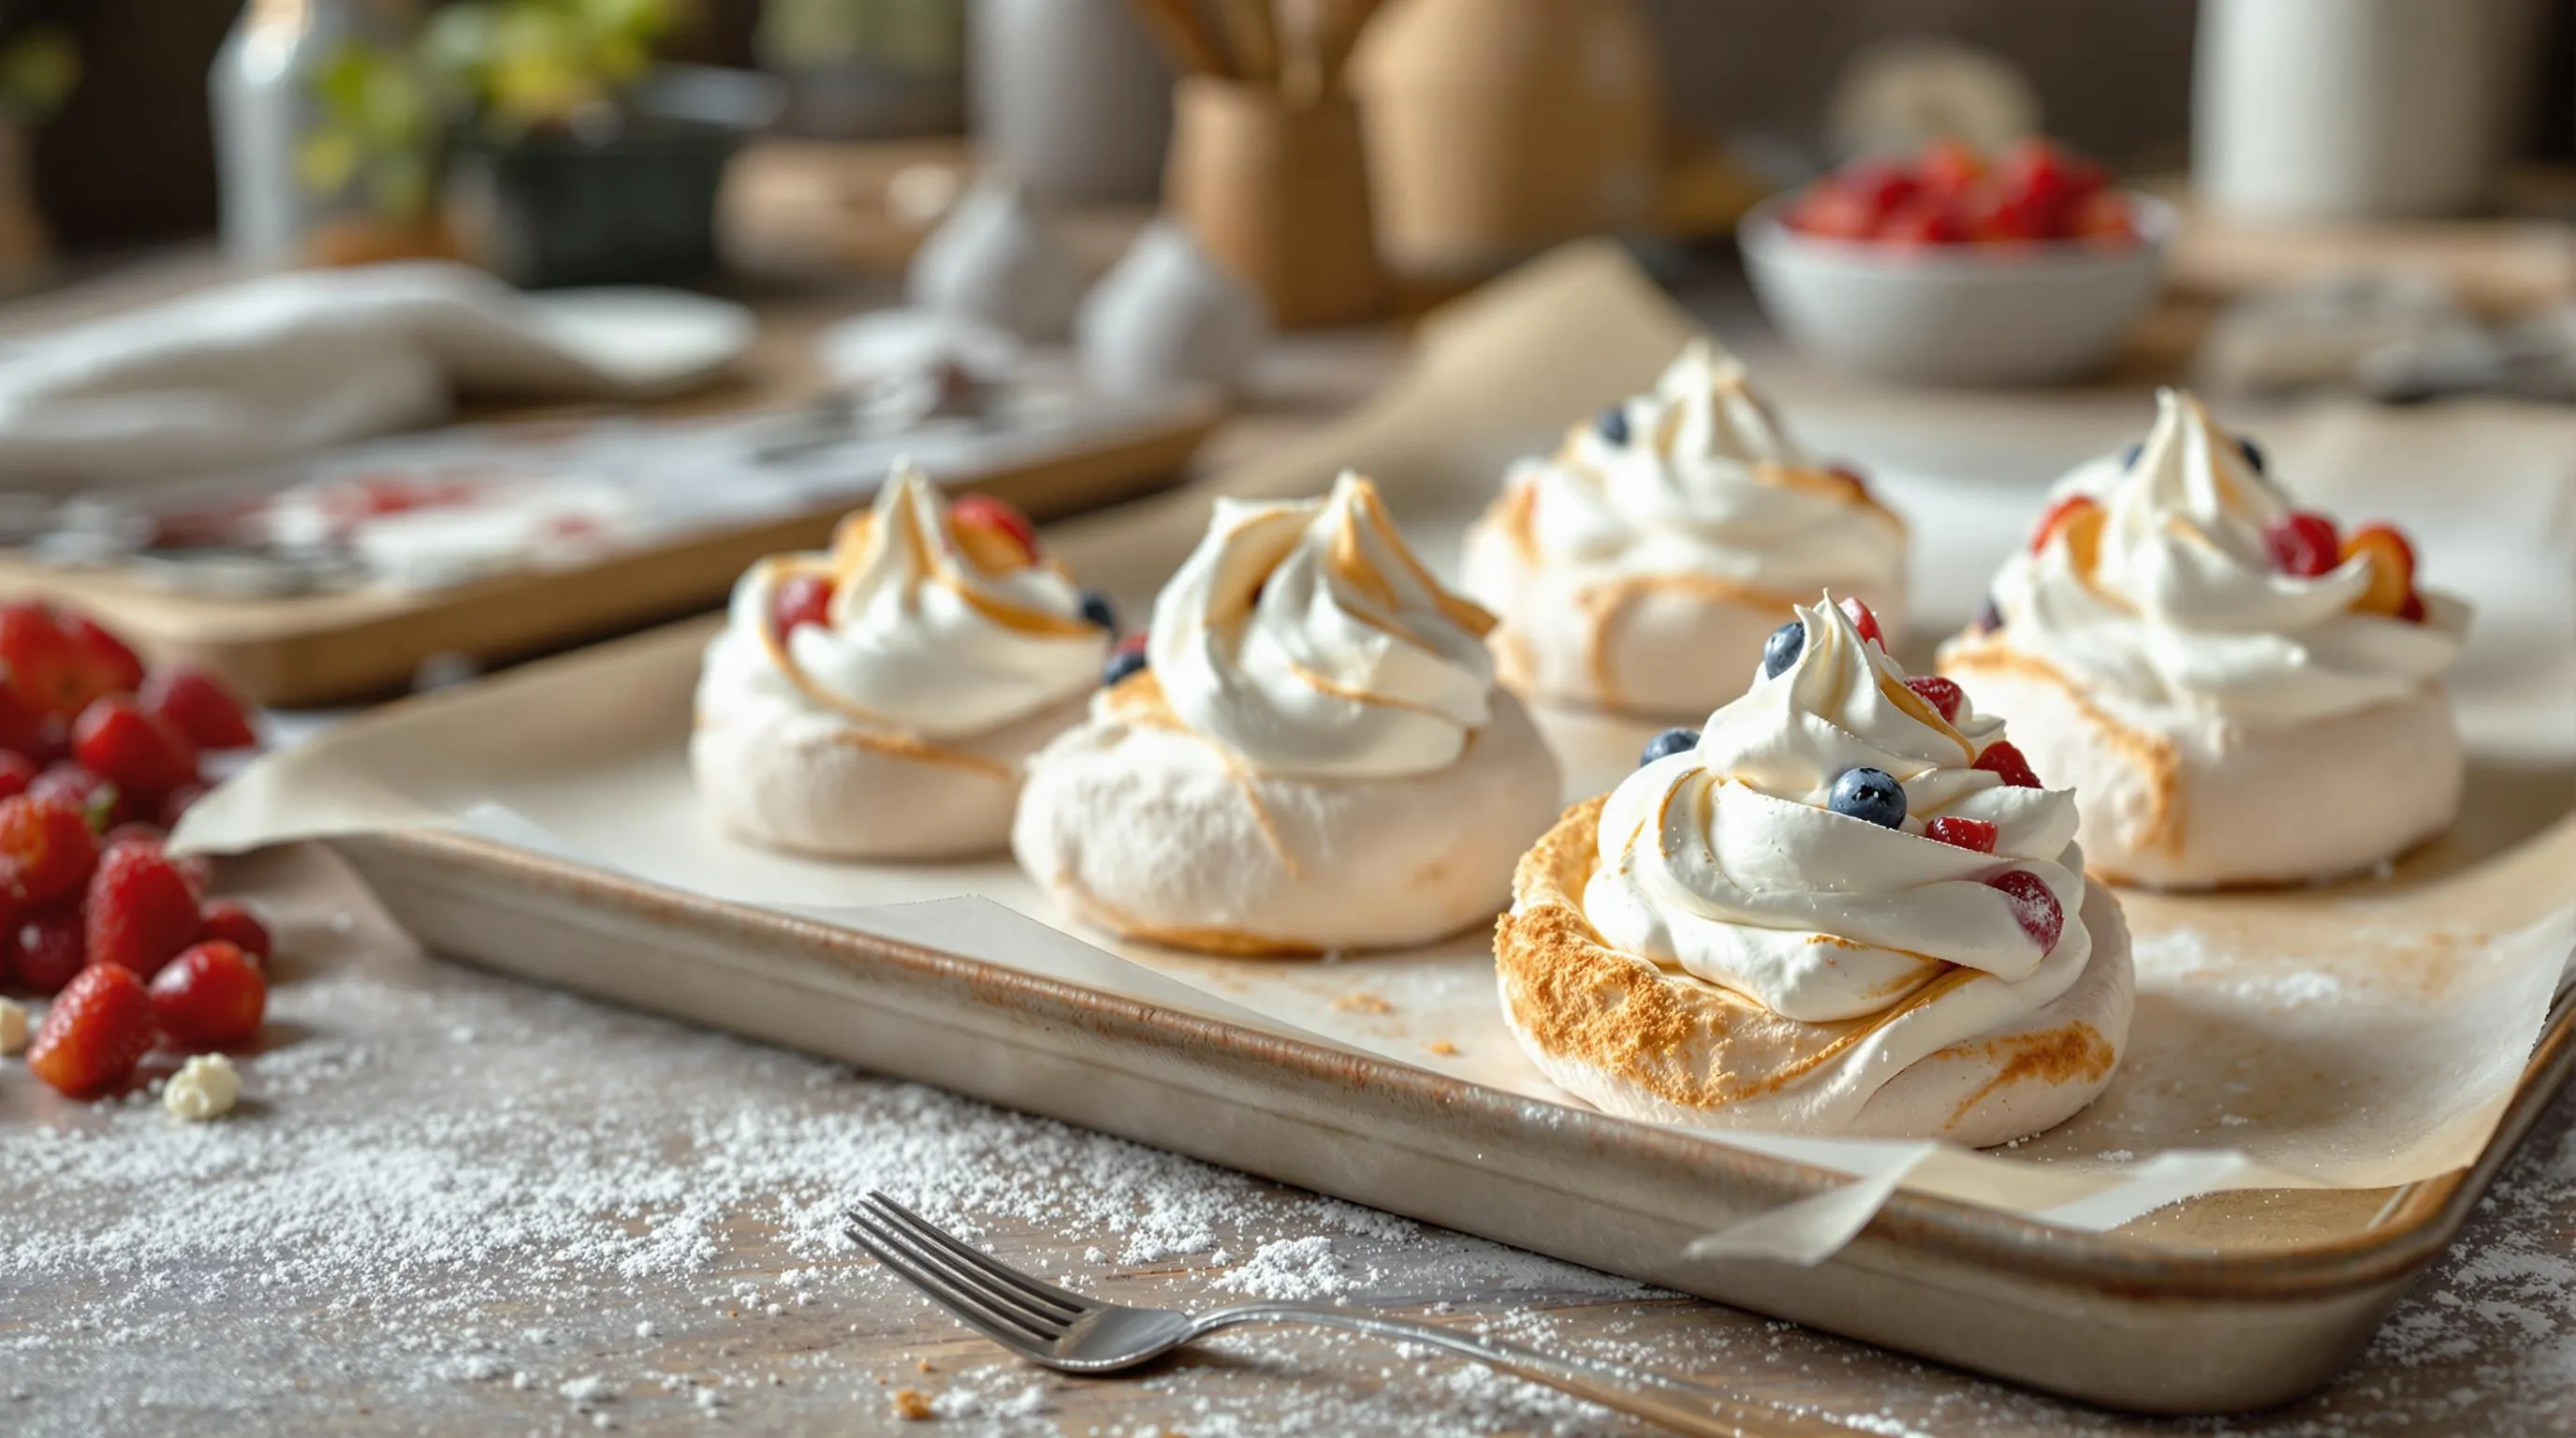
Line your baking sheets with parchment paper before transferring your meringue. You can secure the corners of the parchment with small dabs of meringue to prevent shifting during piping. Transfer the meringue to a piping bag fitted with a large round or star tip for the most professional-looking results. Pipe 3-4 inch circles onto the parchment paper leaving about 2 inches between each pavlova as they will expand slightly during baking. Create a slight depression in the center of each meringue using the back of a spoon this will form the “nest” for your toppings later. If you don’t have a piping bag simply use two spoons to scoop and shape the meringue into nests. Work relatively quickly as extended exposure to air can begin to deflate your carefully whipped meringue. For a rustic look create swirls and peaks on the edges which will become beautifully crisp during baking.
Baking Tips For Perfect Pavlovas
Preheat your oven to 225°F (110°C) before you begin shaping your pavlovas. The low temperature is crucial for properly drying out the meringue without browning. Place your shaped pavlovas in the middle rack of your oven and immediately reduce the temperature to 200°F (95°C) after placing them inside. Avoid opening the oven door during baking as temperature fluctuations can cause cracking. Bake the mini pavlovas for 60-75 minutes until they feel dry to the touch and can be easily lifted from the parchment. Once baked turn off the oven but leave the pavlovas inside with the door slightly ajar for at least 1 hour. This gradual cooling prevents the sudden temperature change that often leads to collapsed or cracked pavlovas. Store completely cooled pavlovas in an airtight container at room temperature for up to 3 days if you’re preparing them ahead of time. Top with freshly whipped cream and fruit only right before serving to prevent the meringue from becoming soggy.
Topping Your Mini Pavlovas
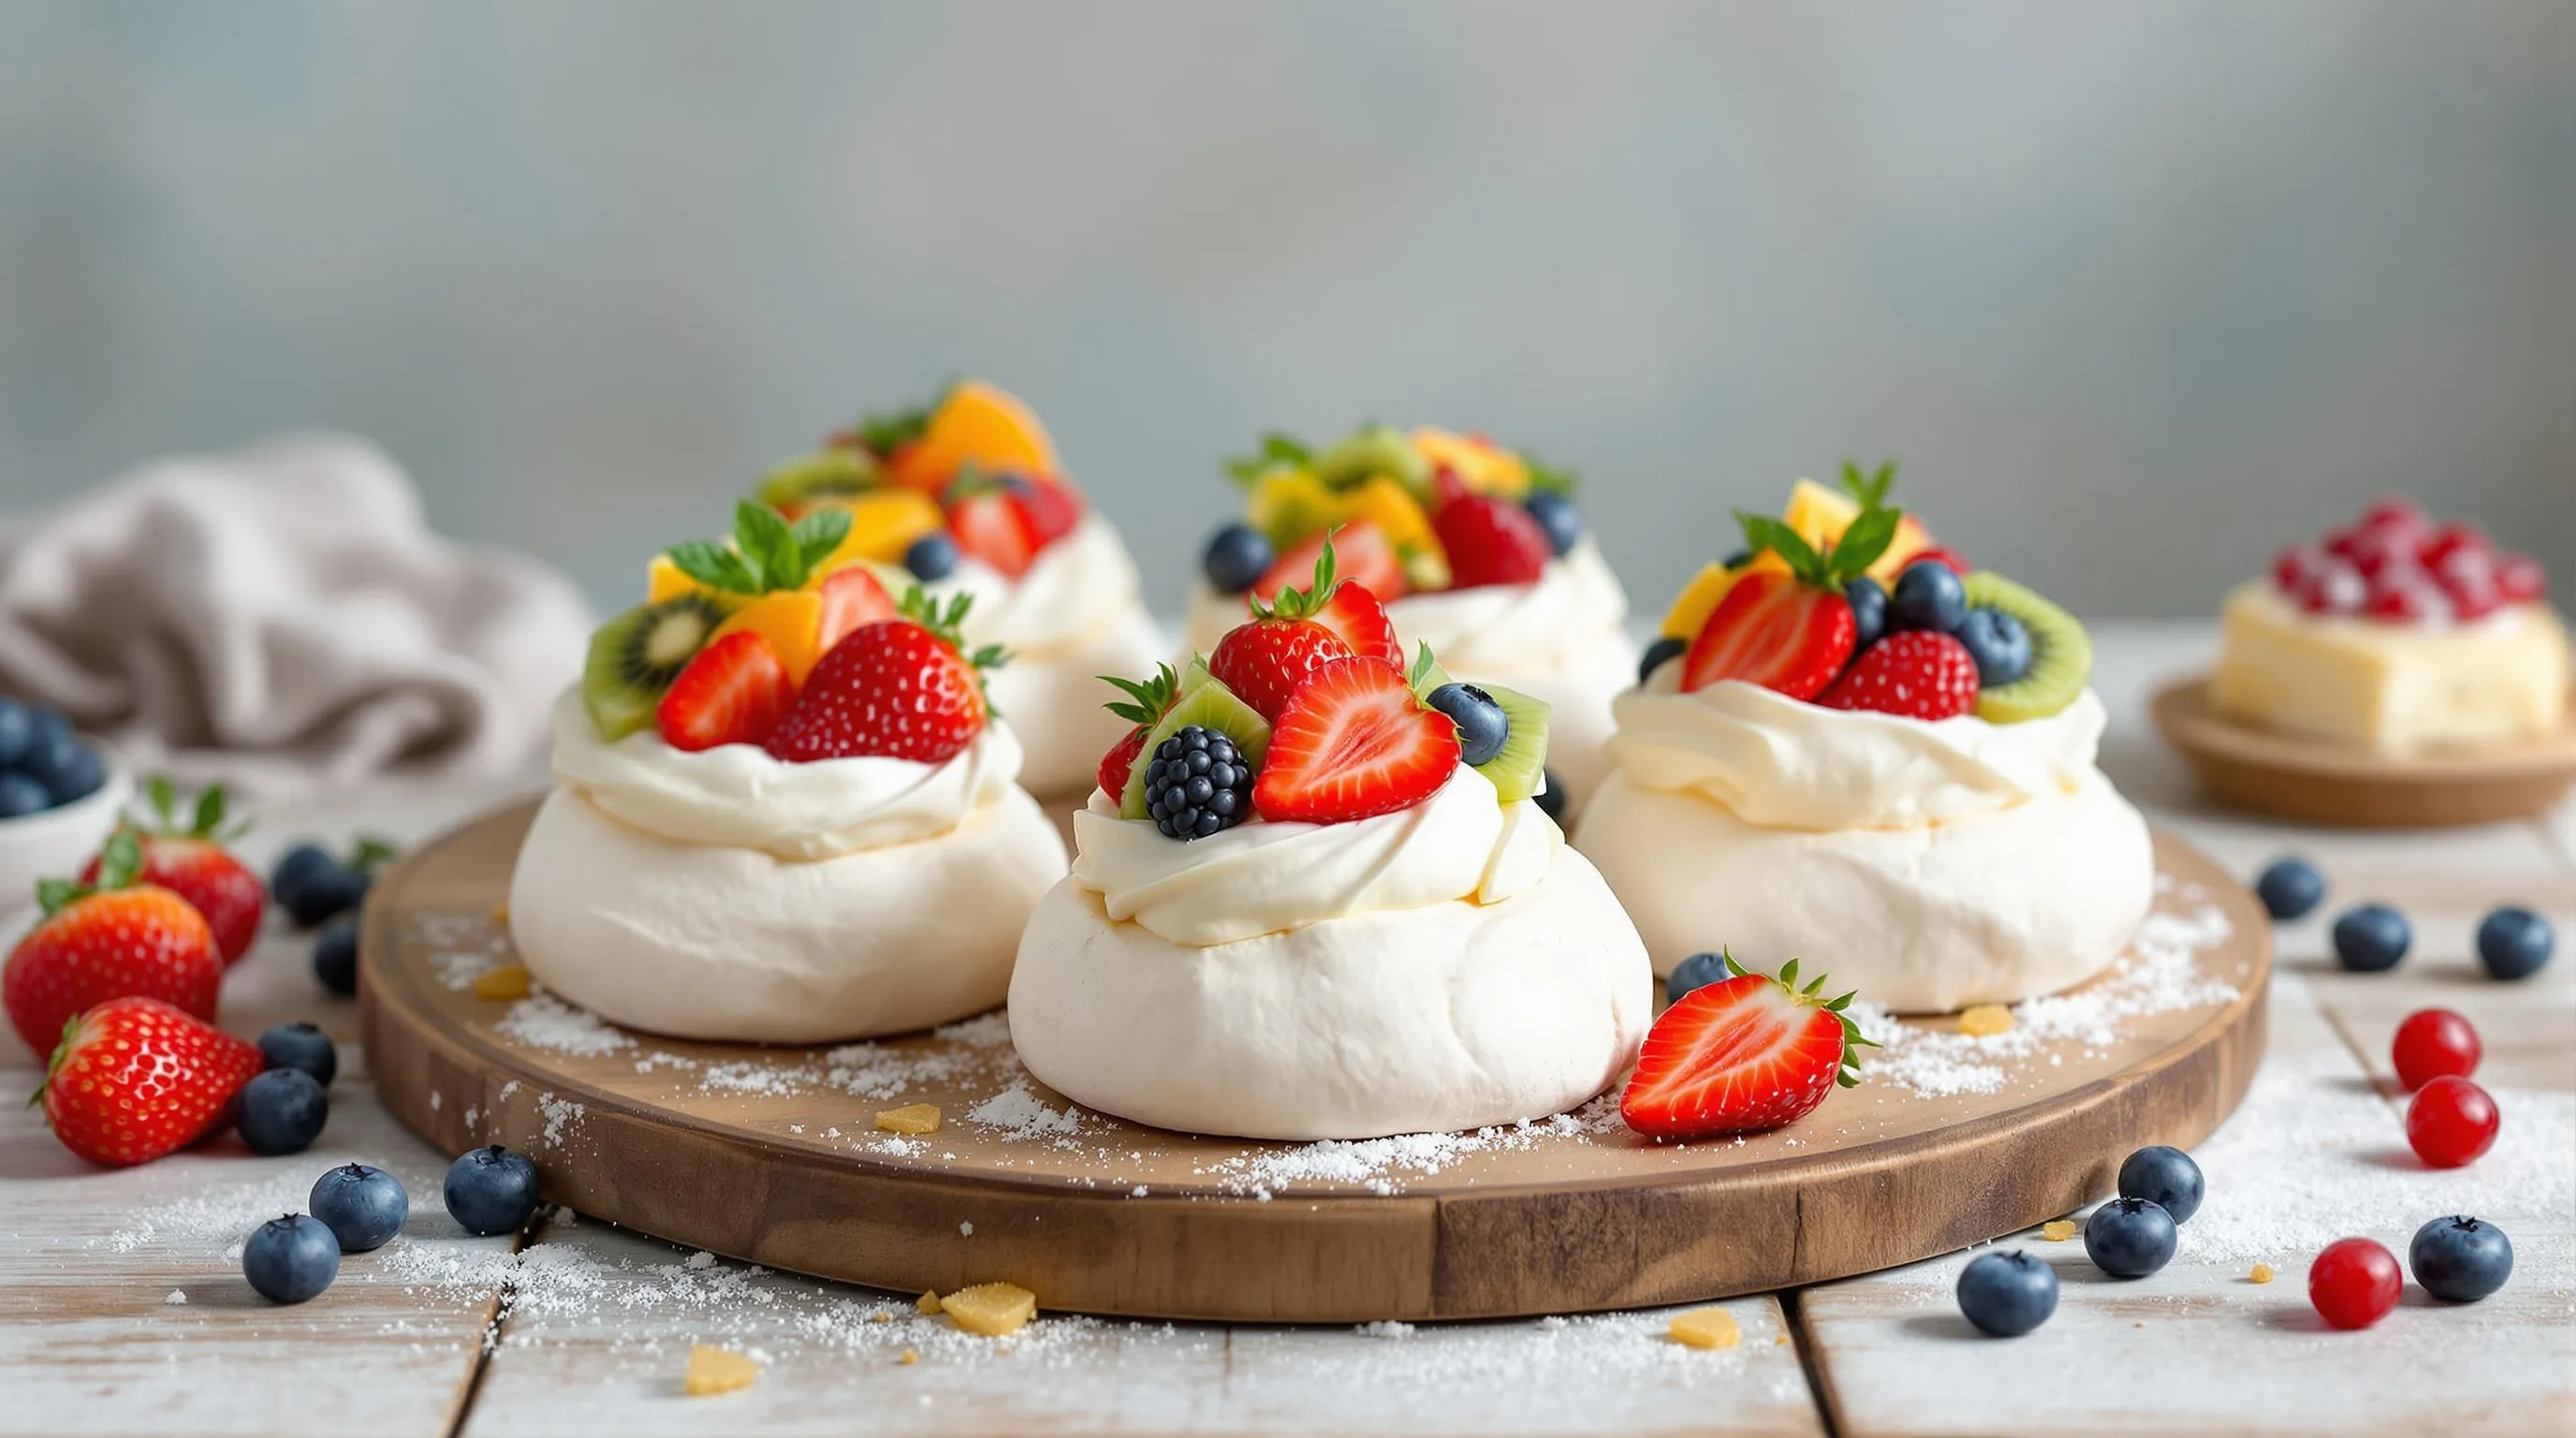
The perfect mini pavlova balances delicate meringue with luscious toppings that add moisture and flavor contrast. Your patience in creating the meringue shells deserves to be rewarded with equally thoughtful toppings that will transform these treats into showstopping desserts.
Classic Whipped Cream
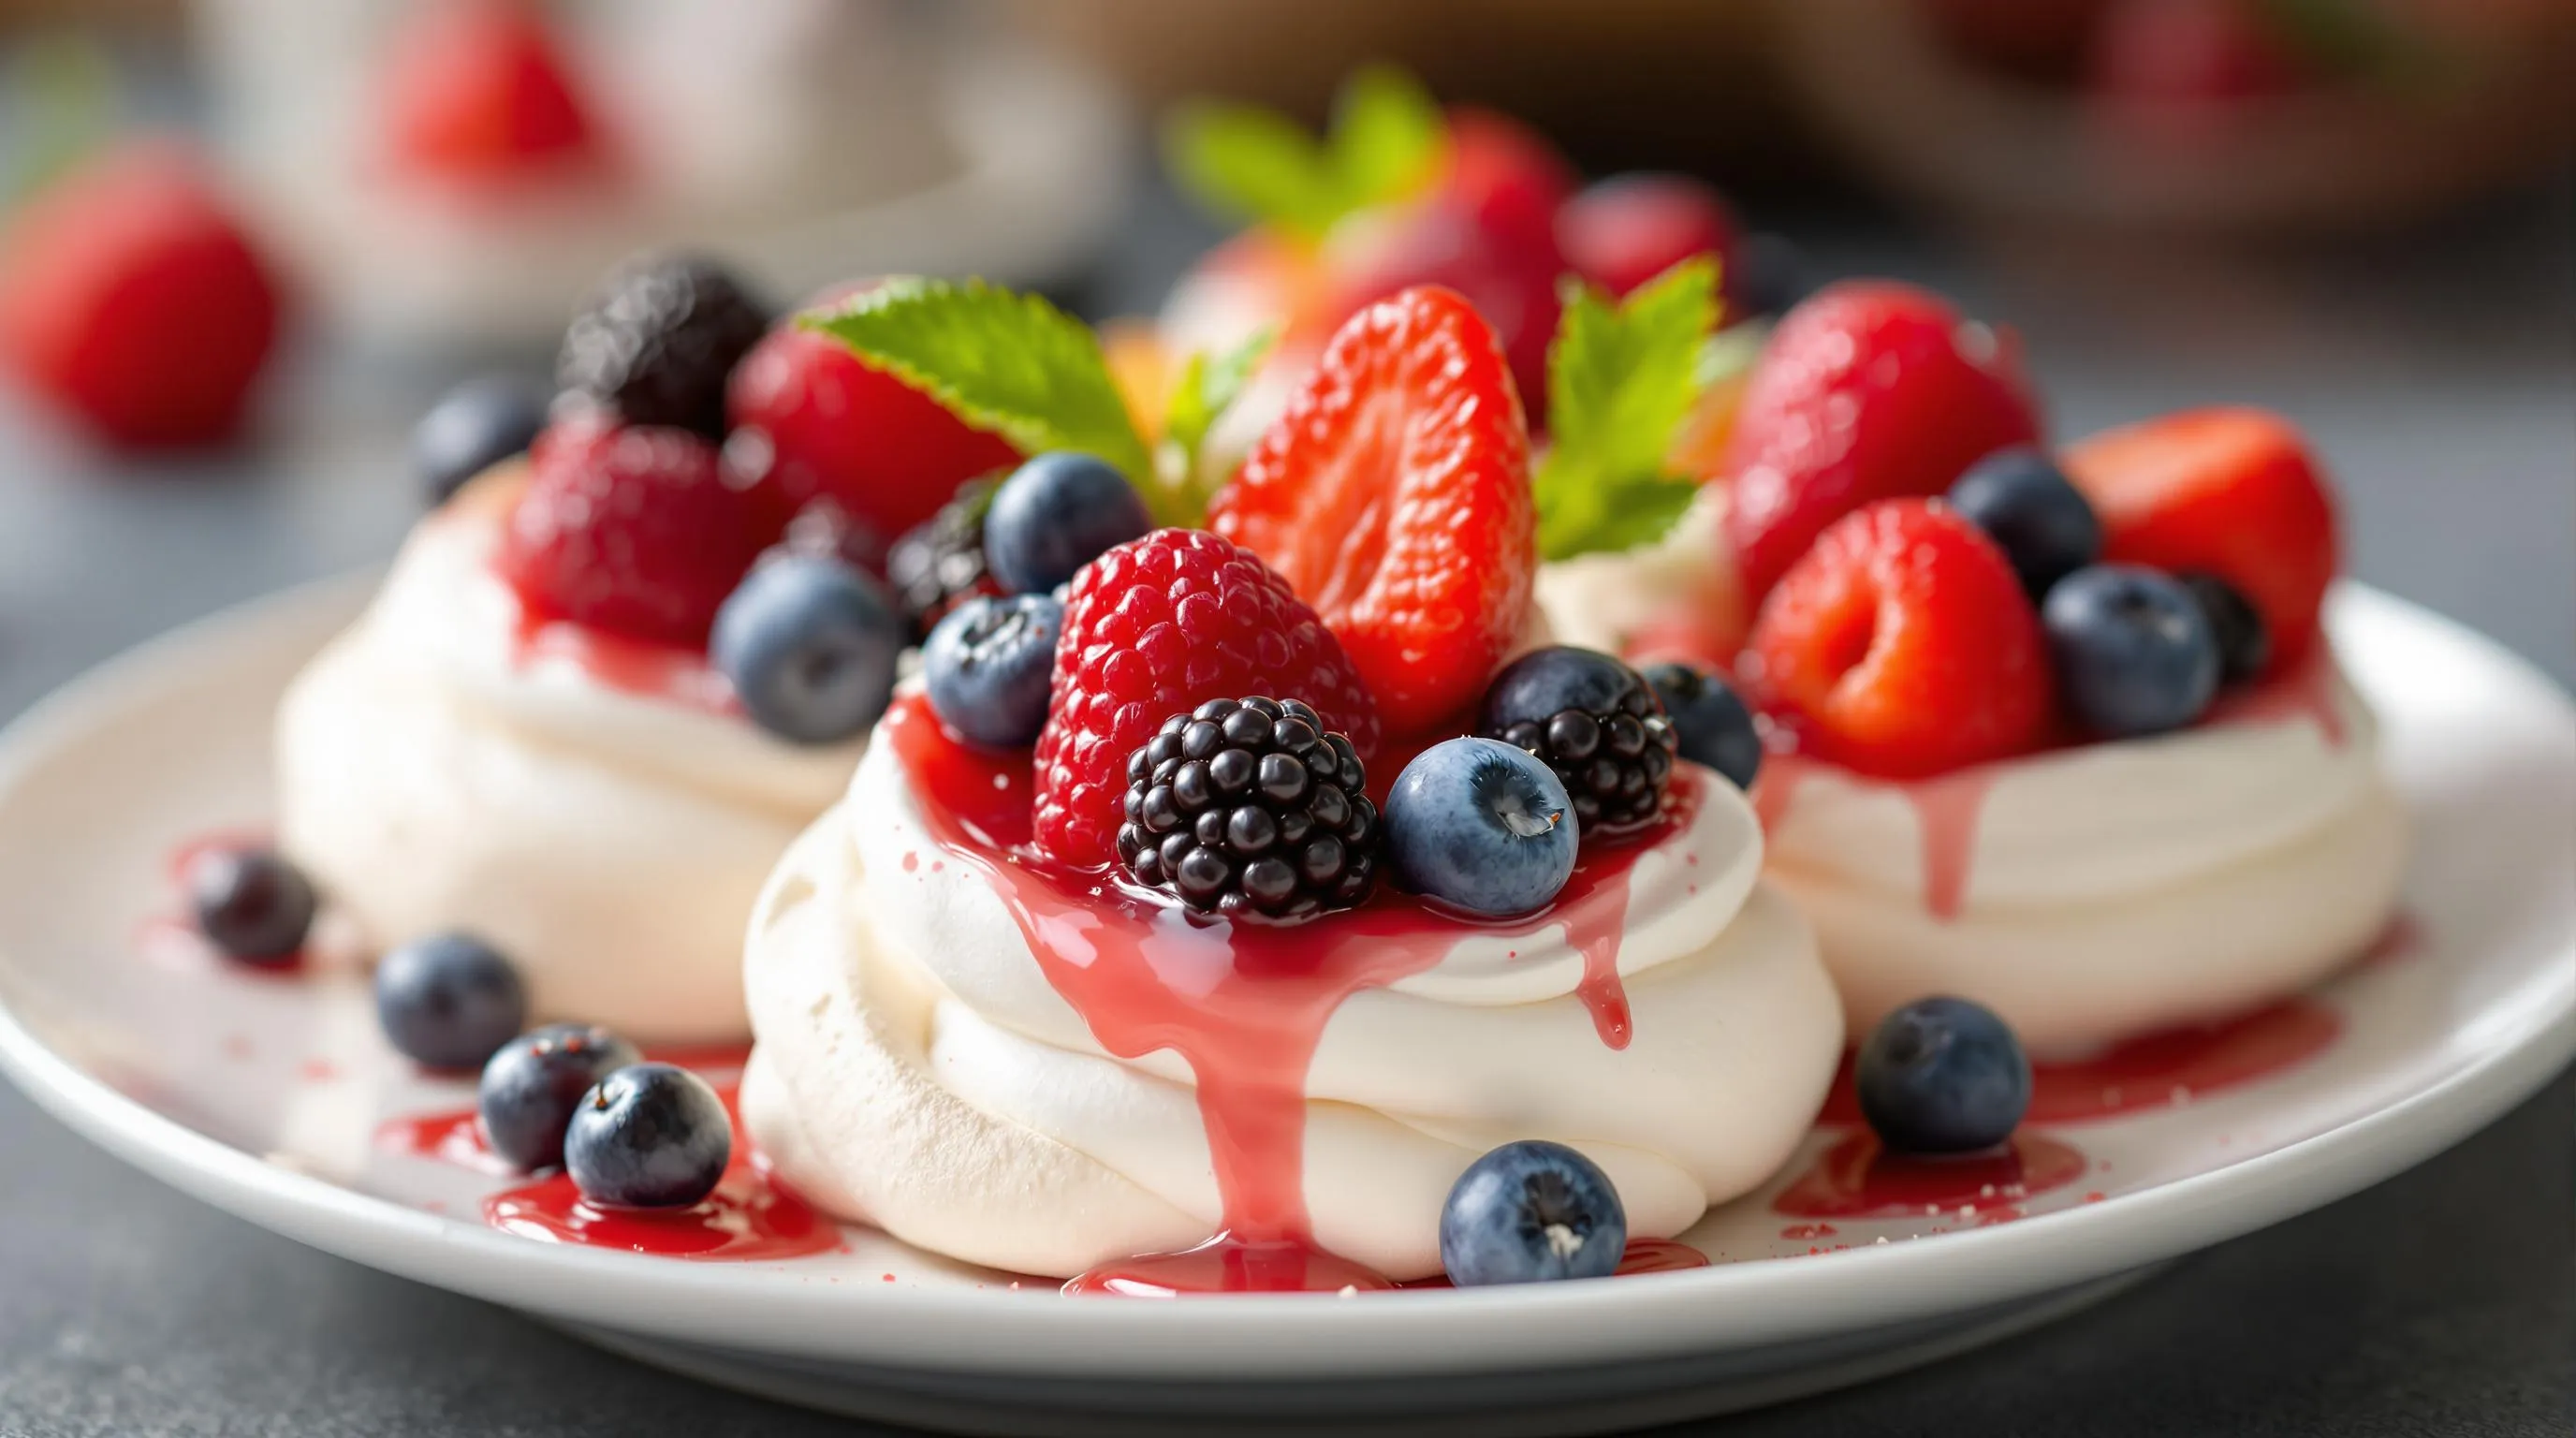
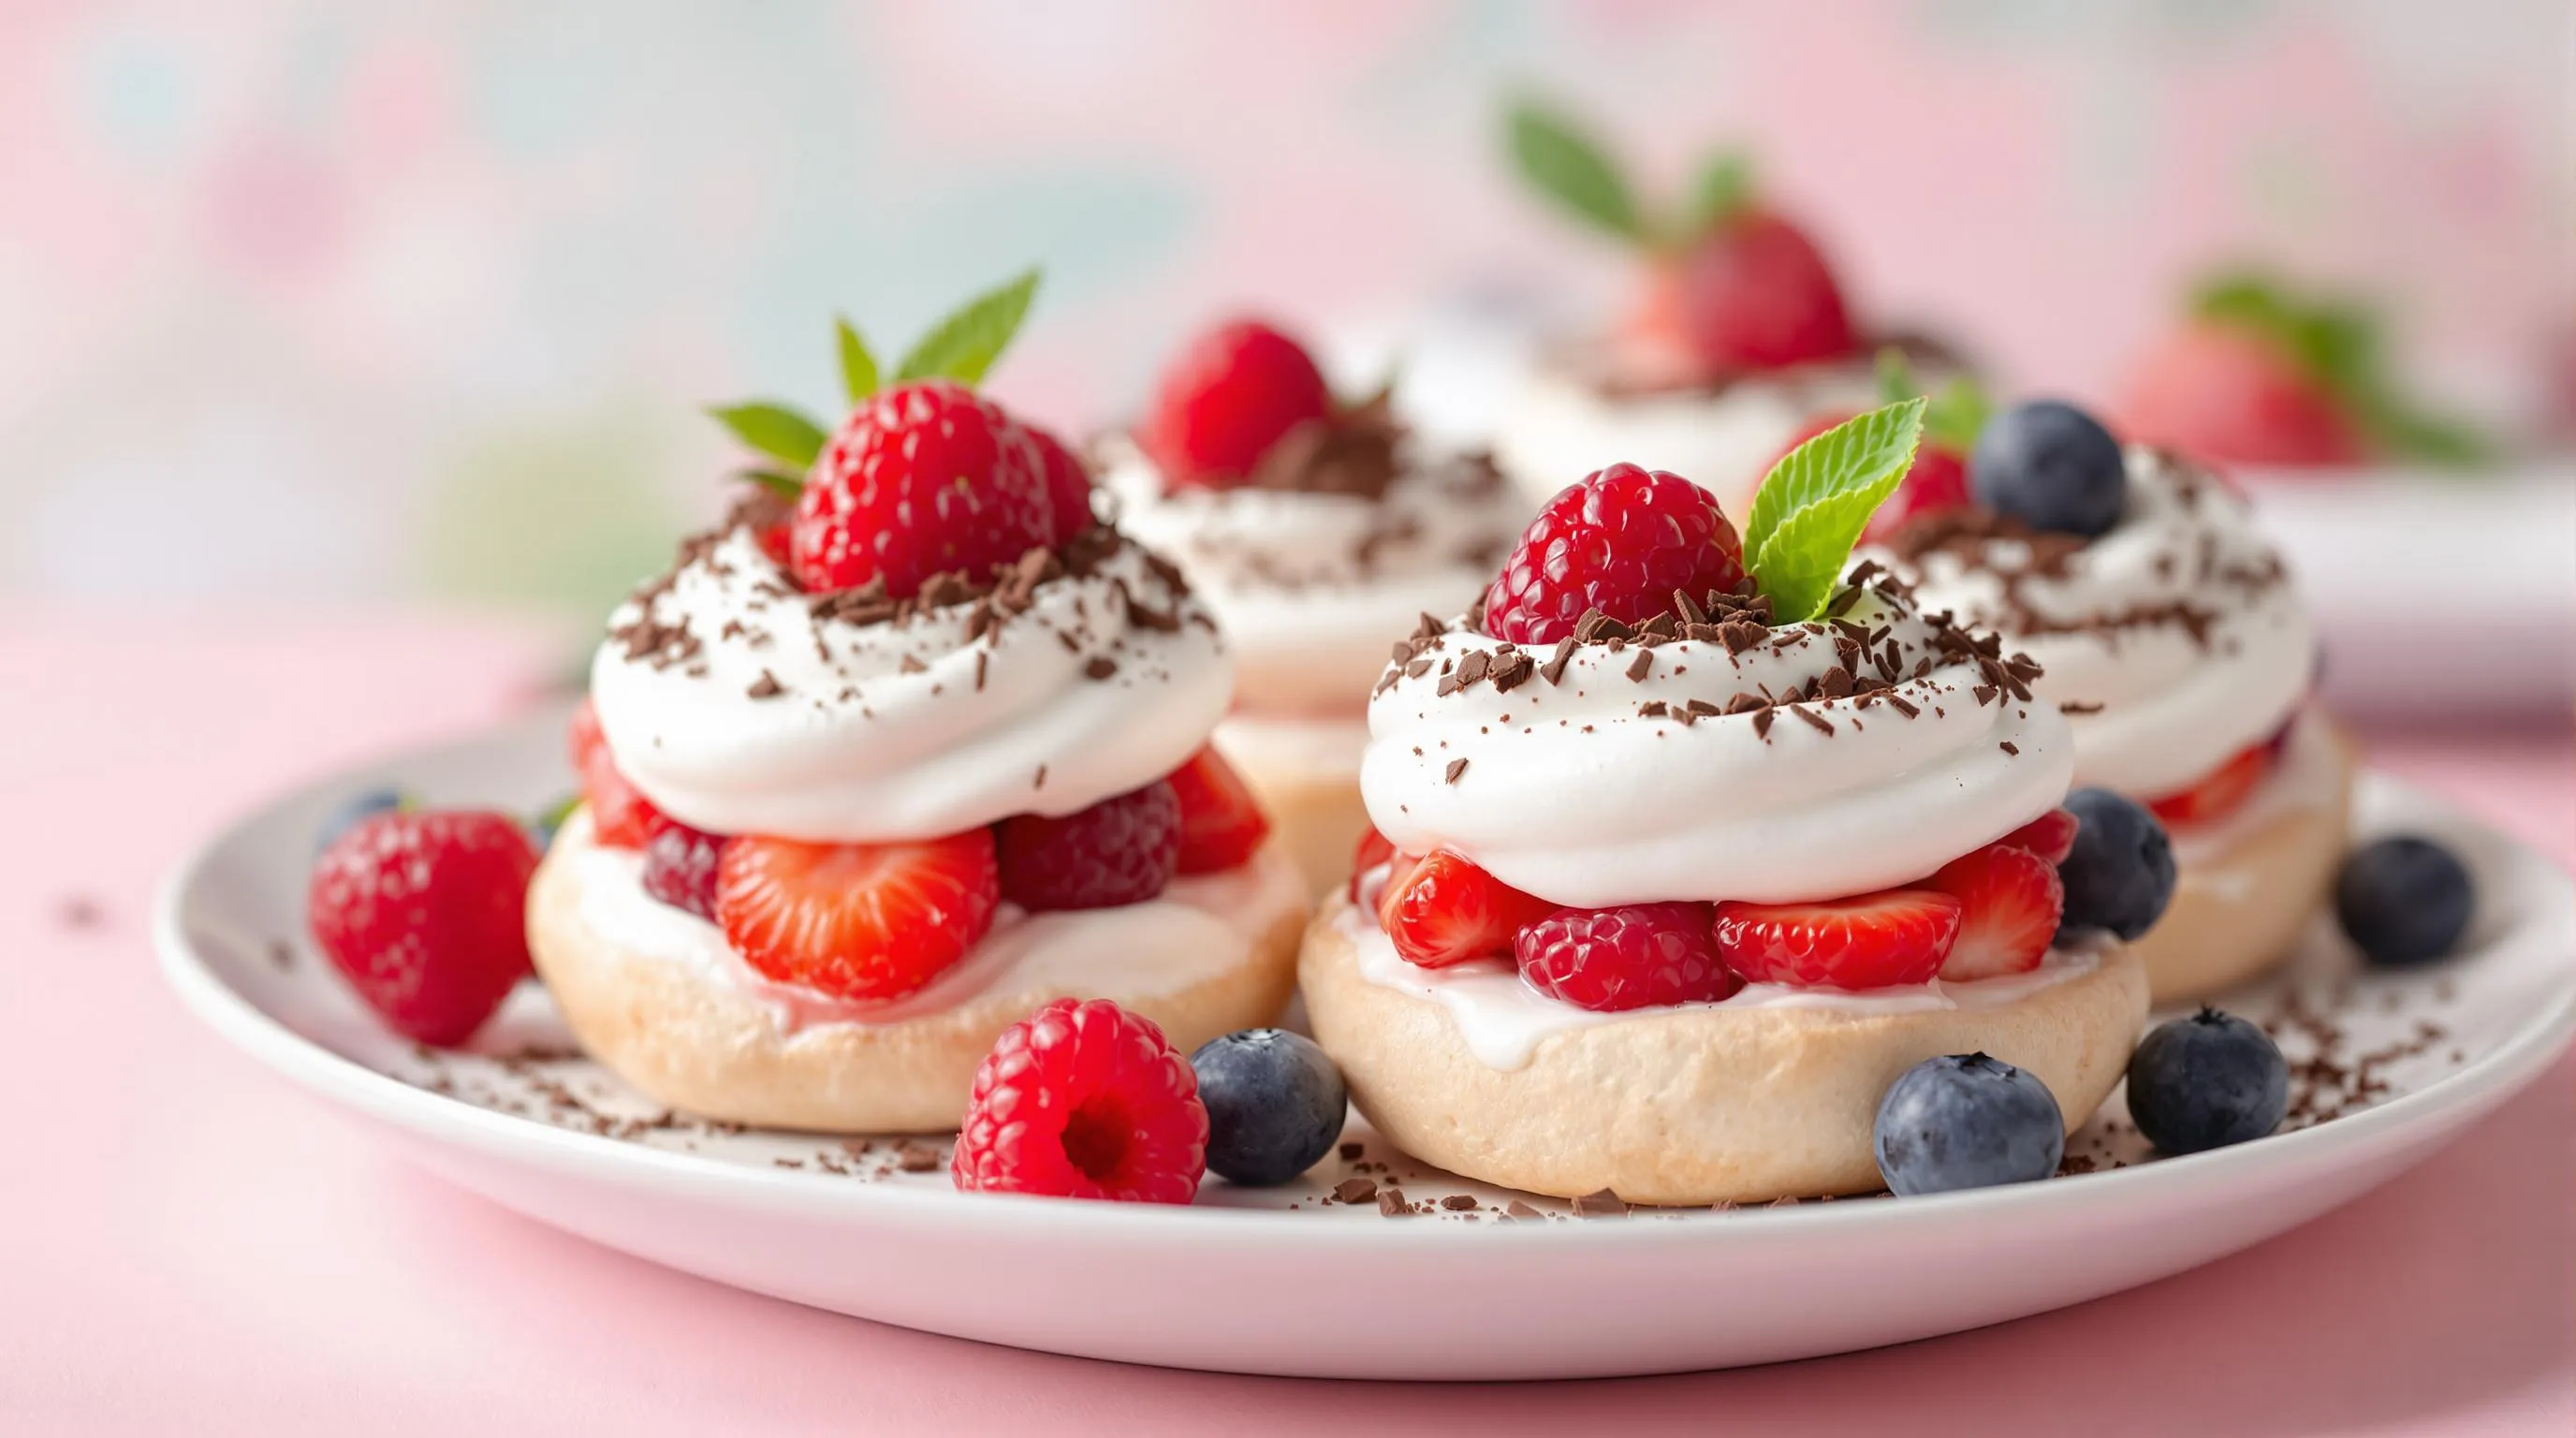
Fresh whipped cream creates the ideal foundation for your mini pavlova toppings. Start with 1 cup of heavy whipping cream that’s been thoroughly chilled for optimal volume. Add 2 tablespoons of powdered sugar and 1 teaspoon of pure vanilla extract for a subtle sweetness that complements rather than competes with the meringue. Whip the mixture until soft peaks form—avoid over-whipping as you want a billowy texture that gently settles into the meringue crater. The cream should hold its shape while remaining cloud-like and spreadable. For a tangy variation that cuts through the sweetness of the meringue, fold in 2 tablespoons of sour cream or Greek yogurt after whipping. This addition creates a more complex flavor profile that sophisticated palates will appreciate.
Fruit Options
Fresh fruit adds vibrant color, natural sweetness, and refreshing acidity that perfectly balances the sweet meringue and rich cream. Berries work exceptionally well—strawberries, raspberries, blueberries, and blackberries offer both visual appeal and bright flavor notes. Tropical fruits like mango, passion fruit, and kiwi provide exotic flair and striking color contrast against the white pavlova base. Stone fruits including peaches, nectarines, and cherries deliver juicy sweetness when in season. Consider creating visual impact by arranging fruits in patterns or color gradients across your mini pavlovas. Macerated fruits can elevate your presentation—simply toss sliced fruits with a teaspoon of sugar and let them sit for 15-20 minutes to release their juices and intensify flavors. For special occasions, garnish with edible flowers or mint leaves that add a professional finishing touch. Remember that fruits should be added just before serving to prevent sogginess and maintain the crisp exterior of your perfectly crafted meringues.
Make-Ahead And Storage Tips
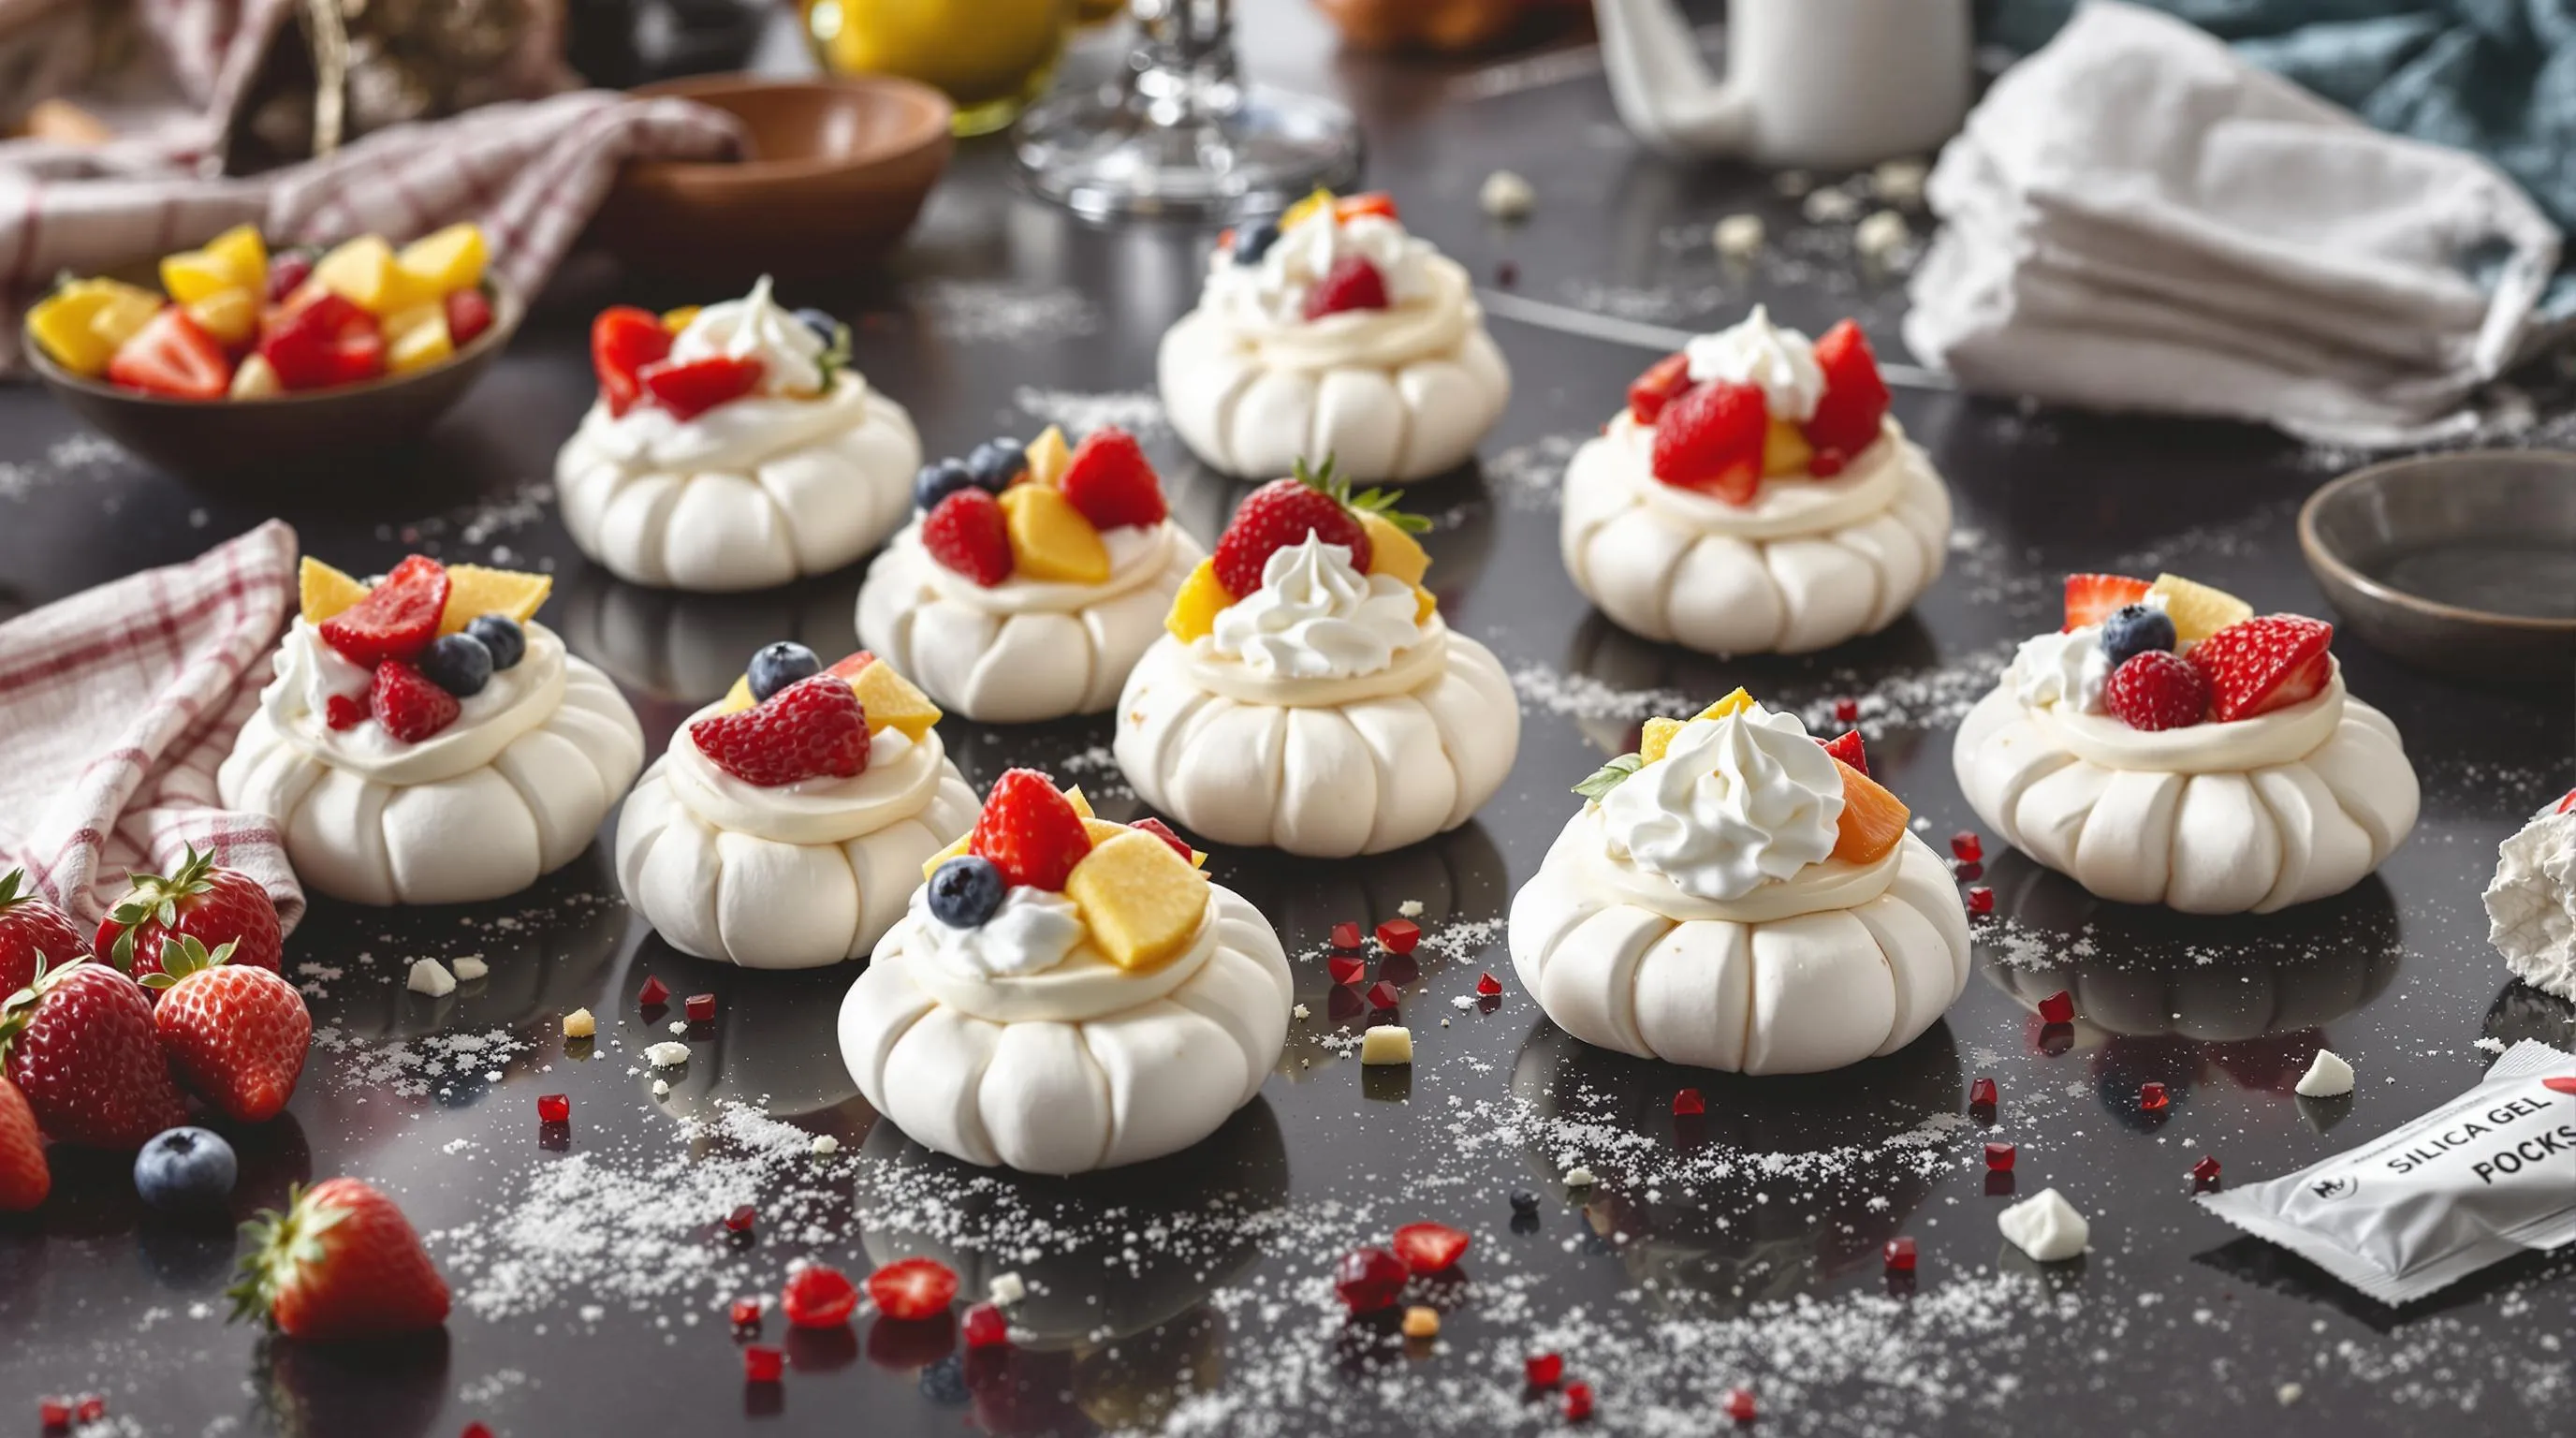
Mini pavlovas are perfect for entertaining because you can prepare components ahead of time. The meringue shells can be made up to 5 days before your event when stored properly. Simply bake the meringues as directed and allow them to cool completely before storing in an airtight container at room temperature.
Humidity is the enemy of crisp meringues. Store your pavlova shells in a cool dry place away from moisture sources like dishwashers and kettles. Placing a small packet of silica gel (the kind found in new shoe boxes) in your storage container helps absorb excess moisture and keeps meringues crisp longer.
Assembled pavlovas don’t store well as the moisture from the toppings will soften the meringue. For best results add whipped cream and fruit just before serving. If you need to prepare slightly ahead your assembled pavlovas will hold their texture for about 1-2 hours in the refrigerator but expect some softening of the meringue base.
Freezing undecorated meringue shells works surprisingly well. Place fully cooled shells in an airtight container with parchment paper between layers and freeze for up to 1 month. Thaw the shells at room temperature for about 2 hours before topping and serving.
Whipped cream can be prepared up to 24 hours in advance. Whip it slightly firmer than usual as it will soften over time and store covered in the refrigerator. Give it a quick whisk before using if it appears to have deflated slightly.
For a stress-free dessert station at parties prepare a “pavlova bar” with plain meringue shells fruit options and freshly whipped cream allowing guests to create their own custom mini pavlovas. This interactive approach eliminates last-minute assembly while keeping the meringues perfectly crisp until serving time.
Troubleshooting Mini Pavlovas
Even experienced bakers encounter challenges when making mini pavlovas. These delicate meringue-based desserts require attention to detail but most issues can be easily resolved with the right knowledge.
Common Problems And Answers
Cracked Pavlovas: Sudden temperature changes often cause cracks in your pavlovas. Allow them to cool gradually in the oven with the door slightly ajar after baking. Avoid opening the oven door during baking as temperature fluctuations can lead to cracking.
Weeping Meringue: Beads of moisture on your pavlova surface indicate the sugar didn’t fully dissolve. Rub a small amount of meringue between your fingers before baking—it should feel smooth, not grainy. Add sugar gradually and beat longer to ensure complete dissolution.
Collapsed Centers: Your pavlovas may collapse if undercooked or removed from the oven too quickly. Bake them until they feel dry to the touch and sound hollow when tapped gently. Remember that pavlovas naturally have some softness in the center—this creates their signature marshmallow-like interior.
Browning or Discoloration: Pavlovas should remain white or very pale. Reduce your oven temperature if they begin to brown. Positioning your baking sheet in the middle rack rather than too close to heating elements helps maintain their pristine color.
Sticky Meringue: Humidity is the enemy of crisp pavlovas. Avoid making them on particularly humid days if possible. Store finished pavlova shells in an airtight container with a silica gel packet to maintain crispness.
Flat Meringues: Your mini pavlovas spread too much during baking if the meringue lacks stability. Ensure your mixing bowl and beaters are completely grease-free. Add cornstarch and vinegar as stabilizers. Avoid overbeating egg whites past the stiff peak stage as this can cause them to lose structure.
Soft Exterior: Mini pavlovas should have a crisp shell. Extend the baking time at a low temperature if they remain soft. Check that your oven temperature is accurate using an oven thermometer—many home ovens run hotter or cooler than their settings indicate.
Difficulty Removing From Paper: Parchment paper occasionally sticks to the bottom of pavlovas. Try turning the parchment over and lightly brushing the underside with water—the moisture helps release the meringue. For future batches, consider using silicone baking mats instead.
Serving Suggestions
Transform your mini pavlovas from simple desserts into memorable culinary experiences with these thoughtful serving ideas. These delicate meringue nests deserve presentation that enhances both their visual appeal and flavor profile.
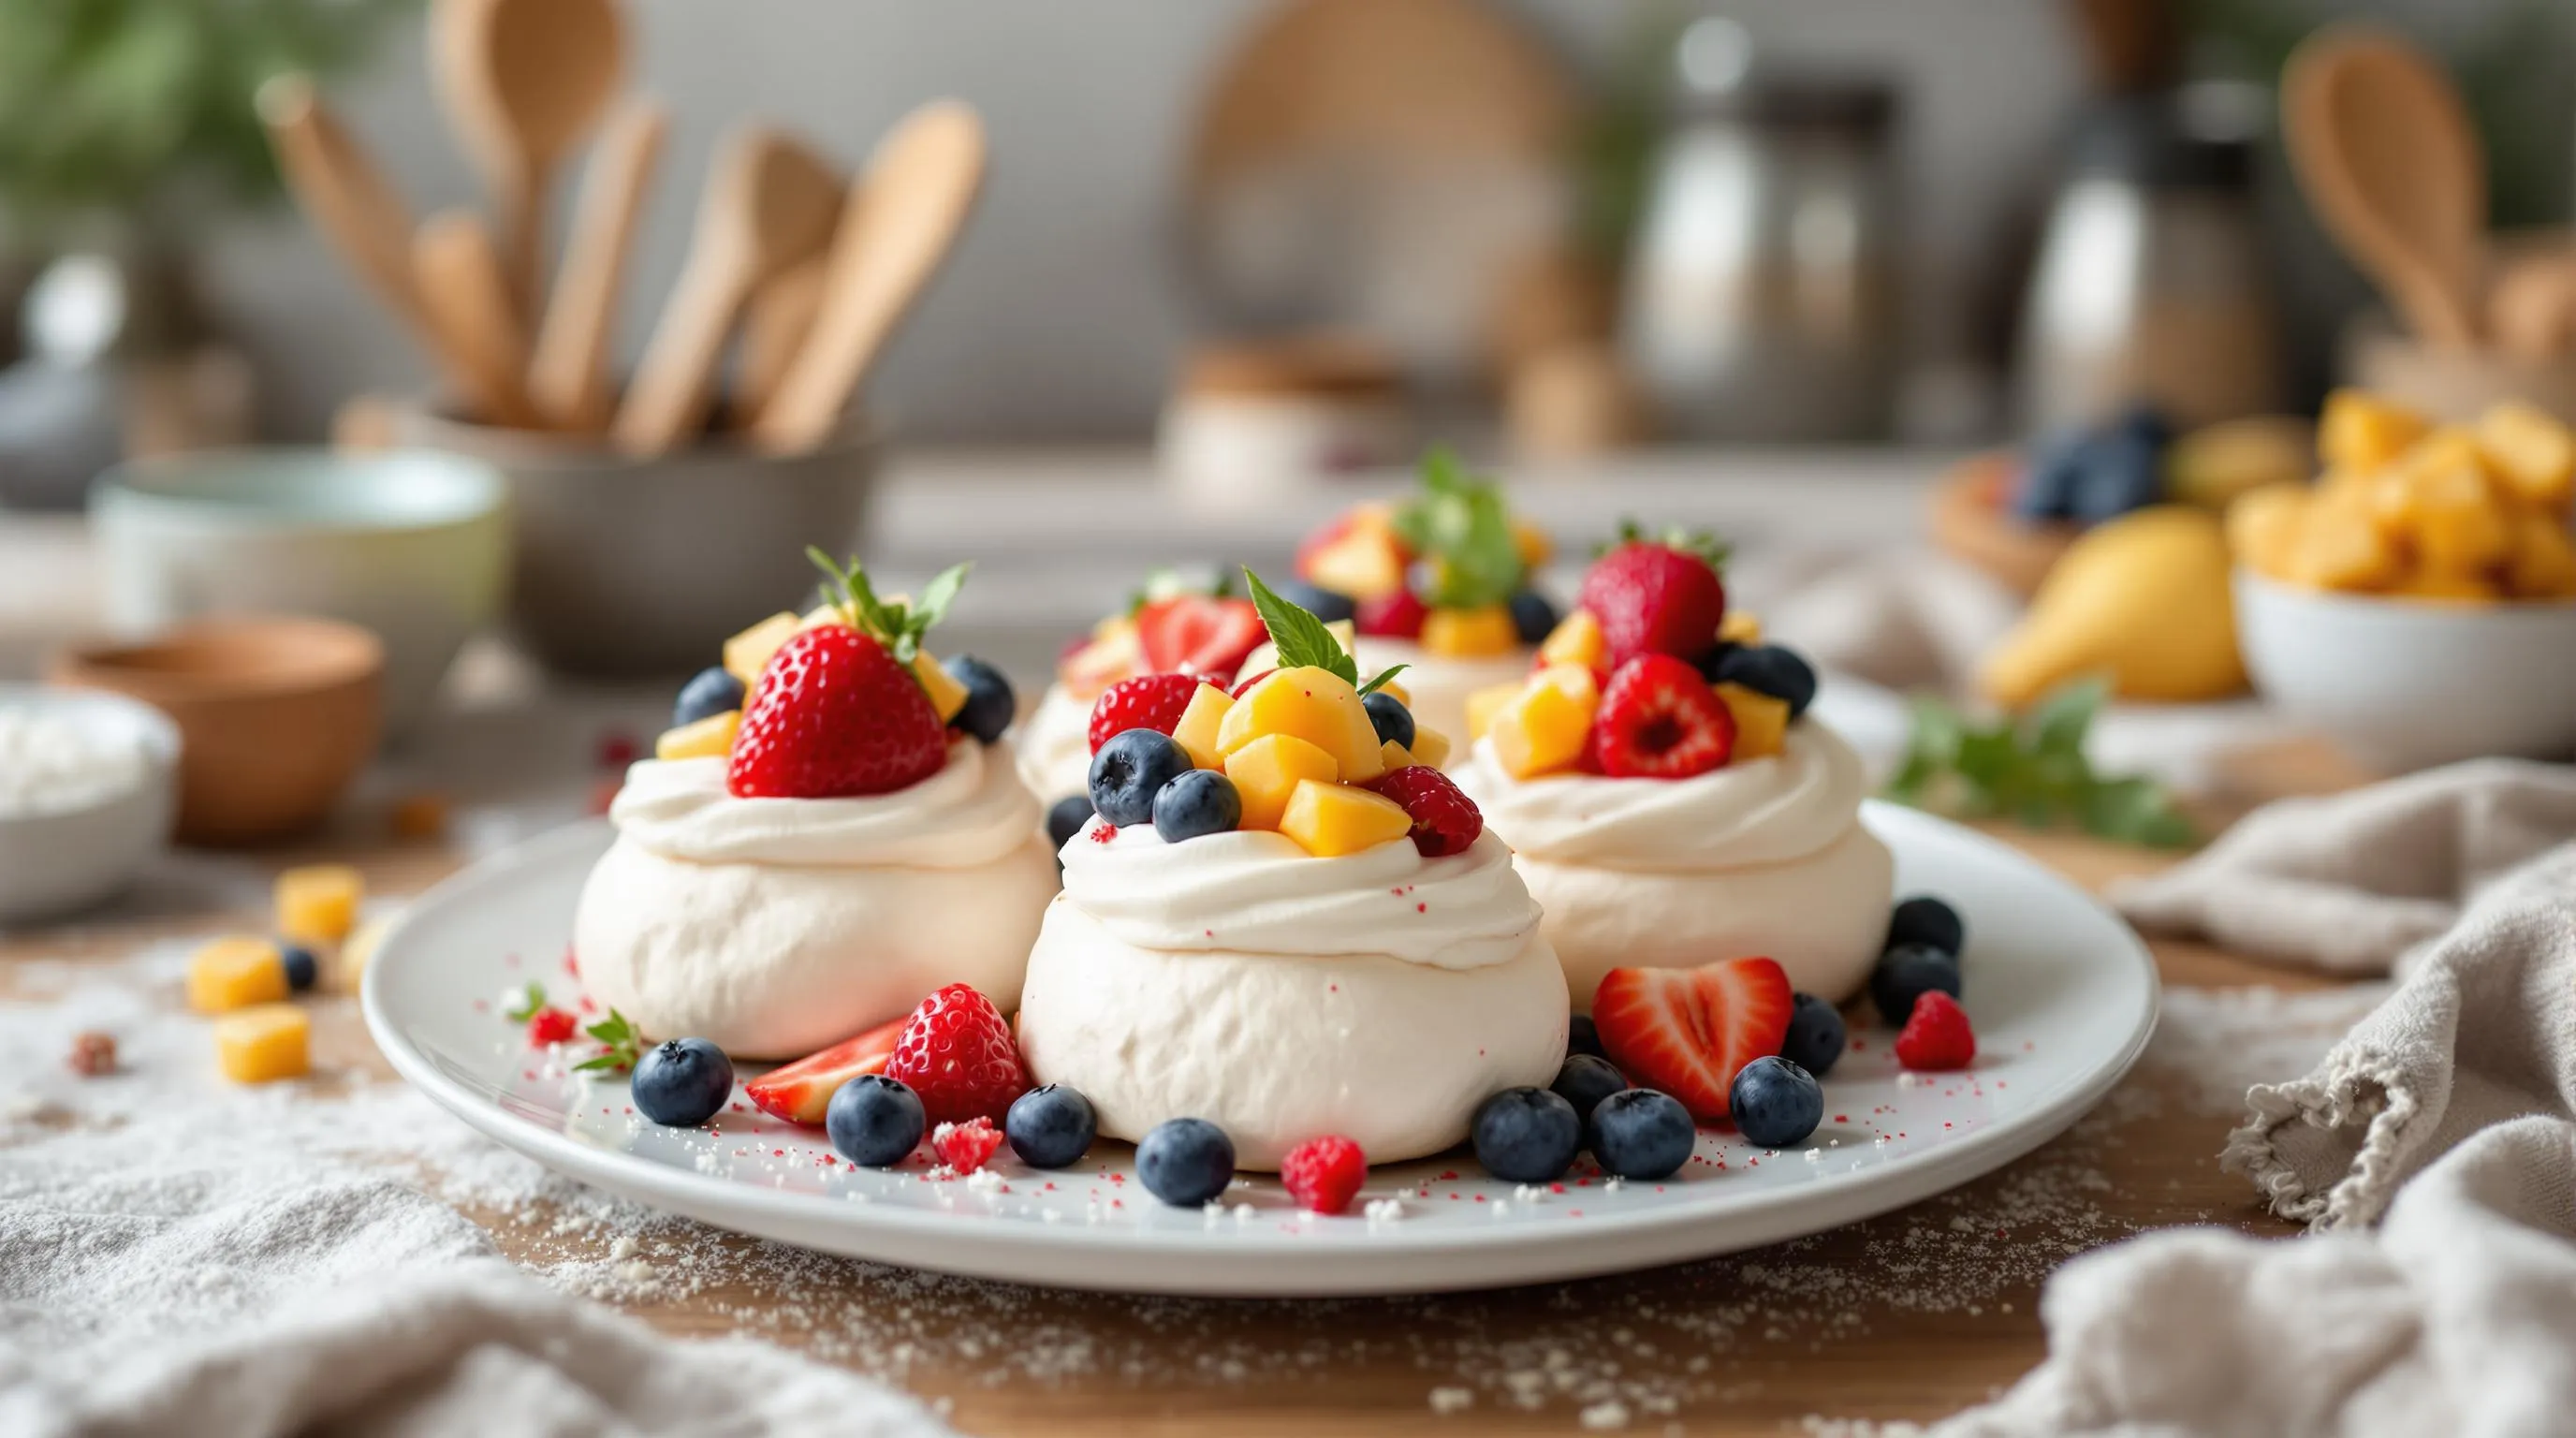
Present your mini pavlovas on a decorative cake stand or elegant white platters to showcase their pristine beauty. The contrast between the crisp white meringues and colorful fruit toppings creates an impressive visual impact at any gathering. For formal occasions consider serving individual pavlovas on small dessert plates with a sprig of mint and a dusting of powdered sugar.
Create a dramatic presentation by arranging mini pavlovas in a circular pattern on a large serving board surrounded by extra berries and edible flowers. This family-style approach encourages guests to admire the display before selecting their treat. Alternatively pair each pavlova with a small shot glass of fruit coulis on the side allowing guests to pour the sauce themselves for an interactive element.
Seasonal adaptations can elevate your mini pavlovas throughout the year:
- Spring: Top with strawberries sliced kiwi and a drizzle of honey
- Summer: Feature mixed berries with a lemon curd swirl in the cream
- Fall: Incorporate caramelized apples cinnamon cream and a maple syrup drizzle
- Winter: Showcase blood oranges pomegranate seeds and a hint of orange liqueur
Complement the sweetness of your pavlovas with a perfectly paired beverage. A crisp dessert wine like Moscato d’Asti or Sauternes enhances the fruit flavors while balancing the sweetness. For non-alcoholic options serve with Earl Grey tea or a sparkling elderflower drink which provide refreshing counterpoints to the rich cream and sweet meringue.
Temperature contrast adds another dimension to your serving strategy. The cool whipped cream against the room temperature meringue creates a delightful textural experience. Serve fruit compotes slightly warm for an additional layer of temperature variation that highlights the crisp meringue exterior.
Recipe Variations
The beauty of mini pavlovas lies in their versatility and adaptability. These delightful meringue-based desserts can be customized in countless ways to suit different tastes preferences and occasions.
Chocolate Mini Pavlovas
Transform your classic mini pavlovas into a chocolate lover’s dream by incorporating cocoa powder into the meringue mixture. Add 2 tablespoons of unsweetened cocoa powder to your standard recipe by sifting it into the sugar before gradually incorporating it into the whipped egg whites. This addition creates a subtle chocolate flavor without compromising the signature texture. You can enhance the chocolate theme further by topping your pavlovas with chocolate whipped cream made by folding 2 tablespoons of cocoa powder and an extra tablespoon of powdered sugar into your standard whipped cream. Garnish with chocolate shavings grated fresh berries or a drizzle of chocolate sauce for an elegant finish. These chocolate variations pair wonderfully with fruits like raspberries cherries or sliced bananas which complement the rich cocoa notes perfectly.
Citrus-Infused Mini Pavlovas
Brighten your mini pavlovas with zesty citrus flavors that cut through the sweetness of the meringue. Fold 1-2 teaspoons of finely grated lemon zest orange zest or lime zest into your meringue mixture just before piping. The essential oils from the zest infuse the entire pavlova with a subtle fragrance and tangy undertone. You can amplify the citrus theme by adding a teaspoon of the corresponding citrus juice to your whipped cream along with a dash of the zest. Top these vibrant pavlovas with complementary fruits like segments of blood orange mandarin slices kiwi or passion fruit. A light dusting of powdered sugar or a drizzle of citrus curd creates a stunning finishing touch. Lemon pavlovas work beautifully with blueberries while orange-infused versions pair perfectly with cranberries during winter months. These refreshing variations offer a palate-cleansing quality that makes them ideal for serving after rich meals.
The Perfect Mini Pavlova Recipe For Any Occasion
These mini pavlovas truly offer the best of both worlds – an impressive dessert that’s surprisingly simple to create. You’ll love how these delicate treats can transform an ordinary meal into a special occasion with their perfect balance of textures and flavors.
Try making a batch for your next gathering and watch your guests’ faces light up with delight. The beauty of mini pavlovas lies in their versatility and make-ahead convenience.
Whether you’re a novice baker or seasoned chef you’ll appreciate how these elegant meringue nests deliver maximum impact with minimal stress. So gather your ingredients whip up those egg whites and treat yourself to this delightful Australian classic that’s sure to become a staple in your dessert repertoire.