There’s nothing quite like a light and fluffy chocolate sponge cake to lift your spirits.
The delicate balance of airy texture and rich chocolate flavor makes it a timeless favorite.
I first encountered this delightful dessert at a quaint bakery in Paris, where it was served with a hint of whipped cream.
Whether it’s a birthday celebration or a casual afternoon tea, this chocolate sponge cake is sure to impress.
Its simplicity in preparation is matched only by its irresistible taste.
Dive into this recipe, and watch as it becomes a staple in your dessert repertoire.
The History and Cultural Significance
• Light and Fluffy traces its origins to the Renaissance period in Italy, where it was originally created by a baker seeking to delight the nobility.
• The dish evolved over decades as the availability of cocoa spread across Europe, eventually becoming the beloved version we know today.
• In many European cultures, this dish traditionally appears at weddings and festive gatherings, symbolizing joy and celebration.
• While many variations exist across different regions, the authentic version maintains its airy texture and simple ingredient list that sets it apart from imitations.
Recipe Overview
Nutritional Information (per serving)
Essential Equipment Guide
Electric Mixer: An electric mixer is crucial for achieving the light, airy texture of the sponge. While a hand whisk can work, an electric mixer ensures the eggs are whipped to the correct volume more efficiently. Look for a mixer with multiple speed settings.
Springform Pan: A springform pan allows for easy release of the delicate sponge cake once it is baked. Alternatives include using a regular cake pan lined with parchment paper. Ensure the pan is non-stick for best results.
Cooling Rack: Proper cooling is essential to maintain the cake’s texture. A cooling rack allows air to circulate around the cake, preventing sogginess. Select a rack that is sturdy and large enough to hold the cake.
Ingredients
For the Cake
|
|
| Amount | Ingredient | Notes |
|---|---|---|
| 4 large | eggs | at room temperature |
| 1 cup | granulated sugar | for sweetness |
| 1 cup | all-purpose flour | sifted for light texture |
| 1/4 cup | cocoa powder | for chocolate flavor |
| 1/2 teaspoon | baking powder | helps the cake rise |
| 1/4 teaspoon | salt | enhances flavor |
For the Topping
| Amount | Ingredient | Notes |
|---|---|---|
| 1 cup | heavy cream | whipped, optional |
| 2 tablespoons | powdered sugar | adds sweetness to the cream |
Preparation Methods
Whipping Eggs: Whipping the eggs to a pale, thick consistency is key for a light sponge. This incorporates air, which acts as a leavening agent. Use an electric mixer on high speed for best results.
Folding Technique: Gently folding dry ingredients into the whipped eggs ensures that the air is not deflated. Use a spatula, and fold in a figure-eight motion.
Baking: Baking at the right temperature ensures the cake rises evenly. Preheat the oven and avoid opening the door during baking to prevent deflation.
Step 1: Prepare Ingredients

Gather all ingredients and equipment.
Ensure eggs are at room temperature for better volume.
Sift flour, cocoa powder, and baking powder together.
Preheat the oven to 350°F (175°C).
Step 2: Whip the Eggs

Place the eggs and sugar in a mixing bowl.
Using an electric mixer, whip on high speed until the mixture is pale and tripled in volume.
The mixture should form ribbons when the beaters are lifted.
This process takes about 5-7 minutes.
Step 3: Incorporate Dry Ingredients

Gradually add the sifted dry ingredients to the egg mixture.
Use a spatula to fold in the dry ingredients gently.
Perform a figure-eight motion to maintain the airiness of the batter.
Ensure the mixture is homogenous with no streaks of flour.
Step 4: Prepare the Pan
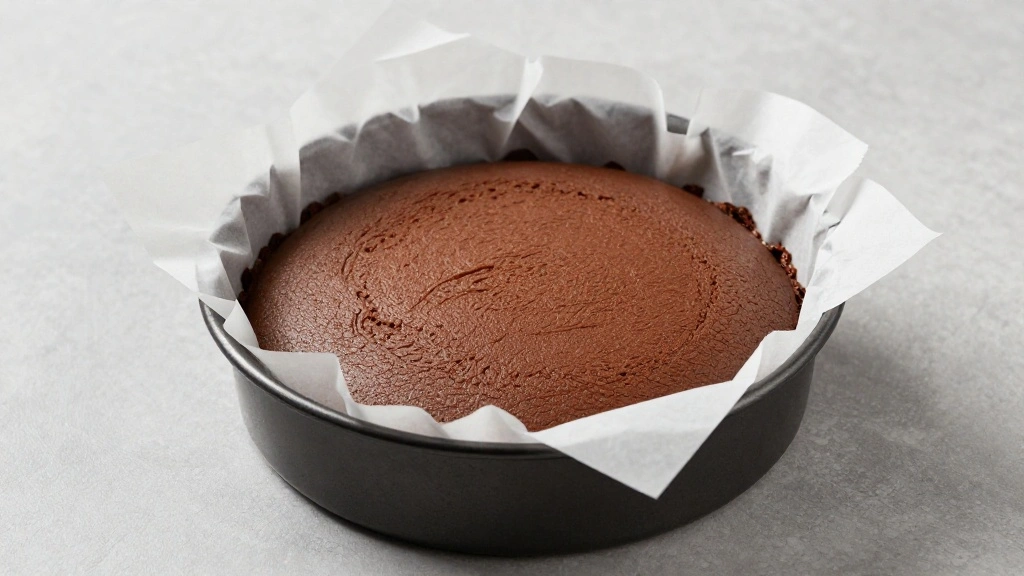
Lightly grease a springform pan with butter or non-stick spray.
Line the bottom with parchment paper for easy release.
Pour the batter into the prepared pan, smoothing the top with a spatula.
Tap the pan gently on the counter to remove air bubbles.
Step 5: Bake the Cake

Place the pan in the preheated oven.
Bake for 25-30 minutes or until a toothpick inserted comes out clean.
The top should be slightly springy to the touch.
Avoid opening the oven door during the initial 20 minutes.
Step 6: Cool the Cake
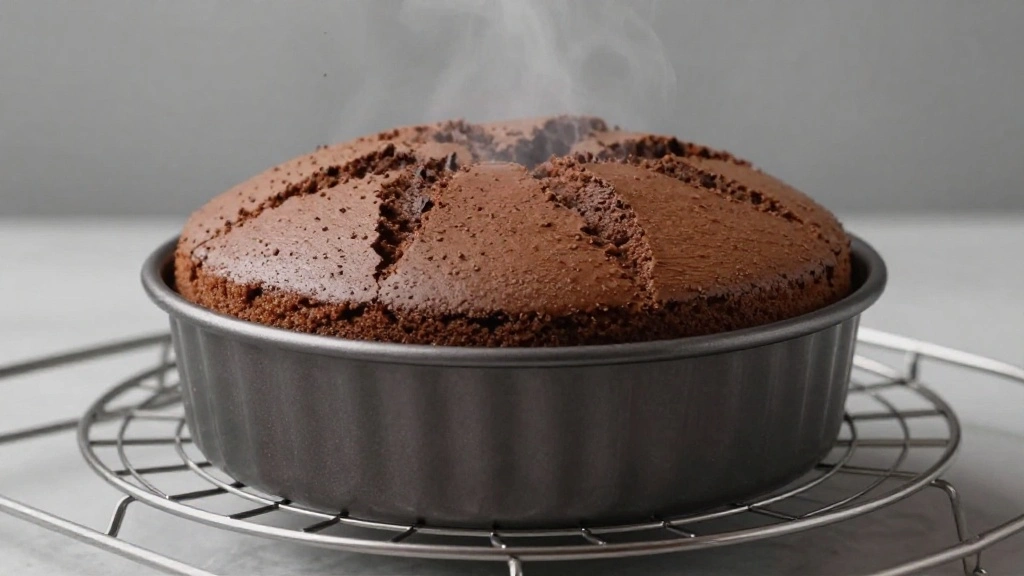
Remove the cake from the oven and place it on a cooling rack.
Allow it to cool in the pan for 10 minutes.
Run a knife around the edge before releasing from the pan.
Let it cool completely on the rack before adding toppings.
Step 7: Prepare the Whipped Cream

Chill a mixing bowl and beaters in the freezer for 10 minutes.
Pour the heavy cream into the chilled bowl.
Add powdered sugar and whip until soft peaks form.
Take care not to overbeat, as it can turn into butter.
Step 8: Serve the Cake
Transfer the cooled cake to a serving platter.
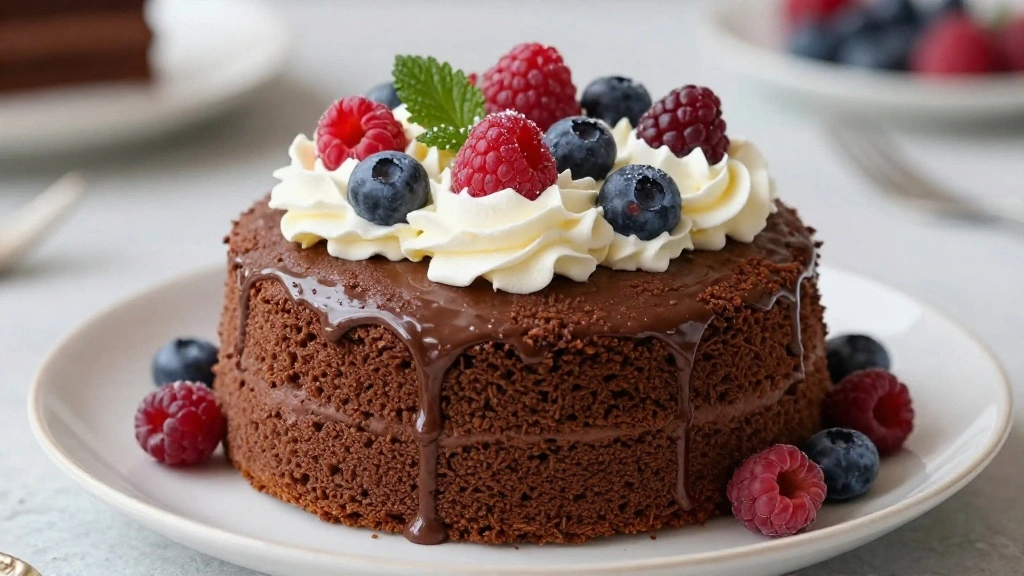
Spread or pipe the whipped cream over the top if desired.
Optionally, dust with cocoa powder or chocolate shavings.
Slice and serve with fresh berries or a side of ice cream.
Critical Timing and Temperature Guide
Whipping Eggs: Whip eggs and sugar on high speed for 5-7 minutes until pale and voluminous. Look for thick ribbons that hold their shape. Avoid under-whipping, which results in a dense cake.
Baking: Bake at 350°F (175°C) for 25-30 minutes. The cake should spring back when lightly pressed. Underbaking leads to a soggy center, while overbaking dries it out.
Cooling: Cool in the pan for 10 minutes, then transfer to a rack. Ensure complete cooling before topping. Rushing this process can cause the cake to collapse.
Pro Tips for Light and Fluffy
• Ingredient Selection: Use fresh, high-quality eggs and cocoa powder for the best flavor and texture.
• Preparation Secret: Whip eggs at room temperature to achieve maximum volume; cold eggs don't whip well.
• Temperature Management: Ensure all ingredients are at room temperature, as cold ingredients can affect the cake's rise.
• Texture Enhancement: Sifting the flour and cocoa powder adds additional air, contributing to a lighter texture.
• Flavor Layering: Add a teaspoon of vanilla extract to enhance the chocolate flavor profile.
• Make-Ahead Strategies: The sponge can be baked a day in advance and stored in an airtight container once cooled.
• Restaurant-Quality Finishing Touches: Dust with cocoa powder or powdered sugar for an elegant finish.
• Equipment Optimization: Ensure your mixer bowl and beaters are clean and dry for optimal egg whipping.
Troubleshooting Common Issues
• Dense Texture: Often caused by under-whipping the eggs. Ensure eggs are whipped to thick ribbons before folding in dry ingredients.
• Cake Sinks: This can occur if the oven door is opened too early or if the cake is underbaked. Avoid opening the door during the first 20 minutes.
• Cracked Top: A common result of baking at too high a temperature. Double-check your oven's temperature calibration.
• Dry Cake: Overbaking is the usual culprit. Make sure to check doneness with a toothpick and remove promptly.
• Uneven Rise: Caused by improper mixing or folding. Ensure the batter is evenly spread in the pan before baking.
Variations and Regional Differences
• Italian Style: Often flavored with a hint of espresso coffee, adding depth and complementing the chocolate.
• French Variation: Incorporates almond flour for a nutty undertone, often served with a rich ganache.
• American Twist: Includes baking soda and a touch of vinegar for an extra light, airy texture.
• British Classic: Uses self-raising flour and a thicker layer of jam and cream as a filling.
Food Science Behind the Recipe
• Egg Foam: Whipping eggs creates a foam structure that traps air, giving the cake its light texture. Understanding this helps achieve the desired volume.
• Maillard Reaction: The browning of the cake's surface is due to the Maillard reaction, enhancing flavor through the combination of sugar and protein.
• Leavening Agents: The baking powder reacts with the heat, creating carbon dioxide bubbles that help the cake rise, resulting in a fluffy texture.
Frequently Asked Questions
What's the most common mistake people make when preparing Light and Fluffy Chocolate Sponge Cake? The most common mistake is under-whipping the eggs, which results in a dense cake. Ensure the mixture is pale and thick before proceeding.
Can I make this cake without a mixer? Yes, but it will require a lot of elbow grease. Whisk vigorously by hand until the eggs reach the desired volume.
How can I ensure my cake doesn't stick to the pan? Use a springform pan lined with parchment paper and lightly greased to prevent sticking.
Is it possible to freeze the cake? Yes, wrap the cooled cake tightly in plastic wrap and foil before freezing for up to 2 months.
Can I substitute gluten-free flour? Yes, a 1:1 gluten-free baking flour can be used with similar results.
What if my cake is too dry? Check your oven temperature and baking time; overbaking is often the cause of a dry cake.
Why did my cake crack on top? This can happen if the oven is too hot or the batter is over-mixed, incorporating too much air.
Serving and Presentation Guide
• Traditional Presentation: Serve on a classic white cake stand with a dusting of cocoa powder for an elegant look.
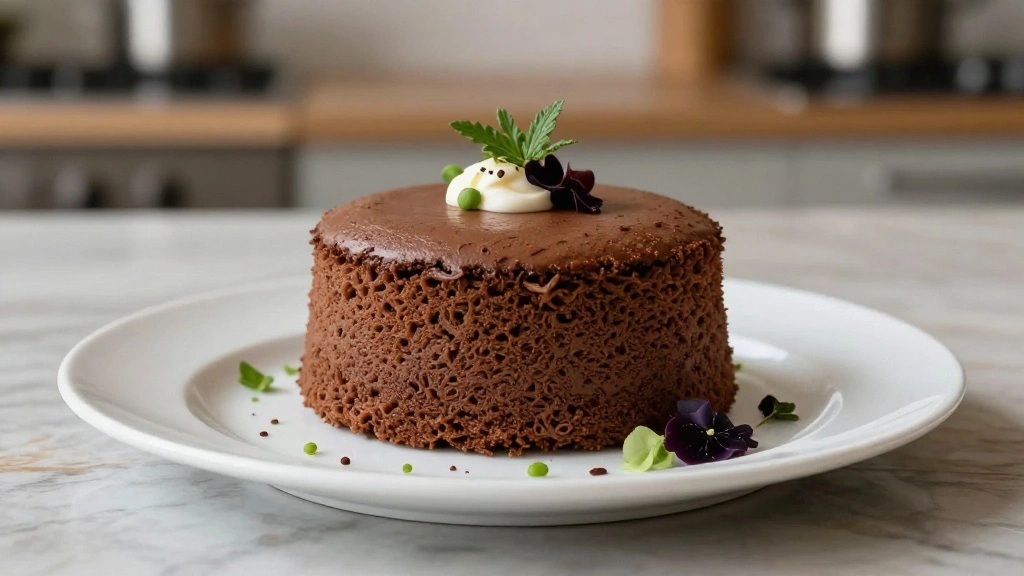
• Modern Style: Pair with a quenelle of whipped cream and fresh raspberries on each slice.
• Casual Approach: Simply slice and serve with a scoop of vanilla ice cream for a comforting dessert.
• Festive Display: Decorate with edible flowers and chocolate curls for special occasions.
Conclusion
Now that you have the secrets to making a perfect Light and Fluffy Chocolate Sponge Cake, it's time to give it a try.
With its delightful texture and rich flavor, it's sure to become a family favorite.
Enjoy the process and watch as your loved ones savor every bite.
Don't forget to share your success and the joy of baking with others!