Ingredients
These Halloween one-eyed monster cake pops require simple pantry staples and specialty decorating items to create your spooky treats. You’ll need ingredients for three main components: the cake base, creamy frosting, and colorful coating.
For the Cake
- 1 box (15.25 oz) chocolate cake mix
- 3 large eggs
- 1/2 cup vegetable oil
- 1 cup water
- 1 teaspoon vanilla extract
For the Frosting
- 8 oz cream cheese, softened to room temperature
- 1/2 cup (1 stick) unsalted butter, softened
- 3 cups powdered sugar, sifted
- 1 teaspoon vanilla extract
- 2 tablespoons heavy cream
For the Coating and Decoration
- 2 pounds white melting chocolate or candy coating wafers
- Food coloring gel in green, purple, orange, and red
- 48 candy eyes (various sizes)
- 48 cake pop sticks
- Styrofoam block or cake pop stand for drying
- Small plastic bags for melting chocolate
- Toothpicks for mixing colors
Equipment Needed
Creating professional-looking Halloween one-eyed monster cake pops requires the right tools to achieve smooth chocolate coatings and perfect presentations. Your success depends on having quality equipment that makes the process efficient and enjoyable.
Mixing and Preparation Tools
- Large mixing bowl for combining cake crumbs and frosting
- Electric hand mixer or stand mixer for smooth frosting consistency
- Medium saucepan for melting chocolate coating
- Silicone spatula for folding ingredients together
- Cookie scoop or tablespoon for portioning cake mixture
- Clean kitchen towel for wiping hands during shaping
Cake Pop Assembly Equipment
- Cake pop sticks (lollipop sticks work perfectly)
- Deep microwave-safe bowls for melting chocolate
- Fork or cake pop dipping tool for coating
- Styrofoam block or cake pop stand for drying
- Parchment paper lined baking sheets
- Small spoons for drizzling colored chocolate
Decorating and Finishing Supplies
- Fine-tip squeeze bottles for precise chocolate application
- Small offset spatula for smoothing coatings
- Tweezers for placing candy eyes accurately
- Paper towels for cleanup
- Measuring cups and spoons for precise portions
Storage and Display Items
- Airtight containers for storing finished cake pops
- Clear cellophane bags for gift wrapping
- Ribbon or twist ties for securing bags
- Labels for identifying flavors or allergens
Having these tools ready before you begin ensures smooth workflow and professional results. Quality equipment makes the difference between amateur-looking treats and bakery-style Halloween cake pops that impress your guests.
Instructions
Follow these step-by-step instructions to create perfectly spooky Halloween one-eyed monster cake pops that will impress your guests. Each stage builds upon the previous one to ensure professional-looking results.
Prep the Cake Base
Preheat your oven to 350°F and grease a 9×13 inch baking pan with cooking spray. Combine the chocolate cake mix, eggs, vegetable oil, water, and vanilla extract in a large mixing bowl. Beat the mixture with an electric mixer on medium speed for 2 minutes until smooth and well incorporated.
Pour the batter into your prepared pan and spread evenly with a spatula. Bake for 28-32 minutes or until a toothpick inserted in the center comes out with just a few moist crumbs. Remove from oven and let the cake cool completely in the pan for at least 2 hours.
Make the Cake Pop Mixture
Crumble the cooled cake into fine crumbs using your hands or a food processor. Transfer the crumbs to a large mixing bowl and set aside. Beat the cream cheese and butter together until light and fluffy using an electric mixer on medium speed.
Add powdered sugar, vanilla extract, and heavy cream to the cream cheese mixture. Beat on low speed initially then increase to medium speed for 2-3 minutes until smooth and creamy. Gradually fold the frosting into the cake crumbs using a silicone spatula until the mixture holds together when pressed.
Shape the Monster Cake Pops
Scoop approximately 2 tablespoons of the cake mixture and roll between your palms to form smooth balls. Place each ball on a parchment-lined baking sheet as you work. Aim for uniform sizing to ensure even coating later.
Gently reshape any balls that have become lopsided during the rolling process. You should have approximately 24-30 cake balls depending on their size. Press each ball lightly to ensure they hold their shape without cracks.
Chill the Cake Pops
Refrigerate the shaped cake balls for at least 2 hours or until firm to the touch. This chilling step prevents the cake pops from falling off the sticks during dipping. For faster results place them in the freezer for 30-45 minutes instead.
Check that the cake balls maintain their round shape after chilling. Remove any that have developed flat spots and gently reshape them before proceeding to the next step.
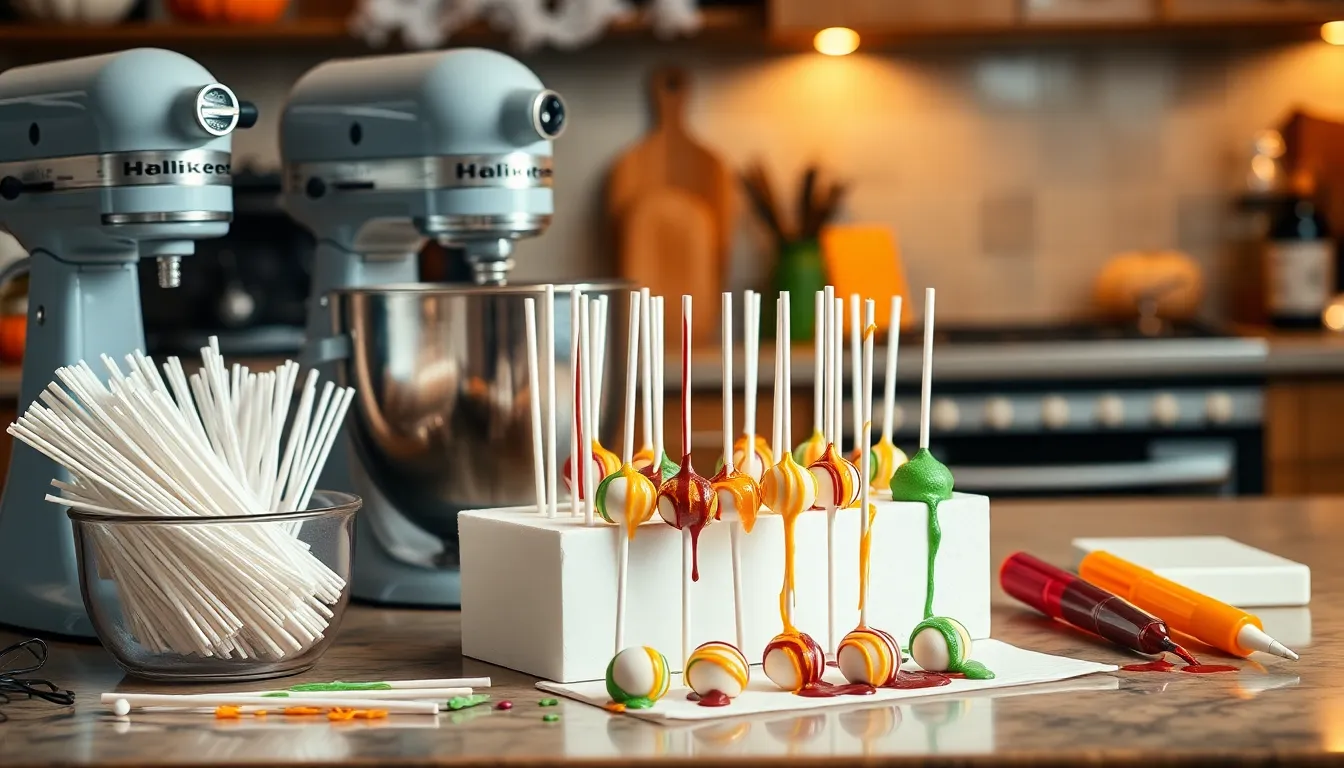
Prepare the Candy Coating
Melt the white chocolate or candy coating wafers in a microwave-safe bowl using 30-second intervals at 50% power. Stir between each interval until completely smooth and fluid. Add food coloring gel one drop at a time while stirring to achieve your desired monster colors.
Prepare separate bowls for different colored coatings if making multi-colored monsters. Keep the melted chocolate at the proper consistency by reheating in 15-second intervals as needed during the dipping process.
Dip and Coat the Cake Pops
Dip each cake pop stick about ½ inch into the melted chocolate then insert it into a chilled cake ball. Push the stick halfway through the ball and let the chocolate set for 2-3 minutes. This creates a secure connection between the stick and cake.
Hold the cake pop by the stick and dip the entire ball into the melted coating. Allow excess chocolate to drip off by gently tapping the stick against the bowl rim. Place each coated cake pop into the drying stand and let set for 10-15 minutes.
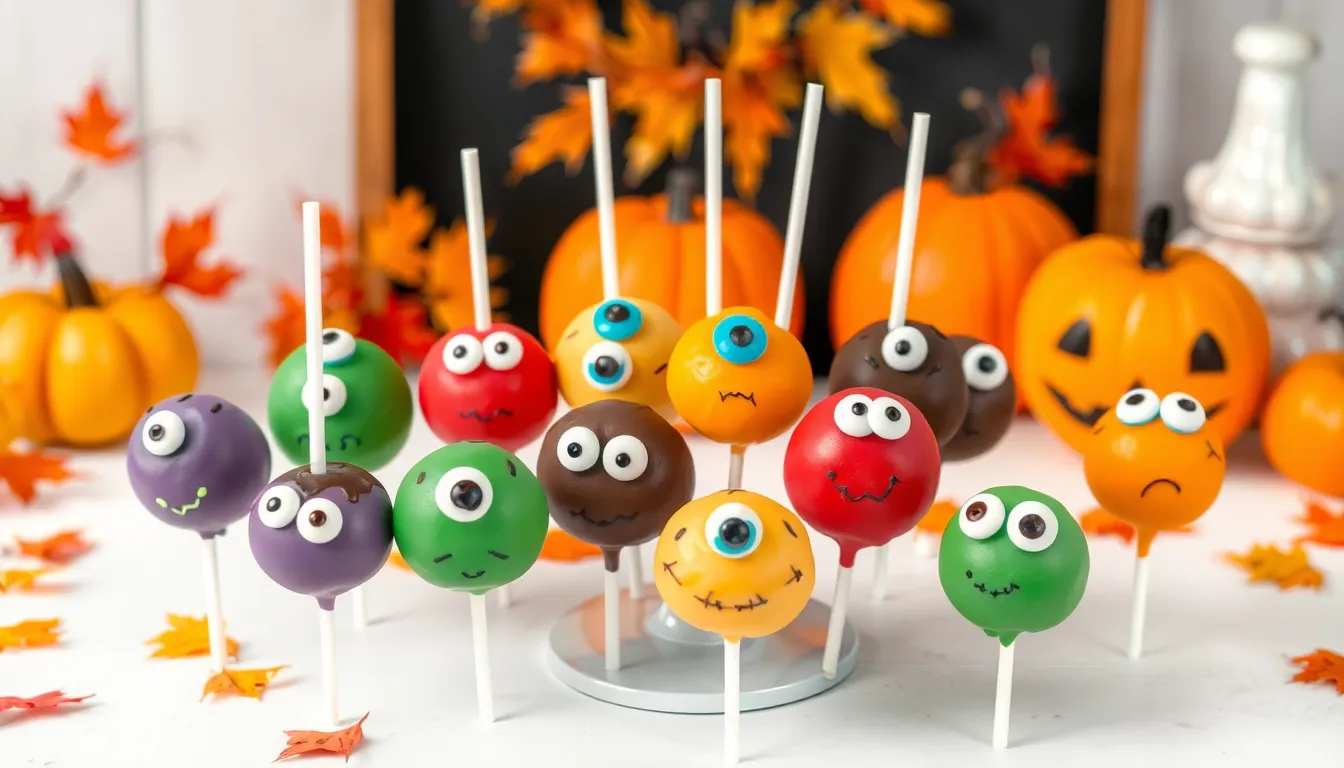
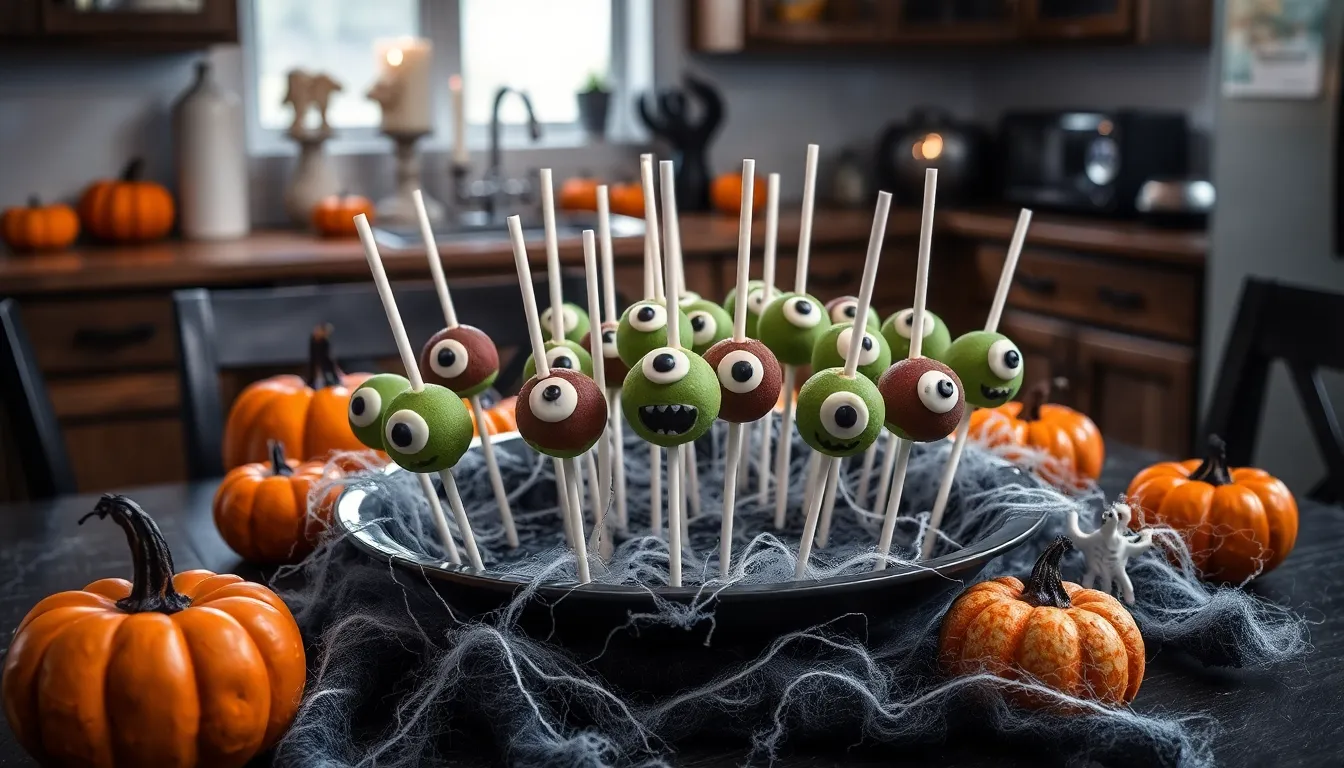
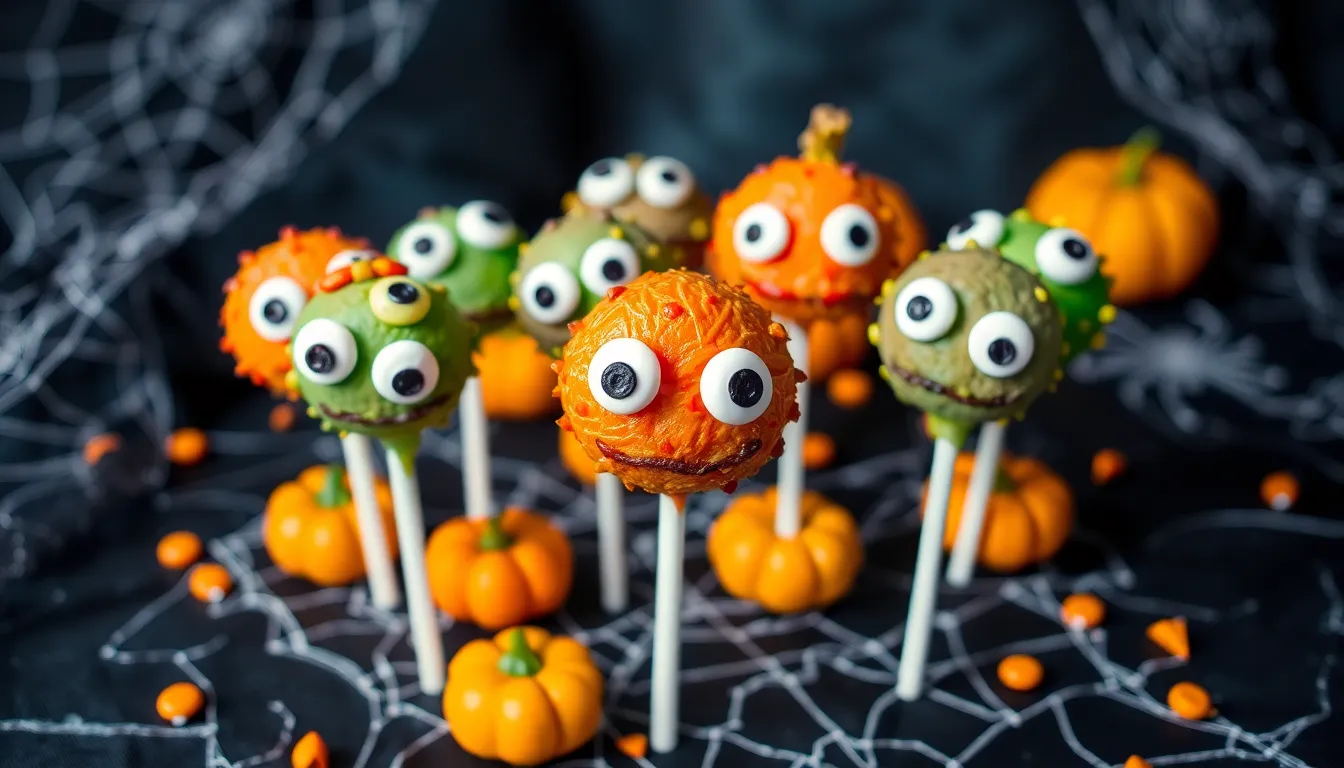
Create the Monster Eyes
Place one candy eye on each cake pop while the coating is still slightly wet. Use tweezers for precise placement and press gently to ensure the eye adheres properly. Position the eye slightly off-center for a more whimsical monster appearance.
Allow the coating to set completely before handling the cake pops further. The candy eyes should be firmly attached and the coating should feel dry to the touch.
Add Final Decorative Touches
Use a fine-tip squeeze bottle filled with contrasting colored melted chocolate to add monster features. Draw jagged mouths, scars, or additional decorative elements around the eye area. Work quickly while the base coating is still slightly tacky for better adhesion.
Let all decorative elements set completely before storing or serving your Halloween monster cake pops. Store finished cake pops in airtight containers at room temperature for up to one week or refrigerate for longer storage.
Make-Ahead Tips
Planning your Halloween one eyed monster cake pops in advance saves time and reduces stress during party preparation. You can bake the chocolate cake base up to three days before assembly and store it tightly wrapped at room temperature. Freezing the baked cake for up to one month works perfectly and actually makes crumbling easier once thawed.
Prepare your cream cheese frosting two days ahead and refrigerate it in an airtight container. The frosting will firm up during storage but returns to the perfect consistency after bringing it to room temperature and giving it a quick stir. This advance preparation allows the flavors to meld beautifully.
Shape your cake pop balls and complete the initial chilling process up to 24 hours before dipping. Place the formed balls on parchment lined baking sheets and cover them with plastic wrap before refrigerating. Cold cake balls maintain their shape better during the coating process and create smoother finished products.
Melt and color your candy coating the morning of your event rather than days ahead. Candy coating can seize or develop a grainy texture when stored for extended periods after melting. Fresh melted coating provides the smoothest finish and easiest dipping consistency.
Complete your cake pops entirely up to two days before serving and store them in the refrigerator. Place finished cake pops in an airtight container with parchment paper between layers to prevent the candy eyes from shifting or the coating from scratching. Remove them from refrigeration 30 minutes before serving to bring them to ideal eating temperature.
Assemble your cake pop display station the night before your party. Set up your drying stand and arrange any additional decorative elements you plan to use. This advance setup allows you to focus on the final decorating touches when your guests arrive.
Storage Instructions
Your Halloween one eyed monster cake pops require proper storage to maintain their delicious taste and spooky appearance. Store completed cake pops in an airtight container in the refrigerator for up to one week. Place parchment paper between layers to prevent the decorative elements from sticking together.
Keep your cake pops upright in a styrofoam block or cake pop stand during refrigeration to preserve their shape. Room temperature storage works for up to two days if your kitchen stays below 70°F. Avoid storing cake pops in humid environments as moisture can cause the candy coating to become sticky or develop condensation.
Freeze your monster cake pops for longer storage by wrapping each pop individually in plastic wrap. Place wrapped pops in a freezer safe container for up to three months. Thaw frozen cake pops in the refrigerator for 2-3 hours before serving to prevent condensation from forming on the candy coating.
Transport your spooky treats in a cool insulated container with ice packs positioned away from direct contact with the cake pops. Remove cake pops from refrigeration 15-20 minutes before serving to allow them to reach optimal eating temperature. Display your finished treats on a serving platter away from direct sunlight or heat sources to maintain their frightfully fun appearance throughout your Halloween celebration.
Troubleshooting Common Issues
Cake Pops Falling Off Sticks
Your cake pop mixture might be too wet if the pops keep sliding off their sticks. Add more cake crumbs gradually until the mixture holds together without being sticky. Ensure each stick penetrates at least halfway through the ball for proper support. Dip the stick tip in melted chocolate before inserting it into the cake ball to create a secure bond.
Cracked Chocolate Coating
Temperature differences cause most coating cracks. Let your chilled cake pops sit at room temperature for 2-3 minutes before dipping them in the melted chocolate. Keep your coating at the proper consistency by maintaining it between 86-90°F throughout the dipping process. Reheat the chocolate gently if it becomes too thick.
Uneven Candy Eye Placement
Attach candy eyes immediately after dipping while the chocolate coating remains wet. Press each eye gently but firmly to ensure proper adhesion. Use tweezers for precise placement if your fingers feel too clumsy. Position eyes at slight angles for a more animated monster appearance rather than perfectly symmetrical placement.
Coating Too Thick or Thin
| Issue | Temperature | Solution |
|---|---|---|
| Too Thick | Below 85°F | Reheat gently and add 1 tsp coconut oil |
| Too Thin | Above 95°F | Let cool for 2-3 minutes before dipping |
| Lumpy | Any temp | Strain through fine mesh sieve |
Cake Mixture Too Dry or Crumbly
Gradually add frosting one tablespoon at a time until the mixture binds properly. Your finished mixture should hold together when squeezed but not leave residue on your hands. Mix thoroughly between each frosting addition to distribute moisture evenly throughout the cake crumbs.
Color Bleeding Issues
Oil-based food coloring works best with chocolate coatings to prevent seizing. Add coloring slowly while the chocolate is warm but not hot. Water-based colors will cause your chocolate to seize and become unusable. Keep colored coatings separate during the decorating process to maintain distinct colors.
Storage Problems
Condensation forms when you move cake pops from cold storage to warm environments too quickly. Allow refrigerated cake pops to come to room temperature gradually before serving. Store finished pops in single layers with parchment paper between them to prevent the coating from sticking together.
Creative Variations
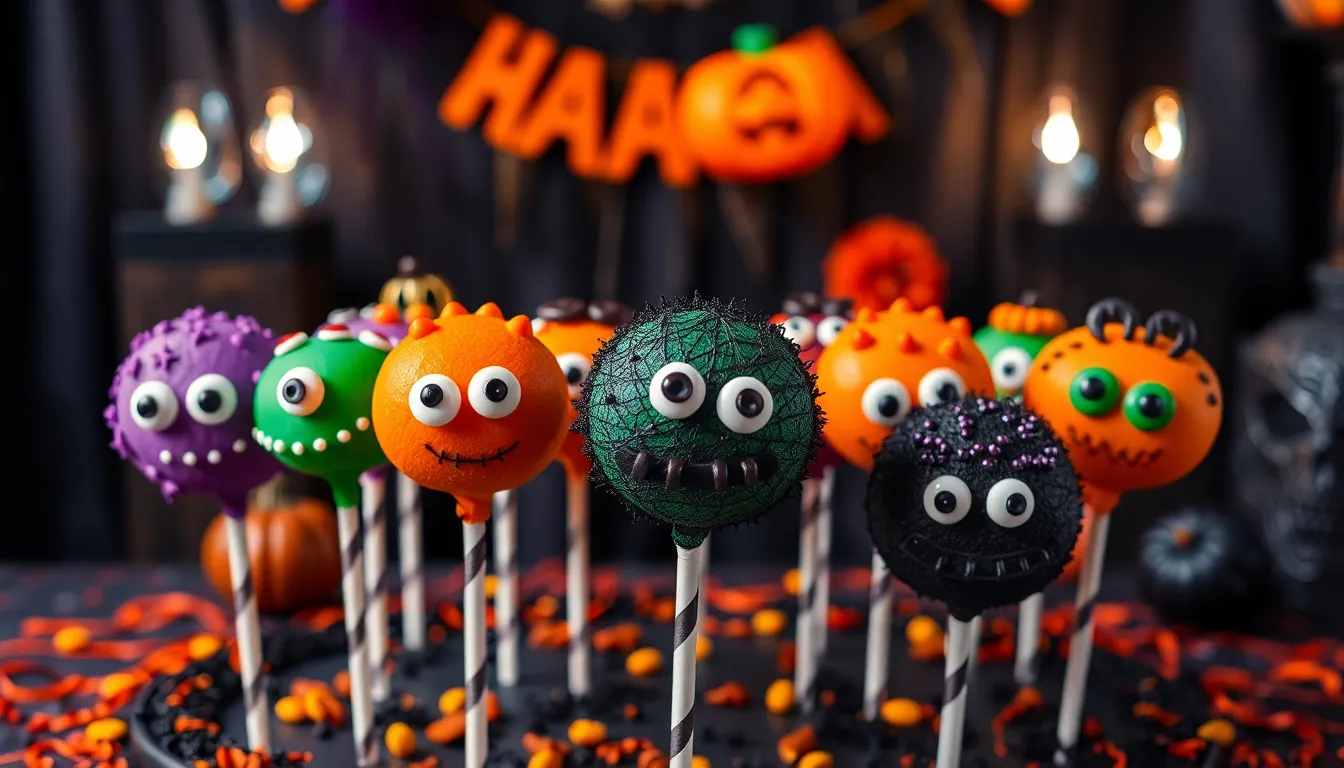
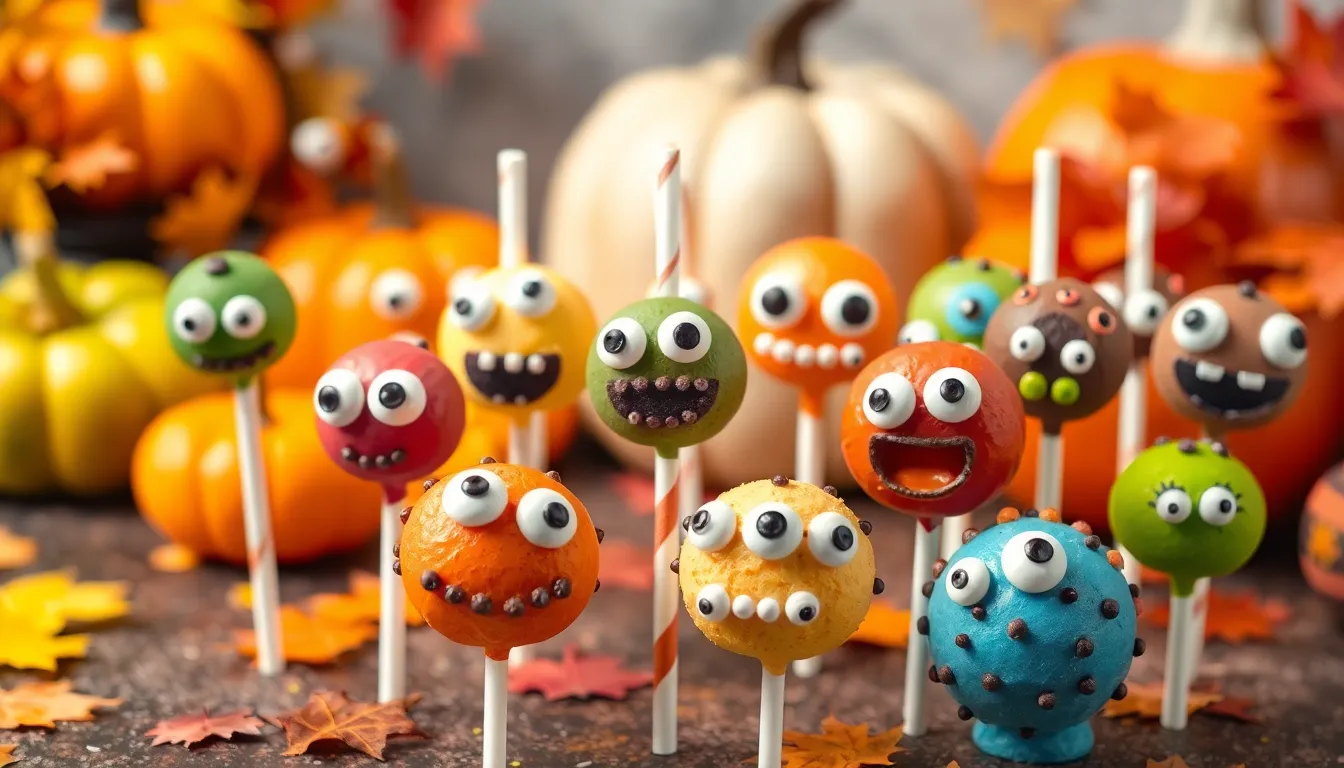
Transform your Halloween one-eyed monster cake pops into an entire spooky creature collection by experimenting with different colors and decorative elements. Purple monsters create an enchanting mystical vibe when you add silver edible glitter to the candy coating before it sets. Green creatures evoke classic Frankenstein vibes and pair beautifully with white chocolate drizzle to mimic stitches across the surface.
Orange cake pops channel pumpkin monster energy when you roll the shaped balls in orange-tinted coconut flakes before dipping. Black monsters deliver maximum Halloween impact and look striking when decorated with white chocolate dots or zigzag patterns using a squeeze bottle technique.
Two-Eyed Monster Variations
Double the spookiness by creating two-eyed monsters that stare intensely at party guests. Position candy eyes slightly closer together for a cross-eyed silly expression that appeals to younger children. Space them wider apart to achieve a more alert and watchful appearance that works perfectly for adult Halloween gatherings.
Create asymmetrical eye placement where one sits higher than the other for a quirky personality. Mini chocolate chips work as alternative eyes when pressed into the coating while still soft. White chocolate buttons piped with dark chocolate centers offer a handmade eye option that adds textural variety.
Flavored Cake Base Options
Vanilla cake creates a lighter base that pairs beautifully with colorful coatings and allows the candy decorations to pop visually. Red velvet cake adds richness and creates an unexpectedly delicious surprise when guests bite through the chocolate shell. Funfetti cake brings celebratory energy with colorful sprinkles visible through translucent candy coatings.
Lemon cake offers a bright citrus contrast to the sweet chocolate coating and works especially well with yellow or green monster themes. Strawberry cake provides a fruity twist that complements pink or red monster variations perfectly.
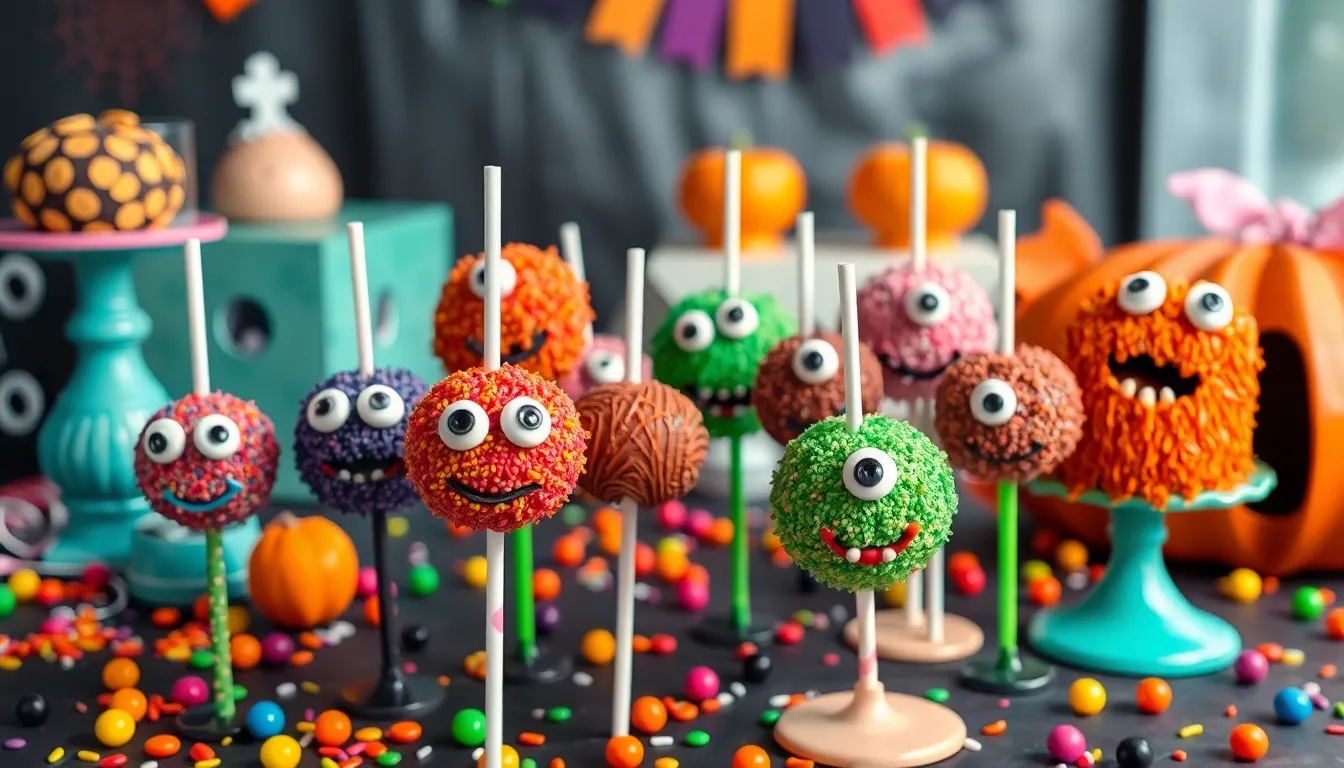
Alternative Coating Techniques
Dip cake pops in melted white chocolate then immediately roll in colored sugar crystals for a textured sparkly finish. Create ombre effects by dipping the bottom third in one color then the top portion in a lighter shade of the same hue. Drizzle contrasting colors over the base coating using a fork or squeeze bottle for abstract monster patterns.
Apply chopped nuts or cookie crumbs to wet coating for monsters with furry or scaly textures. Dust finished pops with edible pearl powder for supernatural shimmer that catches light beautifully under party lighting.
Themed Character Adaptations
Transform basic monsters into recognizable Halloween characters by adjusting decorative elements strategically. Add orange coating with triangle nose cutouts for jack-o’-lantern inspired creatures. Use white coating with black dot placement to create ghost-like appearances that maintain the monster aesthetic.
Create vampire monsters using red coating with white chocolate fang details piped along the bottom edge. Witch monsters emerge when you add green coating and pipe black chocolate triangle shapes for pointy hat silhouettes. Mummy versions require white coating with dark chocolate line details wrapped around the surface irregularly.
Conclusion
These Halloween one-eyed monster cake pops will become your go-to spooky treat for years to come. You’ve got all the tools and techniques needed to create professional-looking results that’ll wow your party guests and trick-or-treaters alike.
The beauty of this recipe lies in its flexibility – you can customize colors flavors and decorations to match your Halloween vision perfectly. Whether you’re making them with kids or preparing for a large gathering these cake pops deliver both visual impact and delicious taste.
Don’t be afraid to experiment with the variations and troubleshooting tips provided. Your Halloween celebrations just got a whole lot sweeter with these adorable edible monsters ready to steal the show.