Ingredients
You need just a few simple ingredients to create these spooky Halloween ghost meringues. The beauty of this recipe lies in its minimalist approach that delivers maximum impact.
For the Meringues
- 3 large egg whites, at room temperature
- 3/4 cup granulated sugar
- 1/4 teaspoon vanilla extract
- 1/8 teaspoon cream of tartar
- Pinch of salt
For Decoration
- Mini dark chocolate chips (for eyes)
- Black gel food coloring (optional, for mouth details)
- Small round candies or chocolate pearls (alternative for eyes)
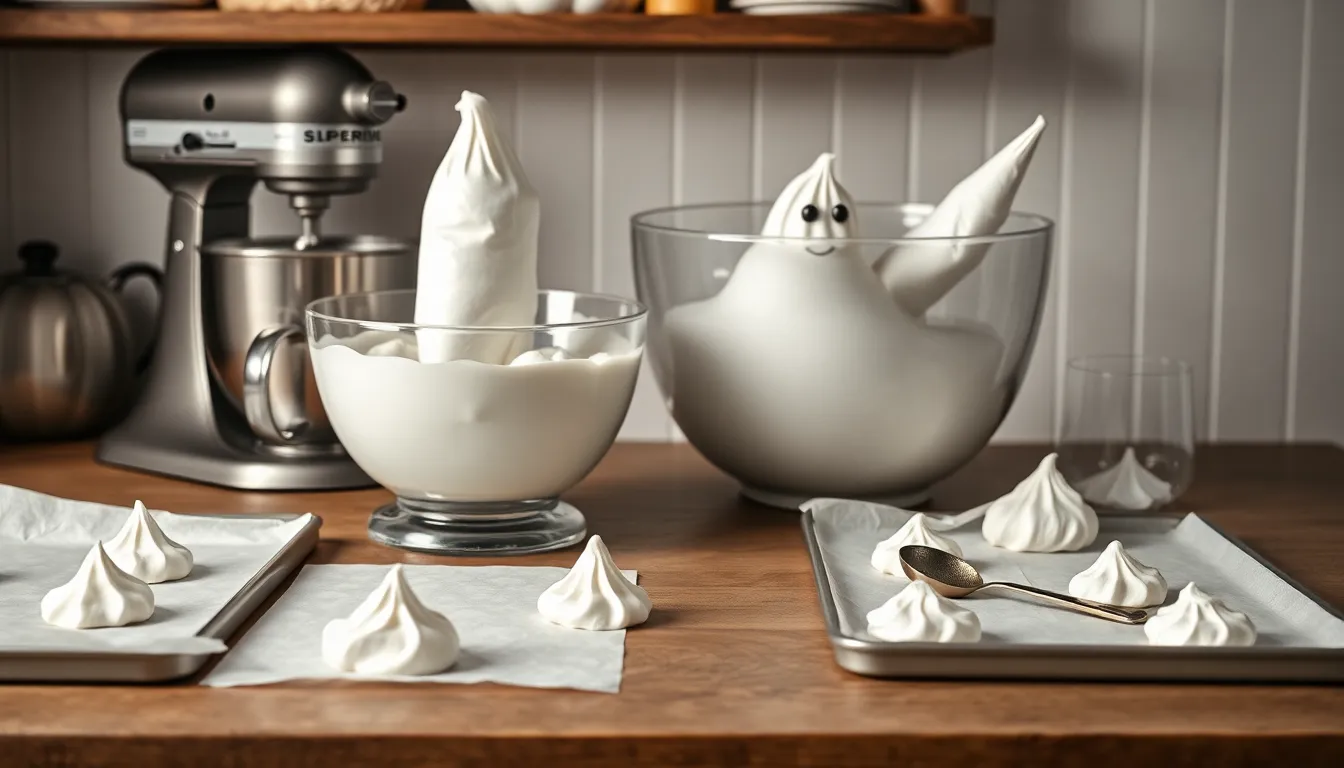
Equipment Essentials
- Large piping bag
- Round piping tip (size 1A or similar large round tip)
- Parchment paper
- 2 large baking sheets
- Electric mixer (stand mixer preferred)
- Clean mixing bowl
Room temperature egg whites whip more effectively than cold ones. Separate your eggs at least 30 minutes before beginning the recipe. Any trace of yolk will prevent proper whipping, so crack each egg carefully into a separate bowl first.
The granulated sugar dissolves completely during the whipping process to create that signature glossy meringue texture. Cream of tartar acts as a stabilizer that helps maintain the meringue’s structure during baking. Vanilla extract adds subtle flavor without affecting the pure white color essential for authentic ghost appearance.
Equipment Needed
Your kitchen setup plays a crucial role in creating perfectly shaped Halloween ghost meringues. The right tools ensure smooth preparation and professional-looking results that will impress your Halloween guests.
Stand Mixer or Hand Mixer forms the foundation of your meringue-making process. A stand mixer provides consistent whipping power and frees your hands for other tasks. Hand mixers work equally well but require more attention during the extended whipping time needed for stiff peaks.
Large Mixing Bowl accommodates the expanding egg whites as they transform into fluffy meringue. Glass or metal bowls work best since plastic can retain oils that prevent proper whipping. Ensure your bowl is completely clean and dry before starting.
Large Piping Bag creates the ghostly shapes that make these treats so charming. A 16-inch disposable piping bag provides ample space for the meringue mixture. Reusable cloth bags also work but require thorough cleaning between uses.
Round Piping Tip shapes your ghost meringues with precision. A #12 or #1A round tip creates the perfect size for Halloween ghosts. The wide opening allows smooth piping without clogging.
Baking Sheets support your meringues during the long baking process. Two large rimmed baking sheets accommodate a full batch. Heavy-duty sheets prevent warping in the oven and ensure even heat distribution.
Parchment Paper prevents sticking and makes removal effortless. Cut sheets to fit your baking pans exactly. Silicone baking mats work as an alternative but parchment paper is preferred for meringues.
Fine-Mesh Sieve removes any lumps from your sugar for ultra-smooth meringue texture. This optional tool elevates your final results by eliminating grittiness.
Small Spoons or Tweezers help position mini chocolate chips for ghost faces with precision. These tools give you control over facial expressions and create uniform appearances across your batch.
Instructions
Creating these adorable Halloween ghost meringues requires patience and precision to achieve the perfect spooky results. Follow these detailed steps to transform simple ingredients into enchanting ghostly treats.
Prep the Meringue Base
Preheat your oven to 200°F (93°C) and line two heavy-duty baking sheets with parchment paper. Position the racks in the upper and lower thirds of your oven for even heat distribution. Ensure your mixing bowl and beaters are completely clean and free from any grease or residue, as even trace amounts can prevent proper whipping. Allow your egg whites to reach room temperature for about 30 minutes before beginning, as this temperature promotes better volume and stability. Set up your piping station by fitting a large piping bag with a round piping tip and placing it in a tall glass for easy filling later.
Whip the Meringue
Separate your egg whites into the large mixing bowl, ensuring no yolk remnants remain. Add the cream of tartar and pinch of salt to the egg whites before beginning to whip. Start mixing on medium speed until the whites become foamy and begin to hold their shape. Gradually increase to high speed and continue beating until soft peaks form, approximately 2-3 minutes. Begin adding the granulated sugar one tablespoon at a time while the mixer runs, allowing each addition to dissolve completely before adding more. Continue whipping until stiff, glossy peaks form and the meringue holds its shape when the beaters are lifted, typically 8-10 minutes total. Add vanilla extract during the final 30 seconds of mixing.
Shape the Ghost Bodies
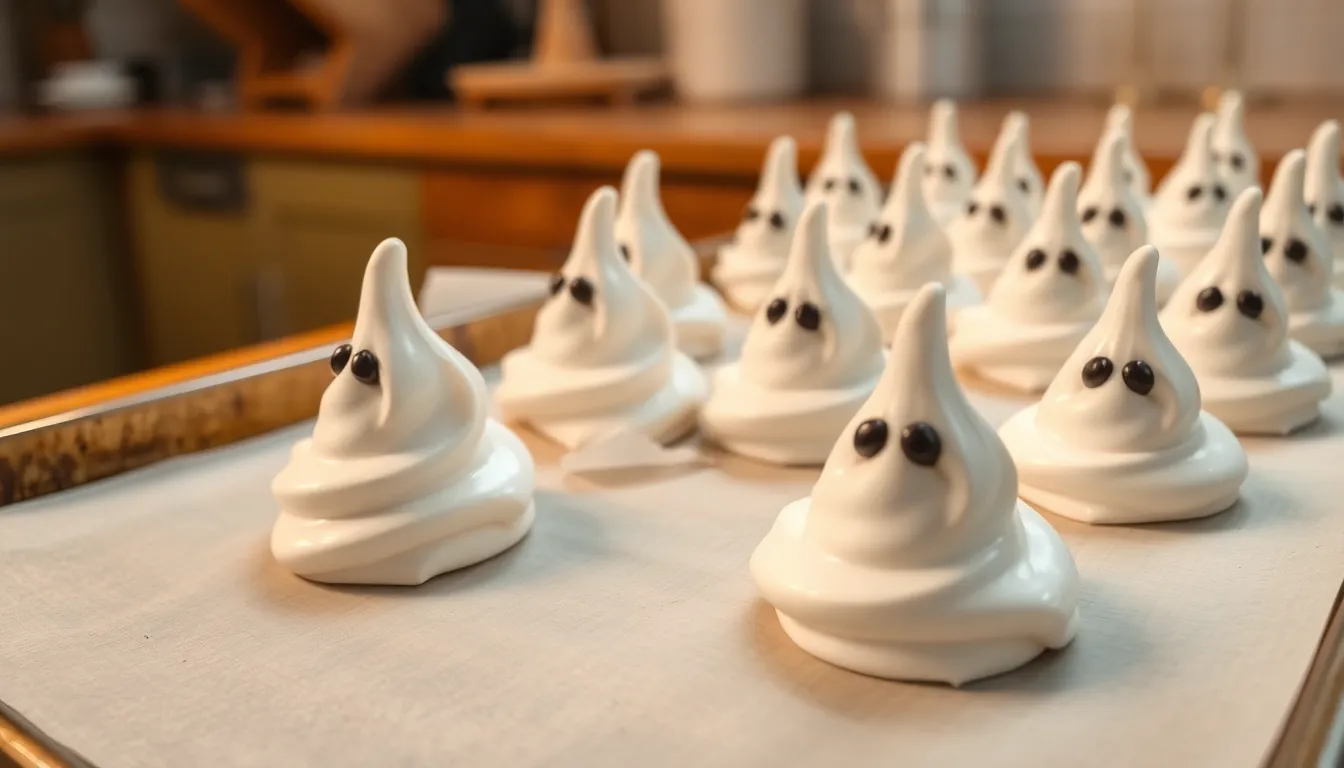
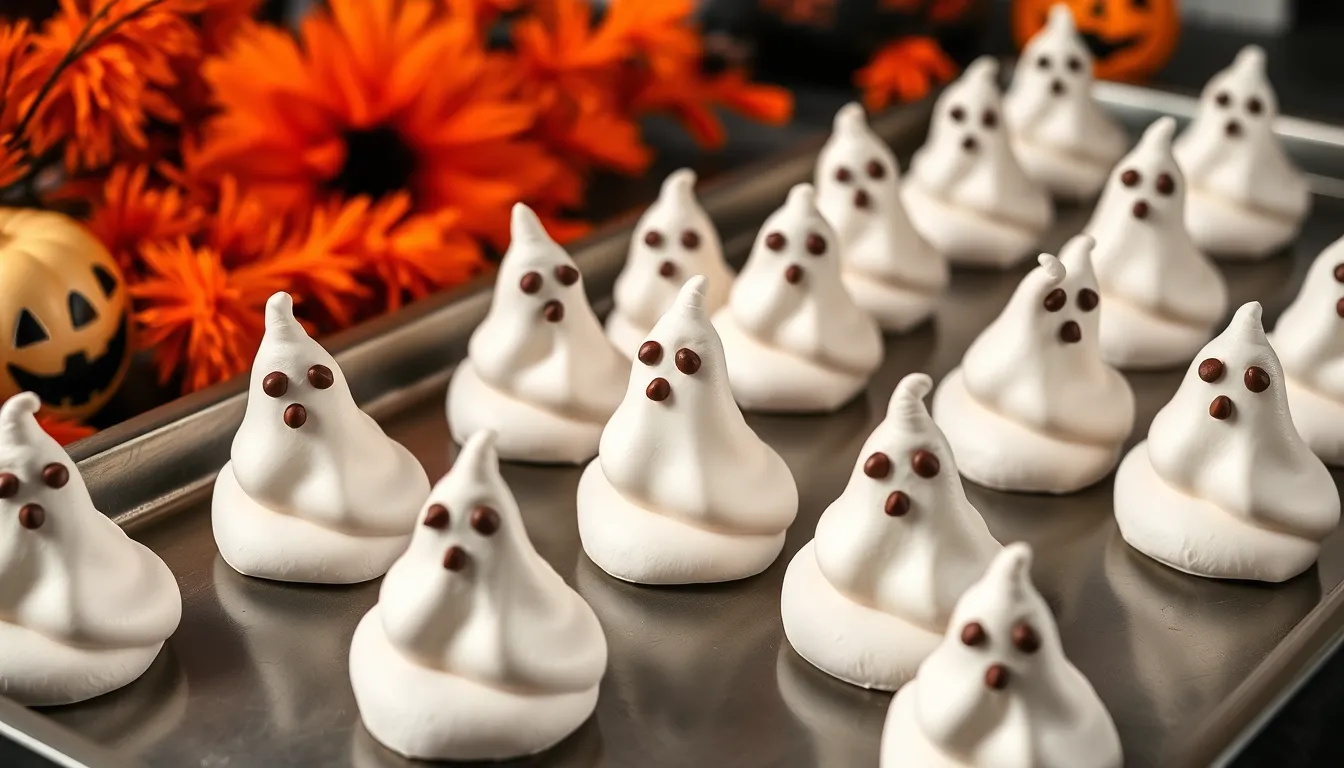
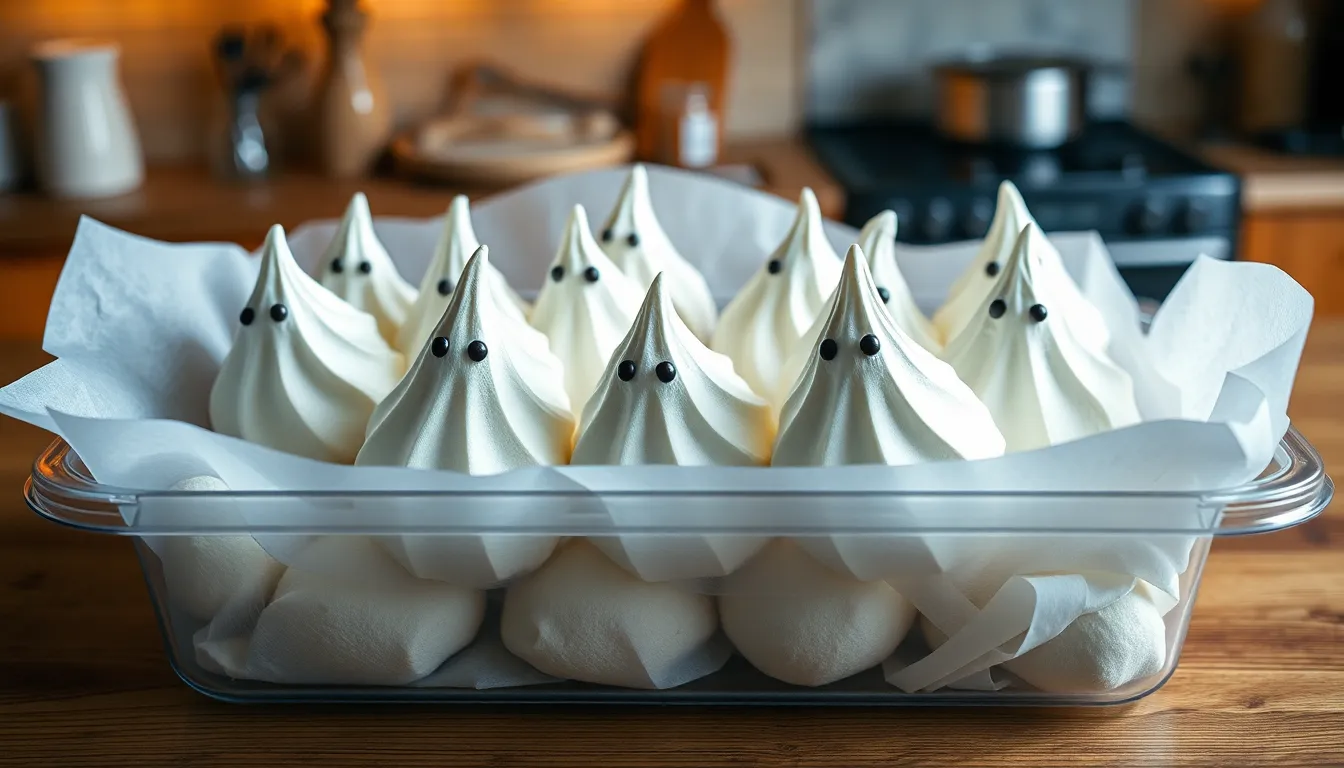
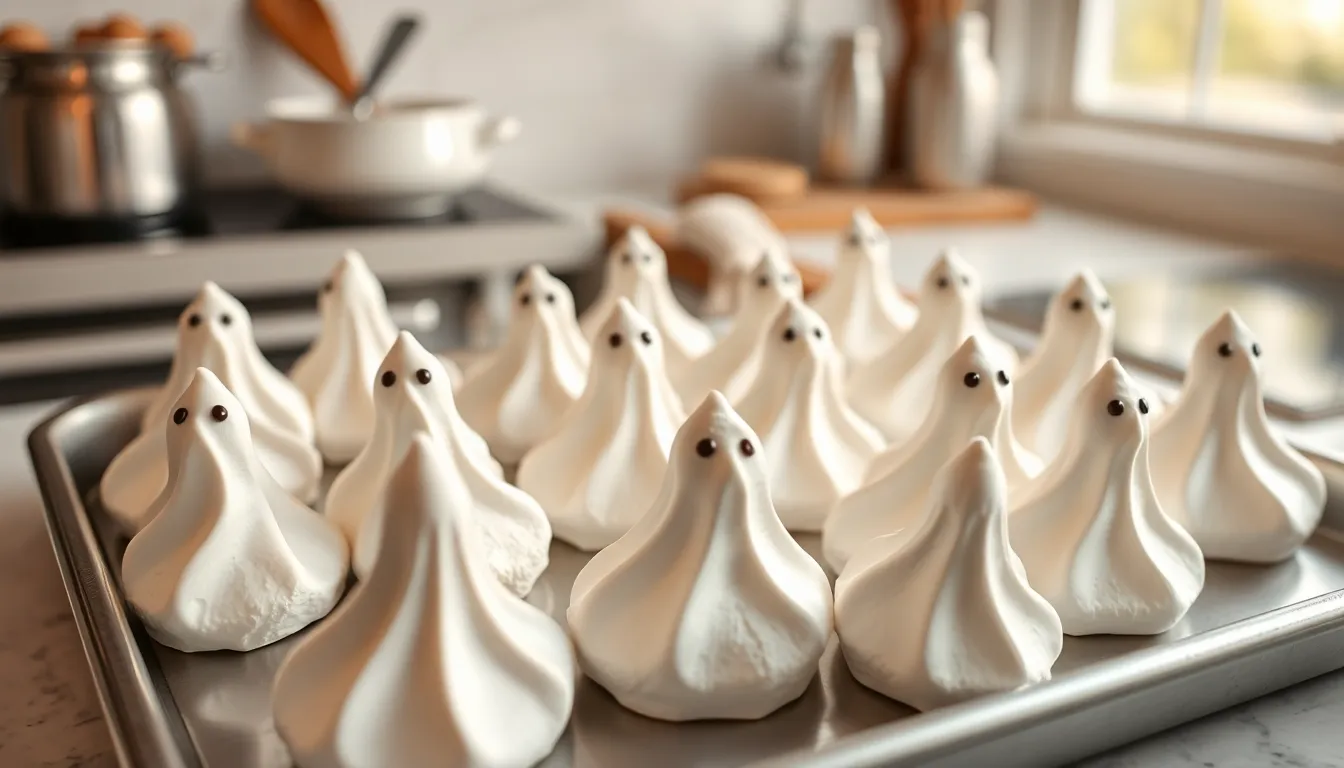
Transfer the finished meringue to your prepared piping bag, twisting the top to seal and prevent spillage. Hold the bag vertically about 1 inch above the parchment paper and apply steady pressure to create the ghost base. Pipe a round mound about 2 inches wide for the body, then lift the bag quickly to create a small peak for the head. Space each ghost about 2 inches apart to allow for slight spreading during baking. Create approximately 20-24 ghost shapes depending on your desired size. Keep the piping motion smooth and consistent to achieve uniform ghost bodies that will bake evenly.
Add the Ghost Features
Work quickly before the meringue surface begins to set, as decorations adhere best to slightly wet meringue. Gently press two mini dark chocolate chips into each ghost head to create spooky eyes, positioning them about halfway up the head portion. Add a third chocolate chip below and between the eyes for the mouth, pressing just deep enough to secure without breaking through the meringue. For variation, create different expressions by adjusting the mouth position or using broken chocolate chip pieces for smaller features. If desired, use a toothpick dipped in black gel food coloring to add additional facial details or repair any decoration placement.
Bake the Meringues
Place both baking sheets in the preheated oven and bake for 2-3 hours until the meringues feel completely dry and lift easily from the parchment paper. Rotate the baking sheets halfway through cooking to ensure even drying. Test doneness by gently lifting one meringue from the paper; it should release cleanly without sticking. Turn off the oven and prop the door open slightly with a wooden spoon, allowing the meringues to cool gradually in the residual heat for 1 hour. Remove from the oven and cool completely on the baking sheets before carefully transferring to an airtight container for storage.
Decorating Tips
Transform your basic meringue shapes into hauntingly adorable ghost treats with these professional decorating techniques. Master these simple methods to create picture-perfect Halloween meringues that will impress your guests.
Creating Perfect Ghost Shapes
Start your ghost shape with a wide base by holding your piping bag perpendicular to the parchment paper. Apply steady pressure while creating a circular foundation about 2 inches in diameter. Gradually lift the piping bag upward while maintaining consistent pressure to form the ghost’s body.
Create the classic ghost silhouette by gently tapering the top portion. Release pressure slowly as you reach the desired height and pull the piping tip away in a swift upward motion. This technique produces the signature ghostly tail that makes your meringues instantly recognizable.
Practice your piping pressure on a separate piece of parchment before starting your final batch. Consistent pressure creates uniform ghost sizes while varying pressure can result in lopsided or uneven shapes. Keep your piping movements smooth and controlled for the most professional appearance.
Size your ghosts appropriately by making them between 2 to 3 inches tall. Smaller ghosts may lack the distinctive shape while larger ones require longer baking times and risk cracking.
Adding Spooky Details
Position chocolate chip eyes immediately after piping each ghost while the meringue surface remains soft. Press the mini chocolate chips gently into the meringue about one third of the way down from the top. Space the eyes evenly and avoid pushing them too deep to prevent the chips from sinking during baking.
Create expressive faces by varying the eye placement and mouth shapes. Place eyes closer together for a surprised look or further apart for a friendlier appearance. Use a single chocolate chip for the mouth or create an “O” shape by gently pressing a small chocolate chip horizontally.
Add dramatic flair with black gel food coloring applied using a toothpick. Dip the toothpick lightly into the coloring and draw small dots or lines for additional facial features. Work quickly since the meringue surface begins to set within minutes.
Enhance your ghosts with textural details by creating small indentations using the back of a spoon. Gently press shallow curves along the sides to suggest flowing fabric or add small dimples for character. Apply these finishing touches before the meringue forms a skin to ensure they hold their shape during baking.
Storage Instructions
Store your finished Halloween ghost meringues in an airtight container at room temperature for up to one week. Place parchment paper between layers to prevent the delicate meringues from sticking together or breaking. Avoid refrigerating these treats as moisture will cause them to become sticky and lose their signature crispy texture.
Keep the storage container in a cool, dry area away from direct sunlight and heat sources. Humidity is the enemy of meringues, so ensure your storage location maintains consistent low moisture levels. A pantry or cupboard works perfectly for maintaining the ideal environment.
You can prepare these ghost meringues up to five days before your Halloween event without any loss in quality. This advance preparation makes them excellent for party planning and reduces last-minute baking stress. Check the container periodically to ensure no condensation has formed inside.
Never store meringues in the freezer as the temperature change will damage their structure and create unwanted moisture upon thawing. Room temperature storage preserves both the visual appeal and the satisfying crunch that makes these ghostly treats so delightful.
Transfer any broken pieces to a separate container to prevent them from damaging intact meringues during storage. These broken bits still taste delicious and work wonderfully as toppings for ice cream or mixed into other desserts.
Make-Ahead Tips
You can streamline your Halloween preparations by making these ghost meringues several days in advance. The key to successful make-ahead planning lies in proper timing and storage techniques that preserve their signature crispy texture.
Optimal Preparation Timeline
| Timeline | Task | Storage Method |
|---|---|---|
| 5 days ahead | Complete meringues | Airtight container |
| 3 days ahead | Pipe and bake | Room temperature storage |
| 1 day ahead | Add final decorations | Sealed container with parchment |
Start your preparation up to five days before your Halloween event for the best results. This timeline allows you to manage your baking schedule while ensuring peak freshness and texture.
Pre-Event Preparation Steps
Prepare your piping bag and tips in advance by washing and thoroughly drying all equipment. Store clean piping tools in a dry location to prevent any moisture exposure that could affect your meringue quality.
Mix your dry ingredients and measure portions ahead of time. Keep granulated sugar in an airtight container and have your cream of tartar pre-measured in small bowls. This preparation reduces active cooking time on your chosen baking day.
Strategic Baking Schedule
Bake your ghost meringues during low-humidity days for optimal results. Check your local weather forecast and choose days with humidity levels below 50% when possible. High humidity can prevent proper drying and create sticky textures.
Plan your baking sessions during cooler parts of the day to maintain consistent oven temperatures. Morning hours typically offer the most stable baking conditions before kitchen heat builds up from daily cooking activities.
Decoration Timeline Management
Add chocolate chip eyes and mouths immediately after piping while the meringue surface remains slightly tacky. This timing ensures secure attachment without the need for additional adhesive methods.
Save any black gel food coloring details for the final day if you want the sharpest contrast. These decorative touches can be applied to fully dried meringues using a toothpick or fine brush for precise control.
Troubleshooting Common Issues
Even experienced bakers encounter challenges when creating perfect ghost meringues. These common problems have simple answers that will help you achieve professional-quality results every time.
Preventing Cracks
Temperature fluctuations cause most meringue cracking during the baking process. Start your oven at 200°F (93°C) and avoid opening the door during the first hour of baking. Sudden temperature changes create stress fractures that ruin the smooth ghost appearance.
Humidity levels above 50% increase cracking risks significantly. Check your local weather forecast and choose low-humidity days for meringue making. Run a dehumidifier in your kitchen if necessary to create optimal conditions.
Cool your meringues gradually inside the turned-off oven with the door slightly ajar. This slow cooling process prevents thermal shock that leads to surface cracks. Allow at least 30 minutes of gradual cooling before removing the baking sheets completely.
Position your oven racks in the center to ensure even heat distribution around each ghost shape. Hot spots from upper or lower heating elements create uneven expansion and subsequent cracking patterns.
Achieving the Right Texture
Underbeaten egg whites produce chewy meringues instead of the desired crispy exterior. Beat your egg whites until they form stiff peaks that hold their shape when you lift the beaters straight up. The mixture should appear glossy and smooth without any visible liquid pooling at the bottom.
Overbeaten egg whites become grainy and separate during baking. Stop mixing as soon as you achieve stiff peaks with a smooth sheen. The meringue should hold its shape without appearing dry or curdled.
Sugar incorporation timing affects final texture dramatically. Add granulated sugar gradually while beating at medium-high speed. Each tablespoon should dissolve completely before adding the next portion. Undissolved sugar crystals create a gritty texture that compromises the smooth ghost appearance.
Oven temperature accuracy determines whether your meringues develop the proper crispy shell. Use an oven thermometer to verify your actual temperature matches the dial setting. Most home ovens run 15-25°F higher or lower than indicated. Adjust accordingly to maintain the low 200°F (93°C) temperature throughout the entire baking period.
Baking time varies based on meringue size and thickness. Small ghost shapes require 2-3 hours while larger versions need up to 4 hours. Test doneness by gently lifting one meringue from the parchment paper. It should release easily without sticking or feeling soft on the bottom.
Serving Suggestions

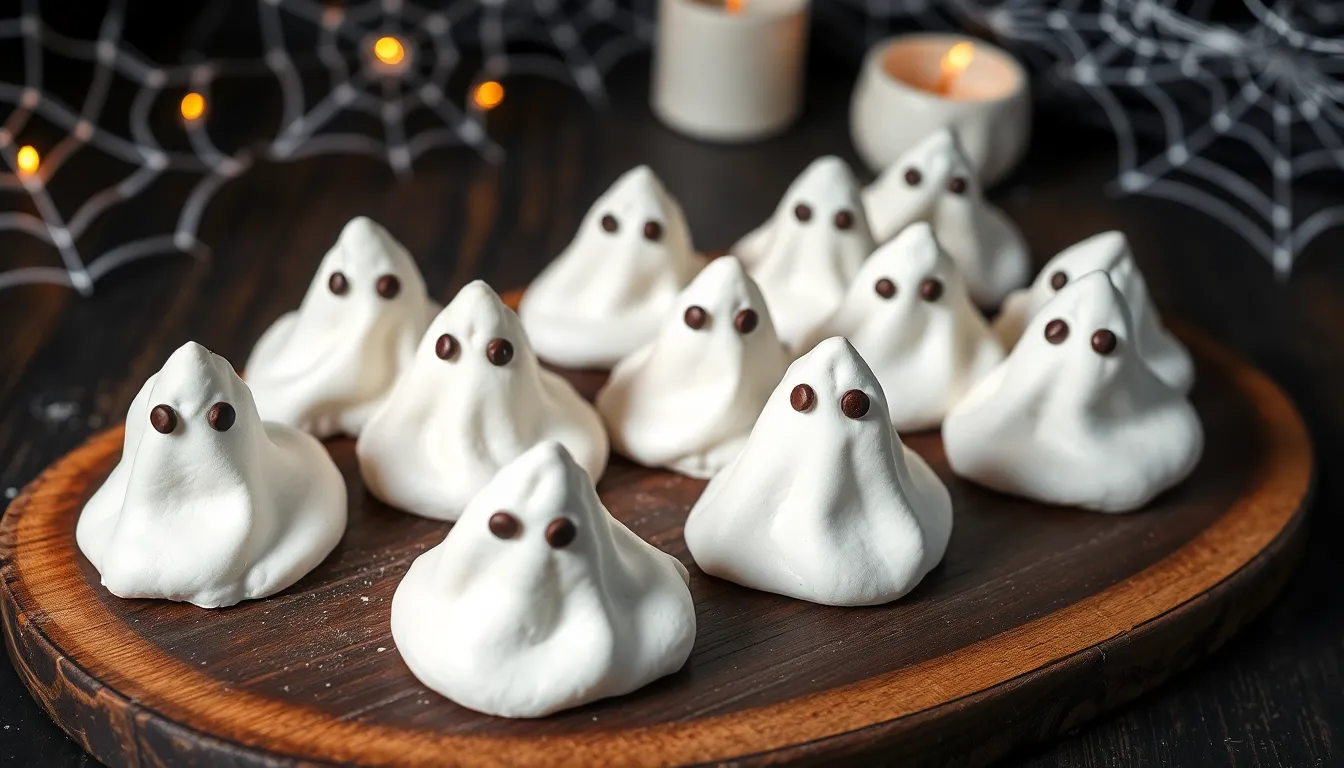
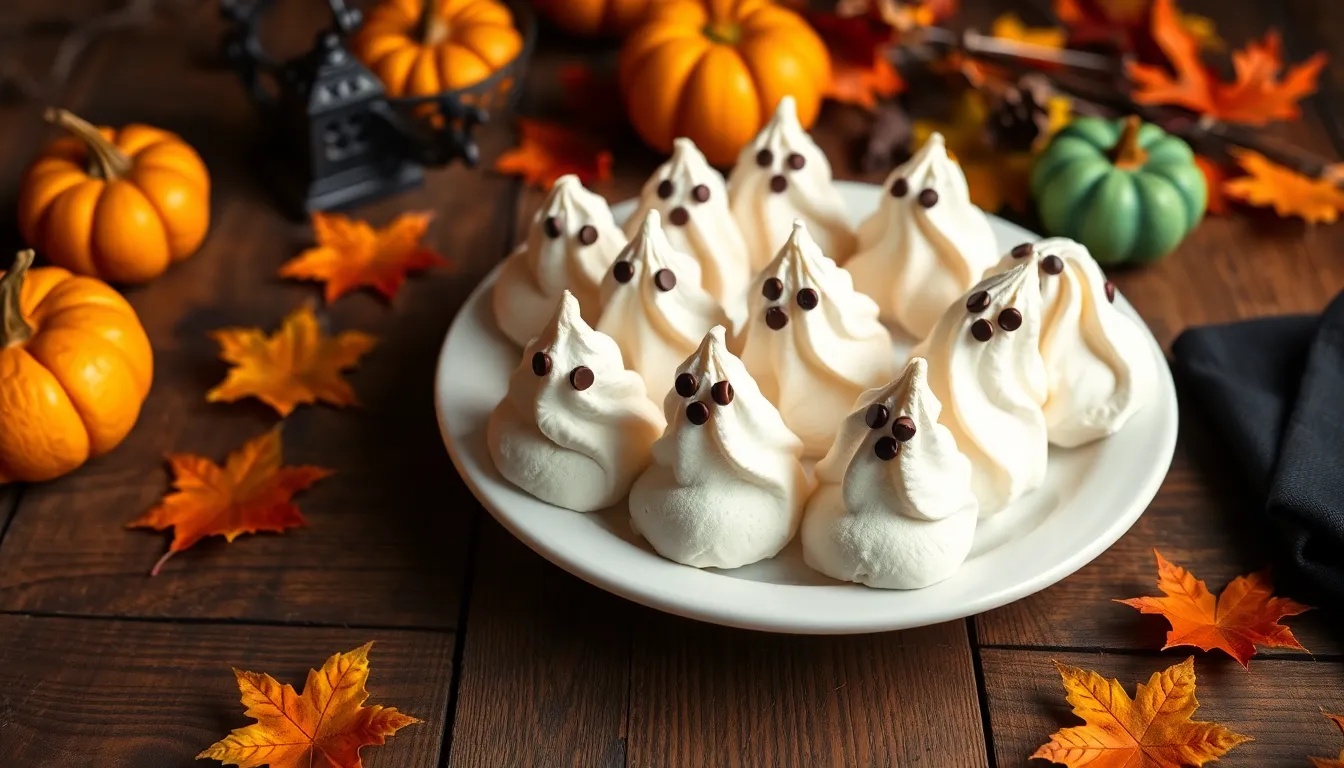
Transform your Halloween ghost meringues into spectacular centerpieces by arranging them on a dark wooden board or black serving platter. The contrast creates an eerie atmosphere that highlights their ghostly white appearance and makes them irresistible to party guests.
Create a haunted dessert table by placing the meringues alongside other Halloween treats like chocolate cupcakes, pumpkin cookies, or orange macarons. Position them at varying heights using cake stands and tiered serving trays to add visual interest and make the display more dramatic.
Individual Presentation Ideas
Serve each ghost meringue on small black paper plates with orange napkins for a classic Halloween color scheme. You can also place them in clear glass bowls filled with crushed chocolate cookies to mimic dirt or graveyard soil.
Present the meringues as part of a dessert charcuterie board featuring seasonal fruits like orange slices, blackberries, and mini pumpkins. The natural elements complement the supernatural theme while providing color variety.
Party and Event Applications
Use the ghost meringues as edible place cards by writing guests’ names on small black tags attached with orange ribbon. This dual-purpose decoration serves as both seating arrangement and party favor.
Package individual meringues in clear cellophane bags tied with black and orange ribbons for trick-or-treaters or party guests to take home. These make memorable alternatives to traditional candy and showcase your baking skills.
Beverage Pairings
Pair the sweet meringues with warm spiced cider or hot chocolate for a cozy autumn combination. The crisp texture contrasts beautifully with warm beverages while maintaining the seasonal theme.
Serve alongside coffee or tea for adult gatherings where you want sophisticated Halloween treats. The light sweetness won’t overwhelm guests after a full meal while still providing festive flair.
Creative Display Methods
Arrange the ghost meringues in glass cloches or bell jars with battery-operated LED lights underneath for an ethereal glow effect. This presentation works particularly well for dinner parties or upscale Halloween events.
Create a spooky scene by placing the meringues among artificial spider webs, mini pumpkins, and battery-powered candles. The theatrical setting enhances the ghostly appearance while keeping the treats easily accessible for serving.
Conclusion
These delightful ghost meringues will become your go-to Halloween dessert for years to come. You’ll love how simple ingredients transform into show-stopping treats that captivate both kids and adults alike.
The beauty of this recipe lies in its flexibility and make-ahead convenience. Whether you’re hosting a spooky party or simply want to add some Halloween magic to your dessert table you can’t go wrong with these ethereal sweets.
Your guests will be amazed by the professional-looking results you’ll achieve with basic baking skills. These charming ghost meringues prove that the most memorable Halloween treats don’t require complicated techniques – just a little creativity and the right guidance.
Happy haunting and even happier baking!