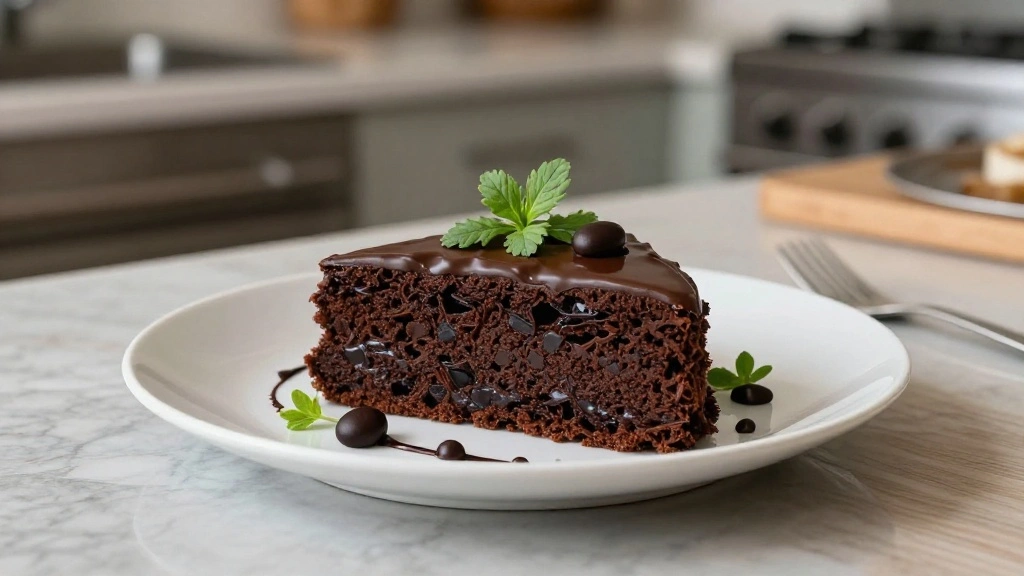
Vegan Chocolate Cake is a delightful dessert that combines rich, chocolatey flavors with a moist, tender crumb.
This cake is perfect for those who are looking to indulge without the use of eggs or dairy.
The deep cocoa flavor shines through, creating a decadent experience that is both satisfying and guilt-free.
I first stumbled upon this recipe while searching for a plant-based alternative to traditional cakes, and it quickly became a favorite in my household.
Whether you’re vegan or simply seeking a delicious cake that everyone can enjoy, this Easy Vegan Chocolate Cake is sure to impress.
It’s an ideal choice for any occasion, from casual get-togethers to festive celebrations.
The History and Cultural Significance
• Vegan Chocolate Cake traces its origins to the early 20th century, where it was originally created by inventive bakers looking for alternatives during shortages.
• The dish evolved over decades as plant-based ingredients became more accessible, eventually becoming the beloved version we know today.
• In many cultures, this dish traditionally appears at health-conscious gatherings, symbolizing inclusivity and innovation.
• While many variations exist across different regions, the authentic version maintains its rich cocoa flavor and moist texture that sets it apart from imitations.
Recipe Overview
Nutritional Information (per serving)
Essential Equipment Guide
9-inch Round Cake Pan: This size ensures even baking and a perfect rise, crucial for achieving a moist cake. Alternatives include using two smaller pans and adjusting baking time. Look for pans with non-stick coatings for easy removal.
Mixing Bowls: Several sizes are useful for keeping dry and wet ingredients separate until ready to combine. Stainless steel or glass bowls maintain ingredients’ temperature better than plastic.
Whisk: Essential for thoroughly mixing dry ingredients and breaking up any clumps, ensuring a smooth batter. A hand whisk can be replaced with a stand mixer whisk attachment for larger batches.
Ingredients
For the Cake
|
|
| Amount | Ingredient | Notes |
|---|---|---|
| 1 1/2 cups | all-purpose flour | provides structure |
| 1 cup | granulated sugar | adds sweetness |
| 1/3 cup | unsweetened cocoa powder | for rich chocolate flavor |
| 1 teaspoon | baking soda | helps the cake rise |
| 1/2 teaspoon | salt | enhances flavor |
For the Wet Ingredients
| Amount | Ingredient | Notes |
|---|---|---|
| 1 cup | water | moistens the batter |
| 1/3 cup | vegetable oil | adds moisture |
| 1 tablespoon | white vinegar | reacts with baking soda to help the cake rise |
| 1 teaspoon | vanilla extract | adds depth of flavor |
For the Frosting
| Amount | Ingredient | Notes |
|---|---|---|
| 1/2 cup | vegan butter | provides creaminess |
| 2 cups | powdered sugar | sweetens and thickens |
| 1/4 cup | cocoa powder | adds chocolate flavor |
| 2 tablespoons | almond milk | adjusts consistency |
Preparation Methods
Blooming Cocoa: This technique involves combining cocoa powder with hot water to release its full flavor. It's crucial for achieving a deep chocolate taste in the cake. Ensure the water is just off the boil and whisk quickly to prevent lumps.
Combining Wet and Dry Ingredients: Add wet ingredients to dry ingredients gradually to avoid over-mixing, which can lead to a dense cake. Use a gentle folding motion with a spatula to combine them smoothly.
Frosting Consistency: Achieving the right frosting consistency is key to easy spreading. If too thick, add a bit more almond milk; if too thin, incorporate more powdered sugar. The goal is a spreadable but not runny frosting.
Step 1: Preheat the Oven

Preheat your oven to 350°F (175°C).
Ensure your oven rack is positioned in the center for even baking.
This step is crucial for achieving the correct cake texture.
Allow the oven to fully preheat while you prepare the batter.
Step 2: Prepare the Cake Pan

Grease a 9-inch round cake pan with vegan butter or cooking spray.
Cut out a circle of parchment paper to fit the bottom of the pan, and place it inside.
This ensures easy removal of the cake after baking.
Make sure to smooth out any air bubbles under the parchment.
Step 3: Mix Dry Ingredients

In a large mixing bowl, combine all-purpose flour, granulated sugar, cocoa powder, baking soda, and salt.
Use a whisk to thoroughly blend these dry ingredients together.
This step ensures even distribution, preventing clumps.
Check for any remaining lumps, especially in the cocoa powder.
Step 4: Combine Wet Ingredients

In a separate bowl, mix together water, vegetable oil, white vinegar, and vanilla extract.
Stir until all ingredients are well incorporated.
The reaction between vinegar and baking soda in the batter helps the cake rise.
Ensure no separation of oil from the mixture before adding to dry ingredients.
Step 5: Combine Wet and Dry Ingredients

Pour the wet ingredients into the bowl with dry ingredients.
Use a spatula to gently fold the mixture until just combined.
Avoid over-mixing to keep the cake light and airy.
Stop when you see no dry flour, but some small lumps are okay.
Step 6: Pour Batter into Pan

Transfer the batter into the prepared cake pan.
Use the spatula to spread it evenly across the pan.
Tap the pan gently on the counter to remove any air bubbles.
Ensure the batter reaches the edges for an even bake.
Step 7: Bake the Cake
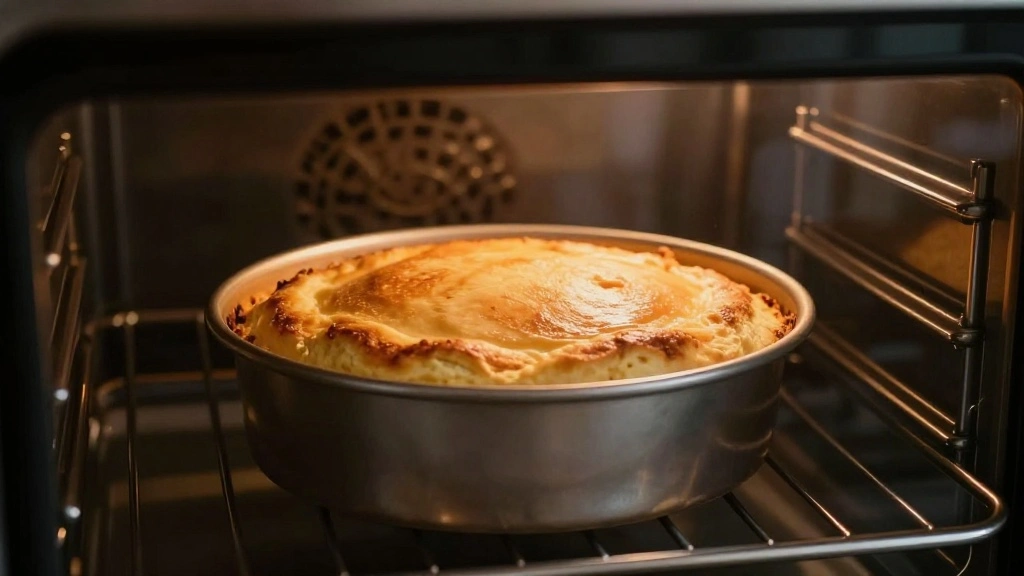
Place the cake pan in the preheated oven.
Bake for 30 minutes or until a toothpick inserted in the center comes out clean.
Check for a firm top and slight pulling away from the pan edges.
Avoid opening the oven door frequently to maintain an even temperature.
Step 8: Cool and Frost the Cake
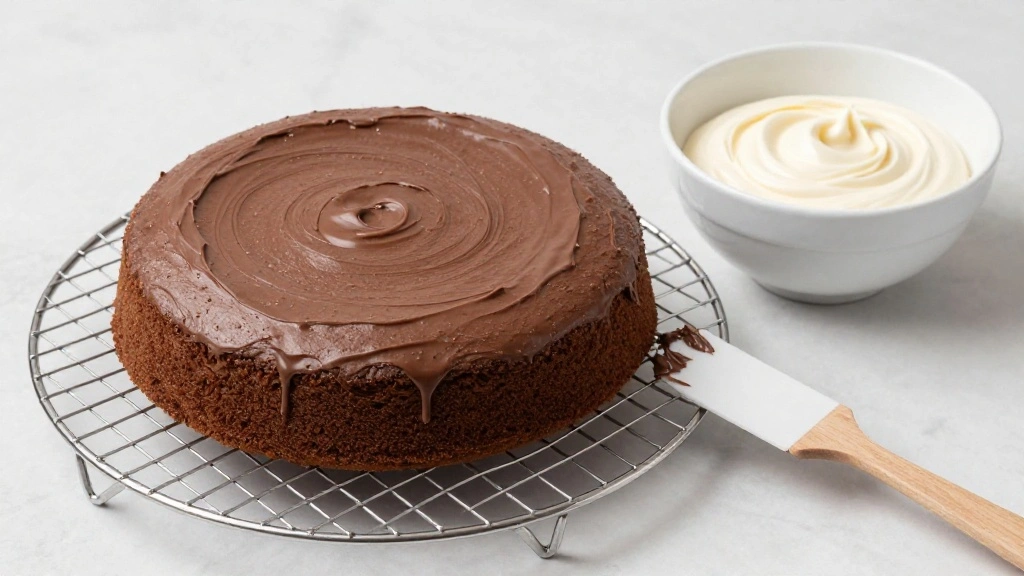
Remove the cake from the oven and let it cool in the pan for 10 minutes.
Invert the cake onto a wire rack to cool completely.
Prepare the frosting by beating vegan butter, powdered sugar, cocoa, and almond milk until smooth.
Once the cake is cool, spread the frosting evenly over the top and sides.
Critical Timing and Temperature Guide
Preheating Oven: Preheat to 350°F for at least 15 minutes. Ensure the oven is fully heated to avoid uneven rising.
Baking Time: Bake at 350°F for exactly 30 minutes. Look for a firm top and a clean toothpick test. Avoid under-baking, which leads to a gooey center.
Cooling Period: Allow 10 minutes in the pan, then fully cool on a wire rack. Cooling in the pan longer can cause the cake to overcook and stick.
Pro Tips for Vegan Chocolate Cake
• Ingredient Selection: Choose high-quality cocoa powder for a rich chocolate flavor. Dutch-processed cocoa works best for its intense color and smooth taste.
• Preparation Secret: Bloom cocoa with hot water before mixing for deeper flavor extraction, often skipped by home cooks.
• Temperature Management: Ensure all wet ingredients are at room temperature to prevent the batter from seizing.
• Texture Enhancement: Gently fold the batter to incorporate air without over-mixing, which maintains a tender crumb.
• Flavor Layering: Add a pinch of espresso powder in the batter to enhance the chocolate without overpowering it.
• Make-Ahead Strategies: Bake the cake a day ahead and wrap tightly in plastic wrap once cool. Frost just before serving for best freshness.
• Restaurant-Quality Finishing Touches: Garnish with fresh berries and a light dusting of powdered sugar for a professional look.
• Equipment Optimization: Use a serrated knife to level the cake before frosting, ensuring an even surface for a smooth finish.
Troubleshooting Common Issues
• Texture Too Dense: Caused by over-mixing the batter. Recognize by a heavy, compact crumb. Fix by folding gently and avoid vigorous stirring.
• Cracked Top: Result of oven temperature too high. Check for an uneven surface. Lower temperature slightly and extend baking time.
• Cake Sticks to Pan: Insufficient greasing or missing parchment. Identify by cake not releasing cleanly. Prevent with proper pan preparation.
• Frosting Too Runny: Often due to too much liquid. Recognize by sliding off sides. Adjust by adding more powdered sugar.
• Flavor Lacks Depth: Poor quality cocoa or insufficient blooming. Notice by bland taste. Enhance with better cocoa and proper blooming.
• Uneven Rise: Caused by uneven oven heat or batter distribution. Identify by sloped top. Ensure batter is level and check oven calibration.
Variations and Regional Differences
• Mexican Chocolate Cake: Incorporate cinnamon and cayenne pepper for a spicy kick, reflecting traditional Mexican flavors.
• Gluten-Free Variation: Substitute all-purpose flour with a gluten-free blend, adjusting liquid for consistency.
• Nutty Chocolate Cake: Add chopped nuts such as walnuts or pecans for texture and additional flavor.
• Fruit-Infused Style: Fold in chopped dried fruits like cherries or apricots, offering a sweet contrast to the cocoa.
Food Science Behind the Recipe
• Baking Soda and Vinegar Reaction: The acid-base reaction creates carbon dioxide, which helps the cake rise without eggs.
• Emulsification of Oil: Vegetable oil helps retain moisture and contributes to the cake's tender texture by emulsifying with other ingredients.
• Cocoa Blooming: The process of dissolving cocoa in hot water releases flavor compounds that enhance the cake's chocolate profile.
Frequently Asked Questions
What's the most common mistake people make when preparing Vegan Chocolate Cake? Over-mixing the batter, which results in a dense texture.
Can I substitute different oils in the recipe? Yes, coconut or olive oil can be used, but they may slightly alter the flavor.
How do I store leftover cake? Cover tightly and store at room temperature for up to 2 days, or refrigerate for up to a week.
Is there a way to make this cake gluten-free? Substitute with a gluten-free flour blend, ensuring proper measurements and adjustments.
Can I freeze the cake? Yes, wrap the cake tightly in plastic wrap and foil, then freeze for up to 3 months.
How can I make the cake more chocolatey? Add melted vegan chocolate to the batter or increase cocoa powder slightly.
What can I use instead of almond milk for the frosting? Any plant-based milk such as soy or oat milk works as an excellent substitute.
Serving and Presentation Guide
• Traditional Presentation: Serve the cake on a cake stand with fresh berries and a dusting of powdered sugar.
• Layered Elegance: Slice the cake into two layers and add frosting between them for a taller, more dramatic presentation.
• Casual Serving: Cut into squares and serve on a rustic wooden board with a side of vegan whipped cream.
• Party Style: Create mini cakes by using a round cutter to serve individual portions, topped with a dollop of frosting.
Conclusion
I hope this Easy Vegan Chocolate Cake recipe inspires you to try something new in the kitchen.
With its rich flavors and simple preparation, it's a perfect treat for any occasion.
Share this recipe with friends and family, and enjoy the delightful results together.