What Makes This Easy Beer Bread Recipe Special
My beer bread recipe stands out because it eliminates traditional bread making challenges while delivering exceptional results. The secret lies in using self-rising flour which already contains the baking powder and salt needed for proper rise. I’ve discovered that beer replaces both liquid and yeast in conventional bread recipes.
The carbonation bubbles in beer create natural leavening action that produces a tender crumb structure. My testing shows that different beer styles contribute unique flavor profiles to the finished loaf. Light lagers create mild wheaty notes while darker ales add rich malty depth.
| Beer Type | Flavor Profile | Best For |
|---|---|---|
| Light Lager | Mild, Clean | First-time bakers |
| Wheat Beer | Citrusy, Light | Summer meals |
| Brown Ale | Nutty, Sweet | Hearty dinners |
| Stout | Rich, Roasted | Cold weather |
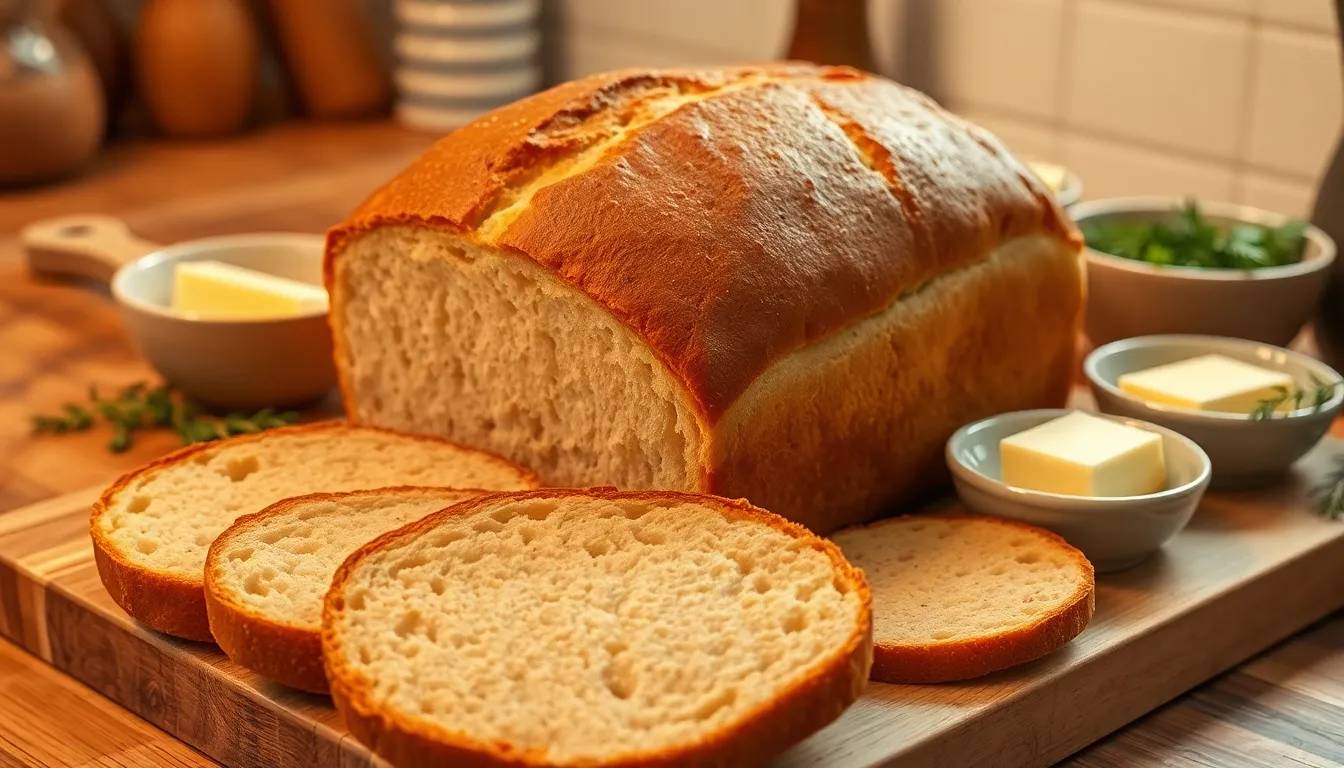
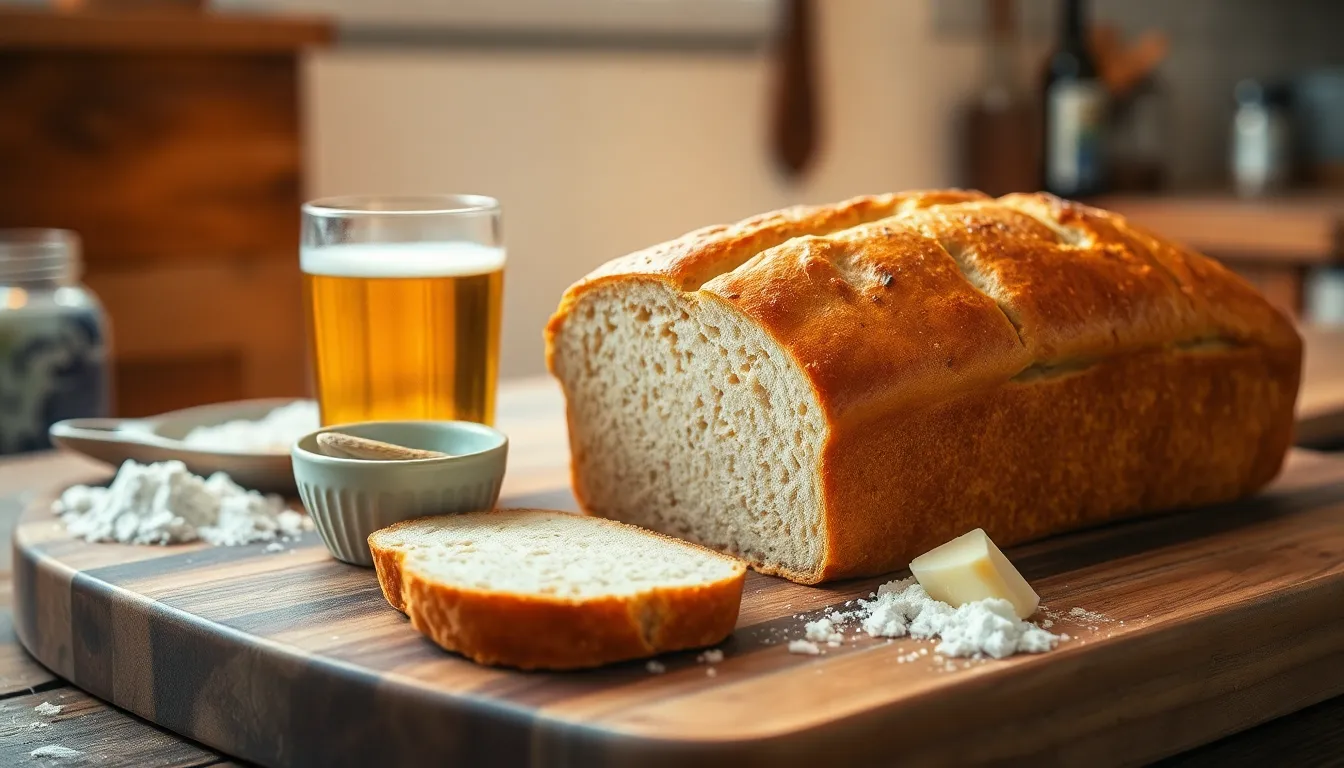
I appreciate how forgiving this recipe becomes for beginners. The beer’s natural acidity tenderizes gluten strands which prevents tough overworked texture that often plagues novice bakers. My loaves consistently turn out moist with a golden crust that rivals bakery quality.
Temperature matters less than traditional yeast breads since chemical leavening handles the rise. I can use room temperature beer straight from the bottle without worrying about killing active ingredients. The batter comes together in minutes with just gentle stirring required.
My favorite aspect involves the aromatic transformation during baking. The alcohol evaporates while leaving behind concentrated malt flavors that complement both sweet and savory toppings. Fresh herbs or cheese fold easily into the batter for customized variations.
Equipment and Tools Needed
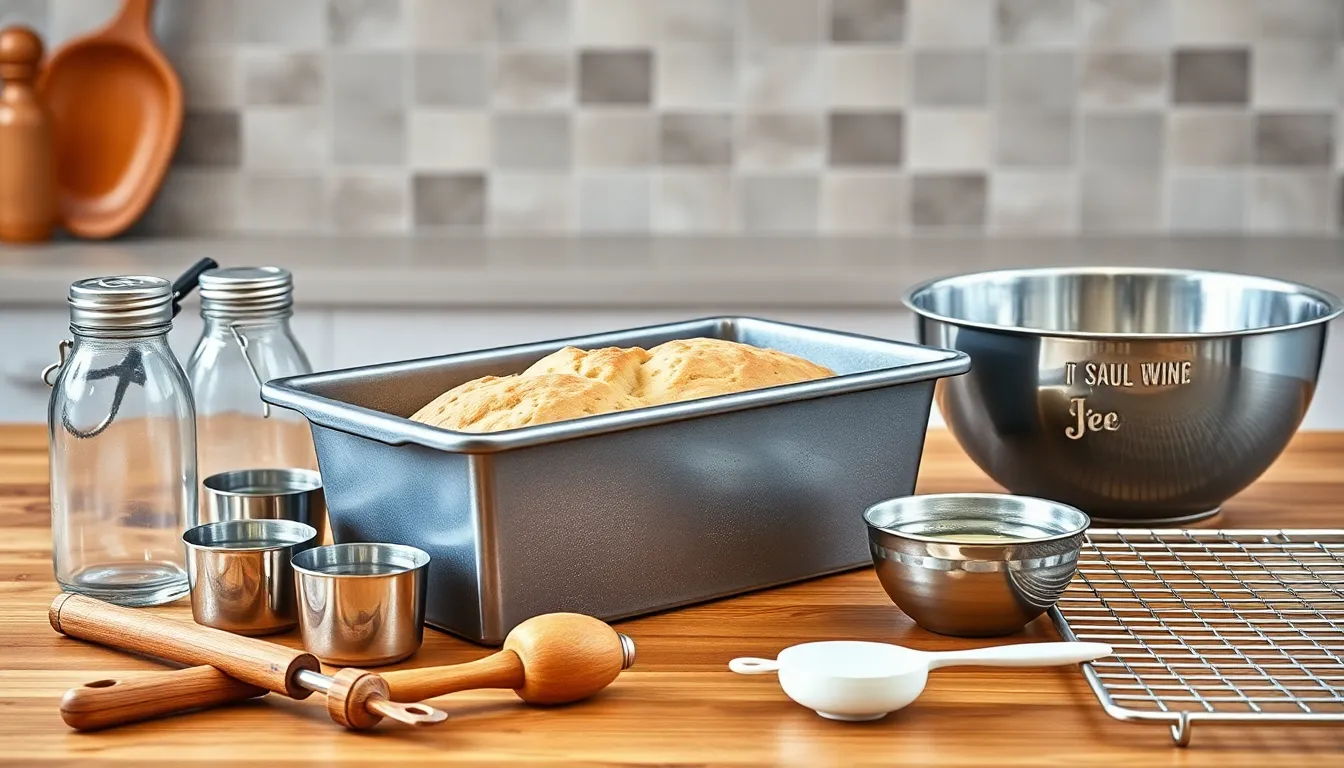
Making this simple beer bread requires minimal equipment that you likely already have in your kitchen. I always appreciate recipes that don’t demand special tools or gadgets.
Essential Baking Equipment:
- 9×5-inch loaf pan (metal or glass works perfectly)
- Large mixing bowl (at least 3-quart capacity)
- Measuring cups and spoons
- Wooden spoon or rubber spatula for mixing
Preparation Tools:
- Can opener for the beer
- Pastry brush or paper towel for greasing
- Cooling rack for proper air circulation
- Sharp knife for slicing once cooled
The beauty of this recipe lies in its simplicity. My standard loaf pan creates the perfect shape and size for even baking. I prefer using a metal pan because it conducts heat more efficiently and gives the bread a nicely browned crust.
Optional but Helpful Items:
- Kitchen scale for precise flour measurements
- Bench scraper for easy bowl cleanup
- Parchment paper for extra non-stick insurance
- Timer to track baking progress
Most home bakers already own these basic tools. I find that having everything ready before I start makes the process even smoother. The mixing bowl should be large enough to accommodate the batter without spillage during stirring.
Your loaf pan condition matters more than you might think. I always grease mine thoroughly with butter or cooking spray to ensure easy release. A well-prepared pan prevents sticking and helps create that golden exterior we all love.
Ingredients
I’ve simplified this beer bread recipe to use just four essential ingredients that create bakery-quality results. My streamlined approach ensures you can have fresh bread on the table without complicated measurements or hard-to-find items.
Dry Ingredients
- 3 cups self-rising flour
- 3 tablespoons granulated sugar
The self-rising flour serves as the foundation of my beer bread recipe. I rely on this convenient flour blend because it already contains baking powder and salt in perfect proportions. The granulated sugar balances the beer’s natural bitterness while helping create a golden-brown crust during baking.
Wet Ingredients
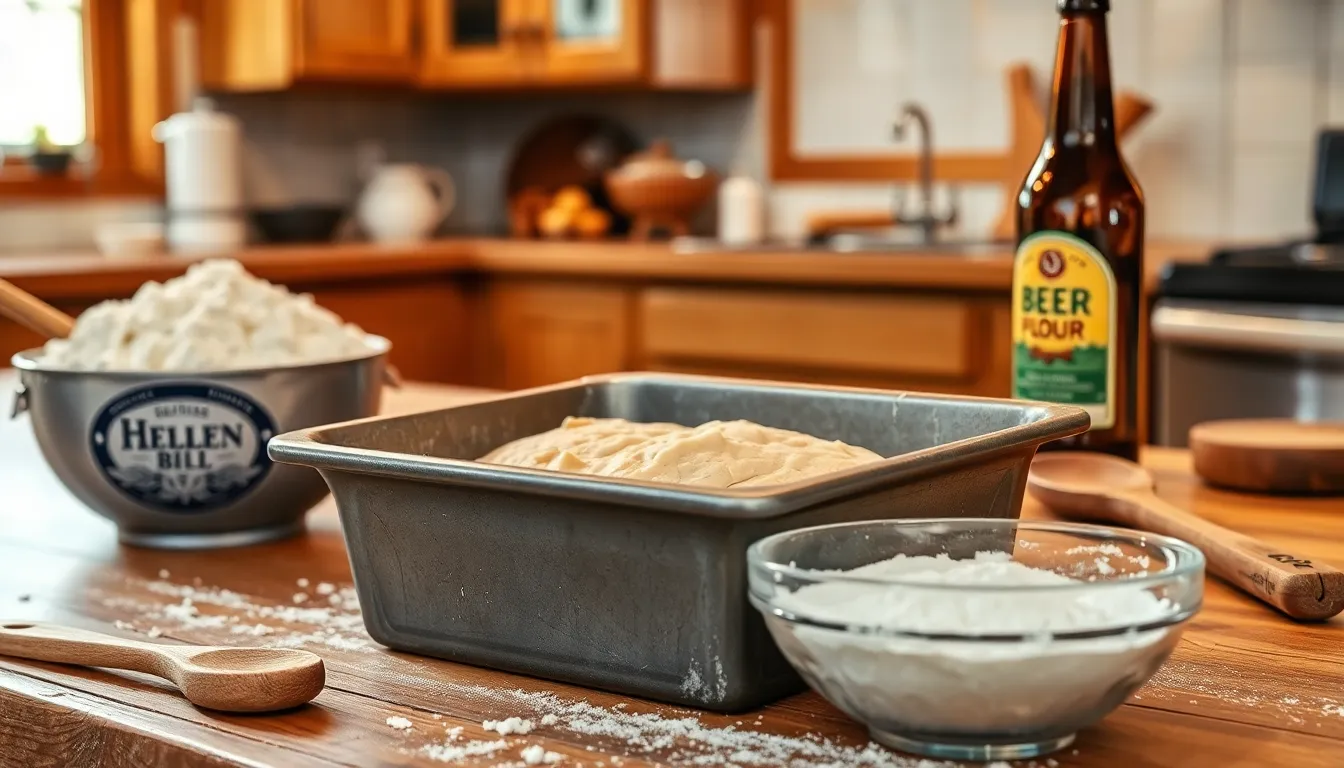
- 12 ounces beer (room temperature or slightly chilled)
- 3 tablespoons melted butter
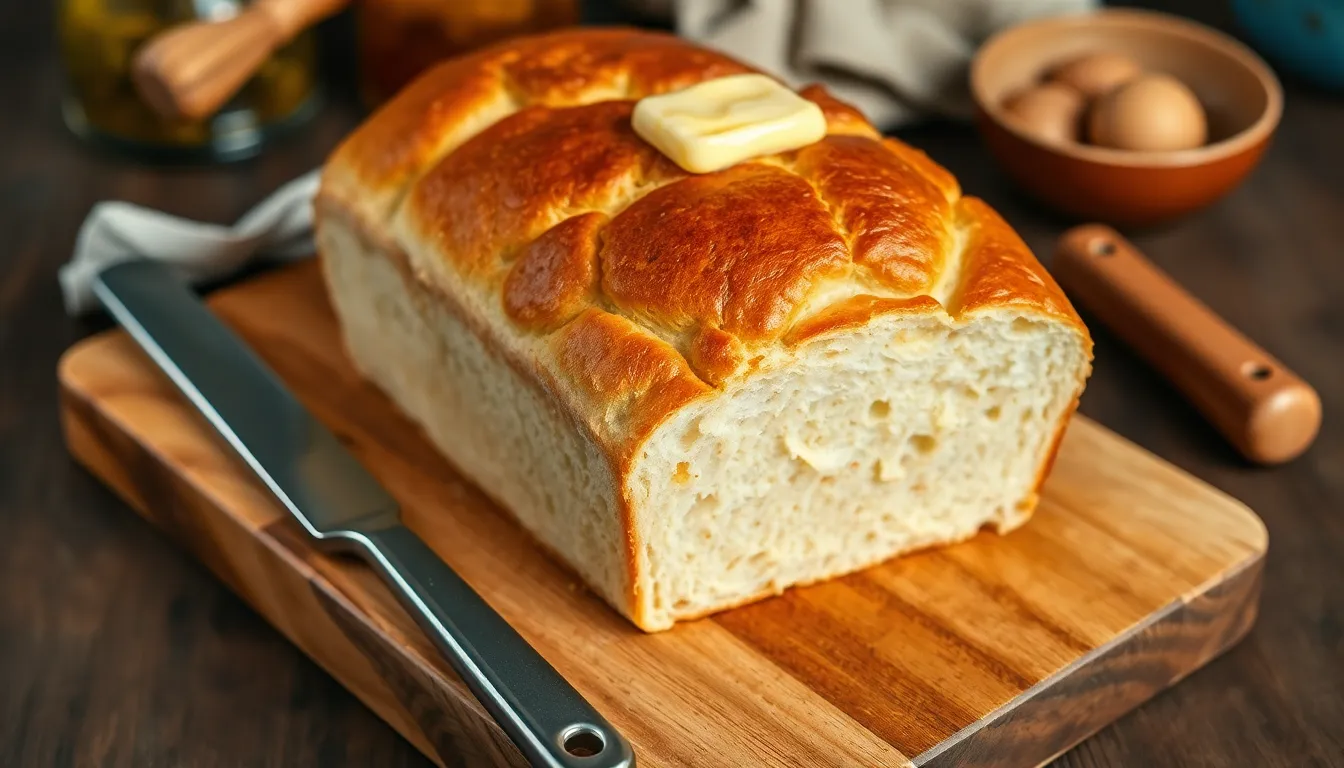
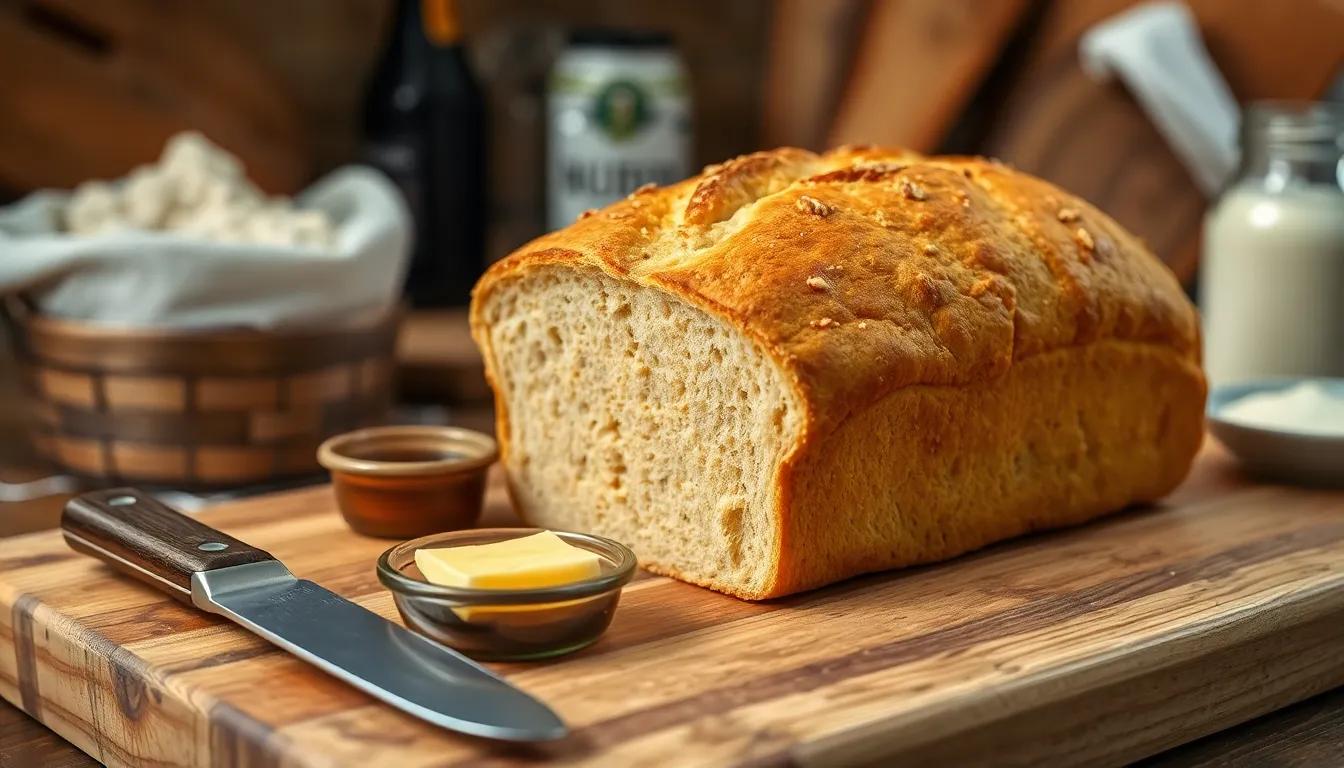
I use any standard 12-ounce bottle or can of beer for this recipe. Light lagers produce mild-flavored bread while darker ales create richer malty notes. Room temperature beer incorporates more easily into the batter than ice-cold beer straight from the refrigerator. The melted butter adds richness and helps create a tender crumb texture. I brush additional melted butter on top of the loaf before baking for an extra golden crust.
Instructions
I’ll walk you through each step of this simple beer bread process that transforms basic ingredients into bakery-quality bread. My method breaks down into five manageable stages that take about an hour from start to finish.
Prep the Oven and Pan
I preheat my oven to 375°F while I prepare the loaf pan. Using butter or cooking spray, I thoroughly grease every surface of my 9×5-inch loaf pan, paying special attention to the corners where bread tends to stick. The generous coating ensures easy release after baking and contributes to that golden crust I love. I place the greased pan nearby so it’s ready when my batter comes together.
Mix the Dry Ingredients
I combine 3 cups of self-rising flour and 3 tablespoons of granulated sugar in my large mixing bowl. Using a wooden spoon, I stir these ingredients together until they’re evenly distributed throughout the mixture. This step creates the foundation for my bread, with the flour providing structure and the sugar balancing the beer’s natural bitterness. I make sure no clumps remain before moving to the next step.
Add the Beer
I pour 12 ounces of room temperature beer directly into my flour mixture. Using my wooden spoon, I gently fold the beer into the dry ingredients until they just come together into a shaggy, sticky dough. The carbonation in the beer immediately begins working as a leavening agent, creating small bubbles throughout the batter. I avoid overmixing at this stage since too much stirring can result in tough bread.
Shape and Transfer the Dough
I scrape the sticky dough into my prepared loaf pan using my wooden spoon or rubber spatula. The dough will look rough and uneven, which is exactly what I want at this stage. Using my spatula, I gently level the top surface without pressing down too firmly. I drizzle 3 tablespoons of melted butter evenly over the surface, allowing it to pool slightly in the uneven spots.
Bake the Bread
I slide the pan into my preheated 375°F oven and bake for 45 to 50 minutes. The bread is done when the top turns a beautiful golden brown and a toothpick inserted into the center comes out clean or with just a few moist crumbs. I listen for a hollow sound when I tap the top gently with my knuckles. After removing from the oven, I let the bread cool in the pan for 10 minutes before turning it onto a wire rack to finish cooling.
Tips for Perfect Beer Bread
Creating exceptional beer bread requires attention to a few key details that can elevate your loaf from good to bakery-quality. I’ve learned these techniques through countless batches and they consistently deliver outstanding results.
Choosing the Right Beer
I always use room temperature beer for the best incorporation into my batter. Cold beer can shock the flour and create lumps that are difficult to mix out smoothly. Light lagers like Budweiser or Coors produce a mild flavor that pairs beautifully with breakfast spreads or soups. Wheat beers add a subtle tang and create an incredibly soft crumb texture.
Darker ales bring rich malty depth that transforms the bread into something special for dinner. I particularly love using brown ales or porters when serving the bread alongside hearty stews. Avoid hoppy IPAs as their intense bitterness can overpower the bread’s delicate flavor balance. Flat beer works perfectly fine since the carbonation isn’t essential for the leavening process.
Achieving the Best Texture
I mix the batter just until the ingredients come together in a shaggy consistency. Overmixing develops the gluten too much and creates a dense heavy loaf instead of the tender crumb I want. The batter should look slightly lumpy with some dry flour spots still visible.
My secret is to fold the beer into the flour mixture using a gentle motion from bottom to top. This technique preserves the air bubbles that create the bread’s characteristic light texture. I stop mixing as soon as no dry flour remains at the bottom of the bowl. The final dough will be sticky and somewhat rough looking which is exactly what produces the perfect crumb structure.
Temperature and Timing
I preheat my oven to exactly 375°F and verify the temperature with an oven thermometer for accuracy. Too hot and the outside browns before the center cooks through. Too cool and the bread becomes dense without proper rise. I place my loaf pan on the center rack to ensure even heat circulation around the entire loaf.
The bread is perfectly done when a toothpick inserted in the center comes out with just a few moist crumbs attached. I start checking at 45 minutes but some ovens require the full 50 minutes for complete baking. The top should be golden brown and spring back lightly when touched. I always let the bread cool in the pan for exactly 10 minutes before transferring to prevent it from falling apart while still too tender.
Variations and Add-ins
I love how adaptable this beer bread recipe becomes with simple additions that transform the basic loaf into something extraordinary. The forgiving nature of the batter makes it perfect for experimenting with different flavors and textures.
Herb and Cheese Beer Bread
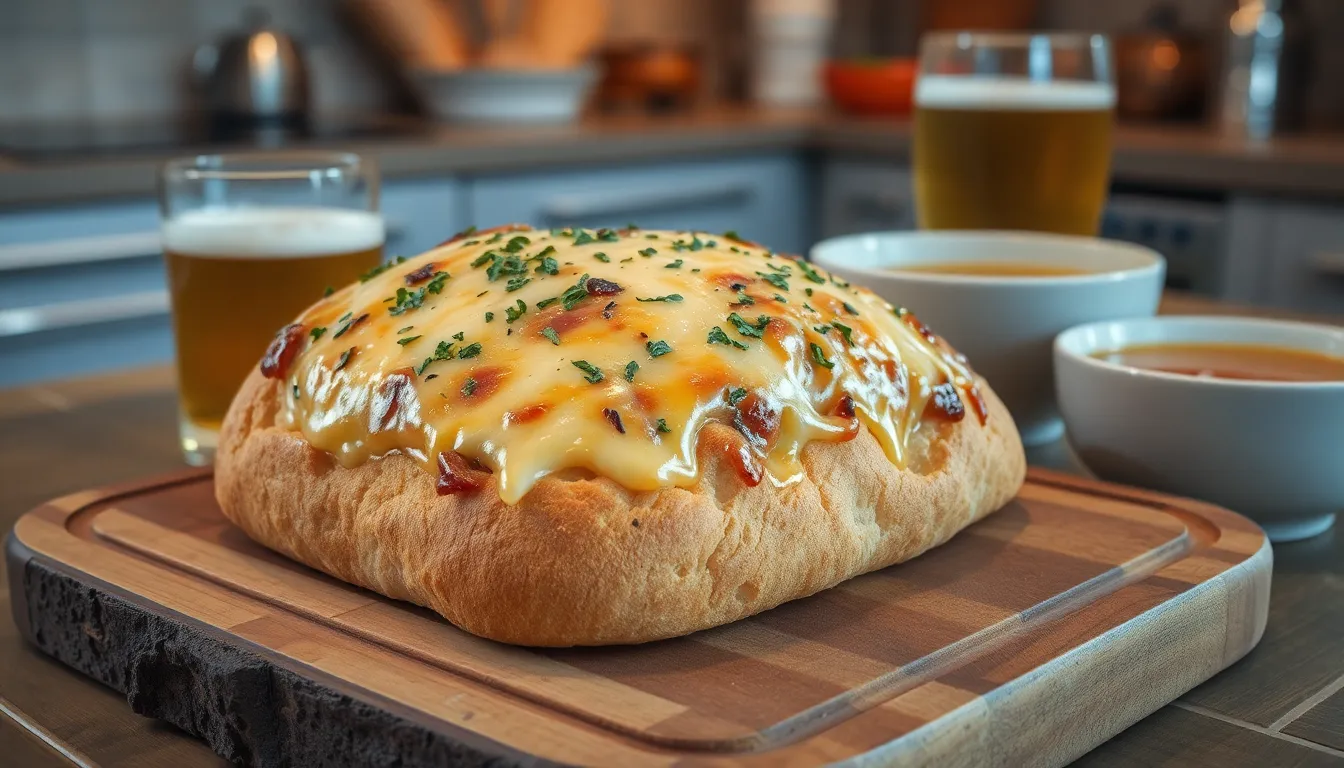
My favorite savory variation incorporates fresh herbs and cheese directly into the batter for an aromatic loaf that pairs beautifully with soups and stews. I add 1/2 cup of shredded sharp cheddar cheese and 2 tablespoons of chopped fresh rosemary to the dry ingredients before mixing in the beer. The cheese melts throughout the bread creating pockets of creamy richness while the rosemary infuses each bite with earthy fragrance.
For a Mediterranean twist I substitute the cheddar with 1/3 cup of crumbled feta cheese and add 1 tablespoon each of dried oregano and chopped fresh chives. The tangy feta complements the beer’s malty notes while the herbs provide bright flavor contrast. I often sprinkle additional cheese on top of the batter before baking to create a golden crusty top that adds textural interest.
Garlic lovers can enhance their loaf by mixing 3 minced garlic cloves with the melted butter before brushing it over the batter. This technique infuses the entire loaf with roasted garlic flavor as it bakes. I sometimes add 1/4 cup of grated Parmesan cheese along with the garlic butter for an Italian inspired variation that makes incredible sandwich bread.
Sweet Beer Bread Options
Sweet variations transform this recipe into dessert worthy treats that showcase beer’s versatility in baking applications. I increase the sugar to 1/2 cup and add 1 teaspoon of vanilla extract along with 1/2 cup of chocolate chips for a rich chocolatey loaf. Dark stouts work particularly well in this variation as their roasted flavors complement the chocolate beautifully.
My cinnamon sugar version combines 1/4 cup of brown sugar with 2 teaspoons of ground cinnamon mixed into the dry ingredients. I create a simple streusel topping by combining 2 tablespoons each of flour and brown sugar with 1 tablespoon of cold butter cut into small pieces. This creates a delightfully crunchy top that contrasts with the tender crumb below.
For fall inspired flavors I fold in 1/2 cup of dried cranberries and 1/4 cup of chopped walnuts along with 1 teaspoon each of ground cinnamon and nutmeg. Wheat beers complement these autumn spices exceptionally well while adding subtle complexity to the overall flavor profile. The cranberries provide tart bursts that balance the beer’s natural sweetness while the walnuts contribute satisfying crunch.
Citrus lovers can create a bright lemon variation by adding the zest of one large lemon to the dry ingredients and substituting a light wheat beer or lager. I brush the finished loaf with a simple glaze made from 1 cup of powdered sugar mixed with 2 tablespoons of fresh lemon juice for an extra burst of citrus flavor.
Storage and Make-Ahead Instructions
I love making this beer bread because it stays fresh for days when stored properly. The moist texture from the beer actually helps the bread maintain its quality longer than traditional breads.
How to Store Beer Bread
I always let my beer bread cool completely before storing it to prevent condensation from making the crust soggy. Once cooled, I wrap the loaf tightly in plastic wrap or aluminum foil and store it at room temperature for up to 3 days. The bread maintains its soft texture and rich flavor throughout this period.
For longer storage, I place the wrapped loaf in an airtight container or resealable plastic bag. This method keeps the bread fresh for up to 5 days at room temperature. I avoid refrigerating beer bread because the cold temperature can make it stale faster and alter the texture.
When I want to refresh day-old bread, I warm individual slices in a 300°F oven for 3 to 5 minutes. This technique restores the bread’s warmth and brings back some of the original texture. For a softer crust, I lightly dampen the outside of the loaf with water before warming it in the oven for 5 to 8 minutes.
Freezing Instructions
I frequently freeze beer bread for future enjoyment since it freezes exceptionally well. After the bread cools completely, I wrap it tightly in plastic wrap, then cover it with aluminum foil or place it in a freezer-safe bag. This double wrapping prevents freezer burn and maintains the bread’s quality for up to 3 months.
For convenience, I sometimes slice the bread before freezing so I can remove individual portions as needed. I place parchment paper between slices to prevent them from sticking together, then follow the same wrapping process. Individual slices thaw in just 10 to 15 minutes at room temperature.
To thaw a whole frozen loaf, I remove it from the freezer and let it sit at room temperature for 2 to 3 hours while still wrapped. Once thawed, I can refresh the bread in a 300°F oven for 8 to 10 minutes to restore its original texture and warmth. The beer bread tastes remarkably fresh after proper freezing and thawing.
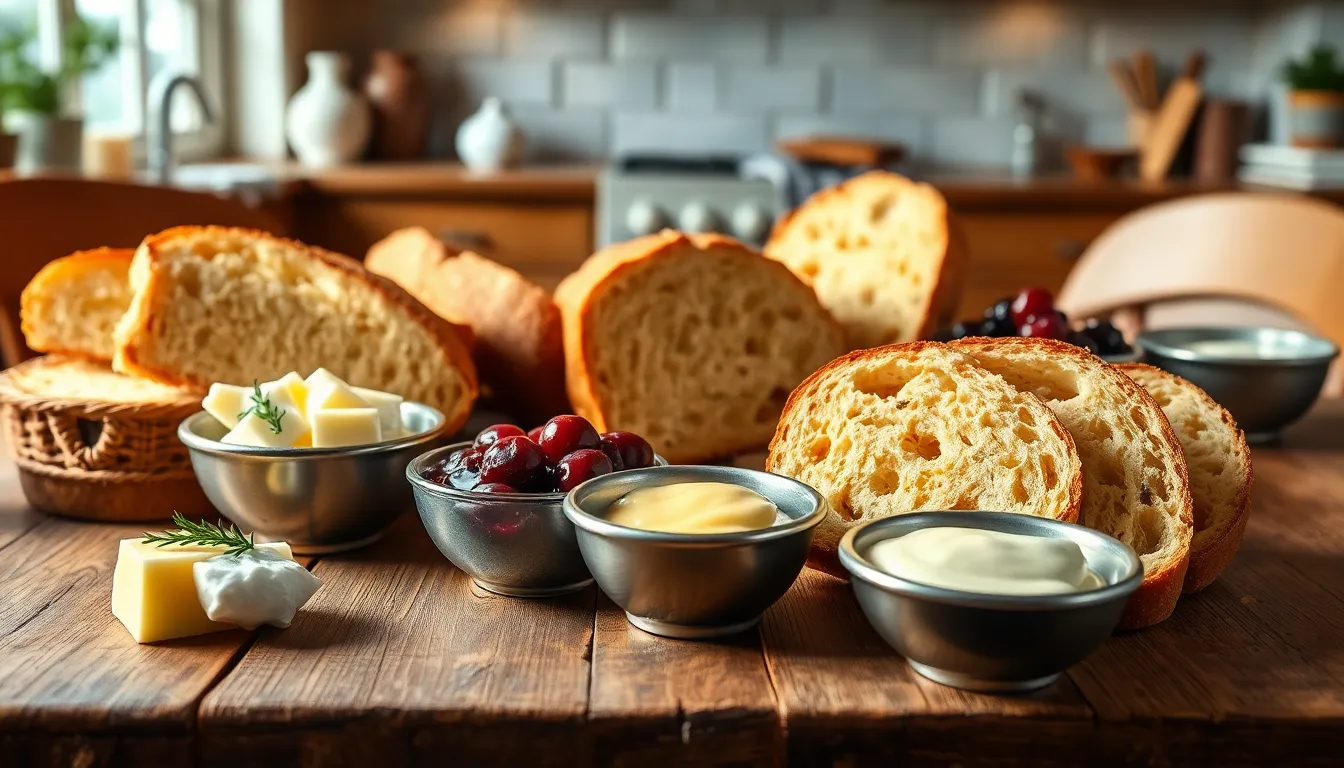
Serving Suggestions
I love serving this warm beer bread straight from the oven with a generous pat of butter melting into each slice. The tender crumb and subtle malty flavor make it an incredibly versatile companion for both savory and sweet accompaniments.
For hearty meals, I pair thick slices alongside soups and stews where the bread’s texture perfectly absorbs the rich broths. Chili becomes even more satisfying when served with this bread, and I often use it to soak up every last drop of flavor. Roasted meats and grilled vegetables also benefit from having fresh bread on the table, creating a complete and comforting meal.
My favorite breakfast application involves toasting slices until golden and spreading them with cream cheese or jam. The bread’s natural sweetness pairs beautifully with berry preserves, while its subtle beer notes complement savory spreads like herb butter or avocado. French toast made from day-old beer bread creates an exceptionally rich and flavorful morning treat.
I frequently serve this bread as an appetizer by slicing it thin and offering various toppings. Whipped honey butter transforms simple slices into an elegant starter, while garlic aioli and fresh herbs create a more sophisticated presentation. The bread also works wonderfully for making sandwiches, providing a sturdy yet tender foundation that holds up well to generous fillings.
For special occasions, I brush warm slices with herb-infused olive oil and sprinkle them with coarse sea salt. This simple preparation elevates the bread into something restaurant-worthy. The combination of the bread’s malty depth with high-quality olive oil creates a memorable flavor experience that guests always remember.
Troubleshooting Common Issues

Even with this forgiving beer bread recipe, I’ve encountered a few common problems over the years that can affect your final loaf. Understanding these issues helps you achieve consistent results every time you bake.
Dense or Heavy Bread
My bread turned out dense when I overmixed the batter or used flat beer. The key lies in gentle folding movements that preserve the beer’s carbonation. I recommend checking your beer’s fizz before adding it to the flour mixture. Expired self-rising flour also creates dense loaves since the leavening agents lose potency over time. Store your flour in an airtight container and replace it every six months for optimal results.
Bread Sticking to the Pan
I learned this lesson the hard way when my first loaf broke apart during removal. Thoroughly greasing your 9×5-inch loaf pan prevents sticking issues. I apply butter or cooking spray to every surface including the corners. Parchment paper provides extra insurance if you’re concerned about sticking. Allow the bread to cool for exactly 10 minutes before attempting removal since hot bread tears easily.
Crumbly or Dry Texture
Dry beer bread typically results from overbaking or using too much flour. I check for doneness at 45 minutes rather than waiting the full 50 minutes. Your toothpick should come out with just a few moist crumbs attached. Room temperature beer incorporates more smoothly than cold beer straight from the refrigerator. Cold beer can create flour pockets that lead to uneven texture.
Bitter or Off Flavors
Strong hoppy beers like IPAs overwhelm the bread’s delicate flavor profile. I stick with light lagers, wheat beers, or mild ales for the best taste. Stale or skunky beer transfers those unpleasant flavors directly to your loaf. Fresh beer makes a noticeable difference in the final product’s aroma and taste.
Uneven Rising or Lopsided Loaf
Uneven distribution in the pan causes lopsided bread that bakes unevenly. I level the batter with a spatula before adding the melted butter topping. Your oven’s hot spots can also create uneven browning. Rotating the pan halfway through baking ensures even coloring on all sides.
Soggy Bottom Crust
Insufficient preheating leads to soggy bottom crusts that never properly set. I always wait for my oven to reach 375°F before placing the pan inside. Using a light colored metal pan helps achieve better browning than dark pans that can overbake the bottom. Glass pans work but require reducing the temperature by 25°F to prevent overbrowning.
Conclusion
I’ve shared everything you need to create this foolproof beer bread recipe that’ll become your go-to solution for fresh homemade bread. With just four simple ingredients and minimal effort you can have warm aromatic bread on your table in under an hour.
The beauty of this recipe lies in its simplicity and reliability. Whether you’re a complete beginner or an experienced baker looking for a quick bread option this recipe delivers consistent results every time. The versatility means you can customize it to match any meal or craving.
I encourage you to experiment with different beer styles and add-ins to make this recipe your own. Once you taste that first warm slice with its tender crumb and subtle malty flavor you’ll understand why this has become my favorite quick bread recipe. Give it a try – your kitchen will smell amazing and your family will be impressed with your baking skills.