
Ingredients
You need just six simple ingredients to create these decadent chocolate treats. Each component plays a crucial role in achieving the perfect balance of crispy texture and rich cocoa flavor.
Main Ingredients:
- 6 cups Rice Krispies cereal
- 4 tablespoons butter
- 1 package (10 oz) mini marshmallows
- 3 tablespoons unsweetened cocoa powder
- 1/2 cup semi-sweet chocolate chips
- 1/4 teaspoon vanilla extract
Optional Enhancements:
- 1/4 teaspoon salt (enhances chocolate flavor)
- 2 tablespoons powdered sugar (for extra sweetness)
Your Rice Krispies cereal forms the foundation with its signature crunch. Fresh marshmallows create the binding sweetness that holds everything together. Unsweetened cocoa powder transforms the classic treat into a chocolate lover’s dream while maintaining the light texture.
Semi-sweet chocolate chips add bursts of rich chocolate throughout each bite. Butter ensures smooth melting and prevents sticking during preparation. Vanilla extract rounds out the flavor profile with its warm aromatic notes.
Choose mini marshmallows over regular size for faster melting and better distribution. Fresh marshmallows work significantly better than stale ones for optimal binding. Quality cocoa powder makes a noticeable difference in the final chocolate intensity.
Equipment Needed
You need just a few essential kitchen tools to create perfect cocoa krispie treats. Most of these items are standard equipment found in any home kitchen.
A large heavy-bottomed saucepan serves as your primary cooking vessel for melting butter and marshmallows. The heavy bottom prevents hot spots and ensures even heat distribution throughout the melting process.
Your wooden spoon or silicone spatula becomes crucial for stirring the marshmallow mixture and folding in the cereal. Wooden spoons work exceptionally well because they don’t conduct heat and won’t scratch your cookware.
A 9×13 inch baking pan creates the ideal thickness for your treats. This standard size produces squares with the perfect ratio of crispy texture to chewy binding.
Measuring cups and spoons ensure accurate ingredient proportions. Precision matters when balancing the cocoa powder and other elements for optimal chocolate flavor.
Non-stick cooking spray or butter prevents your treats from sticking to the pan. This simple preparation step saves time during removal and cutting.
A sharp knife helps you cut clean squares once the treats have cooled completely. Clean cuts showcase the appealing texture and prevent crumbling.
Optional parchment paper makes removal even easier and creates professional-looking results. The paper also allows you to lift the entire batch from the pan before cutting.
| Equipment | Purpose | Size/Type |
|---|---|---|
| Heavy-bottomed saucepan | Melting marshmallows | Large |
| Wooden spoon | Stirring mixture | Standard |
| Baking pan | Setting treats | 9×13 inch |
| Measuring tools | Ingredient accuracy | Cups and spoons |
| Sharp knife | Cutting squares | Chef’s knife |
Instructions
Follow these simple steps to create perfectly chewy and chocolatey Cocoa Krispie treats. Each stage builds upon the last to ensure your treats achieve the ideal texture and flavor balance.
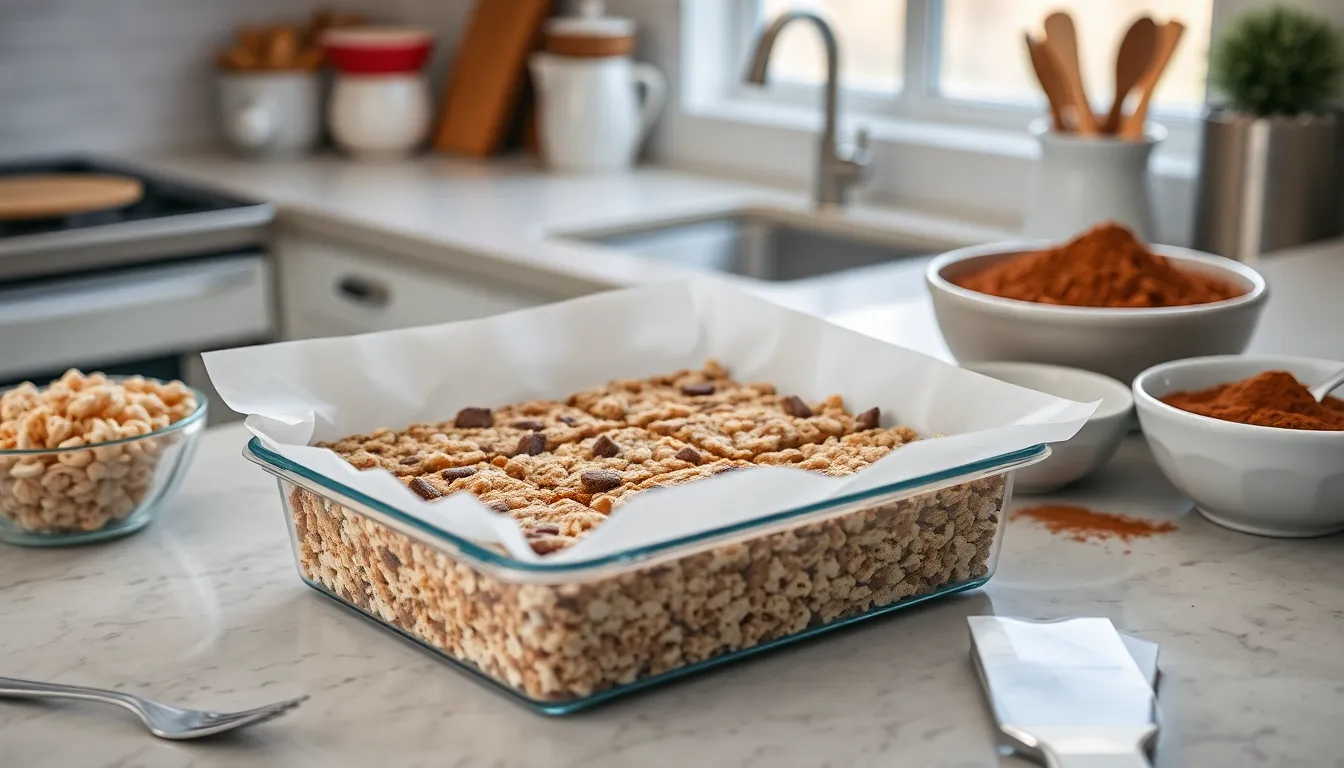
Prep the Pan
Line your 9×13 inch baking pan with parchment paper, leaving overhang on two sides for easy removal. Spray the parchment paper with non-stick cooking spray or lightly butter the surface. This preparation prevents sticking and creates clean edges when you cut your treats later.
Melt the Marshmallows
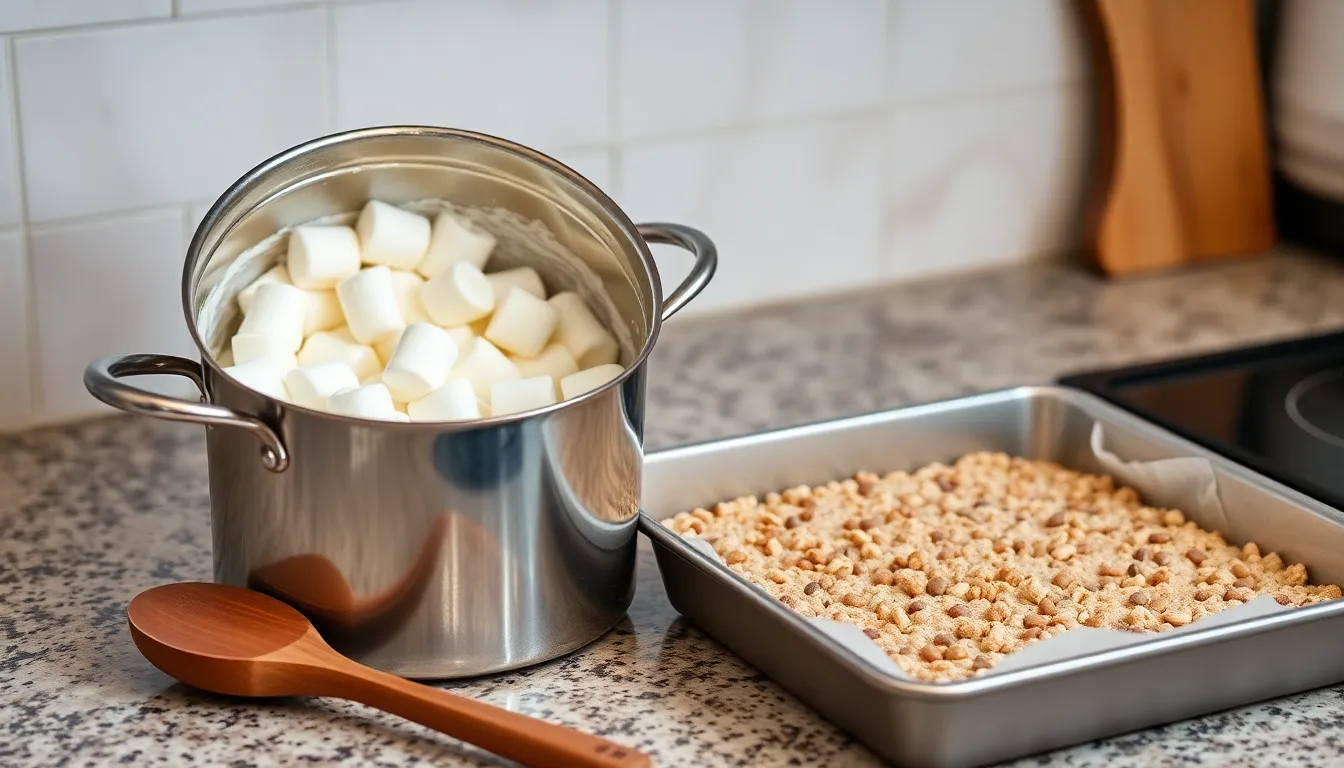
Place 6 tablespoons of butter in your large heavy-bottomed saucepan over medium-low heat. Allow the butter to melt completely before adding 10 cups of mini marshmallows. Stir the marshmallows constantly with your wooden spoon or silicone spatula until they melt into a smooth mixture. The process takes approximately 3-4 minutes and creates the binding base for your treats.
Mix in the Cocoa Krispies
Remove the saucepan from heat immediately after the marshmallows melt completely. Add 1/4 cup unsweetened cocoa powder and 1 teaspoon vanilla extract to the melted marshmallow mixture. Stir vigorously until the cocoa powder dissolves and creates a uniform chocolate color. Pour in 6 cups of Rice Krispies cereal and 1/2 cup semi-sweet chocolate chips. Fold the ingredients together gently but thoroughly until every piece of cereal gets coated with the chocolate marshmallow mixture.
Press into Pan
Transfer the warm mixture into your prepared baking pan immediately while it remains pliable. Use your buttered hands or a piece of wax paper to press the mixture evenly across the pan. Apply firm but gentle pressure to compact the treats without crushing the cereal pieces. Ensure the surface appears level and reaches all corners of the pan.
Cool and Set
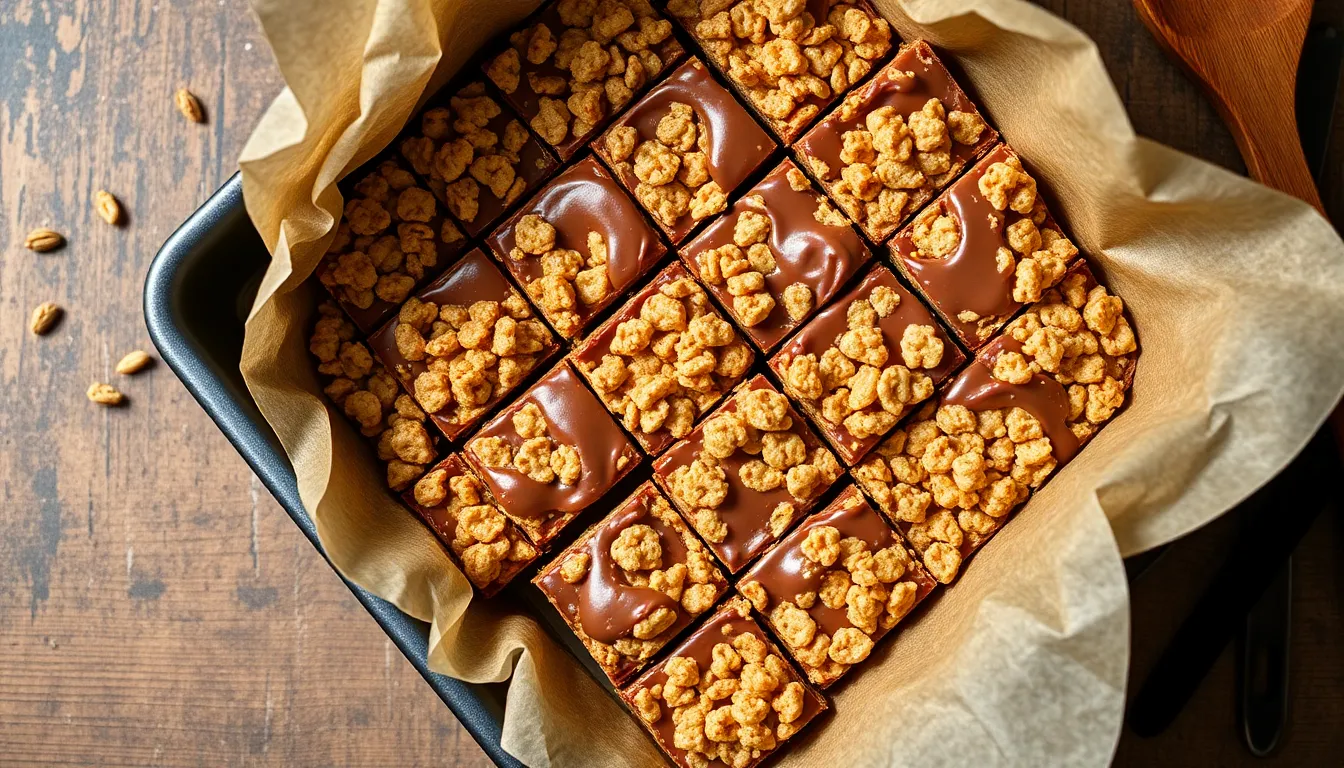
Allow the Cocoa Krispie treats to cool at room temperature for 30-45 minutes until they firm up completely. The treats should feel set to the touch before cutting. Use your sharp knife to cut through the treats in a grid pattern, creating 24 squares. Clean your knife between cuts for the neatest edges and most professional appearance.
Directions for Cutting
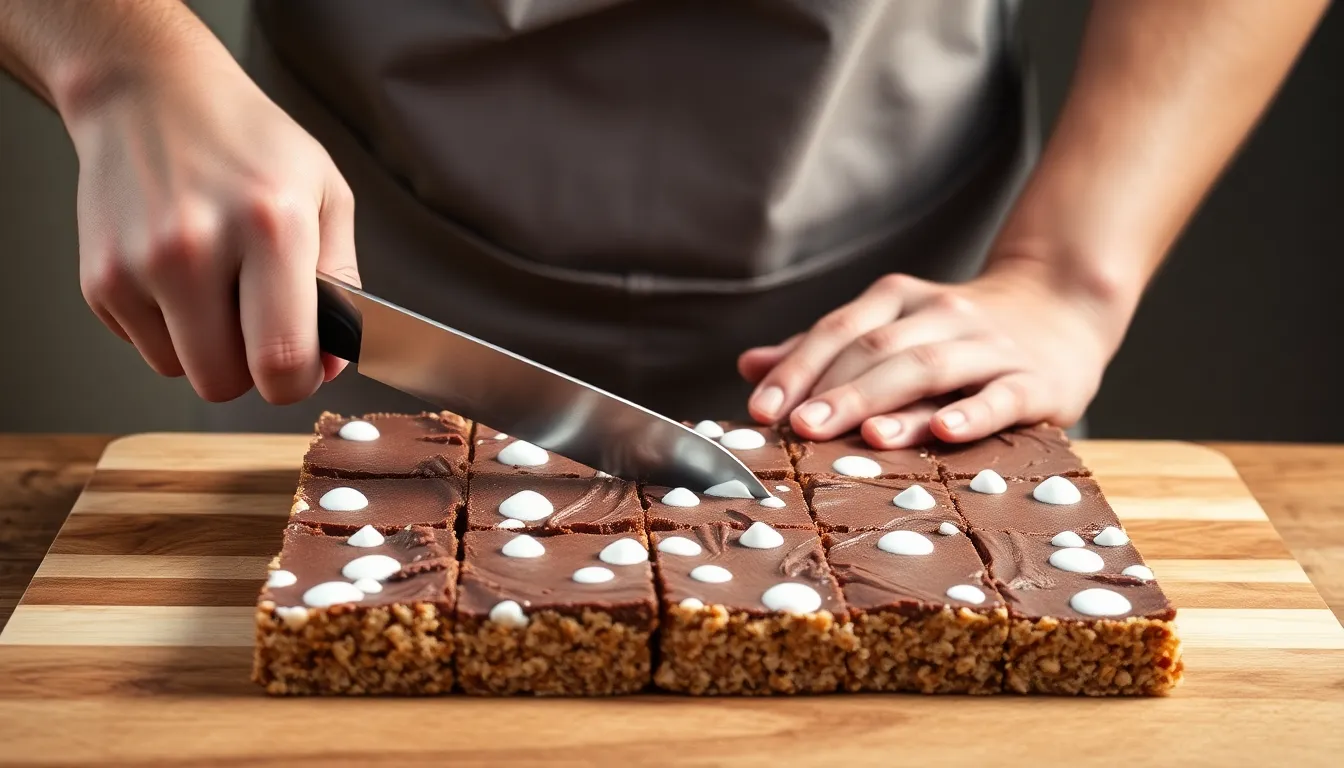
Sharp edges and clean squares make all the difference when presenting your cocoa krispie treats. Use a sharp knife to ensure smooth cuts through the cooled mixture without crushing the delicate cereal pieces.
Start by removing the entire slab from your baking pan using the parchment paper as handles. Place the cooled treats on a cutting board for stability and easier maneuvering. Wipe your knife blade with a damp cloth between cuts to prevent sticky buildup that can tear the surface.
Score light marks across the surface before making full cuts to create even portions. Measure 2-inch intervals along each edge using a ruler for consistent sizing. Press down firmly with one smooth motion rather than sawing back and forth to maintain the treats’ structural integrity.
Clean cuts require patience and the right technique. Allow the knife to do the work by applying steady downward pressure while keeping the blade perpendicular to the cutting surface. Sticky residue on the blade will pull apart the chocolate and marshmallow binding.
Store cut squares in an airtight container with parchment paper between layers to prevent sticking. Room temperature storage keeps the treats at optimal texture for up to one week. Individual wrapping in plastic wrap or wax paper creates perfect grab-and-go portions for lunch boxes or snacks.
Consider dusting the knife blade with powdered sugar if the mixture proves particularly sticky during cutting. This technique creates a barrier between the blade and the marshmallow mixture while adding a subtle sweetness to the edges.
Storage Tips
Store your Cocoa Krispie treats at room temperature in an airtight container to maintain their signature crispy texture. Place parchment paper between layers to prevent the squares from sticking together. You can keep the treats fresh for up to one week when stored properly.
Room temperature storage works best because refrigeration can make the treats hard and chewy. Your kitchen pantry or countertop provides the ideal environment as long as the container seals tightly. Avoid storing them in humid areas like near the dishwasher or stove.
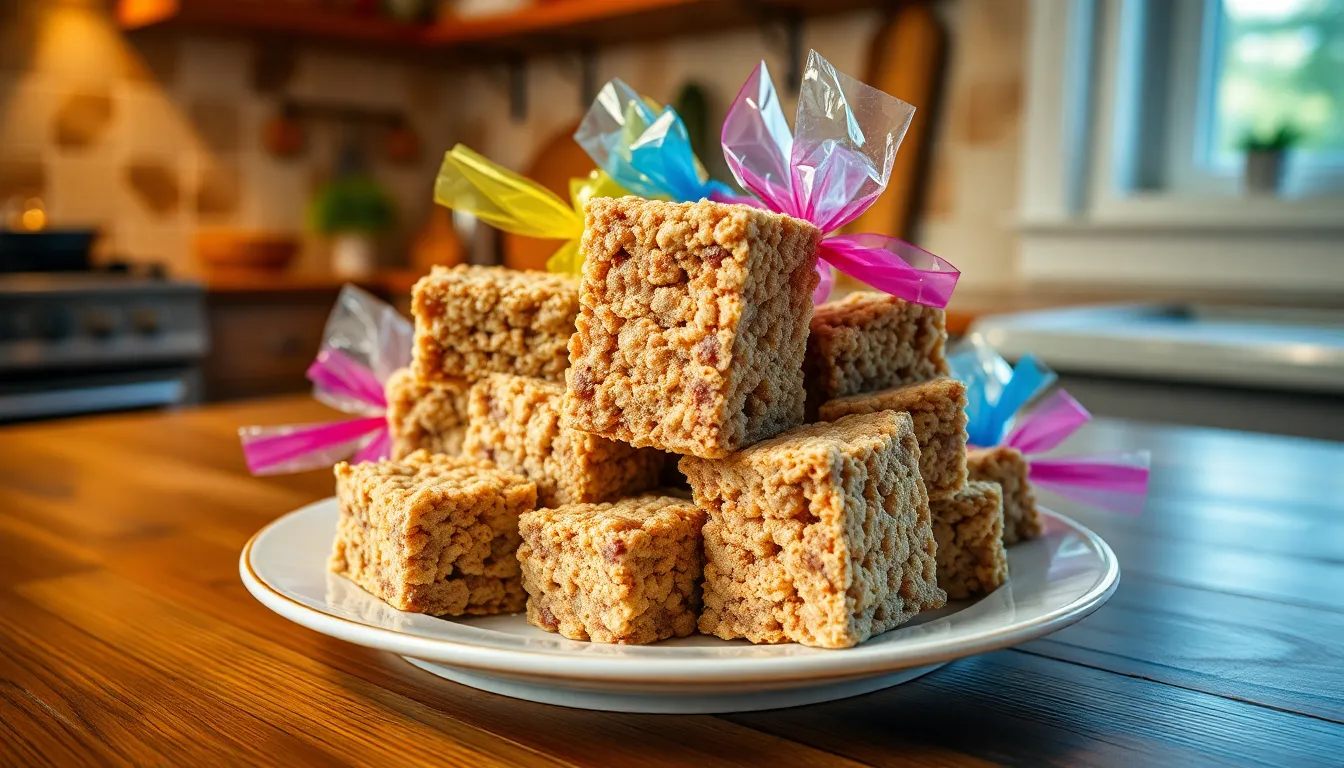
Wrap individual squares in plastic wrap or small cellophane bags for grab-and-go convenience. This method allows you to pack treats in lunch boxes or give them as gifts while keeping each portion fresh. Double wrapping helps prevent air exposure that can make the treats stale.
Freezing extends storage life up to three months when you wrap the treats properly. Wrap the entire uncut slab in plastic wrap followed by aluminum foil before freezing. Cut frozen treats while still slightly firm for cleaner edges.
| Storage Method | Duration | Container Type |
|---|---|---|
| Room Temperature | 7 days | Airtight container |
| Individual Wrapping | 5-7 days | Plastic wrap/cellophane |
| Freezer Storage | 3 months | Plastic wrap + foil |
Thaw frozen treats at room temperature for 15-20 minutes before serving. Your Cocoa Krispie treats will taste just as fresh as the day you made them when you follow these storage guidelines. Check the container daily and consume any treats that show signs of moisture or staleness first.
Variations
Transform your basic cocoa krispie treats into exciting new flavors with these creative twists. Each variation builds upon the original recipe while adding unique ingredients that create distinct taste experiences.
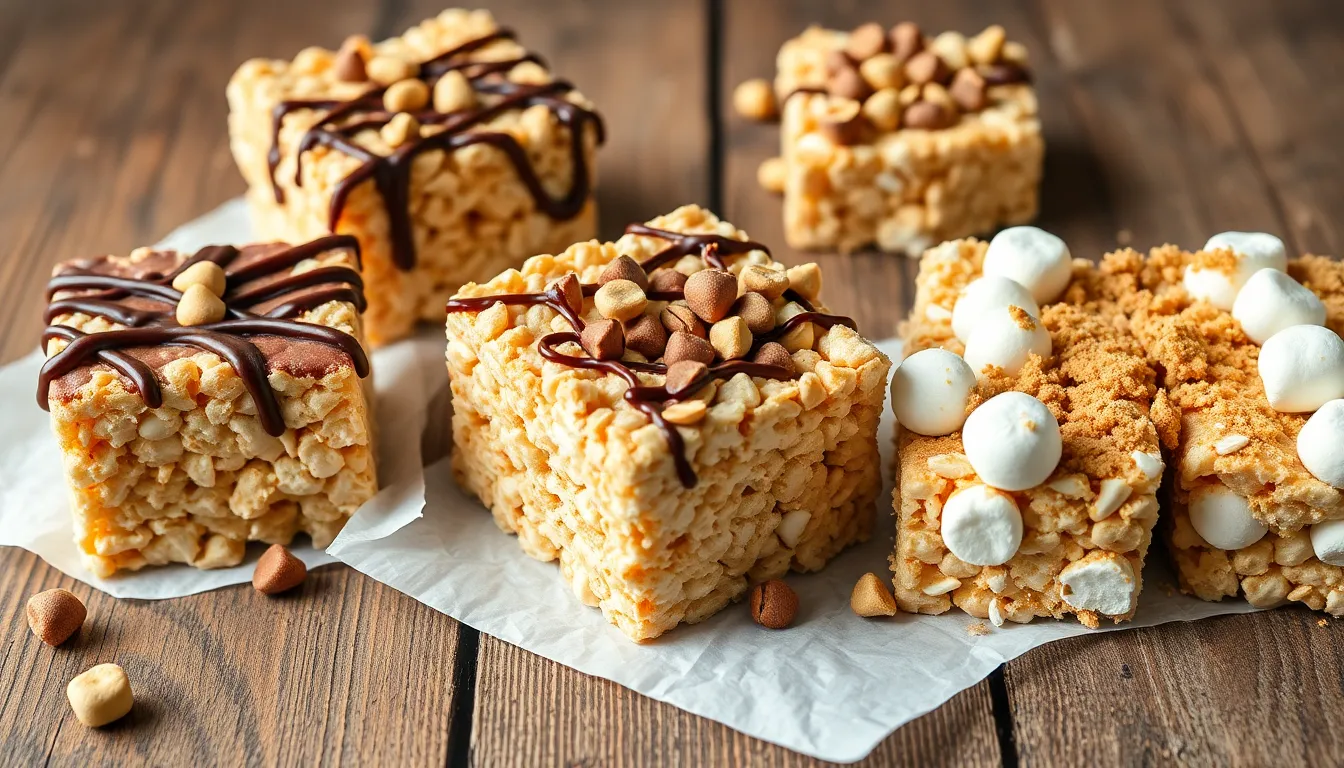
Double Chocolate Cocoa Krispie Treats
You can intensify the chocolate experience by incorporating additional chocolate elements into your treats. Replace half of the Rice Krispies cereal with chocolate Rice Krispies cereal for an extra cocoa boost. Add 2 tablespoons of chocolate syrup to the melted marshmallow mixture along with the cocoa powder. Fold in 1 cup of dark chocolate chips instead of semi-sweet varieties to create deeper chocolate notes. Drizzle melted chocolate over the cooled treats for a bakery-style finish that adds both visual appeal and rich flavor.
Peanut Butter Cocoa Krispie Treats
Combine the classic pairing of chocolate and peanut butter by adding 3 tablespoons of creamy peanut butter to your melted marshmallow mixture. Stir the peanut butter in immediately after adding the vanilla extract to ensure smooth incorporation. Mix 1/2 cup of peanut butter chips with your chocolate chips for added texture and flavor bursts. Top the finished treats with chopped peanuts or drizzle with melted peanut butter for extra indulgence. This variation creates a perfect balance between the cocoa richness and nutty sweetness.
S’mores Cocoa Krispie Treats
Recreate the beloved campfire treat by incorporating s’mores elements into your cocoa krispie base. Crush 6 graham crackers into bite-sized pieces and fold them into the mixture along with the Rice Krispies cereal. Add 1/2 cup of mini chocolate chips and 1/2 cup of mini marshmallows to the cooled mixture for authentic s’mores texture. Press additional mini marshmallows on top of the treats before they set completely. Toast the surface lightly with a kitchen torch for that characteristic campfire flavor and golden marshmallow appearance.
Make-Ahead Instructions
You can prepare Cocoa Krispie treats several days in advance while maintaining their signature crispy texture and rich chocolate flavor. The key to successful make-ahead preparation lies in proper timing and strategic storage techniques.
Complete Preparation Method
Mix and press your Cocoa Krispie treats into the prepared pan up to three days before serving. Allow the treats to cool completely at room temperature for 45 minutes to one hour before cutting. Cut the treats into desired squares and store them immediately in an airtight container with parchment paper separating each layer.
Partial Preparation Strategy
Prepare your dry ingredients by measuring Rice Krispies cereal and cocoa powder into separate bowls up to one week ahead. Store the measured cereal in an airtight container to maintain crispiness. Keep the cocoa powder covered to prevent moisture absorption. This advance preparation reduces active cooking time to just 15 minutes when you’re ready to make the treats.
Freezer-Friendly Approach
Wrap individual cut squares in plastic wrap and place them in freezer-safe containers for up to three months of storage. Label containers with the preparation date for easy tracking. Thaw frozen treats at room temperature for 20 to 30 minutes before serving to restore their optimal texture.
Assembly Timeline Planning
Schedule your preparation based on your serving needs using this timeline approach:
| Preparation Stage | Timing Before Serving | Storage Method |
|---|---|---|
| Complete recipe | 3 days | Airtight container with parchment |
| Cut treats | 2 days | Layered storage with parchment paper |
| Mixed ingredients | 1 day | Covered at room temperature |
| Ingredient prep | 1 week | Separate airtight containers |
Room temperature storage works best for maintaining the treats’ characteristic chewy yet crispy texture when making them ahead of time.
Troubleshooting Tips

Your cocoa krispie treats might encounter common issues during preparation. These answers help you achieve perfect results every time.
Treats Won’t Hold Together
You likely didn’t melt the marshmallows completely or the mixture cooled too much before adding the cereal. Reheat the marshmallow mixture gently until smooth and work quickly when combining ingredients. Fresh marshmallows bind better than stale ones.
Mixture Is Too Sticky to Press
Butter your hands or use a buttered spatula to press the mixture into the pan. Alternatively spray your hands with cooking spray to prevent sticking. Working with slightly warm mixture makes pressing easier than waiting until it cools completely.
Treats Turn Out Too Hard
Overcooking the marshmallow mixture creates hard treats. Remove the saucepan from heat as soon as marshmallows melt completely. Adding too much cocoa powder also contributes to firmness so measure accurately.
Chocolate Chips Melt Completely
Your mixture was too hot when you added the chocolate chips. Allow the marshmallow mixture to cool for 2-3 minutes before folding in chocolate chips. This maintains their shape and creates delightful chocolate pockets throughout.
Treats Fall Apart When Cut
The mixture didn’t cool long enough before cutting. Wait at least 30-45 minutes for proper setting. Using a sawing motion instead of straight downward cuts also causes crumbling. Apply firm steady pressure when cutting.
Uneven Cocoa Distribution
Sift cocoa powder before adding to eliminate lumps. Whisk cocoa powder into the melted marshmallow mixture thoroughly before adding cereal. Gradual incorporation prevents cocoa from clumping together.
Pan Sticking Issues
Line your pan with parchment paper extending over the edges for easy removal. Spray parchment paper lightly with cooking spray as an extra precaution. Butter works as an alternative but parchment paper provides the cleanest release.
Conclusion
Creating these chocolate-enhanced treats brings together the best of both worlds – the beloved crunch you remember from childhood with a rich cocoa twist that satisfies your adult chocolate cravings. You’ll find that this simple six-ingredient recipe delivers impressive results every time.
The beauty of Cocoa Krispie treats lies in their versatility and foolproof nature. Whether you’re making them for a bake sale school event or treating yourself to a weekend indulgence you now have all the tools and knowledge needed for success.
Your kitchen adventures with these chocolatey squares are just beginning. With proper storage techniques creative variations and troubleshooting tips at your fingertips you’re ready to make treats that’ll disappear faster than you can cut them into squares.