
Ingredients
The perfect banana bread starts with quality ingredients measured precisely. Each component plays a crucial role in creating that irresistibly moist texture and rich banana flavor.
Wet Ingredients
- 3 large ripe bananas (mashed until smooth)
- 1/3 cup melted unsalted butter
- 2 large eggs (room temperature)
- 1 teaspoon pure vanilla extract
- 1/4 cup whole milk or buttermilk
Dry Ingredients
- 1 3/4 cups all-purpose flour
- 3/4 cup granulated sugar
- 1 teaspoon baking soda
- 1/2 teaspoon salt
- 1/2 teaspoon ground cinnamon
- 1/4 teaspoon ground nutmeg
Optional Add-ins
- 1/2 cup chopped walnuts or pecans
- 1/3 cup mini chocolate chips
- 1/4 cup dried cranberries or raisins
- 2 tablespoons shredded coconut
- 1 tablespoon orange zest
Equipment Needed
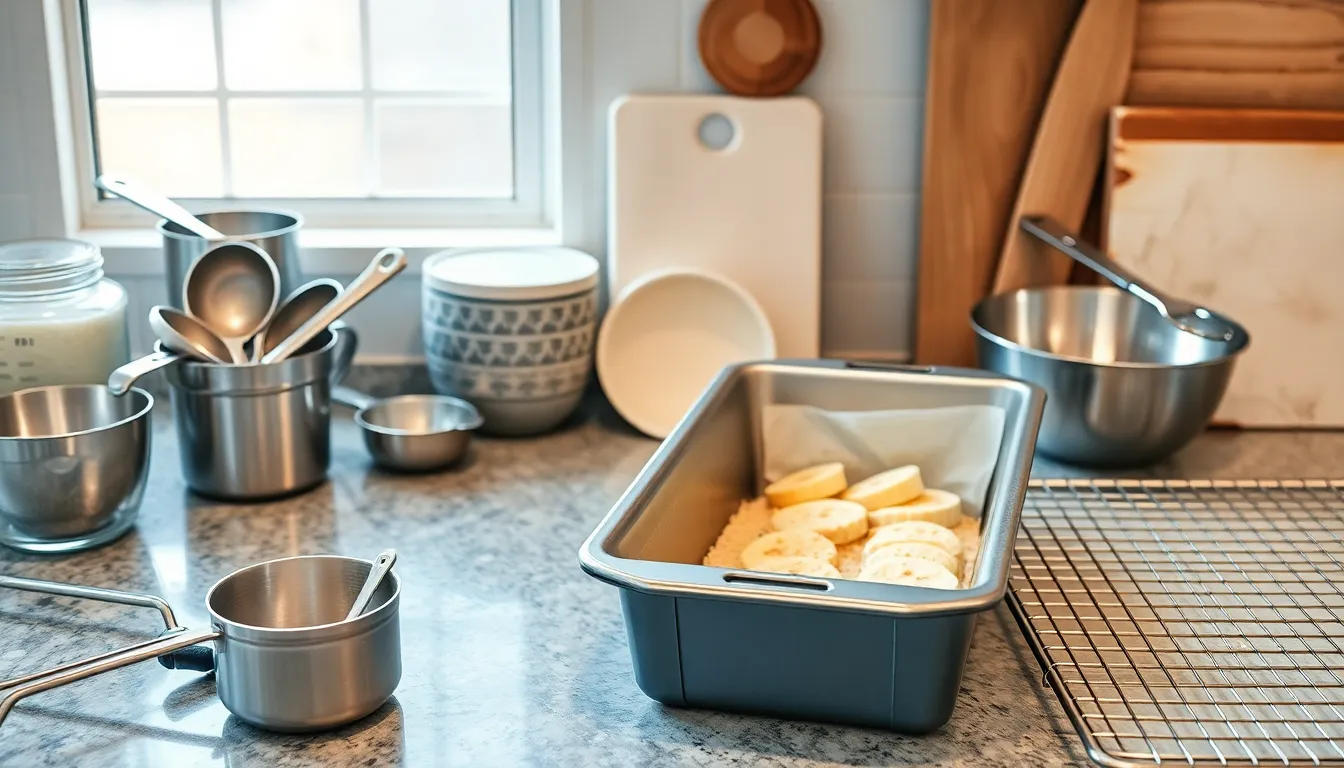
Your banana bread baking success depends on having the right tools at your disposal. A well-equipped kitchen makes the difference between struggling through the process and creating bakery-quality results with ease.
Essential Baking Equipment
You need a standard 9×5-inch loaf pan as your primary baking vessel. Metal pans conduct heat more evenly than glass alternatives and create that coveted golden-brown crust. Non-stick coating helps with easy release but isn’t absolutely necessary if you properly grease your pan.
A large mixing bowl accommodates all your ingredients without overflow during the crucial mixing stage. Stainless steel or glass bowls work best as they don’t retain odors or flavors from previous baking sessions.
Mixing and Measuring Tools
Your measuring cups should include both dry and liquid varieties for accuracy. Dry measuring cups with flat rims allow you to level ingredients precisely. Liquid measuring cups with spouts prevent spills and ensure correct measurements for your wet ingredients.
Measuring spoons become critical for smaller quantities like vanilla extract and spices. A set ranging from 1/4 teaspoon to 1 tablespoon covers all your banana bread needs.
A sturdy wooden spoon or rubber spatula handles the mixing without overworking your batter. Electric mixers aren’t necessary for this recipe and can actually create tough bread through overmixing.
Preparation Tools
You’ll want a potato masher or large fork for breaking down your ripe bananas. Some bakers prefer leaving small chunks for texture while others mash completely smooth. A cutting board provides a stable surface for this task.
Parchment paper lines your loaf pan for foolproof removal and easier cleanup. Cooking spray or butter serves as backup greasing insurance.
A wire cooling rack elevates your finished loaf and prevents soggy bottoms by allowing air circulation. This simple tool transforms your banana bread from good to exceptional by ensuring proper cooling.
Instructions
Follow these detailed steps to create your perfect banana bread with consistent bakery-quality results. Each stage builds upon the previous preparation to ensure optimal texture and flavor.
Prep
Preheat your oven to 350°F (175°C) and position the rack in the center. Grease your 9×5-inch loaf pan thoroughly with butter or cooking spray. Line the bottom and sides with parchment paper leaving a 2-inch overhang for easy removal.
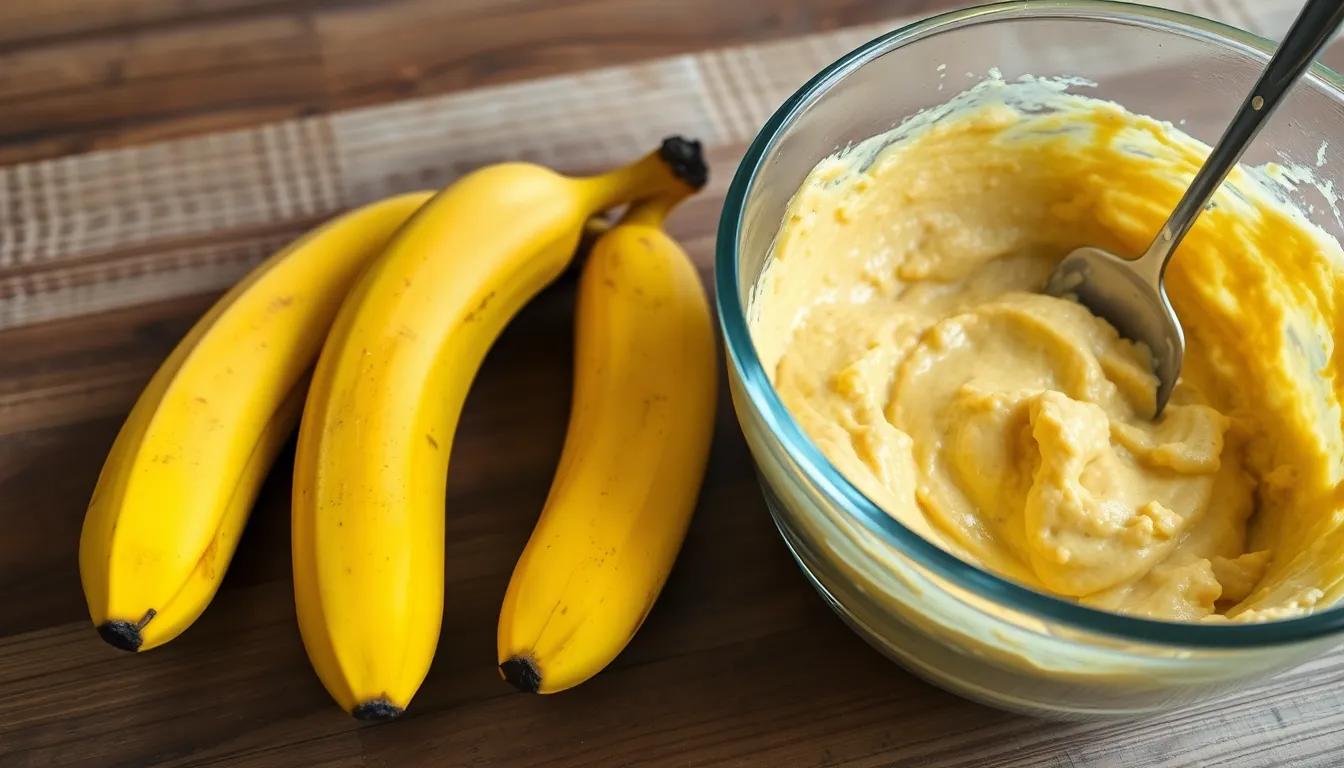
Mash your ripe bananas in a large bowl until mostly smooth with some small chunks remaining. You want approximately 1½ cups of mashed banana. Melt your butter and set aside to cool slightly. Crack your eggs into a small bowl and lightly beat them with a fork.
Mix the Batter
Combine the mashed bananas with melted butter in your large mixing bowl. Stir in the beaten eggs vanilla extract and milk until well incorporated. The mixture should appear slightly lumpy from the banana pieces.
Whisk together flour sugar baking soda salt cinnamon and nutmeg in a separate bowl. Create a well in the center of the dry ingredients. Pour the wet mixture into the well and gently fold together using a wooden spoon or rubber spatula. Mix just until the flour disappears and avoid overmixing to prevent tough bread. Fold in any optional add-ins like nuts or chocolate chips during the final few stirs.
Bake
Pour the batter into your prepared loaf pan and spread evenly with the spatula. Gently tap the pan on the counter twice to release air bubbles. Place in the preheated oven and bake for 55-65 minutes.
Check for doneness by inserting a toothpick into the center of the loaf. The toothpick should come out with just a few moist crumbs attached. The top should appear golden brown and spring back lightly when touched. If the top browns too quickly tent it with aluminum foil during the last 15 minutes of baking.
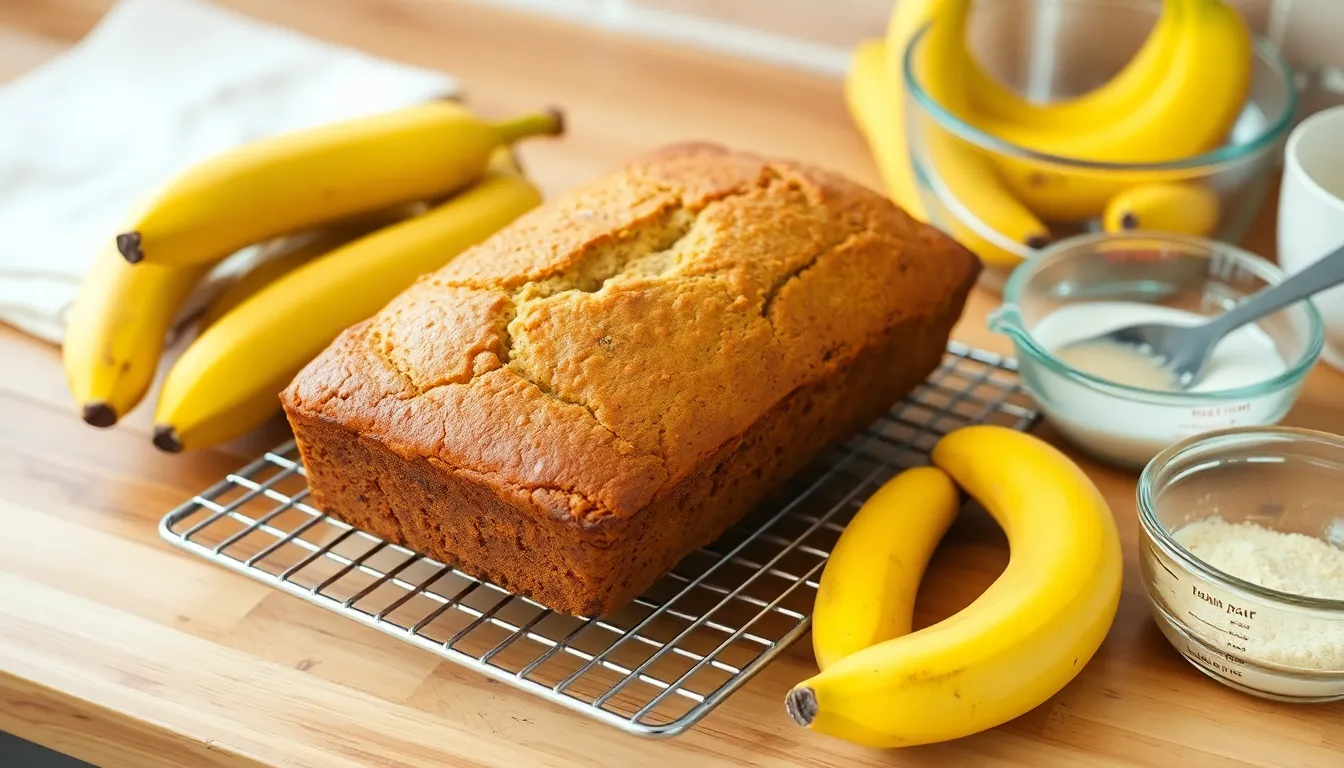
Cool and Serve
Remove the banana bread from the oven and place the pan on a wire cooling rack. Allow it to cool in the pan for 10 minutes before using the parchment paper overhang to lift it out. Transfer the loaf directly to the cooling rack and cool completely for at least 1 hour before slicing.
Slice with a sharp serrated knife using a gentle sawing motion to prevent crumbling. Store covered at room temperature for up to 4 days or wrap tightly and freeze for up to 3 months. Serve slices plain or with butter honey or cream cheese for an extra indulgent treat.
Tips for the Best Banana Bread
Master these essential techniques to transform your banana bread from good to extraordinary. These professional baking secrets ensure consistent results every time you bake.
Choosing the Right Bananas
Your banana selection directly impacts the final flavor and texture of your bread. Look for bananas with deep yellow peels covered in brown spots or completely brown skins. These overripe bananas contain higher sugar levels and break down easily during mashing.
Green or barely yellow bananas lack the sweetness and moisture needed for exceptional banana bread. You can accelerate ripening by placing bananas in a paper bag with an apple for 24-48 hours. Frozen bananas work perfectly too – simply thaw them completely and drain excess liquid before mashing.
Test banana ripeness by gently pressing the fruit. Perfectly ripe bananas yield to light pressure and emit a sweet aroma. Save bananas that are too soft to eat fresh specifically for baking purposes.
Mixing Techniques
Proper mixing technique separates dense banana bread from light and tender loaves. Combine wet ingredients thoroughly before adding them to the dry mixture. Mash bananas until mostly smooth with just a few small lumps remaining for texture.
Mix wet and dry ingredients using the folding method rather than vigorous stirring. Add the wet mixture to the dry ingredients and fold gently with a rubber spatula until flour just disappears. Visible flour streaks indicate you need a few more gentle folds.
Stop mixing immediately once ingredients combine. Overmixing develops gluten strands that create tough and chewy banana bread. The batter should look slightly lumpy and rustic rather than perfectly smooth.
Baking Tips
Oven temperature accuracy ensures even baking and proper rise. Use an oven thermometer to verify your oven reaches exactly 350°F (175°C) before placing the loaf inside. Position your rack in the center of the oven for optimal heat circulation.
Check doneness using multiple methods for foolproof results. Insert a toothpick into the center of the loaf – it should emerge with just a few moist crumbs attached. The internal temperature should reach 200°F (93°C) when measured with an instant-read thermometer.
Cover the top with aluminum foil if browning occurs too quickly during the final 15 minutes of baking. This prevents over-browning while allowing the center to finish cooking completely. Allow the bread to cool in the pan for 10 minutes before transferring to a wire rack.
Storage Instructions
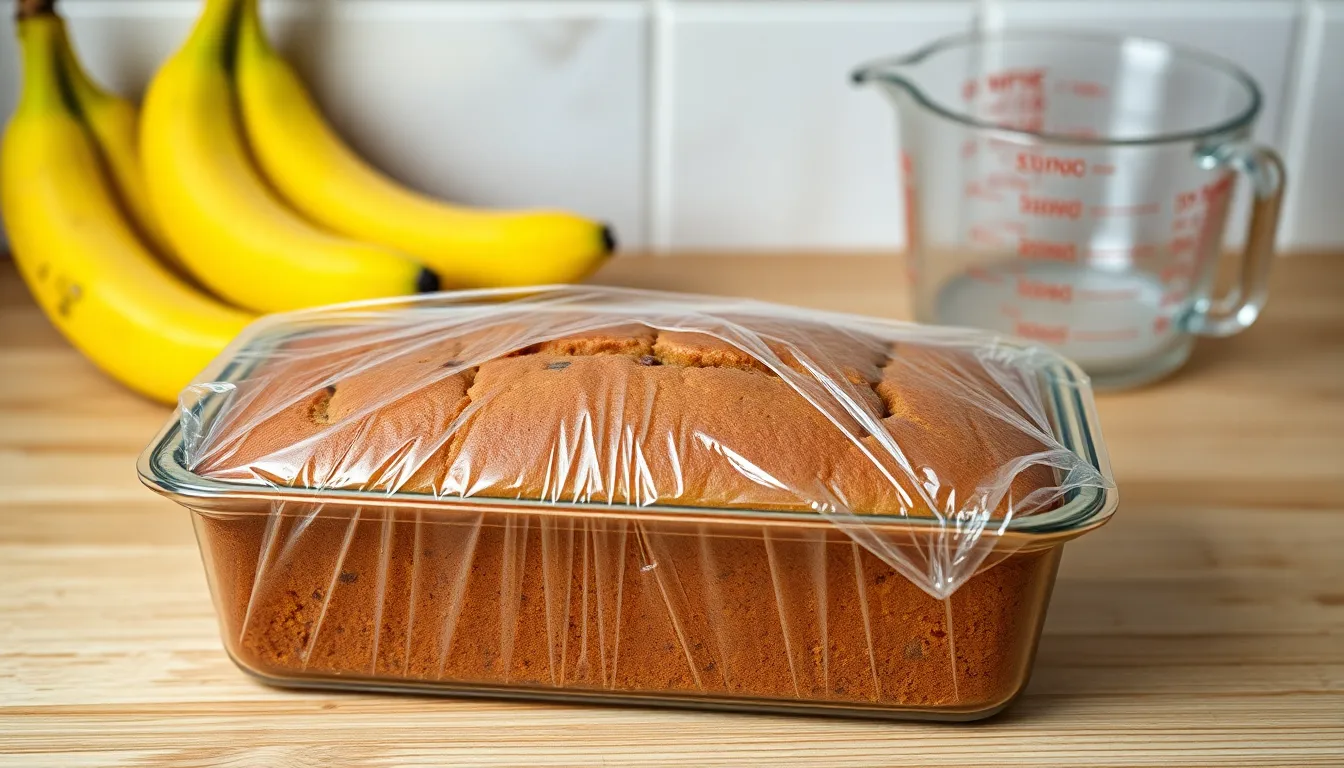
Your freshly baked banana bread requires proper storage techniques to maintain its moist texture and delicious flavor. Room temperature storage works best for the first three days after baking.
Room Temperature Storage
Wrap your completely cooled banana bread tightly in plastic wrap or aluminum foil. Place the wrapped loaf in an airtight container or resealable plastic bag to prevent moisture loss. Store the bread at room temperature for up to 3 days while maintaining optimal freshness.
Refrigerator Storage
Extend your banana bread’s shelf life by refrigerating it for up to one week. Wrap the loaf securely in plastic wrap and place it in an airtight container. Allow refrigerated banana bread to come to room temperature before serving for the best texture and flavor.
Freezer Storage
Freeze your banana bread for long-term storage lasting up to 3 months. Wrap individual slices or the entire loaf in plastic wrap followed by aluminum foil or freezer bags. Label the package with the date to track storage time.
Storage Duration Guide
| Storage Method | Duration | Best Practices |
|---|---|---|
| Room Temperature | 3 days | Airtight container, cool dry place |
| Refrigerator | 1 week | Wrapped in plastic, sealed container |
| Freezer | 3 months | Double wrapped, labeled with date |
Thawing Instructions
Remove frozen banana bread from the freezer and let it thaw at room temperature for 2-3 hours. Individual slices thaw within 30-45 minutes. You can also toast frozen slices directly from the freezer for a warm treat.
Reviving Day-Old Bread
Restore moisture to slightly stale banana bread by wrapping it in a damp paper towel and microwaving for 10-15 seconds. Alternatively, warm slices in a 350°F oven for 5 minutes wrapped in foil.
Make-Ahead Instructions

You can prepare this banana bread recipe days or even weeks ahead of time using several proven strategies. These make-ahead techniques ensure you always have fresh banana bread ready for unexpected guests or busy mornings.
Prepare the Batter in Advance
Mix your banana bread batter up to 24 hours before baking and store it in the refrigerator. Cover the bowl tightly with plastic wrap to prevent the batter from absorbing refrigerator odors. The cold batter may appear slightly thicker than when first mixed but will bake perfectly once brought to room temperature for 30 minutes before transferring to your prepared loaf pan.
Freeze Unbaked Batter
Pour your prepared batter directly into a parchment-lined loaf pan and wrap the entire pan with aluminum foil followed by a layer of plastic wrap. Label the package with the date and freeze for up to 2 months. When ready to bake, remove the wrapping and thaw the batter in the refrigerator overnight. Allow the pan to sit at room temperature for 45 minutes before baking as directed, adding an extra 5-10 minutes to the original baking time.
Make Complete Loaves Ahead
Bake your banana bread completely and cool it thoroughly on a wire rack. Wrap individual loaves tightly in plastic wrap, then place them in freezer bags or aluminum foil for double protection. Frozen baked banana bread maintains its quality for up to 3 months when properly stored.
Portion and Freeze Slices
Slice your cooled banana bread and place parchment paper between each slice before wrapping the entire loaf. This method allows you to remove individual servings as needed without thawing the entire loaf. Frozen slices thaw in 15-20 minutes at room temperature or can be toasted directly from frozen.
| Make-Ahead Method | Storage Duration | Thawing Time |
|---|---|---|
| Refrigerated batter | 24 hours | 30 minutes |
| Frozen batter | 2 months | Overnight + 45 minutes |
| Frozen whole loaf | 3 months | 2-3 hours |
| Frozen slices | 3 months | 15-20 minutes |
Breakfast Prep Strategy
Prepare multiple batches on Sunday and freeze them in individual portions for weekday breakfasts. Toast frozen slices directly in your toaster or warm them in a 300°F oven for 5-7 minutes. This strategy transforms your banana bread into convenient grab-and-go breakfast options throughout the week.
Variations

Transform your basic banana bread into exciting new flavors with these popular variations. Each option builds on the foundation recipe while adding unique ingredients that complement the natural sweetness of bananas.
Chocolate Chip Banana Bread
Fold 1 cup of semi-sweet chocolate chips into your batter during the final mixing stage. Mini chocolate chips distribute more evenly throughout the loaf and prevent sinking to the bottom. You can substitute dark chocolate chips for a richer flavor or white chocolate chips for a sweeter taste.
Add the chocolate chips after combining wet and dry ingredients but before transferring to the loaf pan. Toss the chips in a tablespoon of flour before folding them in to help prevent settling. This variation pairs exceptionally well with a sprinkle of sea salt on top before baking.
Walnut Banana Bread
Incorporate 3/4 cup of chopped walnuts for a classic nutty crunch that complements banana’s creamy texture. Toast the walnuts in a dry skillet for 3-4 minutes before adding to enhance their flavor and prevent them from becoming soggy during baking.
Chop walnuts into uniform pieces roughly the size of chocolate chips for even distribution. You can substitute pecans or hazelnuts for different flavor profiles. Reserve a few walnut pieces to sprinkle on top of the batter before baking for an attractive finished appearance.
Healthy Banana Bread Options
Replace half the all-purpose flour with whole wheat flour for added fiber and nutrients while maintaining tender texture. Substitute Greek yogurt for half the butter to reduce fat content and increase protein. Use coconut oil instead of butter for a dairy-free option that adds subtle tropical notes.
Reduce sugar by one-third and add 2 tablespoons of honey or maple syrup for natural sweetness. Incorporate 1/4 cup of ground flaxseed or chia seeds for omega-3 fatty acids and extra fiber. These modifications create a more nutritious loaf without sacrificing the moist texture and banana flavor you love.
Troubleshooting Common Issues
Even experienced bakers encounter challenges when making banana bread. Understanding these common problems and their answers helps you achieve consistent bakery-quality results every time.
Dense or Heavy Texture
Your banana bread turns out dense when you overmix the batter or use insufficient leavening agents. Mix wet and dry ingredients just until combined to maintain a light crumb structure. Check your baking soda expiration date since old leavening loses effectiveness after six months. Replace expired baking soda immediately for proper rise and texture.
Room temperature ingredients blend more easily and prevent overmixing. Cold eggs and butter create lumps that require excessive stirring to eliminate. Allow eggs to reach room temperature in warm water for 10 minutes before mixing.
Bread Sinks in the Middle
Opening the oven door too frequently causes temperature fluctuations that make banana bread collapse. Wait until the final 10 minutes of baking before checking doneness with a toothpick. Your oven temperature may run hot or cold affecting the baking process.
| Common Temperature Issues | Solution |
|---|---|
| Oven runs 25°F hot | Reduce temperature to 325°F |
| Oven runs 25°F cold | Increase temperature to 375°F |
| Uneven heating | Rotate pan halfway through baking |
Expired baking soda fails to provide adequate lift during baking. Test your baking soda by adding a pinch to vinegar. Fresh baking soda fizzes vigorously while old powder barely reacts.
Dry or Crumbly Bread
Overbaking creates dry banana bread that crumbles when sliced. Start checking doneness 5 minutes before the recommended baking time ends. Your toothpick should come out with just a few moist crumbs attached.
Insufficient fat content leads to dry texture regardless of baking time. Measure butter or oil accurately using liquid measuring cups for oils and solid measuring cups for butter. Adding an extra tablespoon of melted butter rescues slightly dry batter.
Old bananas that have dried out lack the moisture content needed for tender bread. Choose bananas with soft flesh and natural sugars that contribute both sweetness and moisture to your final product.
Uneven Baking or Raw Center
Your loaf pan size affects baking time and evenness. Standard 9×5-inch pans distribute heat properly while smaller or larger pans require timing adjustments. Dark metal pans bake faster than light colored or glass pans.
| Pan Type | Temperature Adjustment | Time Adjustment |
|---|---|---|
| Dark metal | Reduce by 25°F | Check 5 minutes early |
| Glass | No change | Add 5-10 minutes |
| Light metal | No change | Standard timing |
Position your oven rack in the center position for even heat circulation. Lower racks cause bottom burning while upper racks create pale tops with raw centers.
Top Browns Too Quickly
Cover your loaf with aluminum foil during the last 15-20 minutes of baking when the top achieves golden brown color. This technique prevents overbrowning while allowing the center to finish cooking completely.
High sugar content from very ripe bananas accelerates browning at standard temperatures. Reduce oven temperature by 25°F and extend baking time by 10-15 minutes for extremely ripe banana batters.
Bread Sticks to Pan
Proper pan preparation prevents sticking disasters that ruin your beautiful loaf. Grease your pan thoroughly with butter then dust with flour tapping out excess. Parchment paper provides foolproof release when cut to fit the bottom and sides of your pan.
Allow your bread to cool in the pan for exactly 10 minutes before attempting removal. Cooling creates slight shrinkage that naturally releases the bread from pan sides while preventing breakage from handling hot bread.
Conclusion
You now have everything you need to create bakery-quality banana bread that’ll become your go-to comfort food. Whether you’re following the classic recipe or experimenting with chocolate chips and walnuts you’re guaranteed delicious results every time.
Remember that great banana bread starts with perfectly ripe bananas and gentle mixing techniques. Don’t forget to use the storage and make-ahead tips to keep your bread fresh for days or prepare batches in advance for busy mornings.
With these professional techniques and troubleshooting answers you’ll never have to worry about dense or dry banana bread again. Your kitchen will soon be filled with that irresistible aroma that makes everyone gather around asking for your secret recipe.