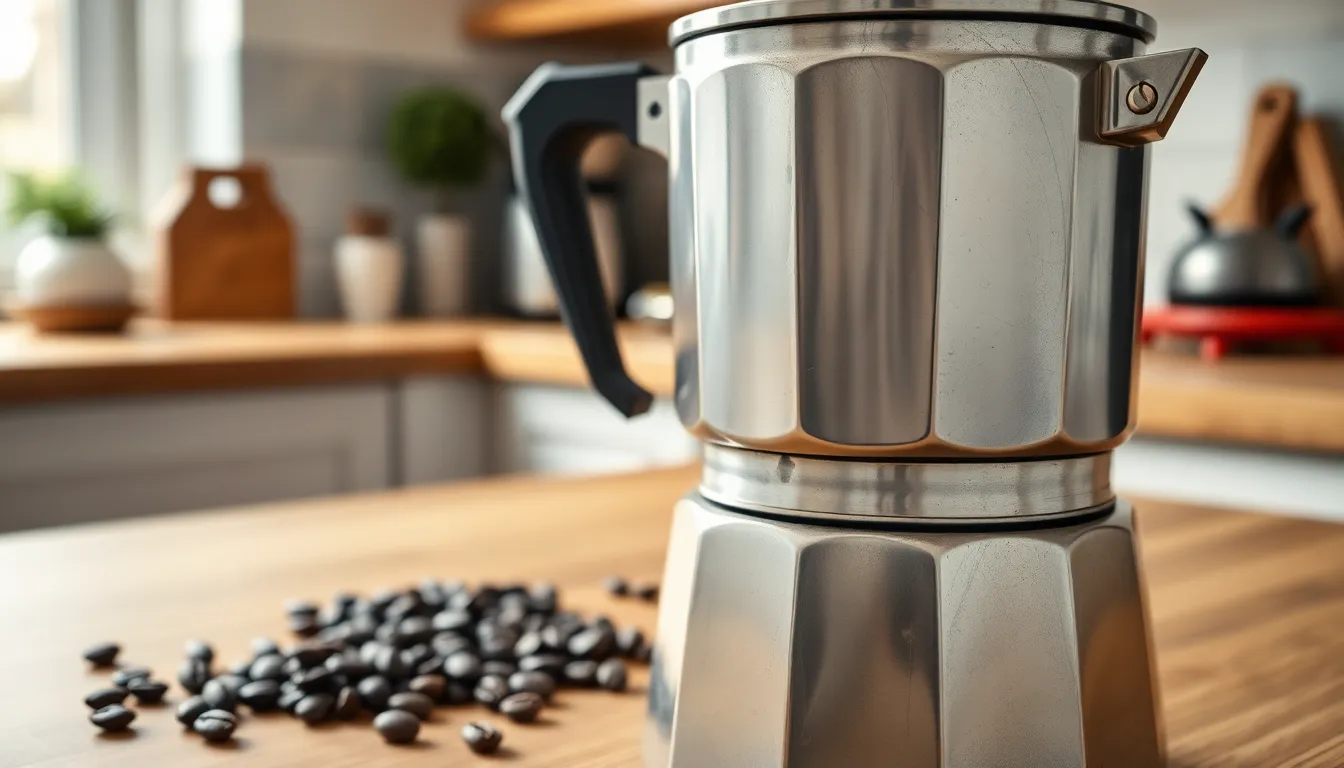
Dealing with mold in your moka pot? It’s a common problem that can ruin your morning coffee routine and potentially affect your health. That telltale fuzzy growth isn’t just unappetizing—it’s a sign you need to take action.
When moisture gets trapped in your beloved coffee maker, it creates the perfect environment for mold to flourish. The combination of coffee residue, warmth, and humidity makes moka pots particularly susceptible to this unwelcome visitor. If you’ve noticed strange smells or discoloration in your brewer, you’re likely facing a mold issue that needs immediate attention.
Don’t worry—with proper cleaning techniques and preventative measures, you can enjoy mold-free coffee again. Let’s explore how to identify, remove, and prevent mold from taking over your moka pot.
Understanding Mold in Moka Pots
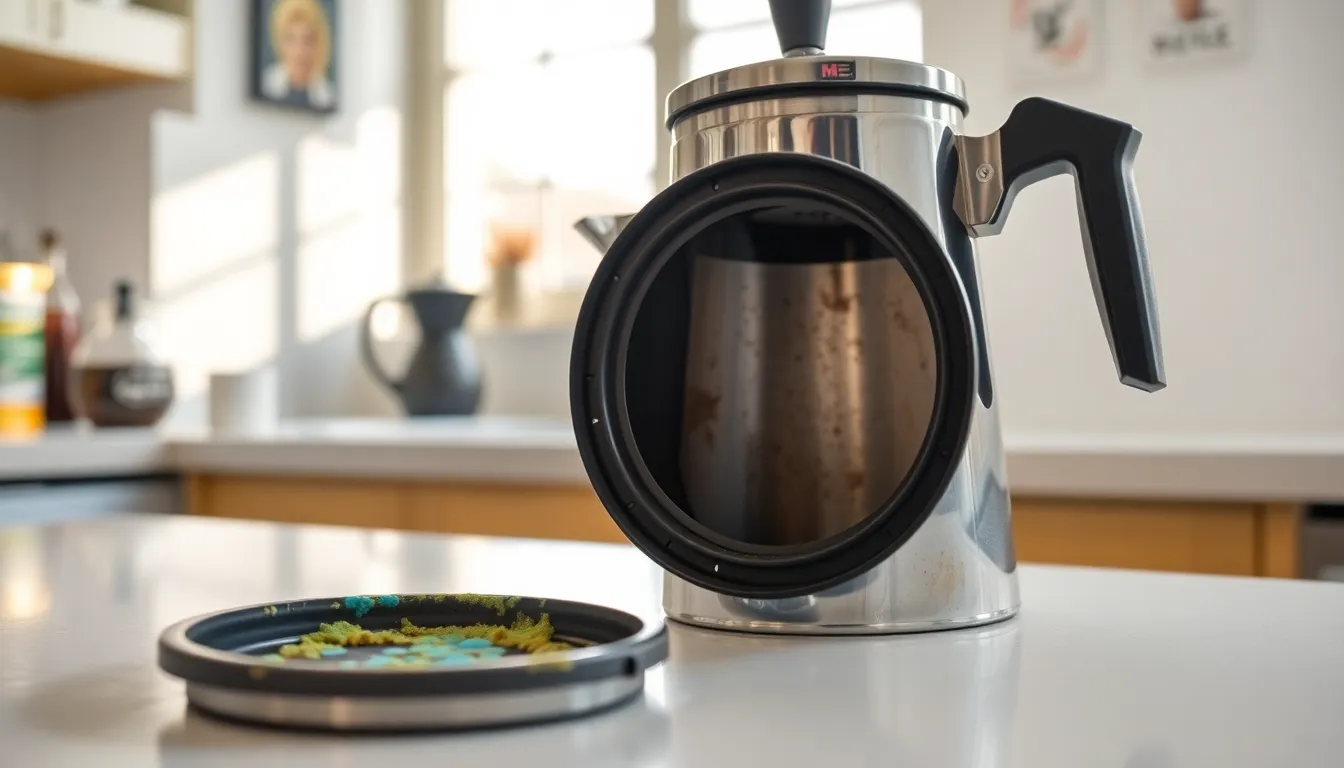
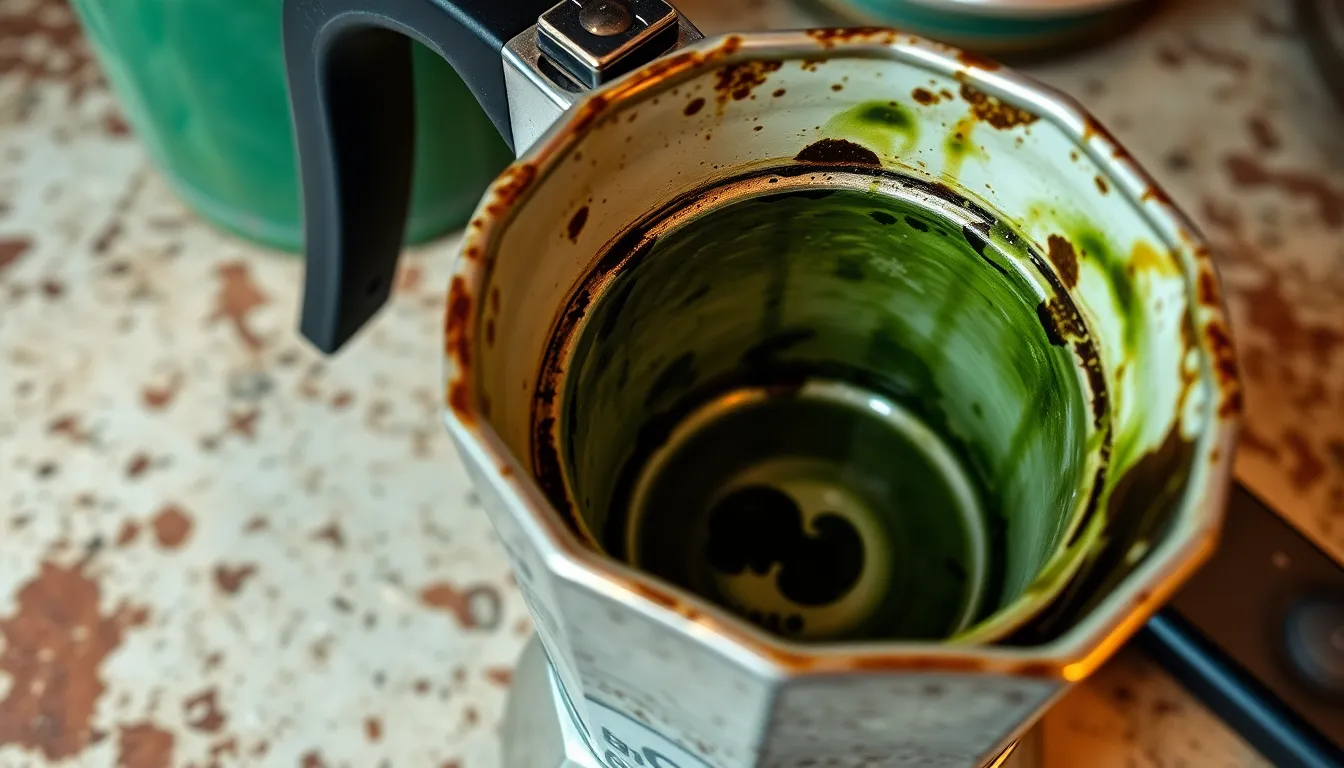
Mold growth in your moka pot isn’t just an aesthetic issue—it’s a potential health hazard that compromises the quality of your brew. The distinctive blue-green or black spots appearing on the rubber gasket, filter plate, or inside the chambers indicate a fungal invasion that requires immediate attention.
Mold thrives in moka pots due to four primary factors: moisture retention, coffee residue accumulation, ideal temperature conditions, and inadequate cleaning. After brewing, residual moisture often remains trapped in the pot’s chambers and crevices, creating a perfect environment for mold spores to settle and multiply. Coffee grounds left behind provide an excellent food source for mold, accelerating its growth exponentially.
Regular exposure to warm temperatures during brewing followed by cooling creates condensation that further encourages mold development. The rubber gasket particularly attracts mold growth due to its porous nature that easily traps moisture and coffee particles in microscopic crevices.
“I once left my moka pot unwashed for just three days while on a short trip,” shares Rikki Manny, “and returned to find alarming green spots throughout the bottom chamber. That experience taught me that mold can develop much faster than most coffee lovers realize.”
Mold contamination manifests through telltale signs: a musty odor emanating from your pot, visible discoloration on components, and sometimes an off-taste in your coffee. These indicators shouldn’t be ignored, as certain mold varieties produce mycotoxins that may cause respiratory issues, allergic reactions, or digestive problems when consumed.
Coffee brewed in a mold-contaminated moka pot often exhibits an unmistakable earthy, musty flavor profile that ruins the intended taste experience. Recognizing these warning signs early allows for prompt intervention before the problem becomes more severe or affects your health.
Recommended Products
![COLETTI Coffee Pot Cleaner — Coffee Percolator Cleaner, Coffee Cleaning Tablets — Descaler for Stainless Steel Percolator, Moka Pot, French Press – Individually Wrapped Tablets [Pack of 24]](https://m.media-amazon.com/images/I/51qs+Fu5FIL._SL500_.jpg)
COFFEE PERCOLATOR CLEANING TABLETS — Ideal Coffee Descaler: Deep-clean your percolator with coffee pot cleaner tablets that dissolve fast and cut through limescale, coffee oils, and stains. Use occasionally as your go-to 'coffee pot cleaner and descaler to keep every brew bold, smooth, and clean

Multipurpose design cleans coffee bowls, brewing baskets and screens

Removes Build-Up & Residue – coffee machine cleaner tablets that descale and eliminate mineral deposits to keep your brewer running smoothly.
Why Mold Grows in Moka Pots
Mold thrives in moka pots due to exact conditions that create the perfect environment for fungal growth. Understanding these factors helps you prevent contamination and maintain a clean, safe coffee brewing experience.
Recommended Products

Bulk Coffeemaker Decalcifier Tablet: 24 Tablets Work out to a Year Supply or more. Compare to other products like powder, pods, sachet, packets. Choose ACTIVE Cleaning Tablets for better Values

6 pack of specially formulated cleaning tablets
One-step cleaning for coffee brewers and servers
Moisture and Coffee Residue
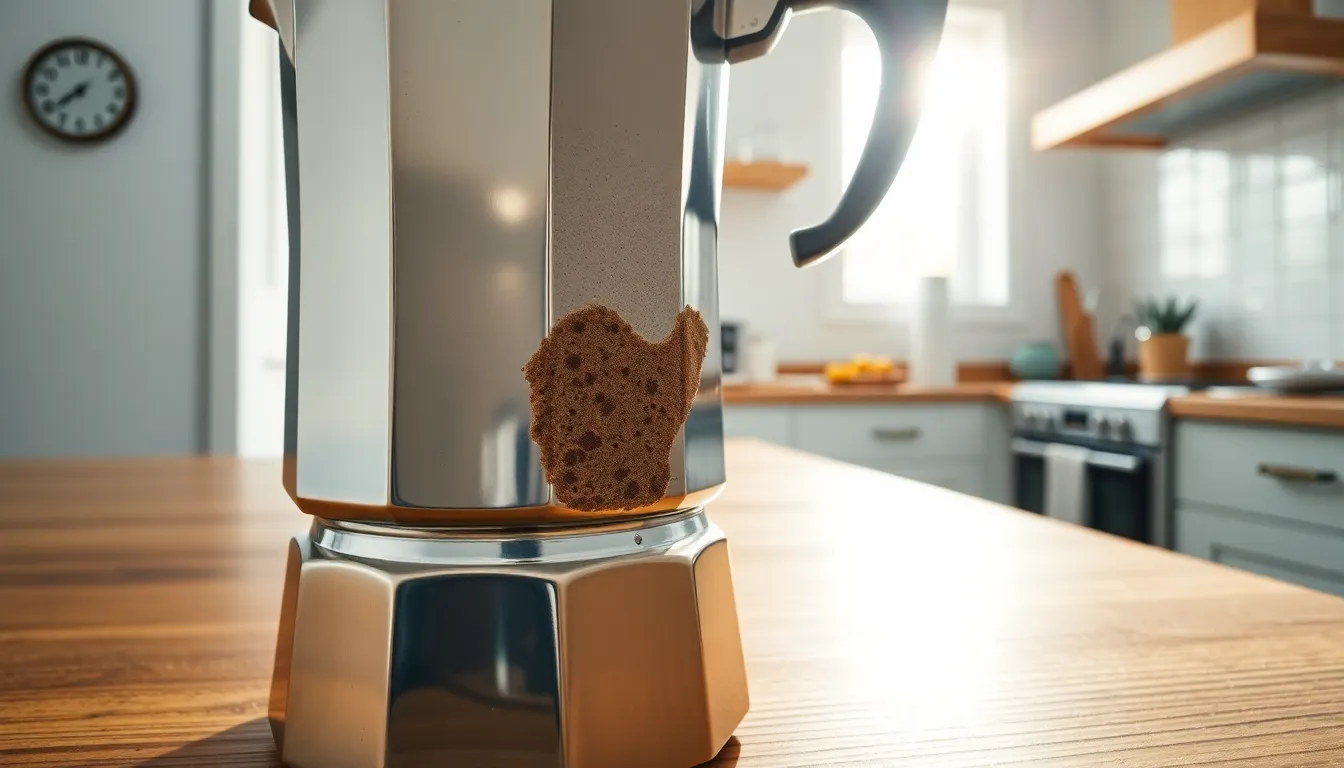
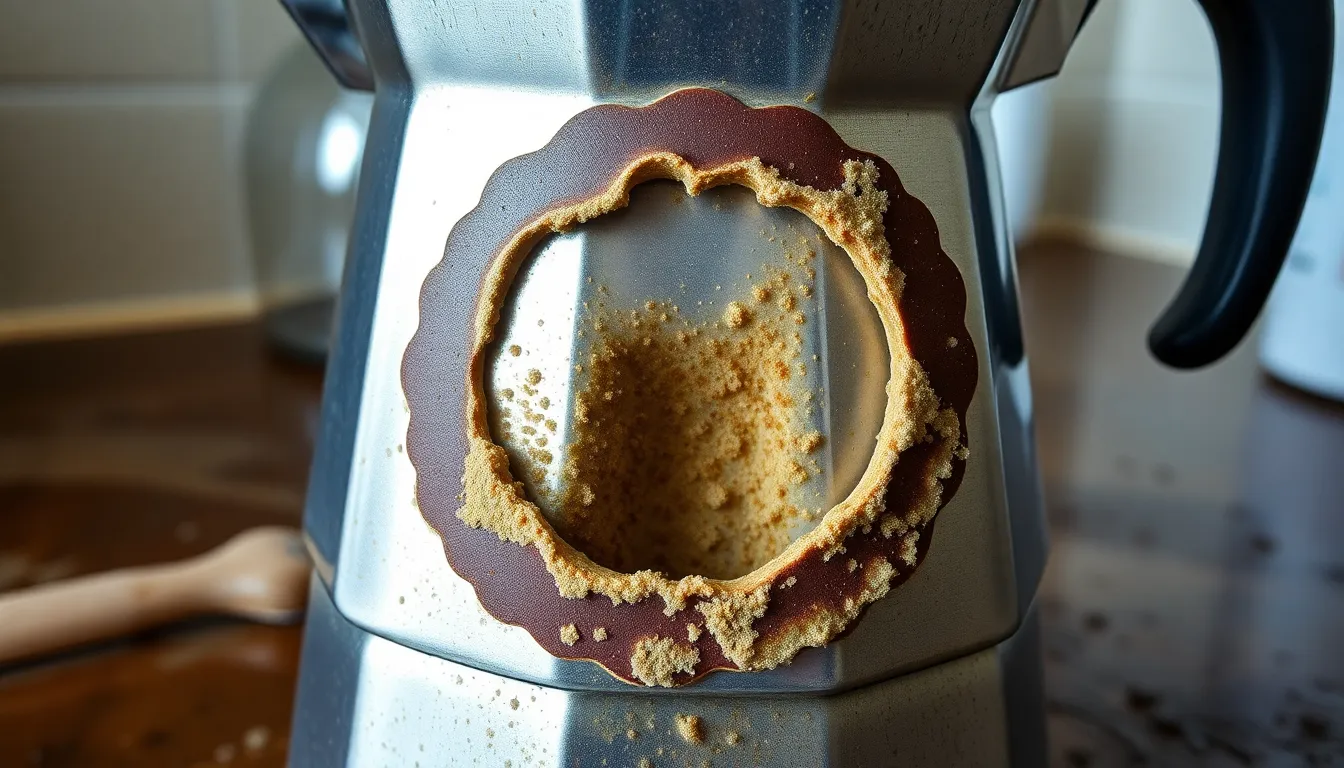
Residual moisture is the primary culprit behind mold development in moka pots. After brewing, steam and water droplets often remain trapped inside the chambers, creating a damp environment where mold spores can flourish. Coffee grounds left behind after brewing serve as an excellent food source for mold, providing organic material rich in nutrients. The combination of warmth from recent use, lingering moisture, and coffee oils creates ideal conditions for mold colonies to establish themselves. These colonies typically appear as black spots or fuzzy growth on various parts of your moka pot, particularly in crevices where moisture tends to accumulate longer.
Improper Cleaning and Storage
Inadequate cleaning routines significantly contribute to mold problems in moka pots. Failing to disassemble your pot after each use prevents thorough cleaning of all components, allowing coffee residue to build up in hard-to-reach areas. The rubber gasket requires special attention during cleaning as its porous nature makes it particularly susceptible to harboring mold spores. Many coffee enthusiasts make the mistake of storing their moka pots while still damp or fully assembled, trapping moisture inside the chambers. Proper storage involves allowing all components to dry completely before reassembly and storing in a dry location with good air circulation. Natural cleaning agents like vinegar or lemon juice effectively remove mold and prevent its return, breaking down coffee oils that regular washing might miss.
Health Risks of Mold in Your Moka Pot
Mold growth in your moka pot isn’t just an aesthetic concern—it’s a legitimate health risk that can impact your wellbeing. When leftover coffee and moisture remain in your pot after brewing, they create the perfect environment for mold and bacteria to flourish.
Recommended Products

Made from white rubber and stainless steel Compatible with all Bialetti 3 cup stovetop coffee and espresso makers Includes 1 replacement filter and 3 replacement gaskets

Made of white rubber and stainless steel
Common Types of Mold Found in Coffee Makers
Moka pots commonly harbor various mold species, including the dangerous mycotoxin-producing varieties. Aspergillus and Penicillium are frequently found in damp coffee equipment, producing harmful compounds like aflatoxin B1 (a known carcinogen) and ochratoxin A (potentially damaging to kidneys). These microscopic fungi thrive in the warm, moist conditions of improperly cleaned coffee makers, establishing colonies in gaskets, filters, and brewing chambers. Regular inspection of your moka pot reveals these unwanted guests as blue-green or black spots that indicate contamination requiring immediate attention.
Potential Health Effects
Exposure to mold from your contaminated moka pot can trigger a range of troubling health issues depending on your sensitivity and immune status. Respiratory problems such as coughing and shortness of breath often appear first, followed by neurological symptoms including brain fog, chronic fatigue, and unexplained mood swings. Digestive disturbances manifest in many cases, particularly after consuming coffee from mold-contaminated equipment. People with compromised immune systems face greater risks, experiencing more severe reactions to even minimal mold exposure. Long-term contact with mycotoxins may increase cancer risks, particularly affecting the liver and kidneys in rare but serious cases. Nausea, dizziness, and immune deficiencies appear in individuals repeatedly exposed to moldy brewing equipment, reinforcing the importance of maintaining a clean moka pot for both coffee quality and personal health.
How to Identify Mold in Your Moka Pot
Identifying mold in your moka pot early helps prevent health risks and maintains coffee quality. Recognizing the telltale signs of contamination allows you to take action before brewing compromised coffee.
Recommended Products

Bulk Coffee Maker Cleaner Tablet: 34 Tablets work out to two year supply or more.Compared to other products like powder, sachet and packets, there is no messy spilled liquid or powder. Choose USKICH coffee machine descaler to keeping your machine clean longer!

A Must-Have Kitchen Essential – Specialized Clean & Revive removes tough, ingrained stains from tea cups, coffee mugs, teapots, and stainless steel. Effortlessly descales with no scrubbing & no residue.

Powerful Descaling Solution: The liquid coffee machine descaler and cleaner compatible with Breville cleaning is formulated to deeply penetrates oil and limescale to keep your machine running smoothly and producing the delicious coffee you love.
Visual Signs of Contamination
Examine your moka pot thoroughly for unusual growths, especially in the water reservoir, filter, and gasket areas. Mold appears in various colors including green, white, grey, blue, black, or brown, with textures ranging from fuzzy and powdery to velvety or slimy. Pay special attention to the rubber gasket, as its porous nature makes it particularly vulnerable to mold growth. Residue or discoloration that doesn’t wash away easily indicates contamination. Check all components after disassembling your pot, looking for spots or patches that differ from normal coffee staining.
Odor and Taste Changes
Trust your senses when inspecting for mold contamination. A musty, earthy, or damp smell emanating from your moka pot signals the presence of microbial volatile organic compounds (MVOCs) produced by mold. This unpleasant odor often persists even after routine cleaning. Your coffee’s taste offers another important clue – mold typically creates an unusual flavor profile described as musty or off, lacking the rich, aromatic qualities of properly brewed coffee. Unexpected bitterness or a stale taste in your morning brew suggests mold or bacterial growth has compromised your pot. Detecting these sensory changes early prevents exposure to potentially harmful mycotoxins that mold can produce.
Effective Cleaning Methods to Remove Mold
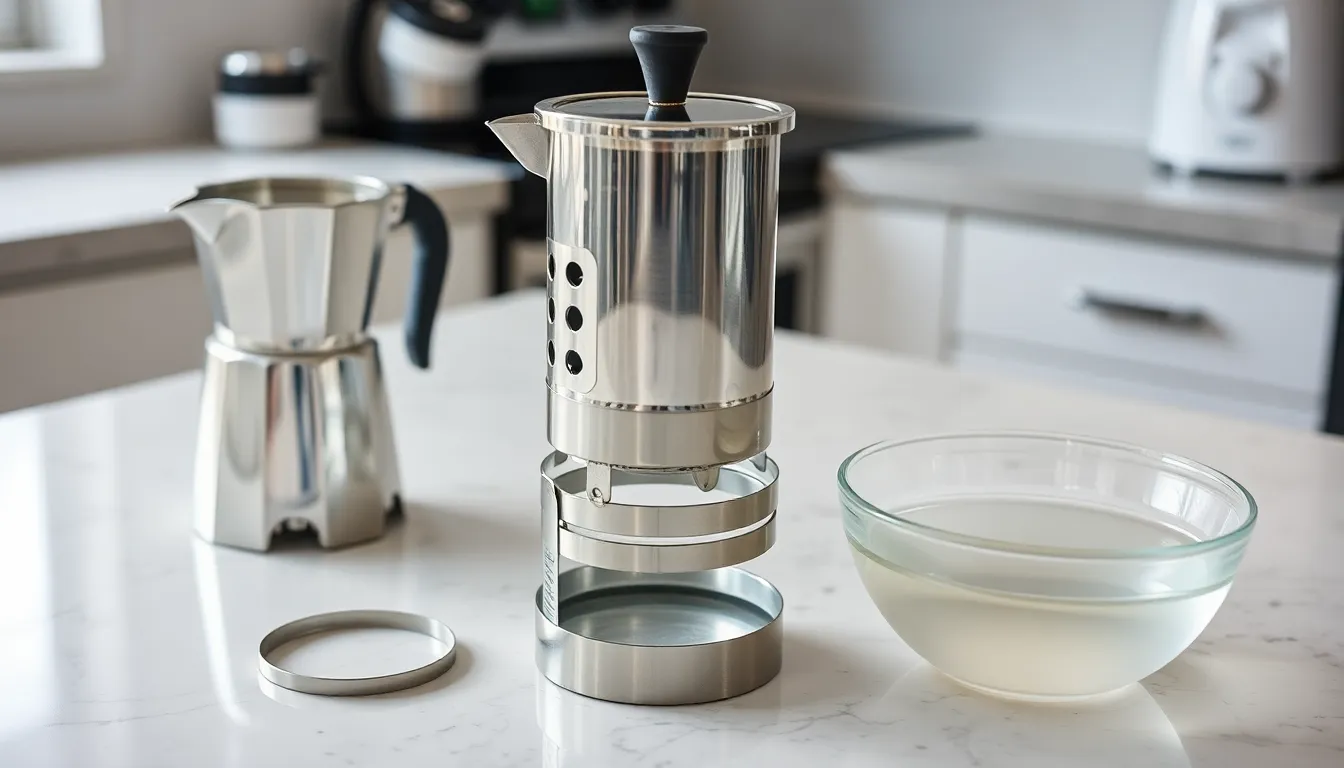
Removing mold from your moka pot requires thorough cleaning techniques that target all components where fungi might lurk. Proper disassembly and specialized cleaning methods ensure complete removal of mold and prevent its return.
Recommended Products

It is a complete coffee and teapot cleaner that will clean the inside, outside and bottom of the pot Cleans the exterior surface of the machine itself and the counter or...
Deep Cleaning with Vinegar Solution
Vinegar answers effectively eliminate mold growth in moka pots through their natural acidic properties. Completely disassemble your pot first, separating the bottom chamber, filter, basket, gaskets, and top chamber to access all hidden areas. For a comprehensive soak method, immerse all components in a solution of 1 part vinegar to 2 parts water for 30-40 minutes, allowing the acid to penetrate crevices and dissolve mold colonies. Alternatively, try the stove method by filling the bottom chamber with the vinegar-water mixture and heating it on low, simulating the brewing process to force the cleaning solution through all internal pathways. After either method, rinse all parts thoroughly with warm water and dry completely to prevent corrosion and future mold development, especially crucial for aluminum moka pots which can develop pitting when moisture remains.
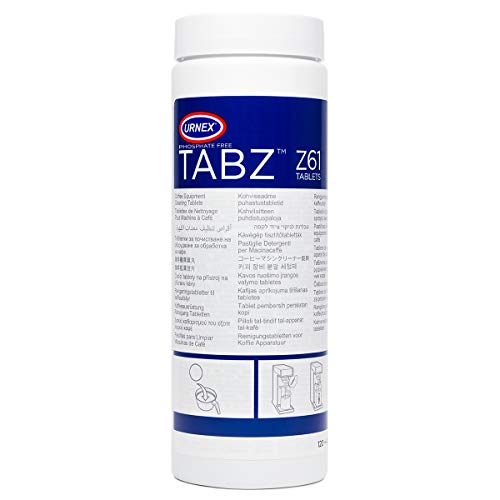
Using Specialized Coffee Maker Cleaners
Commercial coffee maker cleaners offer a convenient alternative to homemade answers for removing mold from moka pots. These specialized products contain formulations specifically designed to sanitize and descale metal coffee brewers without damaging sensitive components. Follow the manufacturer’s instructions precisely when using these cleaners to ensure effective mold elimination without compromising your pot’s integrity. Avoid harsh soaps or abrasive cleaners that might scratch the metal surfaces or leave residues that affect coffee flavor. For regular maintenance, specialized coffee cleaning tablets dissolved in hot water can penetrate small crevices where mold spores hide. Though commercial cleaners work well, natural cleaning agents like lemon juice (about 1 teaspoon per 100ml water) provide a gentler option for aluminum moka pots, effectively removing mold while being less harsh on metal surfaces than vinegar answers.
After any cleaning method, thorough drying represents the most critical step in preventing mold recurrence. Disassemble your moka pot after each use, remove used grounds immediately, and rinse all components with hot water to maintain optimal hygiene and performance. Schedule deep cleaning sessions with acidic answers twice yearly or whenever you detect signs of mold to ensure your brewing equipment remains safe and functional.
Preventing Mold Growth in Your Moka Pot
Preventing mold in your moka pot requires consistent maintenance and proper storage practices. These preventive measures ensure your coffee tastes fresh and your brewing equipment remains free from harmful fungal growth.
Recommended Products

1-Year Supply, Better Value - Includes 24 coffee maker descaling tablets—enough for monthly cleaning for up to a year. A cost-effective alternative to powders, liquids, pods, sachets, or packets.

OFFICIAL BREVILLE CLEANING TABLETS: Extend your espresso machine's functionality and prolong its life by turning to the brand you trust; Use the cleaning tablets designed and manufactured by Breville

Concentrated formula eliminates coffee waste in group heads, valves, and lines
Daily Maintenance Routine
Daily cleaning is essential for keeping your moka pot mold-free. Rinse your pot immediately after use with hot water to remove coffee residues and oils that serve as food for mold. Disassemble all components completely, including the rubber gasket, filter plate, and chambers. Wipe each part thoroughly with a soft cloth until completely dry, paying special attention to crevices where moisture might hide. Avoid using soap on aluminum moka pots as it can interfere with the protective coffee oil coating, though stainless steel versions can handle mild soap. Inspect the rubber gasket regularly for signs of wear or damage, as a compromised seal affects both performance and cleanliness. This daily ritual takes just a few minutes but dramatically reduces the risk of mold formation.
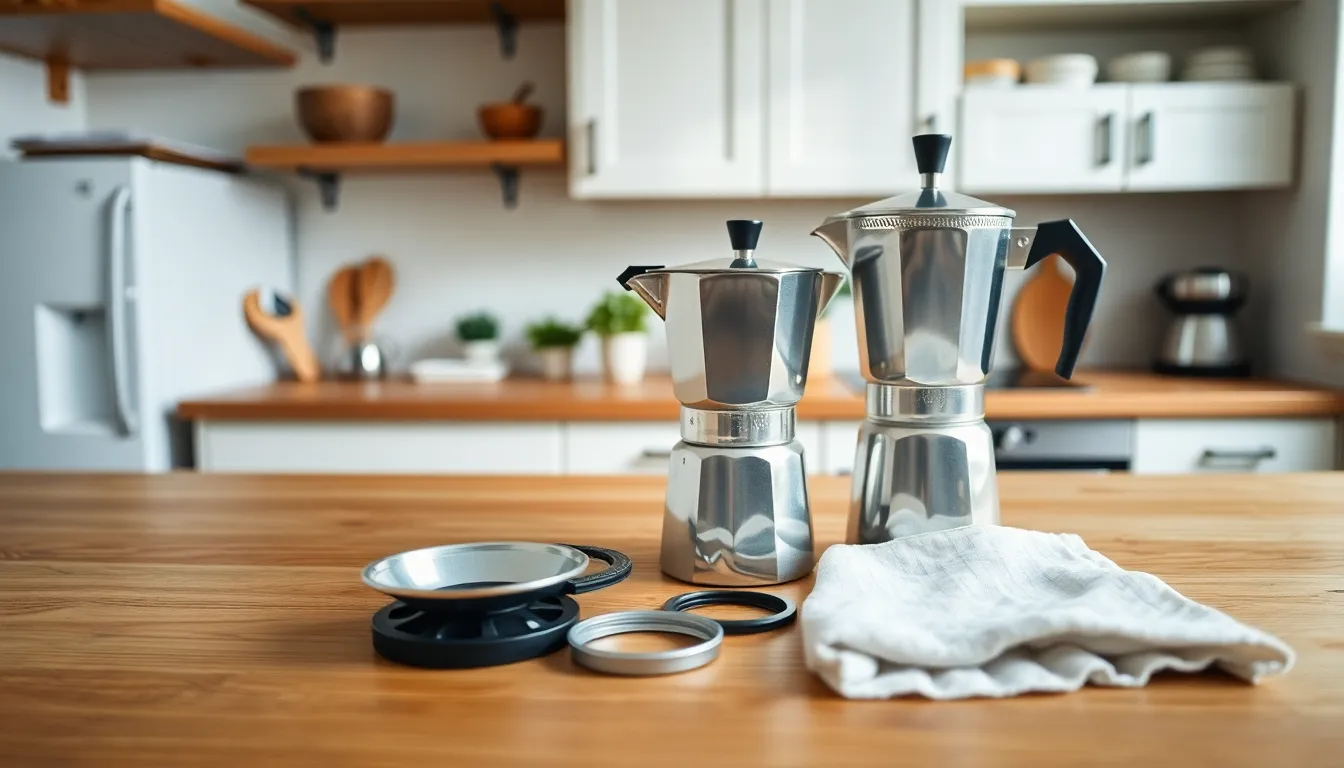
Proper Storage Techniques
Proper storage is just as crucial as cleaning for preventing mold growth. Store your moka pot completely disassembled to allow maximum air circulation through all components. This approach prevents humidity buildup inside the chambers that creates ideal conditions for mold development. Place the separated parts in a dry, well-ventilated cupboard or shelf, away from humid environments like near sinks or dishwashers. Avoid reassembling the pot until you’re ready to brew again, as trapped moisture in a closed pot creates a perfect environment for mold spores to flourish. Some coffee enthusiasts store their moka pot components with a silica gel packet nearby to absorb any ambient moisture. These storage practices complement your cleaning routine and form a comprehensive approach to mold prevention.
When to Replace Your Moka Pot
Even though regular cleaning and maintenance, moka pots don’t last forever. Certain telltale signs indicate it’s time to invest in a new brewing companion rather than continuing to use a compromised one.
Persistent mold or corrosion that remains after thorough cleaning signals replacement is necessary. If you’ve followed all the proper cleaning steps with vinegar or lemon juice answers and stubborn mold spots or corrosion still cling to your pot’s surfaces, these issues won’t resolve on their own and may contaminate future brews.
Damaged rubber gaskets or filters compromise both brewing performance and safety. Look for cracks, tears, or excessive wear on the gasket, as these defects prevent proper sealing during brewing. A worn gasket can’t create the pressure needed for extraction and may lead to leaks or even dangerous pressure buildup.
Important structural damage makes your moka pot unsafe for continued use. Examine your pot for:
- Deep pitting in the aluminum
- Warping of the chambers
- Loose handles that can’t be tightened
- Dents affecting the pot’s ability to seal properly
Discoloration alone isn’t always a reason for replacement, particularly with aluminum pots that naturally develop patina. But, extensive discoloration coupled with pitting or an inability to remove built-up residue indicates the pot’s surface integrity has been compromised.
Stainless steel moka pots typically last longer and resist mold issues better than their aluminum counterparts. If you’re replacing your pot, consider investing in a high-quality stainless steel model that offers improved durability and easier cleaning, though many coffee purists still prefer the traditional aluminum design for its heat conductivity.
Recommended Products

Material: Food Grade Silicone. Soft silicone constructed better sealing,safe and not deformed,will not crack, or leak

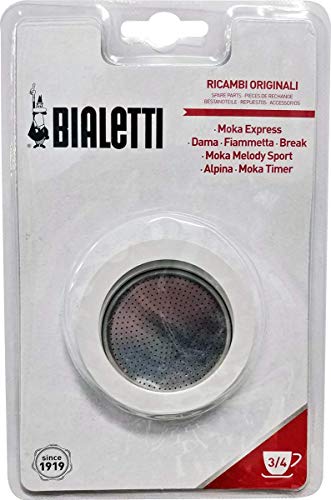
Compatible with the following espresso makers: Moka Express, Dama, Fiammetta, Break, and Mini Express

【Wide Compatibility】 Designed specifically 3/4 cup for Bialetti models,including Moka Express,Fiammetta,Break,Happy,Dama,Moka Melody,Alpina,Moka Timer,and Rainbow.Outer Gasket diameter 65mm,Please measure your old gasket to ensure a proper fit,before ordering to ensure perfect fit and function.
Conclusion
Your moka pot deserves attention to remain a reliable companion in your coffee journey. By staying vigilant for signs of mold and implementing regular cleaning routines you’ll protect both your brewing equipment and your health.
Remember that prevention is your best defense – disassemble your pot after each use dry all components thoroughly and store them properly. A quick daily rinse paired with weekly deep cleaning will keep mold at bay.
Don’t hesitate to replace your moka pot when cleaning no longer resolves persistent mold issues or when structural damage appears. Investing in quality stainless steel can offer greater longevity and resistance to fungal growth.
With these practices your morning brew will remain delicious safe and mold-free for years to come.
Frequently Asked Questions
Recommended Products

Coffee Maker Cleaner Tablet: 12Tablets work out to two year supply or more.Compared to other products like powder, sachet and packets, there is no messy spilled liquid or powder. Choose USKICH coffee machine descaler to keeping your machine clean longer!

Effective Maintenance: Regular use of keurig descaling-solution ensures your coffee machine operates at peak performance; prolongs the lifespan of your appliance and enhances the flavor of your beverages

Boost the flavor: Our coffee machine cleaning tablets remove hard water buildup, limescale, coffee oils, and residue. Deep cleaning maintains machine performance, ensuring every cup is brewed fresh, flavorful, and rich.
Why does mold grow in moka pots?
Mold thrives in moka pots due to four main factors: trapped moisture after brewing, accumulated coffee residue that serves as food for mold, warm temperatures, and humidity. The porous rubber gasket is particularly susceptible to mold growth. When these conditions combine, they create an ideal environment for fungi to develop, potentially contaminating your coffee and affecting your health.
How can I identify mold in my moka pot?
Look for visible blue-green or black spots on the rubber gasket, filter plate, or inside the chambers. A musty, unpleasant odor is another clear indicator. You might also notice an off-taste in your coffee. To thoroughly check, disassemble your pot completely and examine all components in good lighting, paying special attention to crevices and the rubber gasket where mold commonly hides.
What are the health risks of using a moldy moka pot?
Using a moldy moka pot can expose you to harmful mycotoxins produced by molds like Aspergillus and Penicillium. These toxins can cause respiratory issues, headaches, neurological symptoms, and digestive disturbances. People with compromised immune systems or mold allergies are particularly vulnerable. Regular consumption of coffee from a contaminated pot may lead to chronic health problems over time.
How do I clean mold from my moka pot?
Disassemble the pot completely and soak all parts in a solution of equal parts white vinegar and water for 30 minutes. Scrub with a soft brush, paying special attention to the gasket and filter. Alternatively, fill the bottom chamber with the vinegar solution and brew it through the pot (without coffee). Rinse thoroughly with clean water and dry completely before reassembling. For stubborn mold, specialized coffee maker cleaners can be effective.
How often should I clean my moka pot?
Rinse your moka pot with hot water after each use. Perform a thorough cleaning with disassembly once a week for regular users. If you use your pot daily, deep clean it with vinegar or a specialized coffee maker cleaner every 2-4 weeks. Increase cleaning frequency if you live in a humid environment or notice any signs of mold development.
Can I use soap to clean my moka pot?
Avoid using soap on aluminum moka pots as it can leave a residue that affects coffee taste and may cause corrosion over time. For stainless steel moka pots, mild dish soap is acceptable but should be thoroughly rinsed. Instead of soap, use natural cleaning agents like vinegar, lemon juice, or baking soda paste, which effectively remove residue and kill mold without leaving unwanted flavors.
How should I store my moka pot to prevent mold?
Store your moka pot completely disassembled in a dry, well-ventilated area. Make sure all parts are thoroughly dried before storage. Leave the chambers and components separated to allow air circulation and prevent moisture buildup. Avoid storing in cabinets near sinks or dishwashers where humidity levels are higher. Never store a moka pot while it’s still damp or with coffee residue inside.
When should I replace my moka pot?
Replace your moka pot if you notice persistent mold or corrosion that remains after thorough cleaning, damaged rubber gaskets or filters that can’t be replaced, or significant structural damage like deep pitting, warping, or loose handles. Extensive discoloration combined with pitting might also indicate it’s time for a replacement. Generally, stainless steel moka pots last longer than aluminum ones.
Is stainless steel better than aluminum for preventing mold?
Yes, stainless steel moka pots are generally more resistant to mold growth than aluminum ones. Stainless steel is non-porous, making it harder for mold to penetrate the surface. It’s also more durable and easier to clean thoroughly without damaging the material. While stainless steel pots typically cost more upfront, their resistance to corrosion and mold makes them a better long-term investment for health-conscious coffee drinkers.
Can I use bleach to clean mold from my moka pot?
Avoid using bleach to clean your moka pot. Bleach is highly corrosive to both aluminum and stainless steel and can damage the metal. Additionally, bleach residue can be difficult to remove completely and may contaminate your coffee with harmful chemicals and unpleasant tastes. Stick to food-safe cleaners like vinegar, lemon juice, or specialized coffee equipment cleaners that effectively kill mold without risking your health.