Imagine a dessert that combines the gooey richness of chocolate pudding with the cakey delight of a brownie.
Warm Chocolate Pudding Cake is a self-saucing wonder that offers the best of both worlds.
The magic happens right in your oven, as the batter transforms into a two-layer marvel with a cake on top and a luscious pudding beneath.
It’s the perfect dessert for those chilly evenings when you crave something comforting and indulgent.
With its rich chocolate flavor and self-saucing nature, this cake will quickly become your go-to dessert for impressing guests or treating yourself.
Let the aromas of chocolate fill your kitchen as you prepare this irresistible delight.
The History and Cultural Significance
• Warm Chocolate Pudding traces its origins to early 20th century America, where it was originally created by home cooks seeking simple, comforting desserts.
• The dish evolved over decades as baking techniques improved and cocoa became widely available, eventually becoming the beloved version we know today.
• In American culture, this dish traditionally appears at family gatherings and potlucks, symbolizing warmth and togetherness.
• While many variations exist across different regions, the authentic version maintains the self-saucing characteristic that sets it apart from imitations.
Recipe Overview
Nutritional Information (per serving)
Essential Equipment Guide
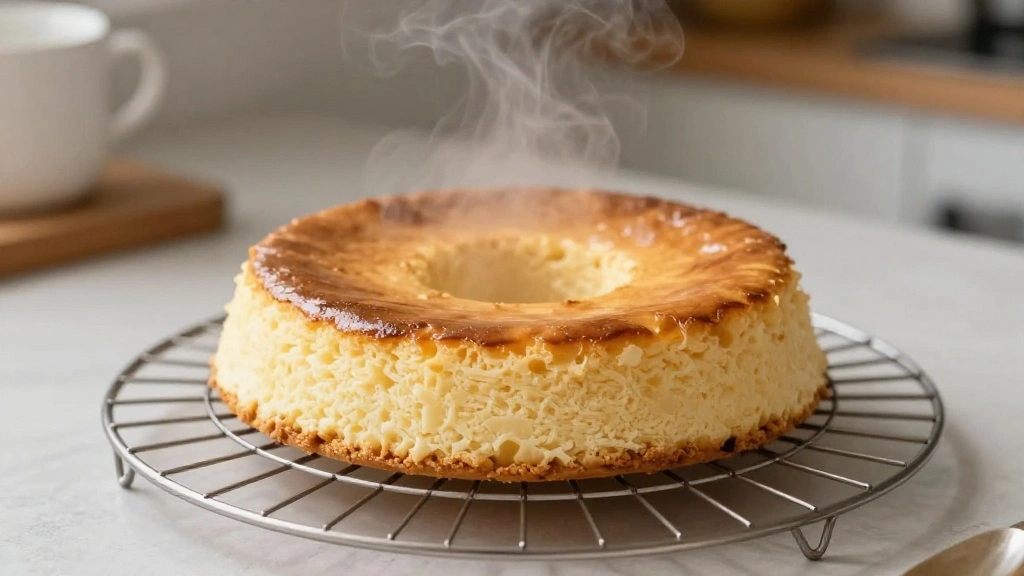
Baking Dish: A ceramic or glass baking dish is crucial for even heat distribution, which ensures the cake cooks evenly and the sauce forms properly. Alternatives like metal pans may not hold heat as well, affecting the self-saucing process.
Whisk: A sturdy whisk helps incorporate air into the batter, leading to a lighter cake layer. A hand mixer can be an alternative, but manual whisking offers more control over the texture.
Measuring Cups and Spoons: Precise measurements are key to maintaining the balance of cake-to-sauce ratios. Look for sets with clear markings and a range of sizes for accuracy.
Ingredients
For the Base
|
|
| Amount | Ingredient | Notes |
|---|---|---|
| 1 cup | all-purpose flour | provides structure to the cake |
| 1/2 cup | granulated sugar | sweetens the base |
| 2 tablespoons | cocoa powder | adds rich chocolate flavor |
| 2 teaspoons | baking powder | helps the cake rise |
| 1/4 teaspoon | salt | enhances flavor |
For the Sauce
| Amount | Ingredient | Notes |
|---|---|---|
| 3/4 cup | brown sugar | creates a caramelized sauce |
| 1/4 cup | cocoa powder | deepens chocolate flavor |
| 1 cup | boiling water | activates the sauce formation |
Preparation Methods
Folding Technique: Folding is a gentle mixing method used to combine lighter and heavier mixtures without deflating air. It is crucial in this recipe to maintain a light, airy cake texture above the pudding.
Bain-Marie: This technique involves placing the baking dish in a larger pan filled with hot water. It helps the cake cook evenly and prevents the edges from over-baking while the sauce beneath remains fluid.
Sifting: Sifting dry ingredients like flour and cocoa powder breaks up clumps and aerates them, resulting in a smoother batter and even distribution of ingredients.
Step 1: Preheat Oven

Preheat your oven to 350°F (175°C).
Ensure your oven rack is positioned in the middle.
This allows for even heat distribution during baking.
A properly preheated oven is crucial for achieving the correct texture.
Step 2: Prepare Baking Dish

Lightly grease a 9-inch square baking dish with butter or non-stick spray.
Ensure all corners and sides are coated to prevent sticking.
This will make serving and cleanup easier.
Greasing is important to maintain the integrity of the self-saucing cake.
Step 3: Mix Dry Ingredients

In a large bowl, sift together the flour, granulated sugar, cocoa powder, baking powder, and salt.
Use a whisk to combine them evenly.
Ensure there are no lumps for a smooth batter.
Sifting aerates the mixture, contributing to a lighter cake texture.
Step 4: Add Wet Ingredients

Add milk, melted butter, and vanilla extract to the dry mixture.
Stir until just combined, being careful not to overmix.
The batter should be smooth and slightly thick.
Overmixing can result in a dense cake layer.
Step 5: Pour Base Into Dish

Transfer the batter into the prepared baking dish.
Spread it evenly using a spatula.
Ensure the surface is smooth for even baking.
An even base ensures uniform cooking and sauce distribution.
Step 6: Prepare Sauce Mixture

In a separate bowl, combine brown sugar and cocoa powder for the sauce.
Mix until well blended and free of lumps.
This mixture will create the rich sauce layer beneath the cake.
Proper mixing ensures even flavor and sauce consistency.
Step 7: Pour Sauce Over Batter

Sprinkle the brown sugar and cocoa mixture evenly over the batter in the dish.
Pour boiling water over the top without stirring.
The water will activate the sauce layer as it bakes.
Do not stir, as this helps form the pudding layer beneath the cake.
Step 8: Bake the Cake

Place the baking dish in the preheated oven.
Bake for 35 minutes, or until the top is set and firm to the touch.
The cake will rise above the sauce as it bakes.
Checking doneness by touch ensures the cake layer is properly set.
Step 9: Cool Slightly
Remove the dish from the oven and allow it to cool for 10 minutes.
This helps the sauce thicken slightly while remaining gooey.
Cooling also makes serving easier.
Letting it rest ensures the sauce doesn't spill out when serving.
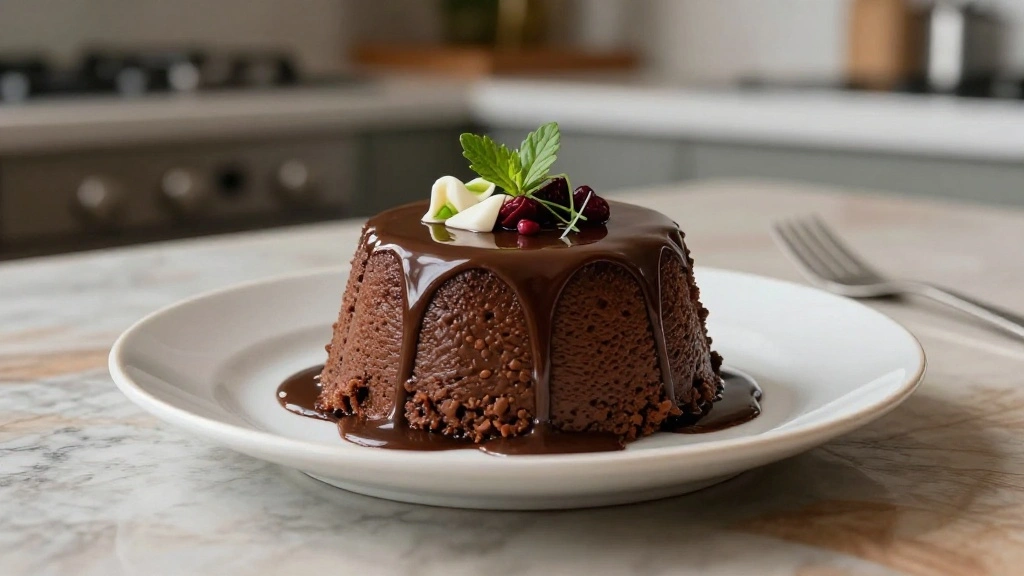
Step 10: Serve Warm
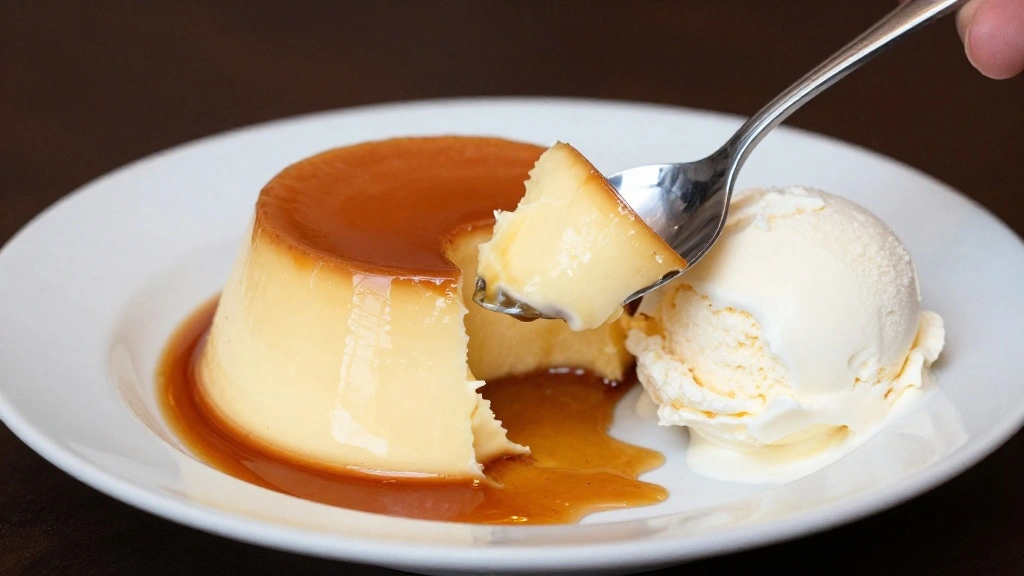
Use a large spoon to serve the pudding cake into bowls.
Ensure each serving includes both cake and sauce from beneath.
It pairs beautifully with a scoop of vanilla ice cream.
Serving warm enhances the experience of the gooey sauce.
Critical Timing and Temperature Guide
Baking: Bake at 350°F (175°C) for exactly 35 minutes. The top should be firm and the edges slightly pulling away from the dish. Avoid frequent opening of the oven door, which can cause uneven cooking.
Cooling: Let the cake cool for 10 minutes after baking. The sauce continues to thicken during this time, and immediate serving can result in too runny a sauce.
Serving: Serve immediately after the initial cooling. The dessert is best enjoyed warm, and delays can cause the sauce to thicken too much, losing its signature gooeyness.
Pro Tips for Warm Chocolate Pudding
• Ingredient Selection: Use high-quality cocoa powder for a richer chocolate flavor. Dutch-processed cocoa offers a deeper, more intense taste.
• Preparation Secret: Pour the boiling water gently over the back of a spoon to avoid disturbing the dry topping, ensuring even sauce formation.
• Temperature Management: Ensure all ingredients, especially milk and butter, are at room temperature to promote even mixing and baking.
• Texture Enhancement: Sift dry ingredients to incorporate air and prevent clumping, resulting in a lighter cake texture.
• Flavor Layering: Add a pinch of espresso powder to the dry ingredients to enhance the chocolate flavor without making it taste like coffee.
• Make-Ahead Strategies: Prepare the dry and wet ingredients separately a day in advance and store them in airtight containers. Combine just before baking.
• Restaurant-Quality Finishing Touches: Dust the top with powdered sugar before serving for an elegant presentation.
• Equipment Optimization: If you don't have a ceramic dish, line a metal one with parchment paper to mimic its heat distribution properties.
Troubleshooting Common Issues
• Texture Too Dense: Overmixing the batter can lead to a dense cake. Mix until just combined and smooth.
• Sauce Doesn't Form: If the sauce is absent, the water may have been stirred into the batter. Ensure gentle pouring without stirring.
• Flavors Unbalanced: This can occur if measurements are off. Use accurate measuring tools for consistency.
• Cake Overcooked: Baking too long or at too high a temperature can dry out the cake. Ensure correct oven temperature and timing.
• Sauce Too Runny: Insufficient cooling time can result in a runny sauce. Allow the dessert to cool for at least 10 minutes before serving.
• Edges Too Crispy: This happens if the dish is too close to the oven walls. Place the baking dish on the center rack for even cooking.
Variations and Regional Differences
• British Style: Known as Chocolate Self-Saucing Pudding, this version often includes dark chocolate chunks in the batter for added richness and texture.
• Australian Variation: Often referred to as 'Choc Pud', this version includes a layer of whipped cream on top for a creamy contrast to the rich chocolate.
• Vegan Version: Substitute dairy milk with almond milk and butter with coconut oil. The texture remains similar, and it’s suitable for those with dietary restrictions.
• Mexican Twist: Add a pinch of cinnamon and cayenne pepper to the dry ingredients for a spicy kick that complements the chocolate.
Food Science Behind the Recipe
• Leavening Agents: Baking powder releases carbon dioxide when heated, causing the cake to rise and creating a light texture.
• Emulsification: The combination of butter and sugar helps to trap air, contributing to the cake's rise and a soft crumb.
• Heat Transfer: The boiling water poured over the batter initiates a convection process, forming the sauce beneath the cake layer.
• Chemical Reactions: The Maillard reaction between sugars and proteins enhances flavor and browning in the cake layer.
Frequently Asked Questions
What's the most common mistake people make when preparing Warm Chocolate Pudding Cake? The most common mistake is overmixing the batter, which results in a dense cake. Always mix until just combined.
Can I prepare this cake in advance? Yes, you can prepare the dry and wet ingredients separately and combine them just before baking for the freshest results.
How can I make this dessert more decadent? Adding chocolate chips to the batter or serving with a scoop of vanilla ice cream can enhance the indulgence factor.
Is it possible to make this gluten-free? Substitute all-purpose flour with a gluten-free baking mix to accommodate dietary restrictions while maintaining texture.
Why didn't my sauce form properly? Ensure the boiling water is poured gently over the back of a spoon and not stirred, allowing the sauce to form beneath the cake layer.
What can I serve with this pudding cake? It pairs well with fresh berries, whipped cream, or a dusting of powdered sugar for added flavor and visual appeal.
How do I store leftovers? Store any leftovers covered in the refrigerator for up to three days. Reheat gently in the microwave before serving.
Serving and Presentation Guide
• Traditional Presentation: Serve the pudding cake in its baking dish, spooning portions into bowls at the table for a rustic, homey feel.
• Elegant Serving: Portion the cake into individual ramekins before baking for a sophisticated, restaurant-style presentation.
• Family-Style: Serve directly from the baking dish with a large serving spoon, allowing guests to help themselves.
• Decorative Touch: Add a sprig of mint or a dusting of powdered sugar on top for a visually appealing contrast to the dark chocolate.
Conclusion

Warm Chocolate Pudding Cake is a timeless dessert that combines rich flavors with a delightful, self-saucing surprise.
Whether for a cozy family night or an impressive dinner party, this dessert is sure to please.
Give this recipe a try and experience the magic of a cake that creates its own sauce.
It's a rewarding bake that promises to become a favorite in your dessert repertoire.