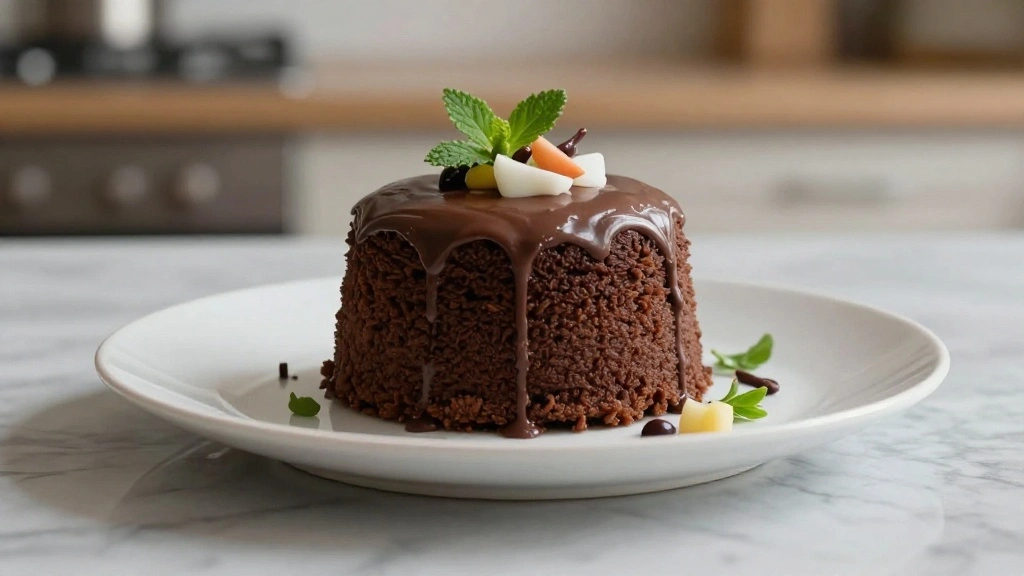
There’s something undeniably charming about a mini chocolate cake that makes it perfect for small gatherings.
The rich, decadent flavors of chocolate meld beautifully with a moist, tender crumb, creating a dessert that’s both delightful and satisfying.
I first encountered this recipe at an intimate family gathering where it was an instant hit.
Its manageable size and ease of preparation make it ideal for those who want to enjoy a homemade treat without the fuss of a full-sized cake.
Whether you’re celebrating a birthday, anniversary, or simply indulging a chocolate craving, this mini chocolate cake is sure to impress your guests.
The History and Cultural Significance
• Mini Chocolate Cake traces its origins to Europe in the early 19th century, where it was originally created by home bakers as a smaller, more manageable dessert option.
• The dish evolved over decades as cocoa became more widely available, eventually becoming the beloved version we know today.
• In many cultures, this dish traditionally appears at intimate gatherings and celebrations, symbolizing the warmth and richness of sharing a meal with loved ones.
• While many variations exist across different regions, the authentic version maintains a perfectly balanced chocolate flavor that sets it apart from imitations.
Recommended Products
HEALTHY COATING: Our Non-stick coating is a food grade safety coating with no harsh chemicals or hazardous substances. The true double layer coating allows the cake be easily removed without damage. Avoid making it difficult to clean the cake because it sticks to the pan or leaves a lot of cake residue.

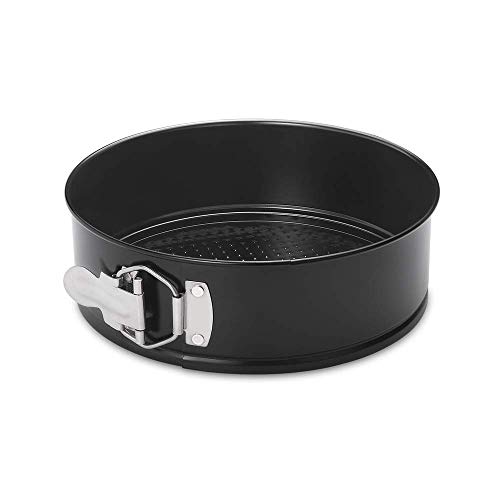
PERFECT MINI BAKES EVERY TIME: RFAQK Premium 6 inch Springform Cake Pan designed for cheesecakes, mousse, quiche, and single-layer cakes. Ideal size for small families, portion control, and 3-qt Inst-Pot baking.
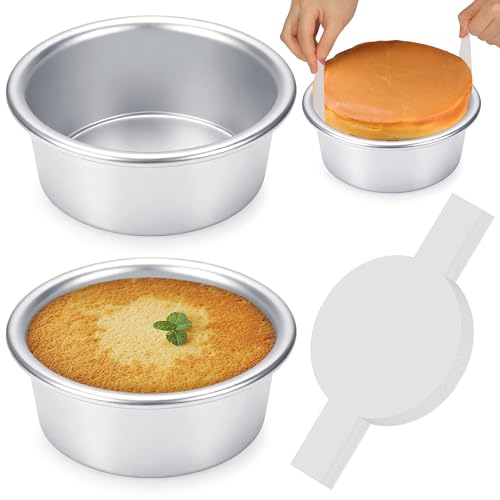
High-quality Aluminum Pans: Our 6 inch cake pans are made of high-quality commercial-grade aluminum for sturdy, durable construction. Compared to stainless steel small cake pans, our circle cake pan deliver exceptional heat conductivity with no hot spots, ensuring evenly consistent browning every time you bake. Unlike carbon steel round cake pans, they will not rust, peel, or flake—making them a favorite among home kitchens and bakeries alike
Recipe Overview
Recommended Products
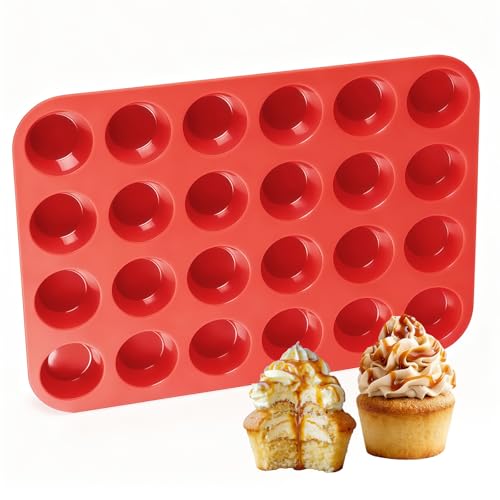
Food Grade Mini Muffin Pan: 24-cup cupcake pan, each cup capacity: 0.6 oz. Cup diameter top: 1.8 inch, cup depth: 0.7 inch

All artisanal breads, cakes, and cookies are baked with better ingredients, so you can feel good about what you're buying (and eating)
Mini cupcake liners measure 2" (top diam.) x 1.38" (bottom diam.) x 0.88" high and produce a tiny cupcake that can usually be consumed in one bite. You can usually find these liners any and everywhere in limited colors.
Nutritional Information (per serving)
Recommended Products

🧇【𝐀𝐋𝐋-𝐈𝐍-𝐎𝐍𝐄 & 𝟑𝟎𝟒 𝐃𝐈𝐒𝐇𝐖𝐀𝐒𝐇𝐄𝐑 𝐒𝐀𝐅𝐄】:1* Whisk, 2* Beaters, 2*Dough Hooks. 2026 Newly upgraded all-pure copper motor. 304 Dishwasher safe attachments. Effectively improves the stirring speed solves many problems for your kitchen, such as mixing eggs, whipping cream, beating dough for chocolate chip cookies, biscuits, cakes, pizzas, etc.

NO MORE LOST BEATERS: The snap-on storage case that comes with the Hamilton Beach hand mixer neatly holds the 2 beaters and whisk in one easy-to-find place, reducing the chance that the attachments are lost or misplaced.

SELF-CONTROL SPEED – Features 5 adjustable speeds, ranging from 1 (Lowest) to 5 (Highest), allowing you to choose the ideal mixing speed for perfectly customizable texture and consistency in any recipe. Perfect for whipping cream, making butter, beating egg whites and batter, or preparing mashed potatoes and other dishes.
Essential Equipment Guide
6-inch Cake Pan: Essential for achieving the classic mini cake size, ensuring even baking and a perfect rise. Alternatives include muffin tins for even smaller cakes, but the 6-inch pan is ideal for a true mini cake experience.
Hand Mixer: Crucial for achieving a smooth, lump-free batter. While a stand mixer can be used, a hand mixer offers better control and is easier to manage for smaller quantities.
Cooling Rack: Important for cooling the cake evenly and preventing sogginess. An alternative is a makeshift rack using an oven rack set over a baking sheet.
Recommended Products
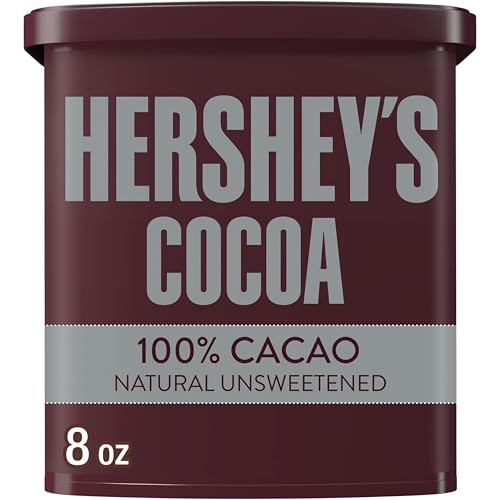
100% Pure Cocoa Our Nestle Toll House Cocoa Powder has no preservatives, artifical flavors or colors. Made with 100% pure cocoa it is perfect for baking. SNAP and EBT item in eligible states

Intense Flavor: Dutch processed black cocoa powder delivers a rich, dark chocolate taste to your baked goods, perfect for creating decadent cakes, cookies, and frostings with a deep, unsweetened flavor profile

USDA Certified Organic Culinary Grade Cocoa Powder - Batch Tested Gluten Free
Ingredients
Recommended Products

𝟏,【𝐏𝐑𝐄𝐌𝐈𝐔𝐌 𝐐𝐔𝐀𝐋𝐈𝐓𝐘】The cooling rack is composed entirely of stainless steel without any harmful coatings. To meet your baking needs, we have chosen for you the substantial material on the market: food-grade stainless steel.

🍪PREMIUM STAINLESS STEEL CONSTRUCTION: The cooling rackis made of food-grade stainless steel without metal plating or coating, durable use for many years, less prone to rust, prevent bending or warping when bearing heavy food, Smooth edges without rough spurs to protect your hands. This baking rack serves as a baking companion for daily use while maintaining maximum durability.

STURDY STAINLESS STEEL CONSTRUCTION: Our baking cooling rack is made of quality materials, prevents bending or deformation when carrying heavy loads. Smooth polished surface of cookie cooling rack without coating or plating, no burrs, no rust, no peeling, protect your daily food safety
For the Cake
|
|
| Amount | Ingredient | Notes |
|---|---|---|
| 1 cup | all-purpose flour | provides structure |
| 1/2 teaspoon | baking powder | helps the cake rise |
| 1/4 teaspoon | baking soda | balances acidity |
| 1/4 teaspoon | salt | enhances flavor |
| 1/2 cup | unsalted butter | adds richness, softened |
| 1 cup | granulated sugar | sweetens the cake |
| 2 large | eggs | binds ingredients, room temperature |
| 1 teaspoon | vanilla extract | adds aroma |
| 1/2 cup | cocoa powder | provides chocolate flavor |
| 1/2 cup | buttermilk | keeps cake moist |
Preparation Methods
Creaming Butter and Sugar: This technique involves beating butter and sugar together until light and fluffy, which helps incorporate air into the batter for a light texture. Ensure the butter is softened and beat at medium speed until pale and fluffy.
Sifting Dry Ingredients: This process involves passing the flour, cocoa powder, baking powder, and baking soda through a sieve. It helps remove lumps and aerates the ingredients, leading to a smoother batter and finer crumb.
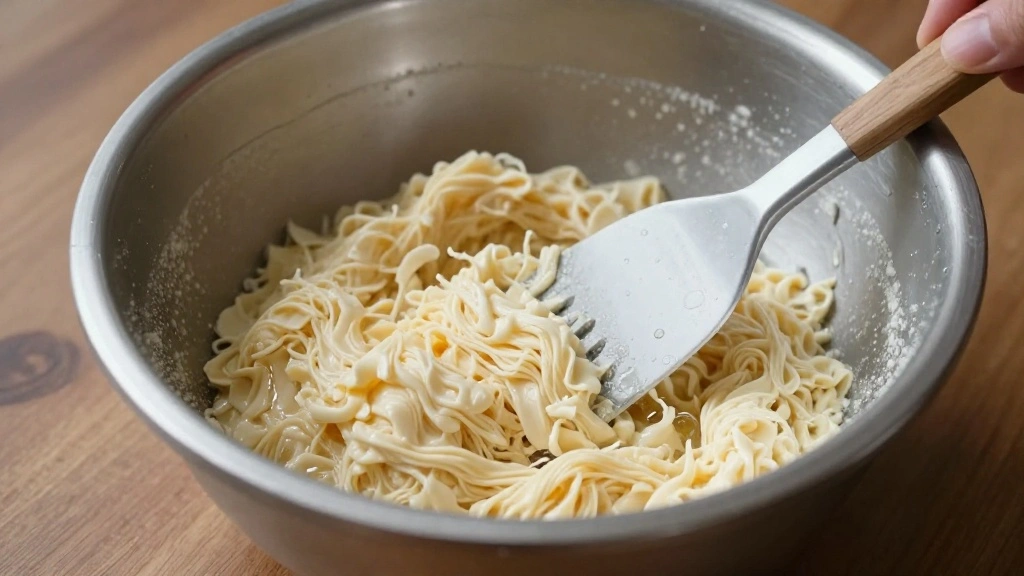
Folding: Gently incorporating the dry ingredients into the wet mixture using a spatula ensures the batter remains light and airy. Use a gentle under-and-over motion to avoid deflating the batter.
Recommended Products

HEALTHY - E-far layer cake pans are made of pure stainless steel without toxic materials, No harmful chemicals leaching into food, Unlike aluminum and Teflon coating pans, Healthy for your daily baking use
Includes 1 round cake pan (6 x 2 in.), great for smash cakes or testing recipes in smaller batches.

Natural aluminum’s superior heat conductivity ensures consistent, evenly browned results every time you bake
Step 1: Preheat Oven

Preheat your oven to 350°F (175°C).
Ensure the oven rack is in the middle position.
This allows for even baking.
A preheated oven is crucial for a proper rise.
Recommended Products
MINI CUPCAKE & MUFFIN MAGIC: With 24 mini molds, this long-lasting muffin pan is up for the challenge. Whether it's a family baking project, or school bake sale, the mini muffin and cupcake pan is sure to be a hit.

Size/Color: Package includes 400 pieces parchment cupcake liners. The bottom diameter is 1.37 inches (3.5 cm) and the height is 0.9 inches (2.4 cm), fitting perfectly into mini muffin or cupcake pans.
Step 2: Prepare the Cake Pan

Grease a 6-inch cake pan with butter.
Line the bottom with parchment paper.
This prevents the cake from sticking.
Ensure all surfaces are covered for easy release.
Recommended Products

SELF-CONTROL SPEED – Features 5 adjustable speeds, ranging from 1 (Lowest) to 5 (Highest), allowing you to choose the ideal mixing speed for perfectly customizable texture and consistency in any recipe. Perfect for whipping cream, making butter, beating egg whites and batter, or preparing mashed potatoes and other dishes.

This hand mixer has the right speed for the task at hand, from mixing in nuts and chocolate chips at speed one, to whipping perfect meringues at speed five

Mix ingredients for a variety of recipes from slowly stirring in chunky ingredients, like nuts or chocolate chips, at speed one to whipping egg whites or heavy cream at speed five
Step 3: Cream Butter and Sugar

In a mixing bowl, beat the softened butter and sugar.
Use a hand mixer on medium speed.
Continue until the mixture is light and fluffy.
This should take about 3-5 minutes.
Recommended Products

We hand-select the world's finest cocoa beans to create our proprietary bean blend and roast them to perfection then we slow-blend in the purest ingredients, to achieve our award-winning distinctively intense chocolate

Organic cocoa powder
Contains one (1) 8-ounce can of HERSHEY'S Natural Unsweetened Cocoa Powder
Step 4: Add Eggs and Vanilla

Add the eggs, one at a time, to the creamed mixture.
Beat well after each addition.
Add the vanilla extract and mix until combined.
The mixture should be smooth and slightly thick.
Recommended Products

HEAVY DUTY STAINLESS STEEL STURDY DESIGN: Set of 2 cooling racks for half sheet baking pans are food-safe, professional grade 304 (18/8) stainless steel with strong, heavy duty wire grids, small holes, smooth no-snag edges, and a full 1 inch height resulting in greater all around airflow for even cooking, cooling and roasting every time

QUALITY STAINLESS STEEL CONSTRUCTION: Made from food grade stainless steel instead of metal plating or coating, the grill is stronger, more durable, less likely to rust, warp or bend and safer.

HEALTHY: TeamFar round cooling rack is made of pure stainless steel, No worries about any toxic chemical substance into your food, Provide you a safer and healthier using experience
Step 5: Sift Dry Ingredients

Sift together the flour, cocoa powder, baking powder, baking soda, and salt.
Use a fine-mesh sieve over a large bowl.
This removes lumps and aerates the dry ingredients.
Make sure all ingredients are well combined.
Step 6: Combine Wet and Dry Ingredients
Gradually add the dry ingredients to the wet mixture.
Alternate with the buttermilk, starting and ending with dry.
Use a spatula to fold gently.
Mix until just combined to avoid overmixing.
Step 7: Pour Batter into Pan

Pour the batter into the prepared cake pan.
Use a spatula to smooth the top evenly.
Tap the pan gently on the counter to remove air bubbles.
Ensure the batter is evenly distributed.
Step 8: Bake the Cake

Place the pan in the preheated oven.
Bake for 25 minutes.
Check doneness with a toothpick inserted in the center.
The cake is done when the toothpick comes out clean.
Critical Timing and Temperature Guide
Creaming Butter and Sugar: Beat for 3-5 minutes at medium speed until light and fluffy. Overbeating can cause the mixture to separate and affect the cake's texture.
Baking: Bake at 350°F (175°C) for 25 minutes. Look for a clean toothpick as an indicator of doneness. Avoid opening the oven door frequently as this can cause the cake to sink.
Cooling: Allow the cake to cool in the pan for 10 minutes before transferring to a rack. This prevents the cake from sticking and maintains its shape.
Pro Tips for Mini Chocolate Cake
• Ingredient Selection: Choose high-quality cocoa powder and vanilla extract, as they significantly impact the final chocolate flavor.
• Preparation Secret: Use room temperature ingredients to ensure even mixing and a smooth batter.
• Temperature Management: Preheat your oven fully before baking to ensure the cake rises properly.
• Texture Enhancement: Sift dry ingredients to aerate them, resulting in a lighter, more tender crumb.
• Flavor Layering: Enhance chocolate flavor by adding a pinch of espresso powder to the dry ingredients.
• Make-Ahead Strategies: Bake the cake a day in advance and store it wrapped in plastic to allow flavors to develop.
• Restaurant-Quality Finishing Touches: Dust with powdered sugar or cocoa before serving for an elegant presentation.
• Equipment Optimization: Use a hand mixer for better control over batter consistency, ensuring a smooth, even mix.
Troubleshooting Common Issues
• Texture Too Dense: This can be caused by overmixing the batter or not sifting the dry ingredients. Ensure gentle folding and proper sifting.
• Cake Sticks to Pan: If the cake sticks, it may not have been greased properly. Use both butter and parchment paper to prevent sticking.
• Center Sinks: Opening the oven door too early or overmixing can cause the center to sink. Avoid these by baking undisturbed and mixing gently.
• Uneven Baking: This results from improper oven calibration. Ensure your oven is preheated and use an oven thermometer for accuracy.
• Flavors Unbalanced: Using low-quality cocoa or vanilla can lead to unbalanced flavors. Invest in quality ingredients for the best results.
• Dry Cake: Overbaking can dry out the cake. Check for doneness early and cover with foil if browning too quickly.
Variations and Regional Differences
• French Variation: Often includes a touch of almond flour for a delicate, nutty texture and flavor.
• Italian Style: Incorporates ricotta cheese into the batter for a moist, creamy cake.
• American Twist: Adds a layer of chocolate ganache on top for extra indulgence and richness.
• Japanese Influence: Uses matcha powder instead of cocoa for a green tea-flavored cake, offering a unique twist on the classic.
Food Science Behind the Recipe
• Maillard Reaction: This browning process enhances flavors and aromas in the cake, contributing to its rich taste.
• Leavening Agents: The combination of baking powder and soda creates carbon dioxide, which helps the cake rise and achieve a light texture.
• Emulsification: Creaming butter and sugar creates an emulsion that traps air, resulting in a fluffy, tender cake.
Frequently Asked Questions
What's the most common mistake people make when preparing Mini Chocolate Cake? Overmixing the batter, which leads to a dense texture. Always fold gently to incorporate dry ingredients.
Can I use regular milk instead of buttermilk? Yes, but the acidity in buttermilk helps tenderize the cake, so consider adding a teaspoon of lemon juice to regular milk as a substitute.
How do I store leftover cake? Wrap tightly in plastic wrap and store at room temperature for up to 3 days or refrigerate for up to a week.
Can I make this cake gluten-free? Yes, substitute all-purpose flour with a gluten-free baking mix, ensuring it contains a binding agent like xanthan gum.
What type of cocoa powder should I use? Use unsweetened cocoa powder for the best balance of chocolate flavor without added sweetness.
How can I tell if the cake is done without a toothpick? Gently press the top of the cake; it should spring back lightly when it's fully baked.
Can I double this recipe for a larger cake? Yes, simply double the ingredients and use a larger pan, adjusting baking time as needed.
Serving and Presentation Guide
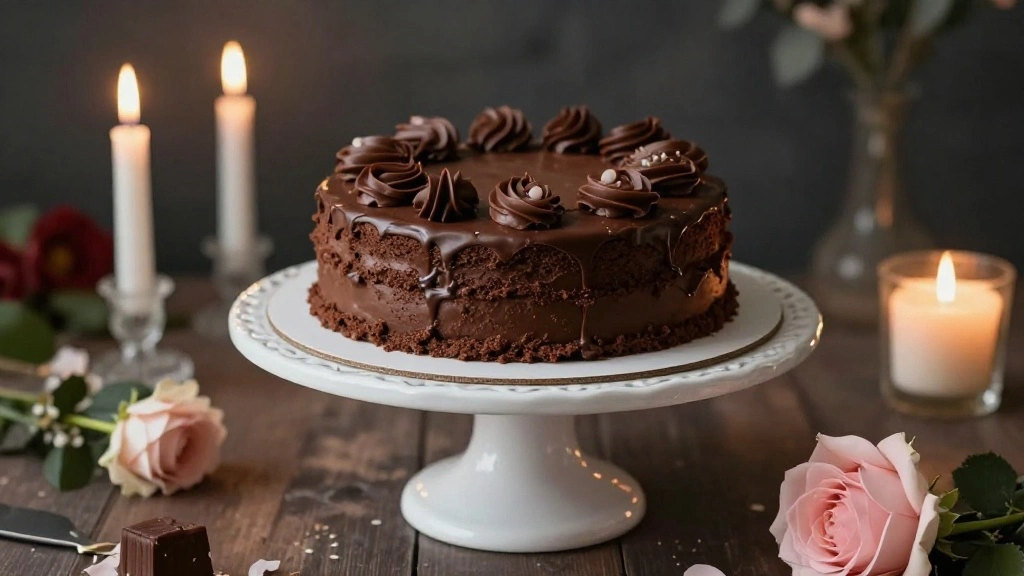
• Traditional Presentation: Serve the mini cake on a small cake stand with a dusting of powdered sugar for elegance.
• Casual Gathering: Slice the cake into wedges and serve with a scoop of vanilla ice cream.
• Formal Event: Plate with a drizzle of chocolate sauce and fresh berries for a sophisticated touch.
• Afternoon Tea: Serve with a side of whipped cream and a pot of freshly brewed tea.
Conclusion
Creating a mini chocolate cake for small gatherings is a rewarding culinary endeavor that promises to delight.
With its rich flavors and inviting presentation, this cake is sure to become a favorite at any event.
Try this recipe the next time you're looking to impress your guests with a homemade treat.
You'll discover that great things truly come in small packages.