There’s something universally comforting about the rich taste of chocolate cake.
Hershey’s Chocolate Cake has become an iconic symbol of indulgence and celebration in many households.
Its deep, intense flavor comes from the perfect balance of cocoa and sweetness, creating a treat that’s both nostalgic and timeless.
I remember baking this cake for the first time with my grandmother, who swore by its foolproof instructions.
Whether it’s for a birthday, a get-together, or just a sweet craving, this Hershey’s Chocolate Cake copycat recipe promises to deliver the same delightful experience, right from your oven.
The History and Cultural Significance
• Hershey’s Chocolate Cake traces its origins to the United States in the early 20th century, where it was originally created by Hershey’s to promote their cocoa powder.
• The dish evolved over decades as baking techniques improved and ingredients became more accessible, eventually becoming the beloved version we know today.
• In American culture, this dish traditionally appears at birthdays and celebrations, symbolizing indulgence and festivity.
• While many variations exist across different regions, the authentic version maintains a moist, rich texture that sets it apart from imitations.
Recommended Products

Intense Flavor: Dutch processed black cocoa powder delivers a rich, dark chocolate taste to your baked goods, perfect for creating decadent cakes, cookies, and frostings with a deep, unsweetened flavor profile

ORGANIC CACAO POWDER - Experience decadent, rich, dark chocolatey goodness with our pure, organic cacao powder. The aroma of rich dark chocolate not only tantalizes your senses but also delivers a guilt-free indulgence, crafted with no added sugar.

ACHIEVE THE DARKEST CHOCOLATE COLOR: Our black cocoa powder is your best bet for all-natural black color in any of your chocolate baking and cooking. As an all-natural substitute for black food coloring, it offers daringly dark chocolate color.
Recipe Overview
Recommended Products

【PERFECT COMBINATION】This cake pan set comes with 3 premium carbon steel 9 inch cake pans and 100 pieces of 9 inch parchment paper, offering plenty of supplies for all your baking needs.With a set quantity that meets both home baking and small - scale commercial needs, you'll always have one on hand. The bottom of the pan is completely flat and free of any unsightly markings, providing a clean base for your creations.

High-quality and Durable materials: The size of the 9 inch round cake pan set for Baking includes 2PCS 9’’ Dia × 2’’ H cake pans and 60 sheets of pre-cut parchment paper. Cake pans 9 inch round are made of a good thick and rather heavy weight carbon steel for stability, even heating, and durability for years to come. Unlike aluminum cake pans that are easily deformed, our round cake pans 9 inch boast an extended service life. These round cake pans let your cakes bake more evenly, and easily release cakes or pastry while the rest finishes baking

Premium Carbon Steel Build: High-quality carbon steel with reinforced rim prevents warping. Ensures superior heat conduction for even baking up to 450°F – perfect for golden, large 9 inch layer cakes, sheet cakes, and deep-dish pizzas
Nutritional Information (per serving)
Recommended Products

NO MORE LOST BEATERS: The snap-on storage case that comes with the Hamilton Beach hand mixer neatly holds the 2 beaters and whisk in one easy-to-find place, reducing the chance that the attachments are lost or misplaced.

SELF-CONTROL SPEED – Features 5 adjustable speeds, ranging from 1 (Lowest) to 5 (Highest), allowing you to choose the ideal mixing speed for perfectly customizable texture and consistency in any recipe. Perfect for whipping cream, making butter, beating egg whites and batter, or preparing mashed potatoes and other dishes.

SELF-CONTROL SPEED – Features 5 adjustable speeds, ranging from 1 (Lowest) to 5 (Highest), allowing you to choose the ideal mixing speed for perfectly customizable texture and consistency in any recipe. Perfect for whipping cream, making butter, beating egg whites and batter, or preparing mashed potatoes and other dishes.
Essential Equipment Guide
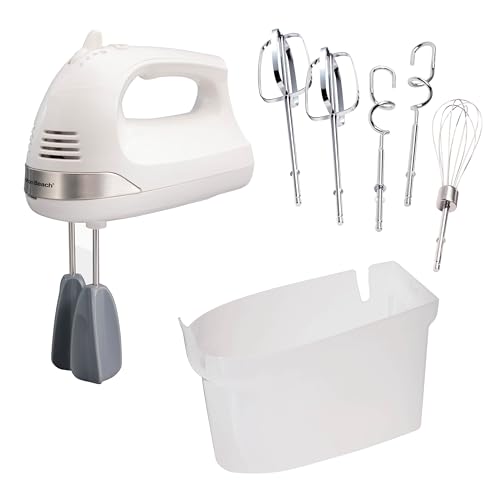
Stand Mixer: A stand mixer is crucial for achieving the right batter consistency, ensuring all ingredients are well incorporated. An electric hand mixer can be a good alternative if you don’t have a stand mixer.
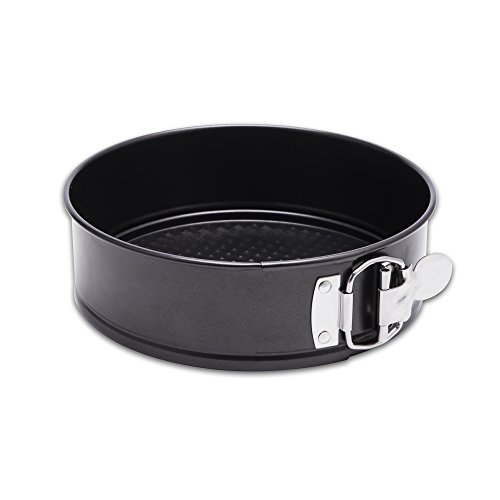
9-Inch Round Cake Pans: These pans help ensure even baking and the classic round shape of the cake. Look for non-stick versions for easy release.
Wire Cooling Rack: Essential for cooling the cakes evenly without trapping moisture, which can lead to sogginess. Any sturdy, heat-resistant rack can work as an alternative.
Recommended Products

METAL TRELLIS FOR CLIMBING PLANTS - The decorative lattice design of this metal trellis will add style and dimension to your landscaping while providing plenty of support for your climbing plants. Use this garden arch as a grape trellis or berry trellis.

Our Mexican Pure Vanilla Extract has a deep, layered flavor profile – creamy and spicy-sweet with woody after-tones, for a bold, beyond-good vanilla.
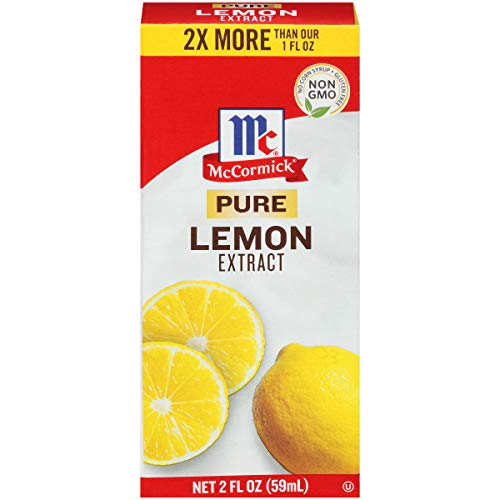
Add lemon flavor to baked goods and more
Ingredients
Recommended Products

CHOCOLATE FLAVORED POWDERED SUGAR FOR BAKING & FROSTING: Whipzi Chocolate Flavored Powdered Sugar adds delicious flavor directly into your baking. Perfect for buttercream frosting, royal icing, glazes, whipped cream, desserts, coffee drinks, and specialty beverages for a refreshing Chocolate flavor in every use.

Pillsbury Zero Sugar Creamy Supreme Chocolate Fudge Flavored Premium Frosting, 15 oz Palatize Pack of 2

1 - 15 oz tub Zero Sugar Chocolate Fudge Frosting
For the Cake
|
|
| Amount | Ingredient | Notes |
|---|---|---|
| 1 3/4 cups | all-purpose flour | provides structure |
| 3/4 cup | Hershey’s cocoa | for rich chocolate flavor |
| 2 cups | granulated sugar | adds sweetness |
| 1 1/2 teaspoons | baking powder | helps the cake rise |
| 1 1/2 teaspoons | baking soda | ensures the cake is light |
| 1 teaspoon | salt | enhances flavor |
| 2 large | eggs | binds the ingredients |
| 1 cup | milk | adds moisture |
| 1/2 cup | vegetable oil | keeps the cake tender |
| 2 teaspoons | vanilla extract | adds aroma |
| 1 cup | boiling water | intensifies cocoa flavor |
For the Frosting
| Amount | Ingredient | Notes |
|---|---|---|
| 1/2 cup | unsalted butter | at room temperature, for creaminess |
| 2/3 cup | Hershey’s cocoa | for rich taste |
| 3 cups | powdered sugar | for sweetness |
| 1/3 cup | milk | adjust for desired consistency |
| 1 teaspoon | vanilla extract | enhances flavor |
Preparation Methods
Creaming Method: This technique involves beating sugar and butter together until light and fluffy, incorporating air into the batter. It’s crucial for a light cake texture. Ensure the butter is at room temperature for best results.
Folding Technique: Carefully incorporating dry ingredients into wet without deflating the mixture. It's important for maintaining batter volume. Use a spatula and fold gently.
Heat Activation: Adding boiling water to the cocoa intensifies the chocolate flavor through a process called blooming. This step is crucial for achieving the deep chocolate flavor characteristic of Hershey's cake.
Recommended Products

Organic cocoa powder

Birch & Meadow Dutch Cocoa Powder in a resealable jar, with 10-12% fat

Ideal product for mousses, creams, ice-creams, sorbets, confectionery coverings, decoration
Step 1: Preheat the Oven

Begin by preheating your oven to 350°F (175°C).
Ensure your oven rack is placed in the center for even baking.
Double-check the temperature with an oven thermometer if available.
A well-preheated oven is key to proper cake rise.
Recommended Products

CARAWAY NOW LIVE ON AMAZON: It's official! We have launched our beautifully designed and consciously crafted Circle Pans on Amazon for everyone to enjoy. It's time to step up your baking game and spruce up your kitchen decor!

FOOD SAFE COATING - Our round cake pans are with 100% food safe nonstick coating which does not include toxic material like PFOA, PTFE, PFOS, lead, cadmium or nickel. Food safe nonstick coating ensures effortless food release.
HEALTHY COATING: Our Non-stick coating is a food grade safety coating with no harsh chemicals or hazardous substances. The true double layer coating allows the cake be easily removed without damage. Avoid making it difficult to clean the cake because it sticks to the pan or leaves a lot of cake residue.
Step 2: Prepare the Cake Pans

Grease two 9-inch round cake pans with butter or cooking spray.
Cut parchment paper to fit the bottoms and place it inside the pans.
This ensures easy release of the cakes after baking.
Proper pan preparation prevents sticking and tearing.
Recommended Products
EASY CLEAN BEATERS REDUCE CLOGGING AND PROVIDE GREAT MIXING PERFORMANCE. Their smooth, innovative design glides through ingredients without clogging, saving you time and aggravation every time you mix.

【6-Speeds& Turbo Function】:With variable 6 progressive speeds and the turbo function can choose appropriate speed for different ingredients needs. Speed 1-2 for Liquid and Butter, Speed 3-4 for Cheese and Dough, Speed 5-6 for mixing Cream and Egg yolks.

EASY CLEAN BEATERS REDUCE CLOGGING AND PROVIDE GREAT MIXING PERFORMANCE. Their smooth, innovative design glides through ingredients to reduce clogging, saving you time and aggravation every time you mix.
Step 3: Combine Dry Ingredients

In a large bowl, combine flour, cocoa, sugar, baking powder, baking soda, and salt.
Use a whisk to evenly distribute the ingredients.
Look for a uniform mix without lumps.
This step ensures even flavor and texture throughout the cake.
Recommended Products

Vanilla Extract + REAL Vanilla Seeds = A Premium Vanilla Paste with a Beautiful Visual Appearance Adding Vanilla Specs to Any Recipe

Vanilla Bean Powder has a 1 Teaspoon Serving Size. It can be Used as an Alternative to Vanilla Extract, Vanilla Paste or Vanilla Beans with a Standard Measurment of 1 tsp of Powder = 1 tsp of Vanilla Extract = 1 tsp of Vanilla Paste = 1/3 Vanilla Bean

Clear Vanilla Flavor: LorAnn Clear Imitation Vanilla Extract provides a robust and consistent vanilla flavor without discoloring your whitest frostings, perfect for maintaining the appearance of your baked goods.
Step 4: Mix Wet Ingredients

In a separate large mixing bowl, beat the eggs until frothy.
Add milk, vegetable oil, and vanilla extract.
Blend until all ingredients are smoothly combined.
Proper blending ensures a smooth batter.
Recommended Products


Contains: 1 Container of Organic Frosting

✨Safe & Edible Luster Dust: Made of food-grade mica powder, MSDS-certified ingredients, Germany imported food coloring, gluten-free, no flavor, non toxic, suitable for vegans & vegetarians,
Step 5: Combine Wet and Dry Ingredients

Gradually add the dry ingredients to the wet mixture.
Use the folding technique to gently combine them.
Ensure no dry streaks remain, but do not overmix.
This step prevents a dense cake texture.
Step 6: Add Boiling Water

Slowly pour in boiling water while mixing on low speed.
The batter will thin out, which is normal.
Look for a homogenous, smooth batter.
This step enhances the chocolate flavor.
Step 7: Pour Batter into Pans

Divide the batter evenly between the prepared cake pans.
Use a spatula to smooth the tops and eliminate air bubbles.
Batter should be evenly distributed for uniform baking.
Proper distribution ensures even cake layers.
Step 8: Bake the Cakes
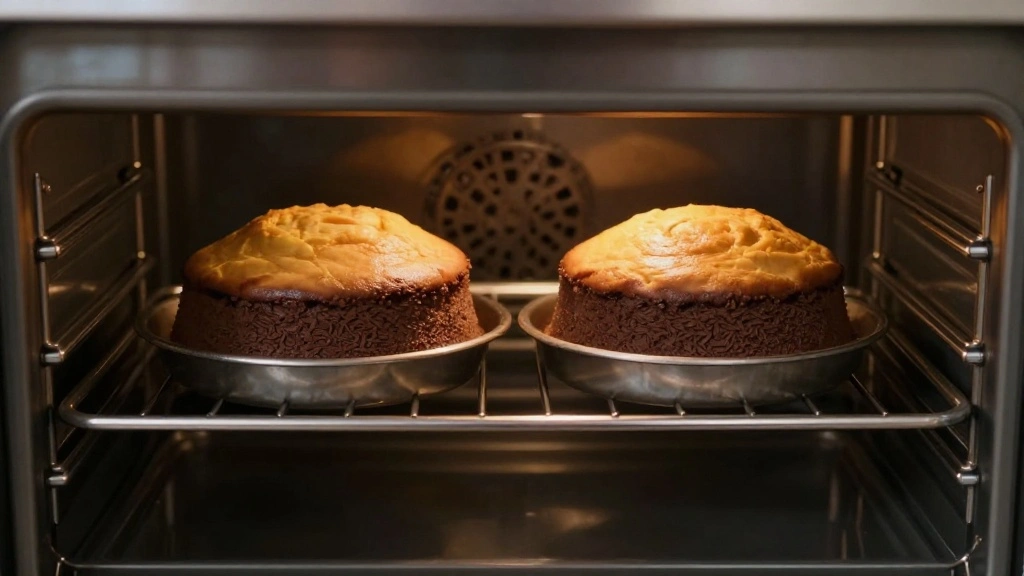
Place the pans in the preheated oven.
Bake for 30 minutes or until a toothpick inserted comes out clean.
Cakes should rise evenly with a slightly domed top.
Proper baking time results in a moist and tender cake.
Step 9: Cool the Cakes
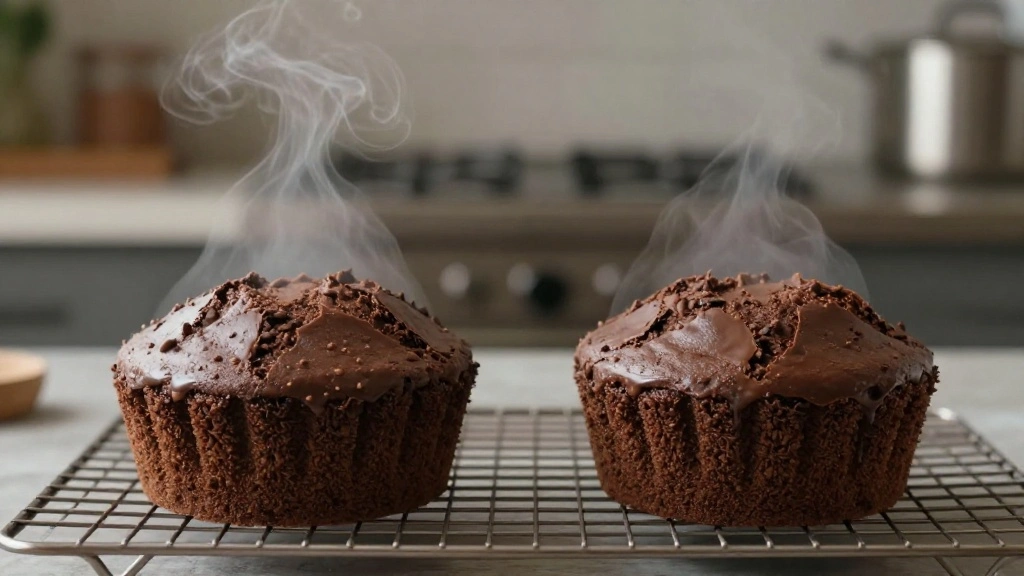
Remove cakes from the oven and let them cool in the pans for 10 minutes.
Carefully invert them onto a wire rack to cool completely.
Ensure cakes are fully cooled before frosting.
This step prevents frosting from melting.
Step 10: Prepare the Frosting
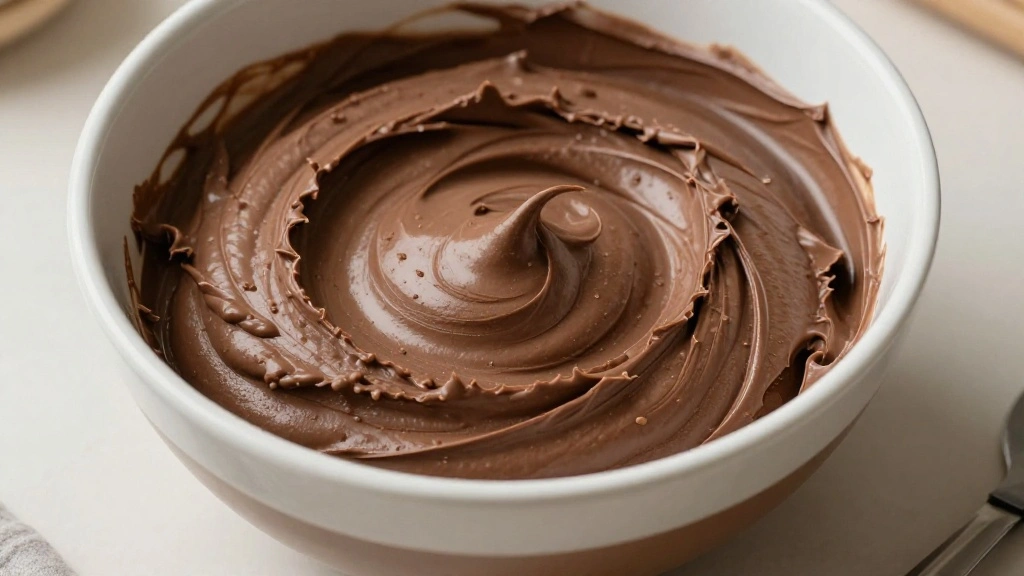
In a large bowl, beat butter until creamy using a stand mixer.
Gradually add cocoa and powdered sugar, alternating with milk.
Mix until smooth and creamy, adjusting consistency with milk if needed.
Proper consistency ensures easy spreading.
Step 11: Frost the Cake

Place one cake layer on a serving plate.
Spread a layer of frosting on top evenly.
Place the second layer on top and frost the entire cake.
Smooth the sides and top for an even finish.
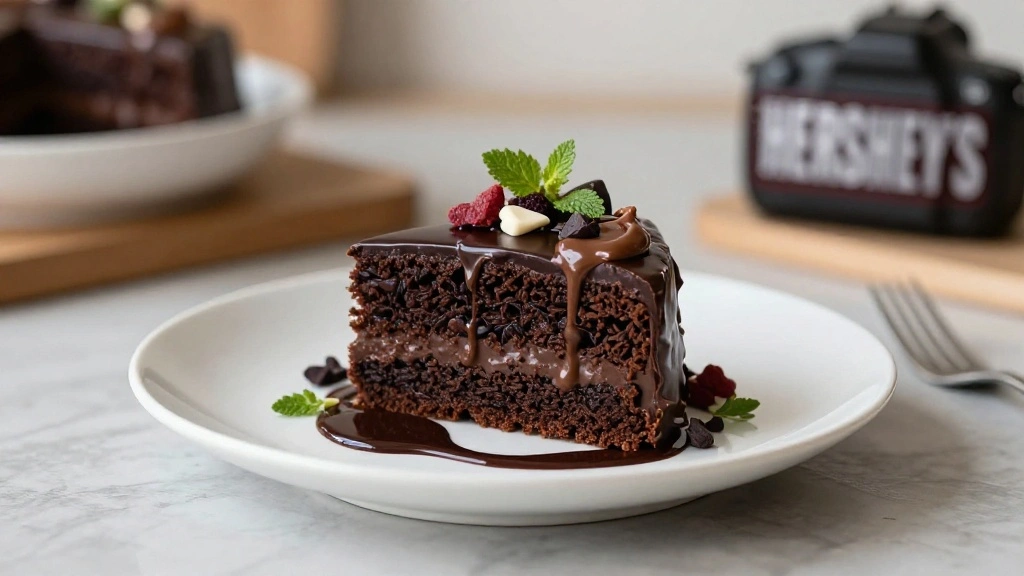
Step 12: Serve and Enjoy
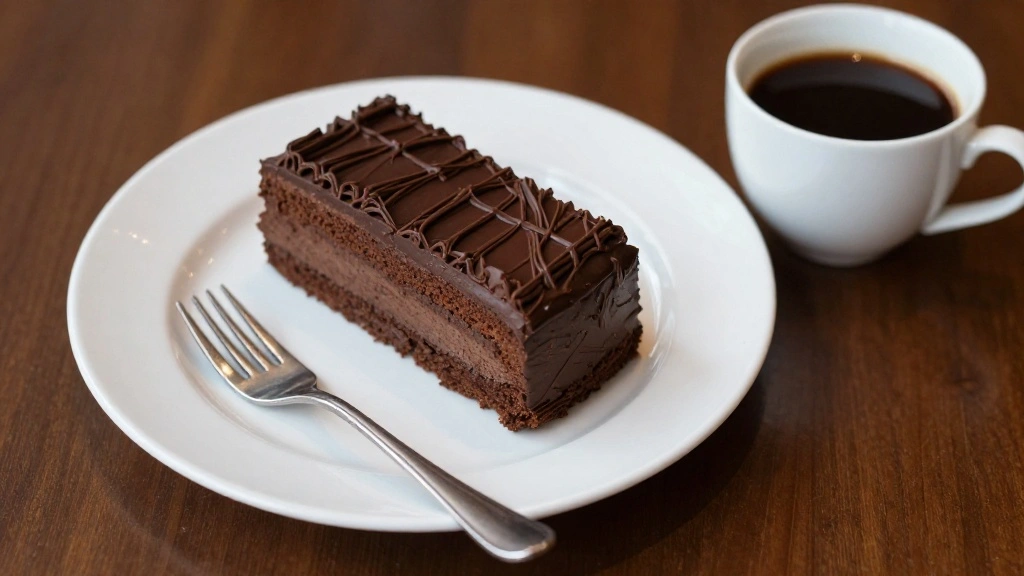
Slice the cake with a sharp knife.
Serve each piece on a dessert plate.
Enjoy the rich, chocolatey delight with friends and family.
A perfect end to any meal or celebration.
Critical Timing and Temperature Guide
Baking Process: Bake at 350°F (175°C) for 30 minutes, or until a toothpick comes out clean. Avoid opening the oven door too early to prevent deflation.
Cooling Process: Cool cakes in pans for 10 minutes before transferring to a rack. Ensure complete cooling before frosting to prevent melting.
Frosting Process: Frost at room temperature. If frosting is too stiff, adjust with a small amount of milk; too warm can lead to melting.
Pro Tips for Hershey's Chocolate Cake
• Ingredient Selection: Choose high-quality cocoa powder for the best flavor. Hershey's cocoa is preferred for authenticity.
• Preparation Secret: Adding boiling water to the cocoa mixture blooms the cocoa, enhancing its flavor intensity.
• Temperature Management: Ensure all ingredients are at room temperature before mixing for even consistency.
• Texture Enhancement: Do not overmix the batter; gentle folding preserves air bubbles for a lighter cake.
• Flavor Layering: Use pure vanilla extract to complement the chocolate and enhance the overall aroma.
• Make-Ahead Strategies: Bake the cake layers a day in advance, wrap them tightly in plastic wrap after cooling, and frost the next day.
• Restaurant-Quality Finishing Touches: Use a warm knife to slice for clean edges and a professional look.
• Equipment Optimization: If using a hand mixer, ensure it has enough power to blend the batter smoothly.
Troubleshooting Common Issues
• Texture Too Dense: This can occur if the batter is overmixed. Recognize it by a heavy batter feel, and fix it by folding gently next time.
• Flavors Unbalanced: Often due to incorrect measurements. Double-check ingredient amounts and use the same measuring cups for consistency.
• Uneven Baking: Caused by uneven oven heat. Rotate the pans halfway through baking and ensure the oven is properly preheated.
• Cake Stuck to Pan: Insufficient greasing or missing parchment. Always prepare pans thoroughly to avoid this issue.
• Frosting Too Runny: This results from too much milk or warm butter. Chill the frosting briefly and whip again to adjust consistency.
Variations and Regional Differences
• Southern Style: Often includes buttermilk instead of regular milk, adding a tangy flavor.
• Mexican Variation: Incorporates a hint of cinnamon and cayenne pepper for a spicy twist on the classic chocolate flavor.
• European Influence: Uses dark chocolate ganache instead of cocoa frosting, emphasizing a richer, denser chocolate experience.
• Asian Twist: Sometimes infuses matcha powder in the frosting for a unique blend of chocolate and green tea flavors.
Food Science Behind the Recipe
• Baking Soda and Baking Powder: These agents cause the cake to rise by releasing carbon dioxide when reacting with moisture and heat, creating a light, airy texture.
• Emulsification: The process of combining fats and liquids into a stable mixture, essential for a smooth, consistent batter texture.
• Cocoa Blooming: Adding boiling water to cocoa powder releases its full flavor potential, a process known as blooming, crucial for a rich chocolate taste.
Frequently Asked Questions
What's the most common mistake people make when preparing Hershey's Chocolate Cake? Overmixing the batter, which can result in a dense cake. Always fold ingredients gently.
Can I use a different type of cocoa powder? While Hershey's cocoa is traditional, any high-quality unsweetened cocoa powder can work.
How do I store the cake to keep it fresh? Store in an airtight container at room temperature for up to 2 days, or refrigerate for up to a week.
Can I freeze the cake? Yes, wrap the unfrosted cake layers tightly in plastic wrap and freeze for up to 3 months.
What can I substitute for eggs? Use 1/4 cup of unsweetened applesauce or mashed banana per egg as a substitute.
How do I know when the cake is done? A toothpick inserted in the center should come out clean or with a few moist crumbs.
Can I make this cake gluten-free? Substitute all-purpose flour with a gluten-free baking blend at a 1:1 ratio.
Serving and Presentation Guide
• Traditional Presentation: Serve the cake on a round cake stand with a slice on each dessert plate, garnished with a dollop of whipped cream.
• Modern Twist: Dust the top with cocoa powder or powdered sugar for a clean, elegant finish.
• Festive Touch: Decorate with chocolate shavings or fresh berries for added color and flavor.
• Casual Setting: Serve with a scoop of vanilla ice cream for a classic pairing.
Conclusion
Hershey's Chocolate Cake is a timeless classic that never fails to delight.
With this copycat recipe, you can bring the joy of this beloved treat into your home.
Whether for a celebration or a simple indulgence, this cake is sure to impress.
Try it today and enjoy a slice of chocolate heaven!