This classic sourdough bread recipe brings together centuries of culinary tradition with modern techniques to create a dish that’s both comforting and elegant.
The harmonious balance of tangy and earthy flavors creates a memorable baking experience that will have everyone asking for your secret.
I discovered this recipe during my travels through San Francisco, where local bakers have perfected it through generations of careful refinement.
Whether you’re preparing a casual family dinner or hosting a special celebration, this sourdough bread delivers impressive results with straightforward preparation.
The History and Cultural Significance
• Sourdough bread traces its origins to ancient Egypt around 4,000 BC, where it was originally created by accident through natural fermentation.
• The dish evolved over decades as commercial yeast became prevalent, but the traditional method persisted, eventually becoming the beloved version we know today.
• In many cultures, sourdough bread traditionally appears at family gatherings and festive occasions, symbolizing nourishment and heritage.
• While many variations exist across different regions, the authentic version maintains a chewy crust and tangy flavor that sets it apart from imitations.
Recommended Products

𝐃𝐨𝐦𝐞 𝐃𝐞𝐬𝐢𝐠𝐧: Perfect for Crusty Sourdough The AHJ pre-seasoned Dutch oven is ideal for sourdough baking. When used with the lid in the oven, it locks in steam—ensuring condensation drips down the lid walls without soggying the bread—for an ultra-crisp crust and soft, fluffy interior. The 5-quart large capacity easily accommodates big sourdough loaves, perfect for sharing with the whole family.
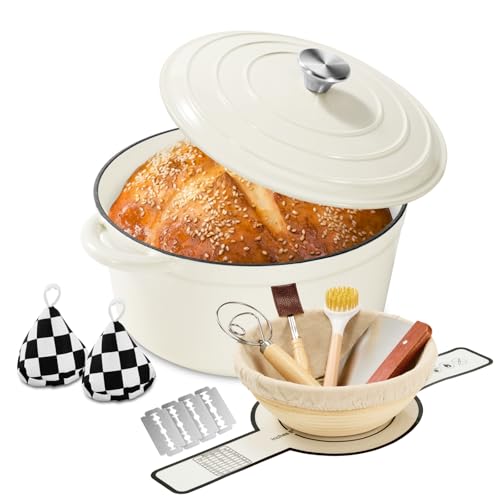
【For Effortless Cooking & Easy Cleaning 】Featuring a seven-layer design, this Dutch oven ensures even heat distribution and retention. The enamel coating resists sticking, and facilitates easy cleanup, saving you time and effort in the kitchen

IDEAL FOR FAMILY MEALS - Perfectly sized for families of 3–5 people, this 5.5QT Dutch oven handles everything from hearty soups and stews to one-pot dinners, pasta dishes, and Sunday pot roasts. Spacious enough for a whole chicken yet practical for everyday cooking, it delivers the ideal balance between daily family meals and weekend entertaining. Also well-sized for artisan bread bakers who want one pot for both family dinners and sourdough baking.
Recipe Overview
Recommended Products

【All-in-One Sourdough Starter Kit】Everything you need is packed in one box: 1L (34oz) Wide-Mouth Glass Jar + 1 Cloth Cover + 1 Silicone Lid + 1 Bamboo Lid + 1 Acacia Wood Spurtle + 1 Feeding Day / Level Band + 1 Thermometer + 1 Recipe Booklet + 1 Instruction Guide + 1 Red Marker Pen + 1 Package Box.

9-in-1 Complete Sourdough Kit: Includes all sourdough tools for starter maintenance: wide mouth jar for easy adding, stirring & cleaning; storable spatula; measuring cups for precise results.

【Ultimate Value: Two Complete Kits, One Unbeatable Price】Get double the baking potential without doubling the cost. This bundle includes two full starter kits—perfect for maintaining different sourdough types (like rye and wheat) or gifting one to a friend. Experience premium quality at an unbeatable per-kit price.
Nutritional Information (per serving)
Recommended Products

👩🍳👩🍳👩🍳PERFECT WORK WITH VARIOUS KNEADING BOWLS --- Instead of traditional rigid PP plastic, These flexible dough scrapers are made of durable PE plastic which have better bendability. Because of this special material, these dough Scraper can perfectly match with various kneading bowls when mixing dough or prepare cake flour, And scraper little dough pieces from bowl corner perfectly when transfer wet dough from bowl. Size: 12x9.5cm/4.7x3.7''

[PRACTICAL SCRAPER SET]: Ecavria kitchen scraper set contains 1 pc 6.6*4.7 inches stainless steel bench scraper and 2 pcs BPA FREE & food grade PE plastic bowl scrapers, which offers novices or baking-masters an effective tool set for all kinds of kitchen use.

PREMIUM STAINLESS STEEL CONSTRUCTION: Heavy-duty metal bench scraper built for professional bakers and home cooks; durable food scraper resists rust and bending while providing precise cuts through sourdough dough and pastry
Essential Equipment Guide
Mixing Bowl: A large mixing bowl is essential for combining and holding the dough during the fermentation process. A glass or ceramic bowl is recommended for its non-reactive properties, but stainless steel can also work.
Bench Scraper: This tool is crucial for handling the dough without tearing it. A bench scraper helps in folding and dividing the dough as needed. Look for one with a comfortable grip and a sturdy blade.
Dutch Oven: A heavy-duty Dutch oven is key for creating the perfect baking environment, trapping steam to develop a crusty exterior. Ensure it can withstand high temperatures and has a fitted lid.
Recommended Products

【MULTI-PURPOSE KITCHEN WORKHORSE】 This isn't just a mixing bowl; it's a versatile kitchen essential. Use it for proofing bread dough, tossing salads, mixing batter, marinating brines, washing fruits, or as a stylish serving bowl. It is oven-safe for baking casseroles, microwave-safe for reheating, and freezer-safe for storing prepped meals, making it the only bowl you need for any recipe.

High-Quality Glass: This large glass mixing bowl is made of durable glass, which is heat and freeze-resistant, ensuring stability during dough fermentation and mixing. It is ideal for making sourdough bread and other fermented breads

Premium Food-Grade Borosilicate Glass Construction: Made of Thickened High Borosilicate Glass Without Harmful Coatings Our Glass Bowls With Lids Is Non-Toxic Odorless and Safe for Long-Term Food Contact The Glass Bowl Withstands High and Low Temperatures From -20 To 400 -4 To 752 With a Net Weight of 5.44Lb Offering Sturdiness and Durability for Years of Daily Baking and Cooking
Ingredients
Recommended Products

AN EASY START FOR ANY HOME BAKER: Our freeze dried sourdough starter is simple to use and ideal for first-time bakers. With clear instructions included, you’ll have a bubbling, ready-to-use culture in just days. It’s the best sourdough starter to begin your artisan baking journey at home.
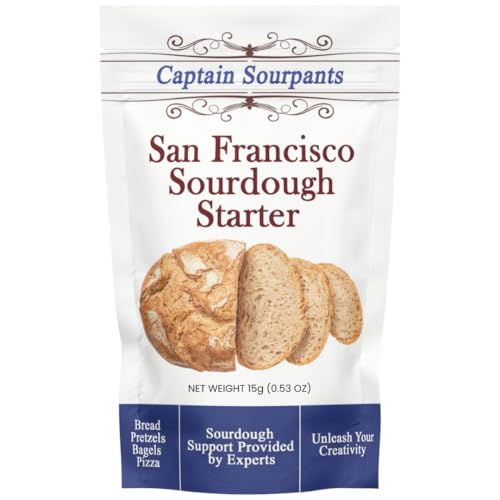
Authentic San Francisco Sourdough Culture: this starter brings the distinct tangy flavor of traditional West Coast sourdough straight to your kitchen.

MORE SOURDOUGH STARTER PER SACHET: Get 21.6 g of dehydrated organic sourdough starter in every sachet for reliable baking results and more homemade creations. This dried sourdough starter provides the perfect base for artisan sourdough bread, pizza dough, muffins, focaccia, and pastries while staying fresh in your pantry for longer-lasting use.
For the Starter
|
|
| Amount | Ingredient | Notes |
|---|---|---|
| 1 cup | all-purpose flour | acts as the base for the starter |
| 1 cup | water | room temperature, activates fermentation |
For the Dough
| Amount | Ingredient | Notes |
|---|---|---|
| 3.5 cups | bread flour | provides structure |
| 1.25 cups | water | room temperature, hydrates the dough |
| 1 cup | sourdough starter | active, imparts flavor |
| 2 teaspoons | salt | enhances flavor and strengthens gluten |
Preparation Methods
Autolyse: A technique where flour and water are mixed and allowed to rest before adding salt and starter. This process allows the flour to hydrate, making it easier to develop gluten. Start with a 30-minute rest.
Stretch and Fold: During the bulk fermentation, the dough is gently stretched and folded to develop strength. This replaces kneading and helps build structure. Perform this every 30 minutes.
Scoring: Cutting the dough just before baking allows for controlled expansion. Use a sharp blade and make decisive cuts. Experiment with patterns for decorative results.
Recommended Products

Even Heat Distribution Retention: This Umite Chef Dutch oven Made with heavy-duty enameled cast iron, ensures even heat distribution for perfect searing and slow cooking, locking in flavors. thickened walls lock in heat for slow braising, searing, and baking. Unlike thin pots that scorch food, this professional-grade Enameled cast iron potSuperior heat retention after preheating (allow 5-7 mins for even distribution). CRITICAL: Always cool naturally for 45+ mins before cleaning. Thermal shock (hot-to-cold contact) cracks enamel. USE TIP: Preheat 2-3 mins on medium-low only

【ALL YOU NEED】Complete set includes 5QT sourdough dutch oven with frying pan lid,bread proofing basket, bread sling, stainless steel scraper, cleaning brush, bowl scraper, wooden-handled dough whisk, bread lame, silicone oil brush,silicone spatula. Sourdough starter kit with dutch oven is ready to use out of the box!

AUTHENTIC BAKING EXPERIENCE - Dive into the art of breadmaking by baking your own bread the traditional way with a Banneton Basket and a cast iron bread pan - comes with great bread recipes
Step 1: Prepare the Starter
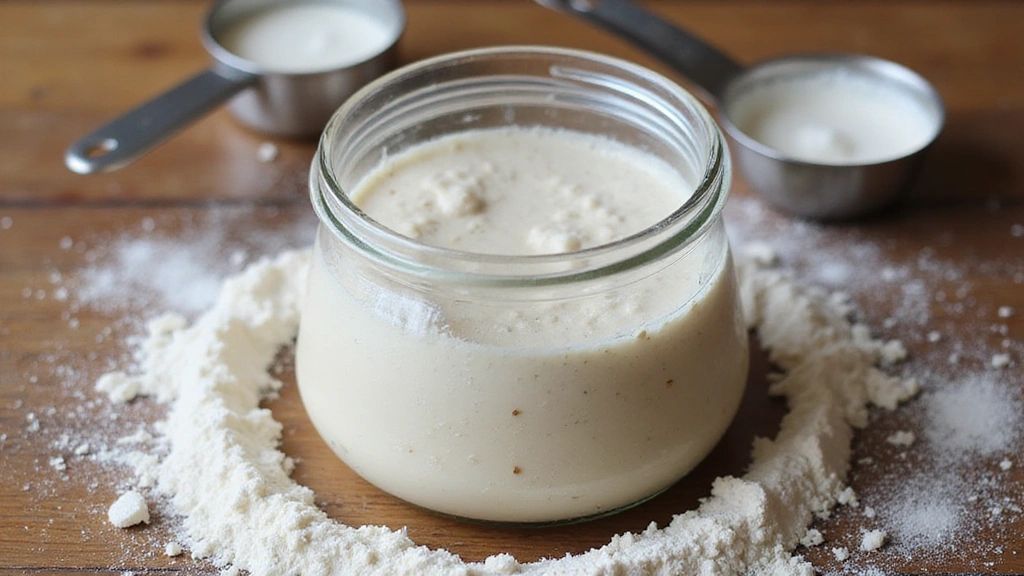
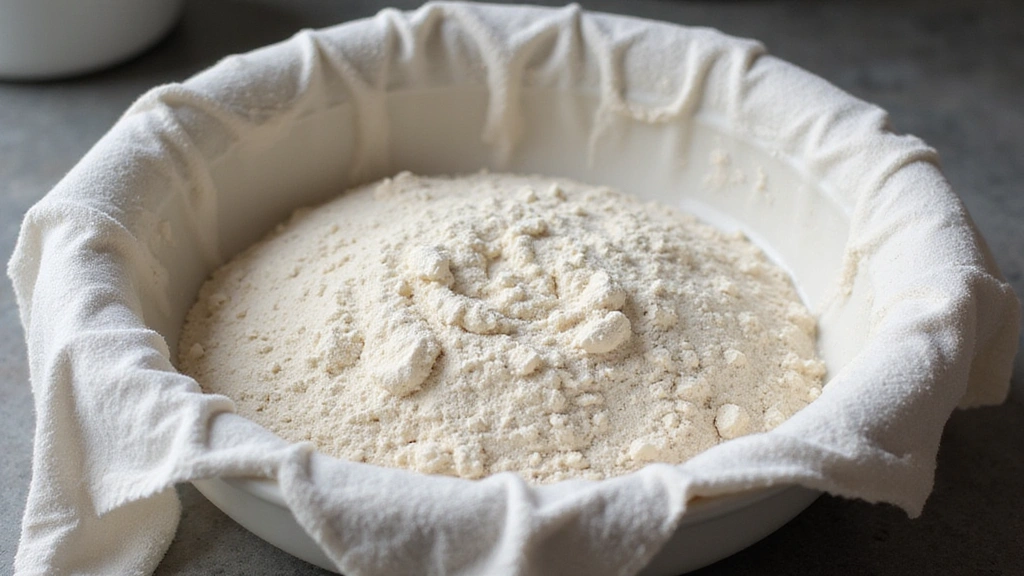
Combine 1 cup of all-purpose flour and 1 cup of water in a jar.
Mix until smooth and let it sit at room temperature for 12-24 hours.
Look for bubbles and a tangy aroma as indicators of activity.
Feed the starter with equal parts water and flour to maintain its strength.
Recommended Products

Wide-Mouth Design for Effortless Baking:Our premium sourdough starter jar features a wide opening for easy mixing, feeding, and cleaning. With a generous 40 oz (1.2L) capacity, it’s perfect for maintaining multiple starters or baking several loaves. Made from durable soda-lime glass that resists thermal shock and acidic fermentation, ideal for beginners and expert bakers alike.
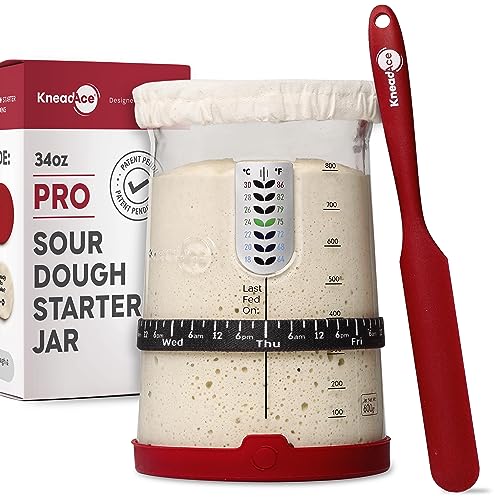
Discover the Joy of Artisan Sourdough Bread - Exclusive design, molded for optimal sourdough starter maintenance. With its funnel-shaped opening, this sourdough starter jar enables effortless handling.

Complete accessories & simple operation. This sourdough starter kit are specially designed to make the starter process easier, and suitable for amateurs and experts. The kit has a long-handled spatula, temperature sticker, feeding indicator strip, breathable cloth cover, and aluminum lid.
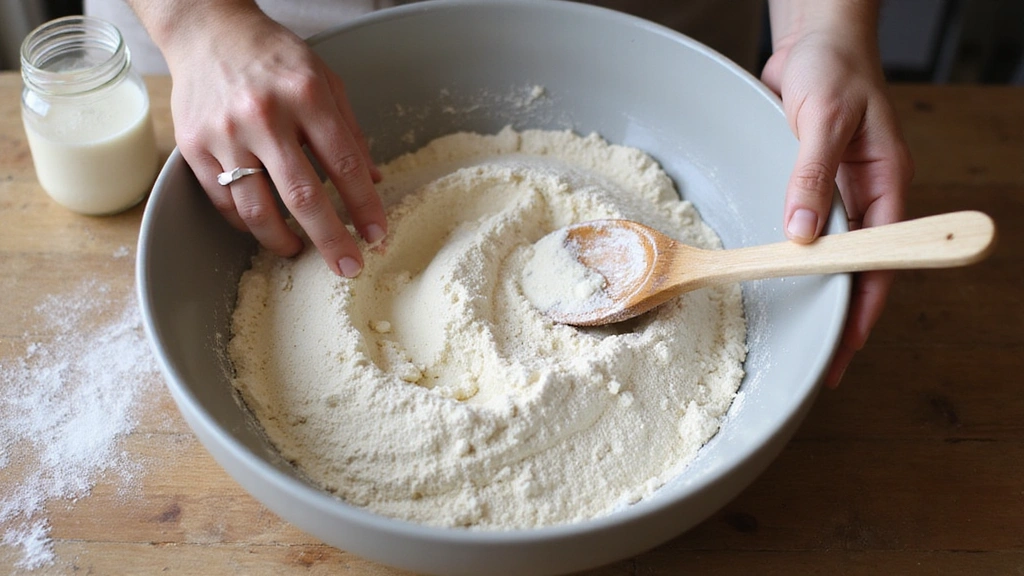
Step 2: Autolyse the Dough
In a large mixing bowl, combine 3.5 cups of bread flour and 1.25 cups of water.
Mix until no dry flour remains, then cover and let rest for 30 minutes.
The dough should feel soft and pliable after resting.
This step helps with gluten development and dough hydration.
Recommended Products
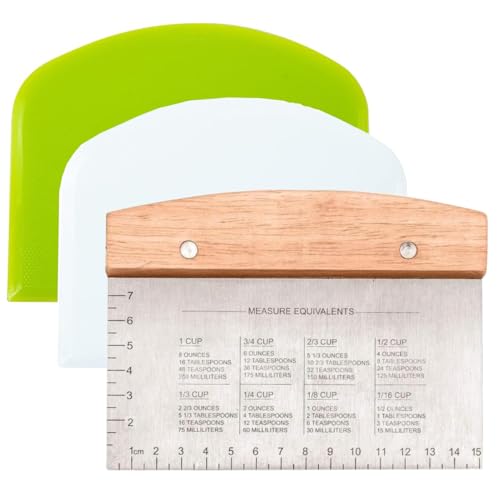
Precision Crafting: Our dough scraper set features meticulously calibrated stainless steel and plastic scrapers with precise measurement guides, enabling you to effortlessly create bakery-perfect portions every time.
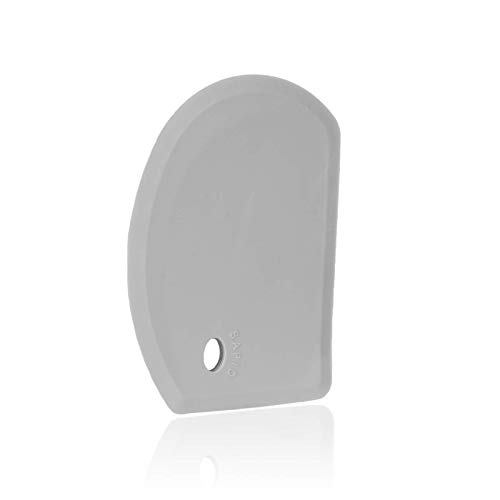
Practical Design : Sapid silicone bowl scraper is composed of stainless steel sheet and premium silicone. The outside of this dough scraper is food-grade silicone, which is equipped with great flexibility and heat resistance. You can easy to handle with the kitchen messes and stacks of dirty bowls.

FLEXIBLE SILICONE BOWL SCRAPER : The silicone bowl scraper conforms to the inside of the bowl for maximum results. It's perfect for scraping flour, dough, batter, and more! The silicone is heat resistant to 400°F.
Step 3: Mix in the Starter
Add 1 cup of active sourdough starter to the autolysed dough.
Mix thoroughly using your hands or a wooden spoon until well incorporated.
Ensure the starter is evenly distributed throughout the dough.
This step introduces the fermentation culture for leavening.
Recommended Products

Durable & Heat-Resistant: The 4.7 quart glass mixing bowls are made of high borosilicate glass, offering excellent durability and sturdiness. This material is highly resistant to thermal shock, making the glass bowl suitable for both hot and cold dishes, from -20°C to 400°C.

Thickened High Borosilicate Glass: Crafted from premium borosilicate glass, the bowl is lead-free and cadmium-free, non-toxic & healthy; Its heat resistance up to 450°F makes it microwavable and oven safe; Built with high thickness, the bowl is extra durable and the extra-thick rim offers a comfortable grip during use

Durable & Heat-Resistant: The 4.7 quart glass mixing bowls are made of high borosilicate glass, offering excellent durability and sturdiness. This material is highly resistant to thermal shock, making the glass bowl suitable for both hot and cold dishes, from -20°C to 400°C.
Step 4: Add Salt
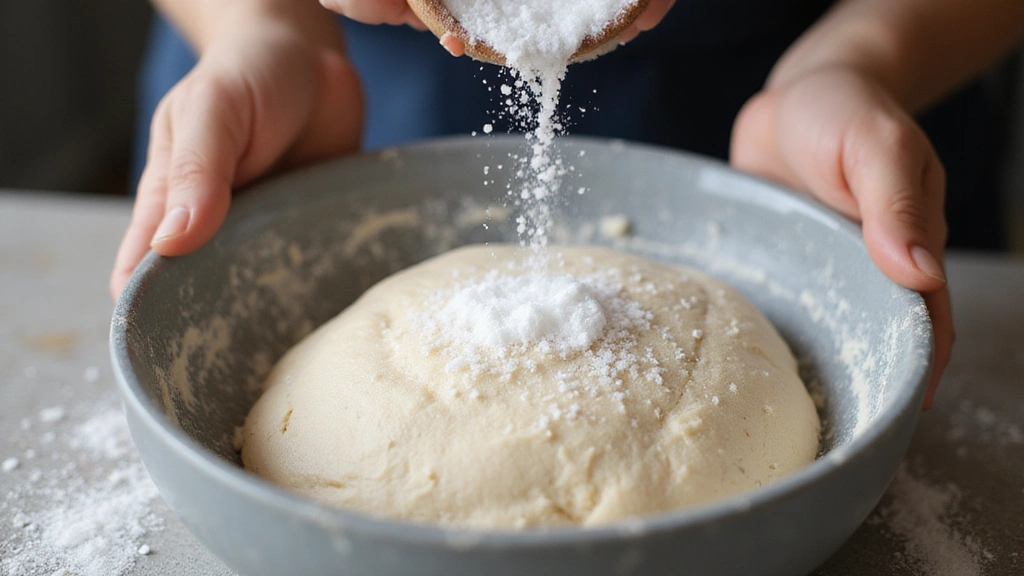
Sprinkle 2 teaspoons of salt over the surface of the dough.
Gently work the salt into the dough using a pinching motion.
Continue until the salt is fully dissolved and integrated.
Salt strengthens the gluten network and enhances flavor.
Recommended Products

Mature and Lively 100+ years Old Dehydrated Sourdough Starter - Create Delicious and Tangy Sourdough Bread right at home.

High Protein Flour: 12.7% protein - a full point more than other national brands, King Arthur flour ensures stronger rise and perfectly textured loaves. This organic unbleached flour is key to achieving beautiful yeasted breads with impressive flavor
Step 5: Bulk Fermentation
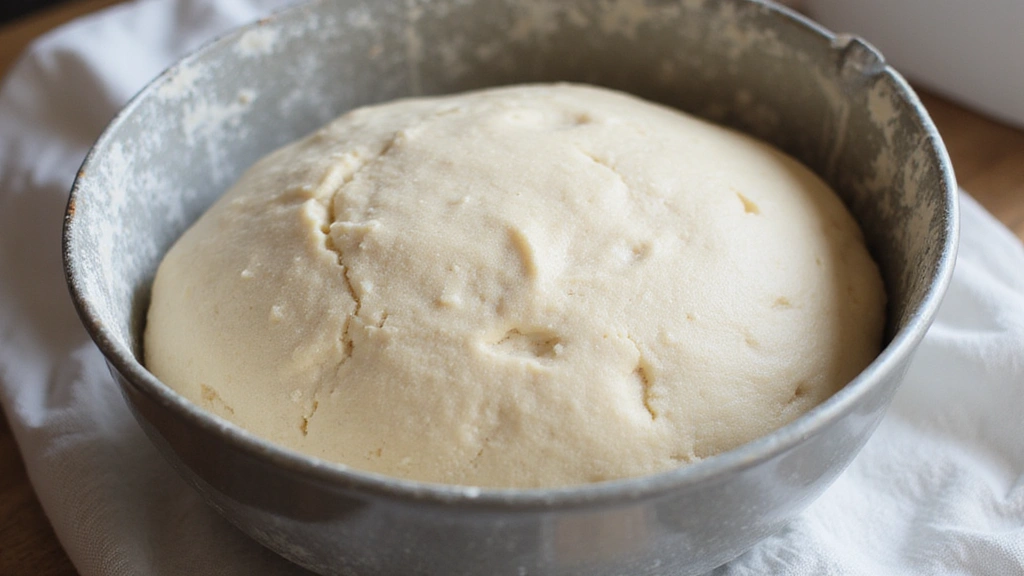
Cover the bowl with a damp cloth and let the dough rise at room temperature.
Perform stretch and folds every 30 minutes for 2 hours.
Watch for increased volume and a pillowy texture as signs of fermentation.
This stage is crucial for flavor and structure development.
Step 6: Shape the Dough
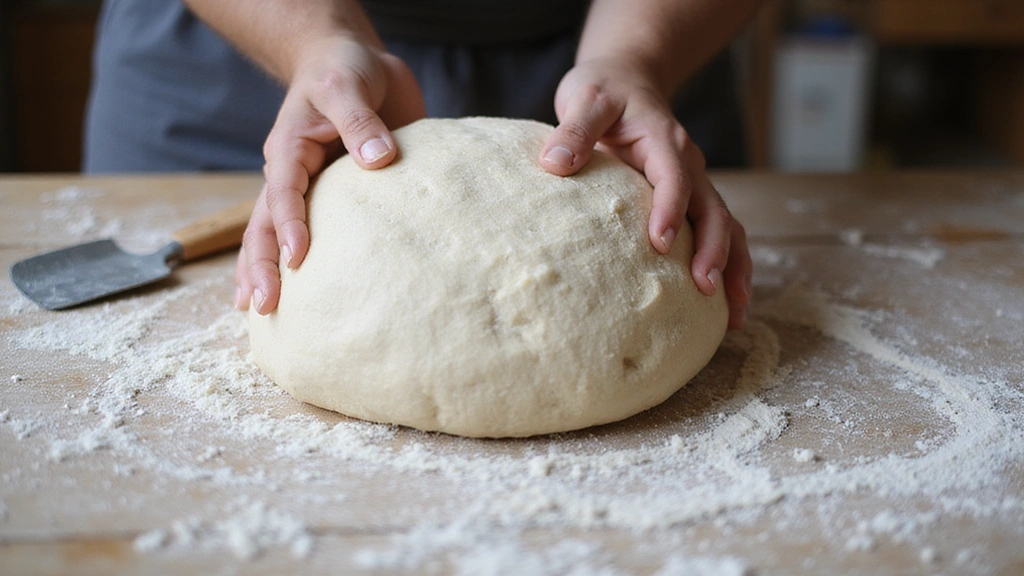
Turn the dough onto a lightly floured surface.
Shape it into a round or oval loaf by folding the edges into the center.
Ensure the dough holds its shape and has a smooth surface.
Proper shaping ensures even baking and a beautiful loaf.
Step 7: Final Proofing
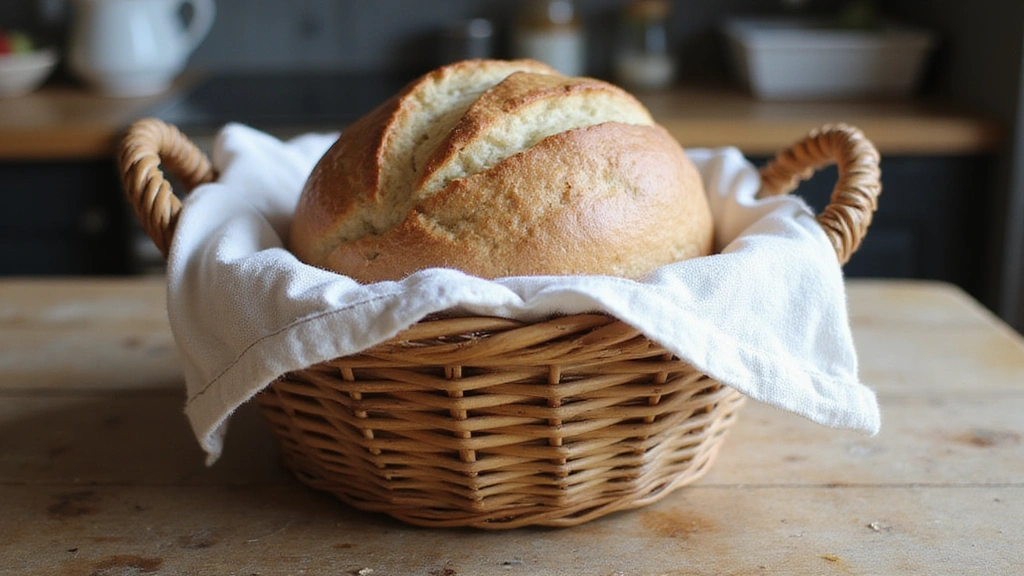
Place the shaped dough in a proofing basket lined with a floured cloth.
Cover and let it proof at room temperature for 2-4 hours.
The dough should feel airy and slightly spring back when gently pressed.
This final rise develops the loaf's texture and flavor.
Step 8: Score and Bake
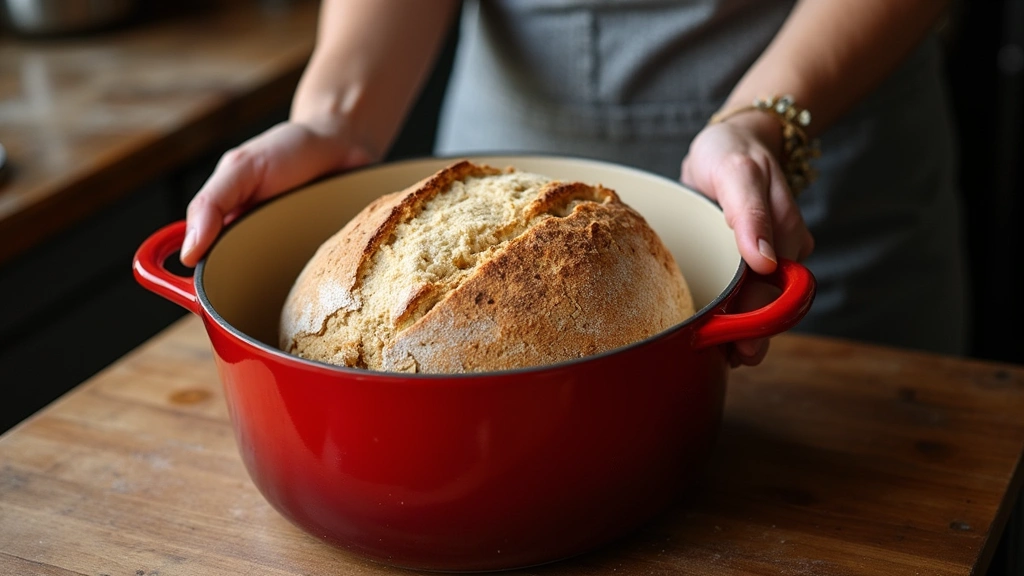
Preheat the oven to 450°F with a Dutch oven inside.
Carefully score the dough with a sharp blade.
Place the loaf into the hot Dutch oven and cover with the lid.
Bake for 20 minutes covered, then remove the lid and bake for another 25 minutes.
Critical Timing and Temperature Guide
Bulk Fermentation: Allow the dough to ferment for 3-4 hours at room temperature, ensuring it doubles in size and develops a slight jiggle when the bowl is gently shaken. Avoid over-proofing, which can lead to a flat loaf.
Final Proving: Proof the shaped dough for 2-4 hours until it is airy and slightly elastic. Under-proofing results in a dense crumb, while over-proofing leads to excessive spreading.
Baking: Start with a preheated oven at 450°F, reducing to 425°F after removing the lid. Look for a deep golden crust and an internal temperature of 200°F. Avoid opening the oven door too frequently, which can release steam and affect crust formation.
Pro Tips for Beginner's Guide to
• Ingredient Selection: Choose high-quality bread flour for better gluten development, and ensure your sourdough starter is active and bubbly for the best rise.
• Preparation Secret: Incorporate a 30-minute autolyse to improve dough elasticity and crumb texture, a step often skipped by beginners.
• Temperature Management: Maintain a consistent room temperature of around 70°F to 75°F for optimal fermentation and proofing times.
• Texture Enhancement: Use the stretch and fold technique to develop gluten without over-kneading, resulting in an open, airy crumb.
• Flavor Layering: Allow the dough to rest in the fridge overnight for enhanced flavor complexity through slow fermentation.
• Make-Ahead Strategies: Prepare the starter a day ahead and store in the fridge until ready to use, maintaining its activity with regular feedings.
• Restaurant-Quality Finishing Touches: Brush the loaf with water before baking to enhance crust development and achieve a glossy finish.
• Equipment Optimization: Use a pizza stone in the oven to mimic a commercial baking environment, ensuring even heat distribution.
Troubleshooting Common Issues
• Dense Texture: Often caused by insufficient gluten development or under-proofing. Ensure the dough is adequately hydrated and perform enough stretch and folds.
• Flat Loaf: May result from over-proofing or weak starter. Check the dough regularly and ensure the starter is active before use.
• Blistered Crust: Caused by excessive fermentation gases. Reduce fermentation time or temperature to prevent this issue.
• Unpleasant Sourness: Excess acidity can develop from prolonged fermentation. Adjust fermentation duration or starter feeding schedule.
• Uneven Crumb: Results from inconsistent dough handling. Focus on even mixing and folding techniques for uniform crumb structure.
Variations and Regional Differences
• San Francisco Style: Known for its pronounced tang, this version uses a stiff starter and longer fermentation times, resulting in a distinct sour flavor.
• French Pain de Campagne: Incorporates whole wheat or rye flour for a rustic quality, often shaped into larger rounds or batards.
• Italian Pane Toscano: Traditionally made without salt, offering a mild flavor that pairs well with rich foods like prosciutto and cheese.
• German Sauerteigbrot: This dark, dense bread uses a blend of rye and wheat flours, with a pronounced sourness and hearty texture.
Food Science Behind the Recipe
• Fermentation: Natural yeast and bacteria in the starter break down sugars in the flour, producing carbon dioxide and organic acids that leaven and flavor the bread.
• Gluten Development: Hydration and gentle folding align gluten proteins, creating an elastic network that traps gas for an airy crumb.
• Maillard Reaction: High oven temperatures cause amino acids and sugars to react, forming a golden-brown crust with complex flavors.
Frequently Asked Questions
What's the most common mistake people make when preparing sourdough bread? Over-proofing the dough, which leads to a flat loaf and compromised texture.
How can I tell if my starter is ready to use? A ready starter should be bubbly, doubled in size, and have a pleasant, tangy aroma.
Can I make sourdough bread without a Dutch oven? Yes, you can use a baking stone and an inverted pan or metal bowl to trap steam.
Why is my sourdough bread too sour? Prolonged fermentation or an imbalanced starter can lead to excessive sourness; adjust proofing times and starter feeding.
How do I store sourdough bread to keep it fresh? Wrap in a clean kitchen towel and store at room temperature for up to 3 days, or freeze for longer storage.
Why didn't my bread rise in the oven? This could be due to weak gluten structure or under-proofing; ensure proper dough handling and proofing.
Can I use whole wheat flour instead of bread flour? Yes, but whole wheat flour absorbs more water and may require adjustments in hydration and fermentation time.
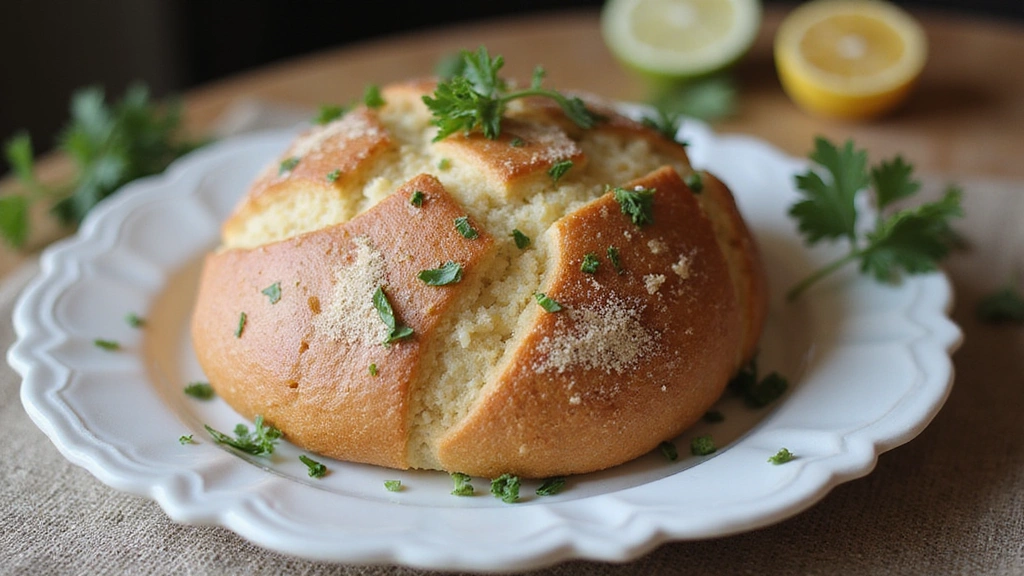
Serving and Presentation Guide
• Traditional Presentation: Slice the bread into even pieces, showcasing the crumb structure and serve on a wooden board with butter or olive oil.
• Rustic Style: Serve whole or halved, accompanied by a selection of cheeses and cured meats for a casual, communal dining experience.
• Sandwich Classic: Utilize slices for gourmet sandwiches, layering with fresh vegetables, meats, and condiments for a hearty meal.
• Artisanal Display: Present as part of a bread basket with other varieties, adorned with fresh herbs and flowers for visual appeal.
Conclusion
Sourdough bread is a rewarding culinary endeavor that combines tradition with hands-on craftsmanship.
With patience and practice, you'll master the art of creating loaves that are both beautiful and delicious.
We invite you to embark on this baking journey and experience the satisfaction of homemade sourdough.